5
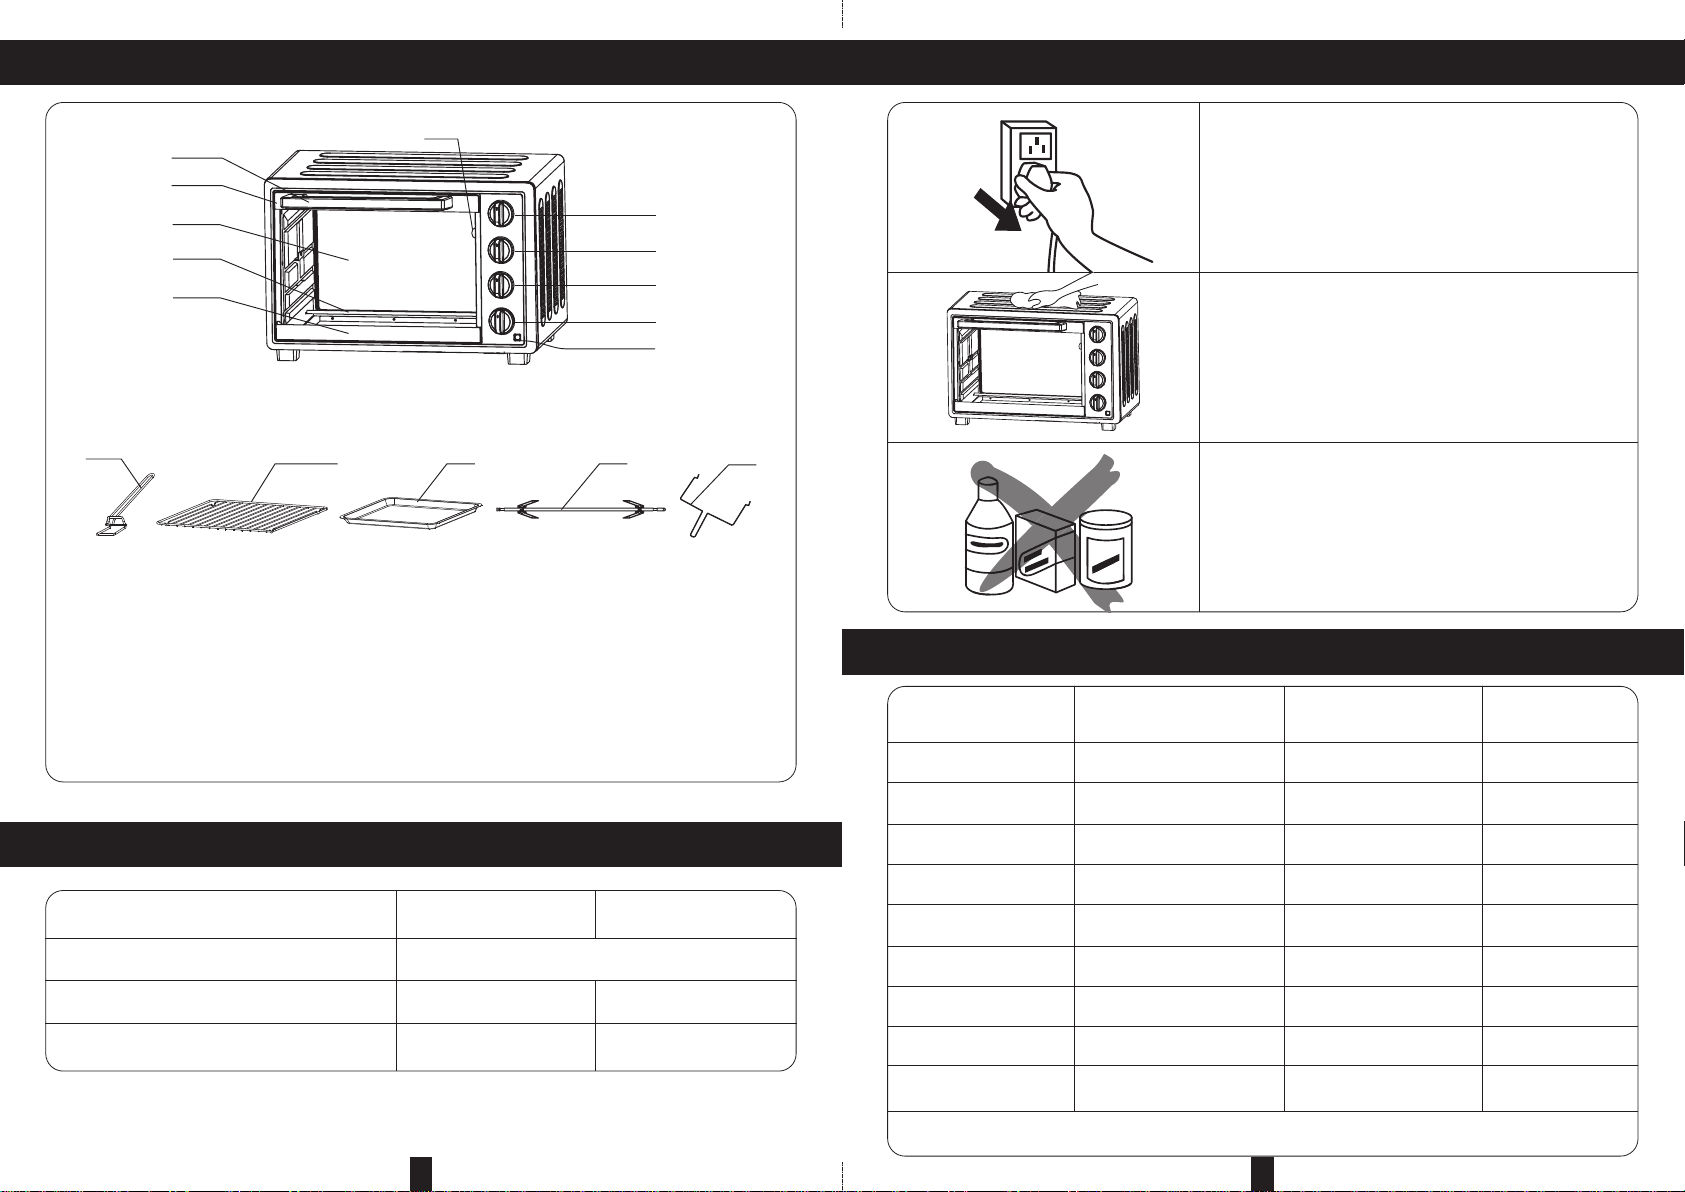
SPECIAL INDICATION: The accessory image varies from different models. Please refer to the
actual model you buy.
PRECAUTIONS
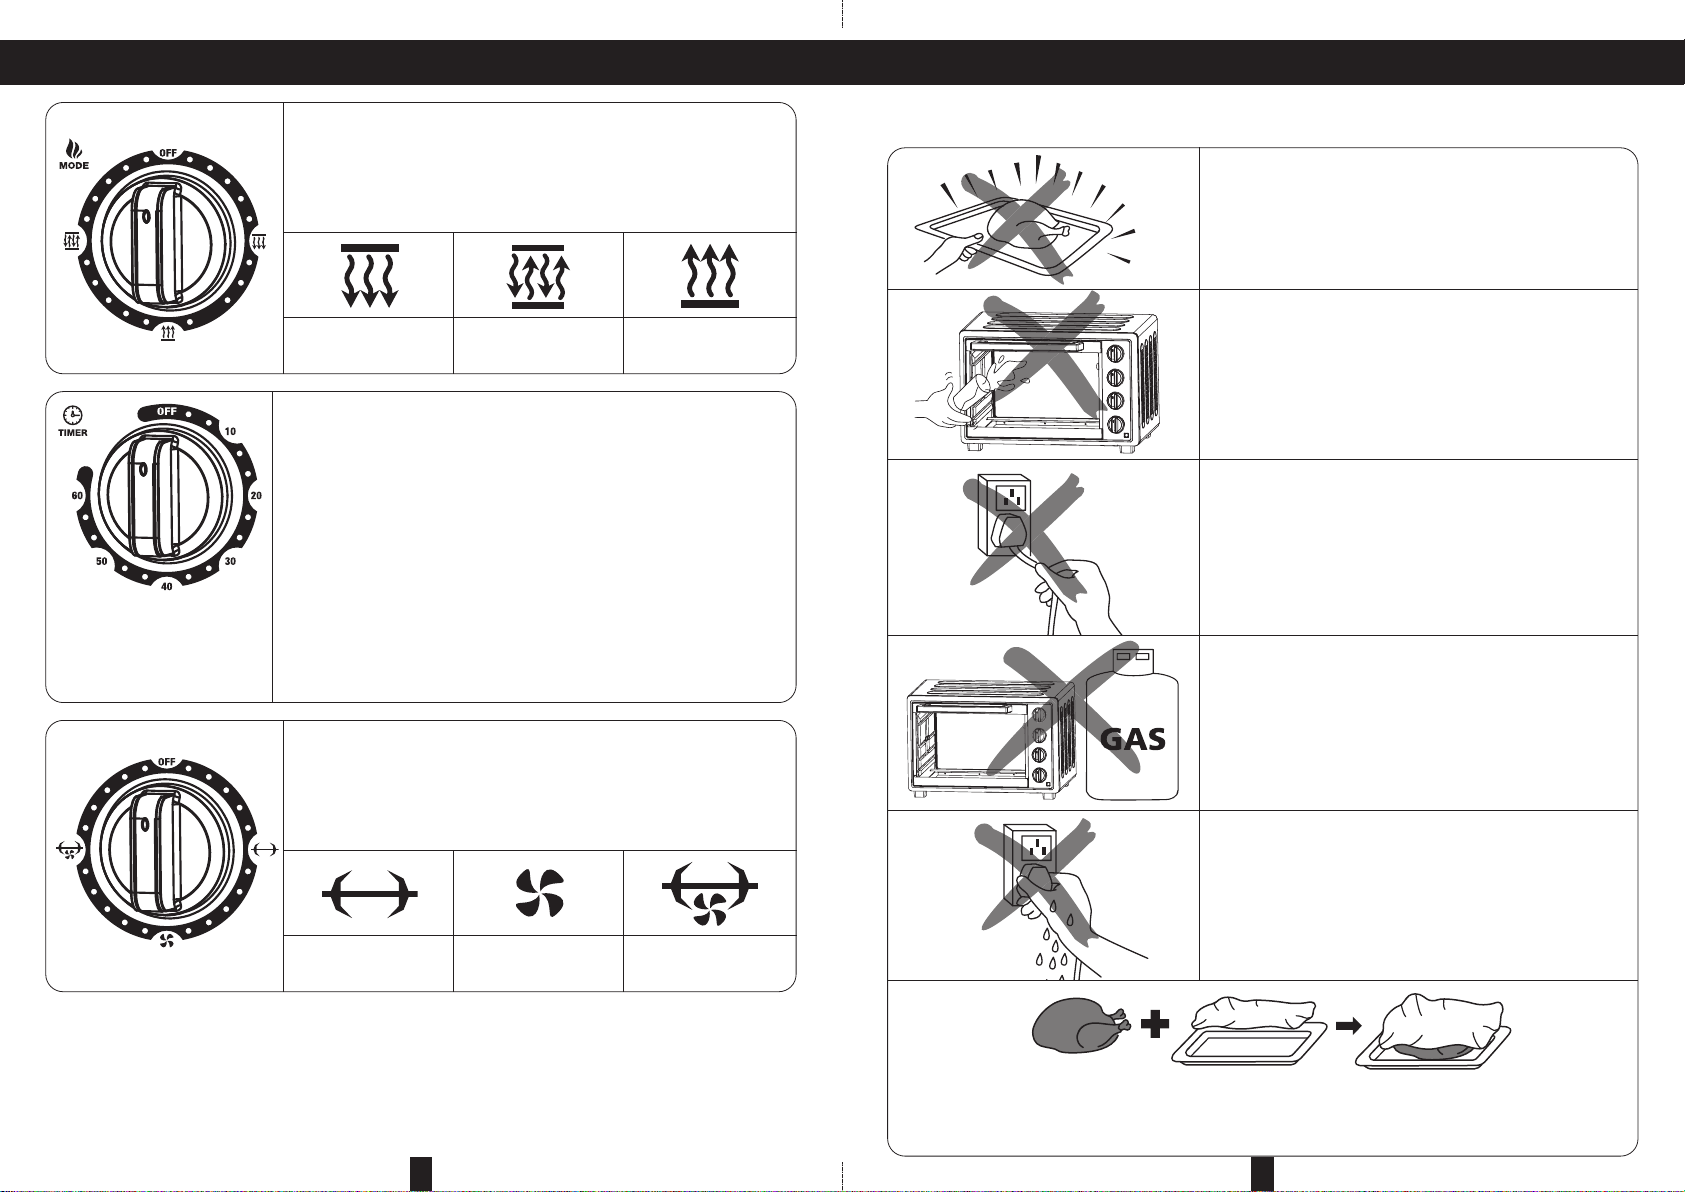
Always use the tray handle when inserting or removing
the tray. Touching these will cause severe burns.
When hot, do not apply water to the glass door. It may
cause the glass to break.
When unplugging the power cord, always take hold of
the plug itself. Never pull on the cord. Doing so could
break the wires inside the cord.
Do not position the unit close to a gas burner or other
source of high temperature or do not direct an electric
fan, etc, at the unit during use. Doing so could prevent
correct temperature control.
Do not wet the power cord nor handle the unit with
wet hands. Always unplug the cord after use, or
whenever the unit is to be left unattended. A
malfunction while the plug is inserted into the outlet
could cause a fire.
When cooking oil-splashing dishes such as roasted chicken, it is recommended to put 2 sheets of
aluminum foils on a tray in order to diminish oil splashing. Put one on a tray. Then oil will drip to a
gap between foils.
8
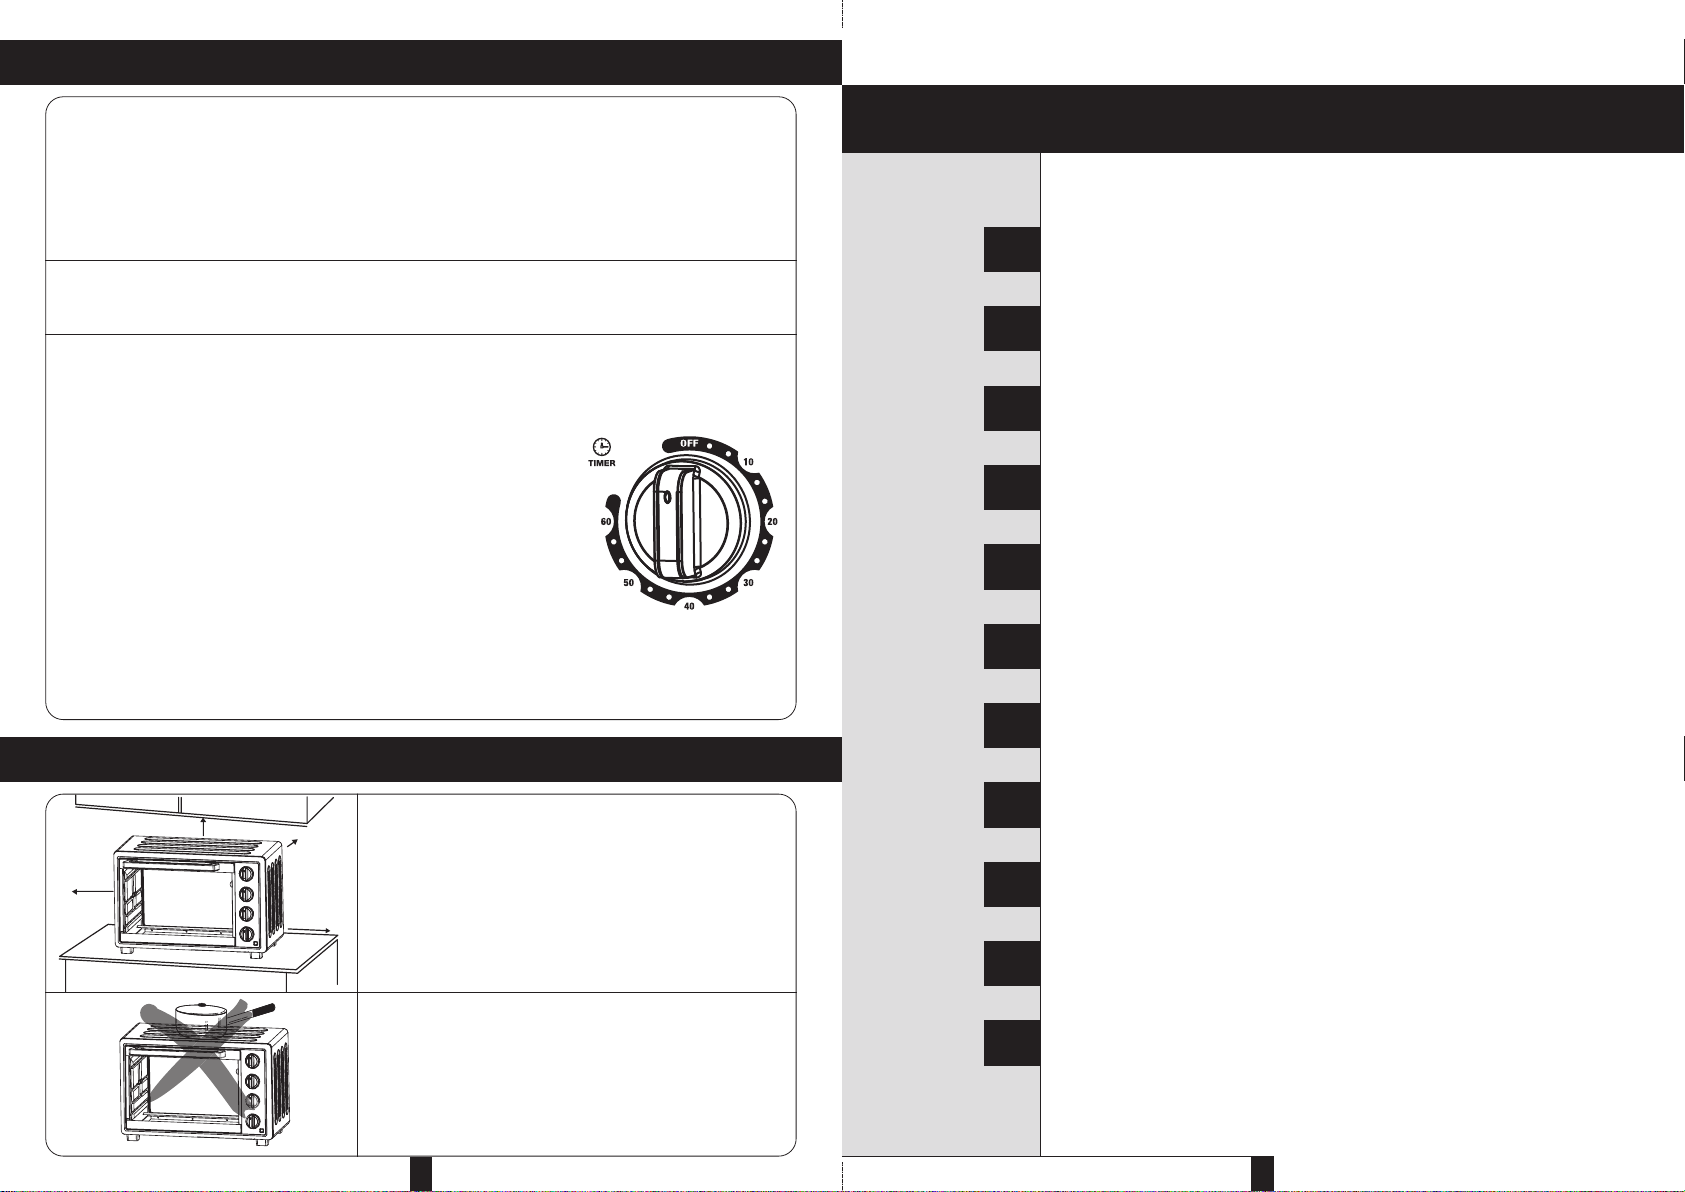
TIME
1. Set the arrow on the “Timer” to the number which indicates the
cooking time (minutes) according to the dishes you are going
to cook.
2. Set the “Timer” by turning it clockwise. The oven will turn off
automatically at the end of the selected time and a bell will
ring.
• When setting the Timer to less than 5 min, turn it to more
than 6 min. and then back to the selected time.
3. The oven can be turned off manually during cooking by turning
the “Timer” anti-clockwise to the " FF" position.
MODE CONT OL
Select the suitable heating element according to the dishes you
are going to cook.
pper Heating pper & Lower
Heating Lower Heating
OTISSE IE FUNCTION
Select the suitable heating element according to the dishes you
are going to cook.
Rotisserie
Function Convection
Function Convection &
Rotisserie Function
*You can observe whether the
heating elements are working or
not by observing the front
Indicator light.
FUNCTIONAL CONTROL