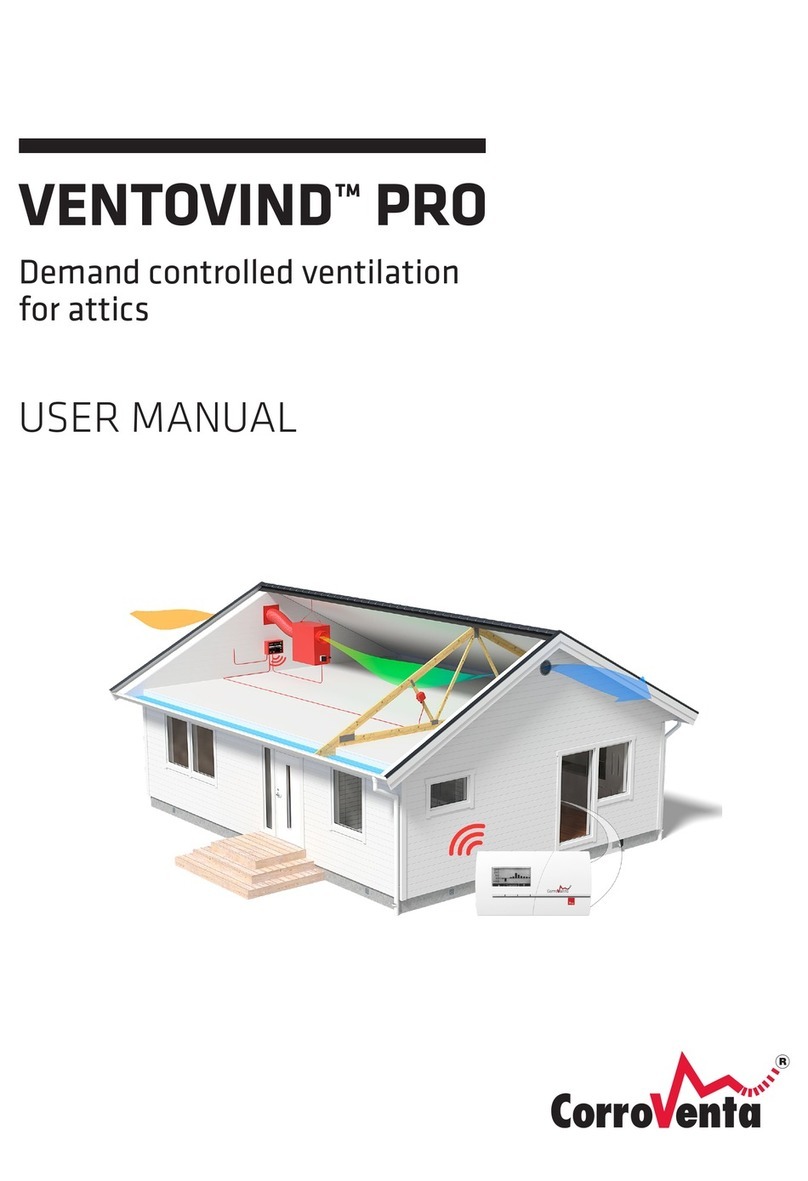
CorroVenta VentoVind PRO Special User manual

VENTOVIND™ PRO SPECIAL
USER MANUAL
Demand controlled ventilation for apartment
buildings and larger attic spaces

VentoVind PRO Special user manual
© Corroventa Avfuktning AB
2020.12
1 (39)
Contents
Area of use .......................................................................................................................................... 3
Manufacture directive......................................................................................................................... 4
Safety information............................................................................................................................... 5
Quick-start guide for VentoVind™ PRO Special....................................................................................... 6
VentoVind PRO function ..................................................................................................................... 6
Installation........................................................................................................................................... 7
Electrical installation ........................................................................................................................... 7
Starting and test operation ................................................................................................................. 8
Check the function .............................................................................................................................. 8
Relative humidity and its impact on materials........................................................................................ 9
Moisture problems in cold attics........................................................................................................... 10
How VentoVindTM works ....................................................................................................................... 11
Delivery check ....................................................................................................................................... 12
Installation............................................................................................................................................. 12
Planning the installation.................................................................................................................... 12
Air flow and location of vents ....................................................................................................... 13
Vents and Dampers ....................................................................................................................... 14
Sealing cold attic spaces........................................................................................................................ 14
Gable and ridge vents........................................................................................................................ 15
Air gaps.......................................................................................................................................... 15
Vapour barriers in joists ................................................................................................................ 15
House construction without vapour barrier ................................................................................. 16
Electrical sockets and electrical installation...................................................................................... 16
Control panel................................................................................................................................. 16
Installing the Control unit.............................................................................................................. 16
Installing Sensors........................................................................................................................... 17
Connecting fans and motorised dampers ......................................................................................... 19
Installation of EC fans with 1-10V speed control .......................................................................... 19
Installing AC fans ........................................................................................................................... 20
Installing fans and motorised dampers............................................................................................. 21
Installing suspended fans.............................................................................................................. 21

VentoVind PRO Special user manual
© Corroventa Avfuktning AB
2020.12
2 (39)
Installing Damper and fan for supply air....................................................................................... 22
Installing horizontal fan................................................................................................................. 22
Mounting Damper for exhaust air................................................................................................. 23
Control unit - inputs and outputs...................................................................................................... 23
Checking and monitoring via ModBus RS485.................................................................................... 25
RS485 (Building Automation) ........................................................................................................ 25
Recommended cable..................................................................................................................... 25
Connection to RS485..................................................................................................................... 25
Terminating resistance.................................................................................................................. 26
Setting ID address.......................................................................................................................... 26
Setting signal speed (Baud rate).................................................................................................... 26
Holding Register ............................................................................................................................ 27
Service check and resetting via Modbus........................................................................................... 28
Starting and settings.......................................................................................................................... 29
Checks at start-up.............................................................................................................................. 30
Maintenance and service ...................................................................................................................... 31
Troubleshooting .................................................................................................................................... 32
Actions in the event of power failure............................................................................................ 33
Technical data ....................................................................................................................................... 34
Control panel................................................................................................................................. 34
Control unit VentoVind™............................................................................................................... 34
Sensor unit VentoVind™................................................................................................................ 34
Fans: Technical specification............................................................................................................. 35
VentoVind™ PRO Villa. Fan, KVKE 160 (AC)................................................................................... 35
VentoVind™ PRO Villa Large. Fan KVKE 200 (AC)......................................................................... 35
VentoVind™ PRO Special. Fan KVK 160 (EC).................................................................................. 36
VentoVind™ PRO Special. Fan KVK 200 (EC).................................................................................. 36
VentoVind™ PRO Special. Fan KVK 250 (EC).................................................................................. 37
Fan size.......................................................................................................................................... 38
Accessories........................................................................................................................................ 39

VentoVind PRO Special user manual
© Corroventa Avfuktning AB
2020.12
3 (39)
Area of use
VentoVind™, designed for cold attics, is a system which provides optimised ventilation thereby minimising
moisture-related problems such as mould and rot. This is achieved by the system's control unit reading off
the climate both outdoors and indoors using sensors, and ensures to only activate the supply air fan
when the outdoor air has a drying out effect. The principle is patented and originally developed at
Chalmers University in Gothenburg, where it was evaluated in practice in several reference
installations that were carefully monitored. VentoVind™ is a proven technology which has been used for
several years to solve moisture problems in attics in an energy-efficient way. A big advantage of VentoVind™ is
that the system is suitable for both large and small cold attic spaces, and can be used in houses as well as large
tenement buildings, schools etc. VentoVind™ can be installed both during and after new construction.
A condition for VentoVind™ to function optimally is that the attic space is sealed thoroughly during the
installation so that uncontrolled air exchange does not take place from the surroundings, or that moisture
penetrates from the residence. The aim is that air exchange only occurs through the supply fan and the
ventilation openings that are part of the system, and that the supply fan creates a weak over pressure in the
attic, which prevents humid air from entering the attic space. Depending on the type of fan used, the supply
fan can be speed controlled to always supply the correct level of ventilation. In this way, the ventilation is
optimised to the temporary ventilation requirement and as little energy as possible is consumed.
Properties:
•Energy efficient
•Robust
•Service-friendly
•Very quiet
•Flexible

VentoVind PRO Special user manual
© Corroventa Avfuktning AB
2020.12
4 (39)
Manufacture directive
VentoVind™is CE-labelled.
Disclaimer
•Incorrect installation and/or incorrect handling can cause property damage as well as injury.
•The manufacturer assumes no liability for damage arising as a result of failing to follow these
instructions. Such damage is not covered by the warranty.
•Changes or modifications to the machine must not be performed without written
permission from Corroventa Avfuktning AB.
•The product, technical data and/or installation and operating instructions are subject to
change without notice.
•These user instructions contain information protected by copyright laws. No part of this
document may be reproduced, stored in an information storage system or transmitted in
any way or by any means without Corroventa AB's written consent.
Any comments regarding the content of this document must be sent to:
Corroventa Avfuktning AB
Mekanikervägen 3
SE-564 35 Bankeryd
Sweden
Tel.: +46 (0)36-37 12 00, E-mail: mail@corroventa.se

VentoVind PRO Special user manual
© Corroventa Avfuktning AB
2020.12
5 (39)
Safety information
This device is not intended for use by persons with reduced physical, mental or sensory impairments
nor other persons lacking the necessary skills or experience, unless supervised or instructed by
another person with responsibility for their safety.
•Children may only use the device under the supervision of an adult to ensure that the device is not
used as a toy.
•Electrical installations carried out in connection with VentoVind® installation must be done by a
qualified electrician in accordance with local and national regulations.
The following instructions must also be observed:
1. VentoVind™must not be powered on before installation is completed in accordance with this manual.
2. VentoVind™ and its fan(s) as well as any electromechanical dampers must not be covered as this can cause
overheating and a fire hazard.
3. VentoVind™ may not be used in areas where it can produce explosive gases.
4. Do not insert objects into the fan as this could damage the apparatus and injure people.
5. Install VentoVind™ and its fan(s) and dampers in accordance with this manual so that it cannot tip over, fall or in
any other way injure anybody or damage property.
6. Keep children, animals and bystanders away from the workplace.
7. Any installation work at height, on roofs or facades must be carried out in accordance with occupational safety
regulations to prevent fall accidents and fall injuries.
8. Contact the supplier if VentoVind™ is damaged or if the plug or the electrical cable is damaged. Do not make any
repairs yourself if you have not undergone adequate training.
9. Do not damage the electrical cable. The cable must not run through water or over sharp edges.
10. Never carry or drag VentoVind™ by its cables.
11. Using electrical equipment in very damp or wet conditions can be dangerous. Do not operate VentoVind™ if it is
standing in water.
12. Use an earth-fault breaker to minimise the risk of electric shock.
13. Water must not come into contact with the system's electrical components. If it does, ensure that they are dried
thoroughly before the unit is used again.
14. Never open VentoVind™ or any of its components without first ensuring that it is disconnected from power.
15. The control panel is only intended for indoor use. Temperature: -0 –+40° C. Humidity: 20 –70 % relative
humidity, non-condensing.
16. The control unit is only intended for indoor use. Temperature: -20 –+40° C. Humidity: 20 –100 % relative
humidity, non-condensing. Max. height above sea level: 0 to 2000m
17. Sensors can be installed outdoors well-protected from rain and sun. Temperature: -20 –+40° C. Humidity: 20 –
100 % relative humidity, non-condensing. Max. height above sea level: 0 to 2000m
18. VentoVind™ must not be used with accessories other than those described in this manual or approved by
Corroventa Avfuktning AB.
19. Installation work in attic spaces can involve: Uncomfortable working positions, dusty air, mould spores, poor
lighting etc. Use the relevant protective equipment and protective clothing in accordance with the employer's
regulations/ applicable local work environment plan.
20. When handling fans weighing more than 25 kg, a two-man lift according to AFS2012:02 is recommended
21. Installation of the product can involve work at height/work on roofs.. Work in accordance with AFS 1981:14,
Protect against injury by falls.
Contact the supplier of this unit for further advice on the safety and use of the product.

VentoVind PRO Special user manual
© Corroventa Avfuktning AB
2020.12
6 (39)
Quick-start guide for VentoVind™ PRO Special
This guide contains a bulleted list of the steps required for a functioning installation of VentoVind
PRO Special. Read more in detail how each step should be performed in the user instructions:
VentoVind PRO Special and HomeVision control and monitoring system. The latest version of the
user instructions can be obtained from www.corroventa.com/documentation/. See section Living
Environment and Control systems.
VentoVind PRO function
VentoVind PRO, designed for cold attics, is a system which provides optimised ventilation thereby
minimising moisture-related problems such as mould and rot. This is achieved by the system's
control unit reading off the climate both outdoors and indoors using sensors, and ensures to only
activate the supply air fan when the outdoor air has a drying out effect.

VentoVind PRO Special user manual
© Corroventa Avfuktning AB
2020.12
7 (39)
Installation
Perforation and positioning of inlets and outlets of VentoVind PRO Special is unique depending on
each project, for more information consult drawings or instructions corresponding to the project.
•Motorised damper
A spring-return 230V motorised damper is installed at each inlet and outlet. Inlet dampers
can alternatively be installed directly towards the fan.
•Fan installation
Install fans in the supplied wire brackets at each inlet.
•VentoVind PRO Control unit
Install the control unit in the attic space or in a nearby space.
•Indoor sensor
Install 1 x indoor sensor according to the manual. Supplied complete with 15m cable
•Outdoor sensor
Install 1 x outdoor sensor weather-protected from rain and sun. Supplied complete with 15m
cable which is separable at the sensor.
NOTE! It is extremely important that the sensors are positioned in accordance with
the manual. When reconnecting sensors, the control unit must be disconnected from power.
Electrical installation
Wiring diagram can be found in the manual.
•Fan connection option 1
1 x 230V power outlet for VentoVind control unit and up to 16A fuse. Fan(s) powered from
the VentoVind control unit. Max. power outlet for fans is 2000 W
•Fan connection option 2
1 x 230V 10A power outlet for VentoVind control unit and separate power supply to fan(s),
fused as per specification on fan.
•Control cable Fan
1 x control cable (3 wire) 1-10V installed between the control unit and fan(s). When installing
multiple fans, only read off the speed of one fan with TACHO signal
•Motorised dampers
230V Power supply cable from VentoVind control unit and to motorised dampers. All
dampers are connected to the same power supply and open simultaneously.
•Control panel
1 x 230V 10A power outlet to wireless control panel.

VentoVind PRO Special user manual
© Corroventa Avfuktning AB
2020.12
8 (39)
Multiple available functions
•Monitoring with Modbus RS485
1 x screened signal cable of class A is connected to the control unit for monitoring via the
property system.
•External alarm
Connection of external alarm function e.g. flashing light made via auxiliary control relay.
Alarm signal from VentoVind control unit activates control relay.
Starting and test operation
Connect the wireless control panel with the control unit via the menu in the control panel. The
following settings are made via the control panel.
•Time & Date
Set the correct time and date to obtain the correct date stamp in the log.
•Set the correct type of fan
Check that the correct fan type, AC or EC, is set. NOTE! If the incorrect fan is selected, the
ventilation will not work.
•Test operate fan and dampers
Test operate fan and dampers according to the manual. It is important to check that the air is
transported from the fan, through the entire area and out through the exhaust air damper.
•Activate speed monitoring, TACHO-signal
Activate Tacho signal to obtain feedback of the fan speed and thus get an alarm in the event
of operational interruption of the fan. Note! in the event of multiple fan installation,
monitoring of Tacho-signal may only occur on one fan.
Check the function
After completed installation, check the Ventovind system's function and settings as per protocol
Commissioning and Warranty documentation, that can be found in the manual for VentoVind PRO
special or on Corroventa's website. www.corroventa.com/documentation/. See section Living
Environment.
A condition for the machine warranty to apply is that the protocol for commissioning and Warranty
In the event of questions, contact Corroventa avfuktning AB, tel. +46 (0)36-37 12 00.

VentoVind PRO Special user manual
© Corroventa Avfuktning AB
2020.12
9 (39)
Relative humidity and its impact on materials
All air contains a greater or lesser degree of moisture. We can’t see it with the naked eye until it
appears in the form of small water drops against a cold metal or glass surface for example. However,
before it is visible, moisture is already causing problems by affecting materials, causing corrosion and
growth of micro-organisms. It can be taken for granted that the Nordic climate is always humid.
Large areas of water, in the shape of thousands of lakes and the surrounding sea, cause a lot of
humidity.
Air moisture is measured and usually given in relative humidity (% RH). This is a measurement of how
much moisture the air contains compared to how much it can hold in total at a given temperature
and pressure. The higher the temperature, the more water the air can hold but it is the relative
humidity which is calculated, and which must be controlled.
At 100% RH the air is saturated and the moisture falls in the form of small water droplets. Steel
corrodes at 60% RH and at 70% RH there is a risk of mould. A rule of thumb is that 50% RH is a good
climate for most materials but here in Scandinavia, it is rarely that low. The annual average value in
most places is instead around 80% RH and can be equally high in both summer and winter.

VentoVind PRO Special user manual
© Corroventa Avfuktning AB
2020.12
10 (39)
Moisture problems in cold attics
Moisture problems in cold attics can be due to one or several causes, usually a combination of several factors
that determine how serious the moisture impact on the attic space is. Moisture problems usually occur in
connection with additional insulation or during the transition from oil boiler to geothermal or district heating.
The underlying cause, however, is the natural ventilation used in cold attics, as ventilation at the wrong time
leads to humidification of the attic space. According to a 2009 investigation Så mår våra hus (This is how our
houses feel) carried out by the Swedish National Board of Housing, about 300,000 buildings in Sweden suffer
from mould, mildew odours or high moisture levels that can be directly traced to problems in the attic. 84% of
these attics are cold attics with natural ventilation.
Disadvantages of natural ventilation
Problems most often occur during the colder half of the year when the relative humidity of the outside air is
highest, the solar radiation less intensive and the days shorter. The temperature of the attic spaces is then also
significantly lower than during the summer and the air can bear much less moisture. During nights with a clear
sky, the attic space can even become colder than the outside air, which results in condensation on the
underside of the roof. Water droplets can build up and in some cases can run down the inside of the roof. This
is because the outer roof of the attic is "facing" the sky and is therefore cooled by the colder layers of air higher
up in the atmosphere. This is the same phenomenon we see on cars, where we often have to scrape ice off the
angled windscreen, which is "facing upwards", but not off the side windows.
Moisture movement from the residence
An adult human being evaporates approximately 40 - 50 grams of water per hour when at rest at room
temperature and a family can easily produce 10 litres of water per day that evaporates into the indoor air.
Other sources of moisture production in a residence are baths/showers, drying laundry and cooking. Most of
the moisture is transported away by the residence’s ventilation but when the hot indoor air wants to rise
upwards, some of that moist air can flow into the cold attic through leaks at attic joist level and then condense.
Even joists wrapped in plastic sheeting intended to seal against the residence leak somewhat.
Changing heat source and additional insulation
The residential ventilation, which mostly consists of natural draft or a mechanical exhaust air system, helps to
reduce moisture leakage up to the attic by creating a negative pressure in the residence. Today, however, it is
quite common to change heating systems from firing with heated chimneys to, for example, geothermal heat
pumps or district heating. In such a situation it is important to check that there is still sufficient ventilation,
since the driving force of the natural draft has been removed. There is otherwise a great risk, among other
things, of increased transport of moist air up to the attic. In the event of additional insulation, the cold attic's
temperature and the air's capacity to carry moisture are reduced. If it gets too cold in the attic, there is a large
risk of the moisture precipitating as condensation.
Building moisture
Building moisture that comes from materials that are naturally moist during the construction period but also
leaking water have a negative effect on cold attics. Concrete and aerated concrete are examples of materials
that contain a lot of building moisture and that need a long time to dry out. If large amounts of building
moisture leak into the attic during the construction period, there is a risk that the humidity will be so high that
there may be problems with mould and rot on the outer roof structure during, or soon after the construction is
completed.

VentoVind PRO Special user manual
© Corroventa Avfuktning AB
2020.12
11 (39)
How VentoVindTM works
VentovindTM is a method for adaptive controlled ventilation that guarantees that the ventilation only
takes place when it benefits the attic space. The supply air system ensures ventilation at the right
times while establishing a positive pressure scenario of the attic that prevents the travel of moisture
up from the accommodation. The system works best if the attic is sealed as tightly as possible where
the aim is that all ventilation occurs via intended dampers and vents.
The VentoVind™ system basically consists of a controlled supply air fan and a mechanical or
motorised exhaust air damper. The supply fan is powered and speed controlled via a control unit
placed inside the attic. Sensors that measure the outdoor climate as well as the climate in the attic
are connected to the control unit. The control unit reads off the sensors and determines, via an
algorithm, whether the ventilation should be open or closed, and also controls the fan speed
accordingly. In this way, the ventilation is optimised to the temporary ventilation requirement and as
little energy as possible is consumed. The ventilation system is only operational when the moisture
conditions are beneficial for ventilation using outdoor air.
Auxiliary dehumidifier
To ensure satisfactory drying even in very unfavourable conditions, VentoVind™ is prepared to be
supplemented with a backup dehumidifier. The VentoVind™ system is set so that the dehumidifier is
Image 1
DAMPER
SUPPLY AIR FAN
INDOOR SENSOR
OUTDOOR SENSOR
CONTROL UNIT
CONTROL UNIT INDOOR

VentoVind PRO Special user manual
© Corroventa Avfuktning AB
2020.12
12 (39)
put into operation as required, i.e. only when drying with adaptive ventilation is not able to lower the
humidity below the set level. Only Corroventa dehumidifiers intended for fixed installations in cold
attics are recommended for this type of installation.
Delivery check
VentoVindTM special control unit is supplied with the following parts:
Control unit VentoVindTM
1 x
Outdoor sensor, with separable 15m cable
1 x
Indoor sensor, with 15m cable
1 x
Control panel HomeVision
1 x
Current adapter control panel
1 x
Mounting screws for control unit and sensor
8 x
User instructions
1 x
Operation & maintenance instructions
1 x
Plastic pouch + operation & maintenance instructions
1 x
Other component parts such as fan, dampers and other installation parts adapted according to each
installation and number as well as dimensions are stated on the delivery note that accompanies the
delivery.
Installation
Note that any electrical installations carried out in connection with this work must be
done by a qualified electrician in accordance with local and national regulations.
VentoVind™ must be connected to an earthed, single phase 230 VAC/50 Hz socket.
The socket must be fused with a protection fuse up to 16A and an earth-fault breaker
is recommended. Relevant protective equipment and protective clothing must be used
in accordance with the employer's regulations/applicable local work environment plan
AFS2012:02 AFS1981:14.
VentoVindTM is installed and assembled in the following steps.
Step 1: Plan thoroughly so that an adequate air exchange can occur in the cold attic.
Step 2: Connections to outdoor air and connection of electricity.
Step 3: Thorough sealing of the attic.
Step 4: Assemble the equipment.
Step 5: Starting and test operating the installation.
Planning the installation
Thorough planning of the installation is a condition for a good result. Each installation is unique and a
universal installation principle cannot be specified. Depending on how much attic space is to be

VentoVind PRO Special user manual
© Corroventa Avfuktning AB
2020.12
13 (39)
ventilated and the building's construction, different types of solutions are required in terms of fans,
dampers, and their placement. It is also important how the sensors are positioned so that the system
works correctly. Consult an expert to jointly decided what the installation should look like for
optimum function. Here, we only describe general installations.
Air flow and location of vents
VentoVind PRO works according to the principle that outdoor air that is drier than the air in the attic
space is blown into the attic via fan. Regardless of whether it is one continuous cold attic or several
divided attic spaces, the installation must be designed so that the drier outdoor air flows through the
entire attic before it is evacuated to the surroundings again via the dampers that have been installed.
Image 2
Image 3

VentoVind PRO Special user manual
© Corroventa Avfuktning AB
2020.12
14 (39)
Vents and Dampers
Inlet and outlet vents must have satisfactory capacity in order to achieve the correct air flows and
pressure ratio. The recommended size of the inlet vent is a diameter that is at least as large as the
supply air fan's duct. In simpler attics, that consist of a single space, the air is most easily taken in at
one end and evacuated at the other. The inlet vent is then equal in size to the outlet vent. For larger
attics, you should use several outlet vents to distribute the air flow throughout the attic space. The
size of the inlet vent is then not the same as the outlet vent because you want to distribute incoming
air to two or more outlet vents by creating a small overpressure in the attic space. The size of the
vents is determined by the air volume that is to pass through the attic space.
For more complex attics that are divided up into multiple areas, you must ensure that the air can
pass freely between the areas. It is important to control the air streams without creating
counterpressure in the flow, this is to achieve optimum through-flow and drying out in the entire
cold attic space. See images 1–3.
•Inlets and outlets can also occur through roof hoods. Roof hoods, which are purchased
separately from alternative suppliers and installed in accordance with their instructions.
•Avoid using insufficiently large vents with gills or insect net equipped vents as these are very
likely to cause whistling sounds when the fan operates at full power.
When installing in large attic spaces, the location of the inlet and outlet vents are projected on the
building drawing in consultation with a specialist.
Sealing cold attic spaces
How the attic is sealed is important as the VentoVind™ function works best the better sealed the
cold attic is against uncontrolled air exchange from outside or from the living space. This should of
course be done in different ways for different houses and house constructions. The idea is that all air
that ventilates the attic space should be controlled by the VentoVind™ system, to create the best
conditions to keep the moisture levels down.
Even if the following instructions only give a general description of a smaller cold attic, the principle
is the same for large constructions. It is intended to give an understanding of what has to be
achieved and some of the relevant materials. If in doubt about what kind of material and which
principle is best suited for a specific house construction, consult a professional.

VentoVind PRO Special user manual
© Corroventa Avfuktning AB
2020.12
15 (39)
Gable and ridge vents
Vents that are not to be used for supply or exhaust air are most suitably sealed using insulating
board, bottom strip, polyurethane foam, sealant or similar material. When vents in or adjacent to the
suspended ceiling are to be sealed, be careful so that no screws or nails penetrate the suspended
ceiling and penetrate roofing such as baseboard, surface board or similar.
Air gaps
There are several alternatives for sealing air gaps. Of course, the house
design determines which of the following is most suitable and feasible. New sealing products are
continuously being launched on the market and it is important to check that they meet the
requirements for good weather and age resistance. Age-resistant joint foam and sealant can be used
for smaller cracks and plastic or sheet material may be needed for larger openings.
1. Seal the joist openings or caulk/seal the ventilation gap to the eaves using suitable material.
If the eaves are sealed, point 2 does not need to be performed. Seal the ceiling ventilation
inside the attic
2. Ceiling ventilation is sealed inside the attic if the eaves cannot be sealed (point 1). Use a
malleable seal which is pushed down into the ventilation gap towards the eaves.
3. Seal ventilation under roof tiles and ridge.
4. Seal the vapour barrier downwards to the living area with PE tape, polyurethane foam and
age-resistant construction plastic.
Vapour barriers in joists
All newer houses have a vapour barrier in the form an age-resistant construction plastic that
prevents moisture from the residential environment from leaking out into the outer structure of the
house causing moisture damage. Despite the vapour barriers, leaks may still occur which should be
1
2
4
3
1. Ventilation in eaves
2. Ceiling ventilation between
insulation and outer roof
3. Ventilation under roof tiles and ridge
4. Vapour barrier

VentoVind PRO Special user manual
© Corroventa Avfuktning AB
2020.12
16 (39)
sealed. Check for obvious leaks in the vapour barrier, such as at retrofitted spotlights or other
grommets and holes in the vapour barrier. Larger leaks through the vapour barrier and the attic floor
joists can be detected by visually inspecting the attic space as the leak can be seen as local mould
infestation on the suspended ceiling. A thermal camera can be used to find weak points in the
vapour barrier, however, this method works best the colder the attic space is. Depending on the type
of construction and leakage, aging-resistant PE tape and construction plastic intended for the vapour
barriers can be used for example. Alternatively age-resistant joint foam (polyurethane foam) can be a
suitable material to use for sealing. NOTE! ensure that the vapour barrier is not damaged by the
selected sealing material.
House construction without vapour barrier
For installations of VentoVind in houses with no vapour barrier it is important to check the house's
ventilation system and ensure that the residential environment has the supply air vents and exhaust
air vents that are recommended according to building regulations. Check that the ventilation system
is open and working. Add more vents as necessary. The areas that produce a lot of moisture such
bathrooms and laundry rooms can be fitted with a humidity controlled exhaust fan.
Electrical sockets and electrical installation
Any electrical installations carried out in connection with this work must be done by a qualified
electrician in accordance with local and national regulations.
VentoVind™ PRO special must be connected to an earthed, single phase 230 VAC/50 Hz socket. The
socket must be fused with a protection fuse up to 16A and an earth-fault breaker is recommended.
Control panel
Place the control panel in an area where any alarms can be detected.
The control panel has wireless communication with the control unit. How much distance there can
be between the control unit and the control panel depends on any obstructions between the
devices. Pure wooden structures have high permeability of radio signals while cast concrete
structures with steel reinforcement attenuate radio signals. The control panel must be powered by
the supplied 230V AC adapter. The batteries that are in the control panel must be removed as they
will not be used for continuous operation. Further information about the control panel can be found
in the supplied manual for HomeVision control system.
Installing the Control unit
Place the VentoVind™ control unit in a location that is easily accessible for servicing, e.g. in a fan
room or near the attic entrance. The connection cable with plug is 5m. If the control unit is installed
as a fixed electrical installation, a switch can also be installed to switch the VentoVind Control unit on
and off.

VentoVind PRO Special user manual
© Corroventa Avfuktning AB
2020.12
17 (39)
Install the supplied brackets on the control unit. Tap in the pins to secure the brackets in the holes (1
- 2). Then mount the control unit on a flat surface centrally and make sure it is easy to access (3).
Installing Sensors
VentoVind PRO is supplied with one indoor sensor and one outdoor sensor. It is important to position the
sensors in the designated locations at installation. An incorrectly positioned sensor can cause incorrect
operation of the VentoVind system.
Indoor sensor
The indoor sensor is connected to the control unit via a 15m cable upon
delivery. The cable can be replaced as necessary and extended up to 100m
The indoor sensor must be installed so that the measured values
are representative of the general climate in the attic space. When VentoVind ventilates the attic
space, the indoor sensor must not be affected by the incoming air too fast. Normally, the sensor is
mounted in the far part of the attic in relation to incoming air flow from the fan and approximately at
half the ridge height. Sensor and cable output must be pointing down. In cramped attics, the sensor
should primarily be placed at the exhaust air damper, alternatively, the sensor can be placed behind
the fan. The airflow of the fan must be directed away from the sensor so that the attic space can be
ventilated before the indoor sensor is affected by incoming air. See image 4
Image 4
1.
2.
3.
SENSOR
CONTROL UNIT

VentoVind PRO Special user manual
© Corroventa Avfuktning AB
2020.12
18 (39)
Important!
•Do not place the indoor sensor so that it is affected by heat radiation or leaking air from
outside or from the residential environment such as the proximity of an attic hatch or other
leaks in the attic structure.
•Do no place the indoor sensor too close to incoming air from the fan.
•Do not place the indoor sensor in direct contact with the outer roof
•The indoor sensor may not be covered with insulation
•When removing the sensor cable ensure that the current to the control unit is disconnected
Outdoor sensor
The outdoor sensor is connected to the control unit via a 15m cable upon delivery. The cable has a
connector 1.5m from the sensor that can easily be separated to facilitate routing the cable through
pipes or walls. The connector is 10mm in diameter and holes for lead-through should be a diameter
of at least 11mm. The connector must be weather-protected at installation.
The sensor must be installed so that the measured values are representative of the general climate in
the outdoor air. It is therefore extremely important that the outdoor sensor is placed outdoors in a
location that is protected from direct sunlight, rain and snow, preferably under the roof overhang or
under the eaves on the house's north or west side. Sensor and cable output must be pointing down.
Important!
•Position the outdoor sensor so that it is not affected by heat radiation from the sun or other
heat source.
•Do not install the outdoor sensor in or on any steel roof hood on the roof.
•Do not place the outdoor sensor too close to the vent for outgoing air from the attic space.
•Do not place the outdoor sensor by outgoing air from the house's ventilation system.
•the outdoor sensor must not be recessed, the sensor must be installed with a good exchange
of air.
•When removing the sensor cable ensure that the current to the control unit is disconnected.

VentoVind PRO Special user manual
© Corroventa Avfuktning AB
2020.12
19 (39)
Connecting fans and motorised dampers
Both normal AC fans and energy-saving 230V 50hz EC fans can be used with VentoVind™ PRO Special.
Connection and control of each fan are different, so ensure that the correct current output in the
control unit is used when connecting. See section, Control unit - inputs and outputs for more info.
VentoVind PRO Special is delivered prepared to be connected to one or multiple EC low-energy fans,
the total power output on all fans must not exceed 2000W. For larger power outputs, the fans must
be supplied with a separate power supply.
EC fans must be speed controlled by control signal 1–10 VDC via extra cable from the VentoVind
control unit.
A maximum 350W AC type fan can be used. When connecting to the control unit, the power output
for AC fan must be used. The AC fan speed is PWM (Pulse Width Modulation) controlled. See section,
Control unit - inputs and outputs for more info.
Important!
•EC and AC type fans cannot be mixed in the same installation.
•Always check that the correct type of fan is selected in the menu on VentoVind control panel,
see manual for the HomeVision control panel.
Installation of EC fans with 1-10V speed control
The fan output for EC fans has a maximum power output of 230VAC 50hz 2000W. When installing
multiple EC fans whose combined power output exceeds 2000W, each EC fan must be connected to
an external power supply. EC type fans must always be speed controlled with control signal 1-10V
1. Control unit
2. Control panel
3. Indoor sensor
4. Outdoor sensor
5. Fans 230V
6. Dampers 230V
7. Junction box
8. External power supply 230V
9. Control signal +1-10VDC
Table of contents
Other CorroVenta Fan manuals
Popular Fan manuals by other brands

Lunos
Lunos RA 15-60 installation manual

Ortech
Ortech Compact Series manual

Hunter
Hunter Contempo 59013 Owner's guide and installation manual

Maico
Maico ECA 120 SERIES Mounting and operating instructions

Dimplex
Dimplex DCTF117NL instruction manual

Home Decorators Collection
Home Decorators Collection BAXTAN AM731A-MBK Use and care guide

ATD Tools
ATD Tools 30330A owner's manual

Suntec Wellness
Suntec Wellness KLIMATRONIC CoolBreeze 1500 TV manual

SPT
SPT SF-1469 owner's manual

Ridder Drive Systems
Ridder Drive Systems PolyDrive RPD 506 Series product manual

Vent-Axia
Vent-Axia Sentinel User, installation & maintenance manual

Vaventis
Vaventis Fresh-r On-The-Wall Maintenance manual