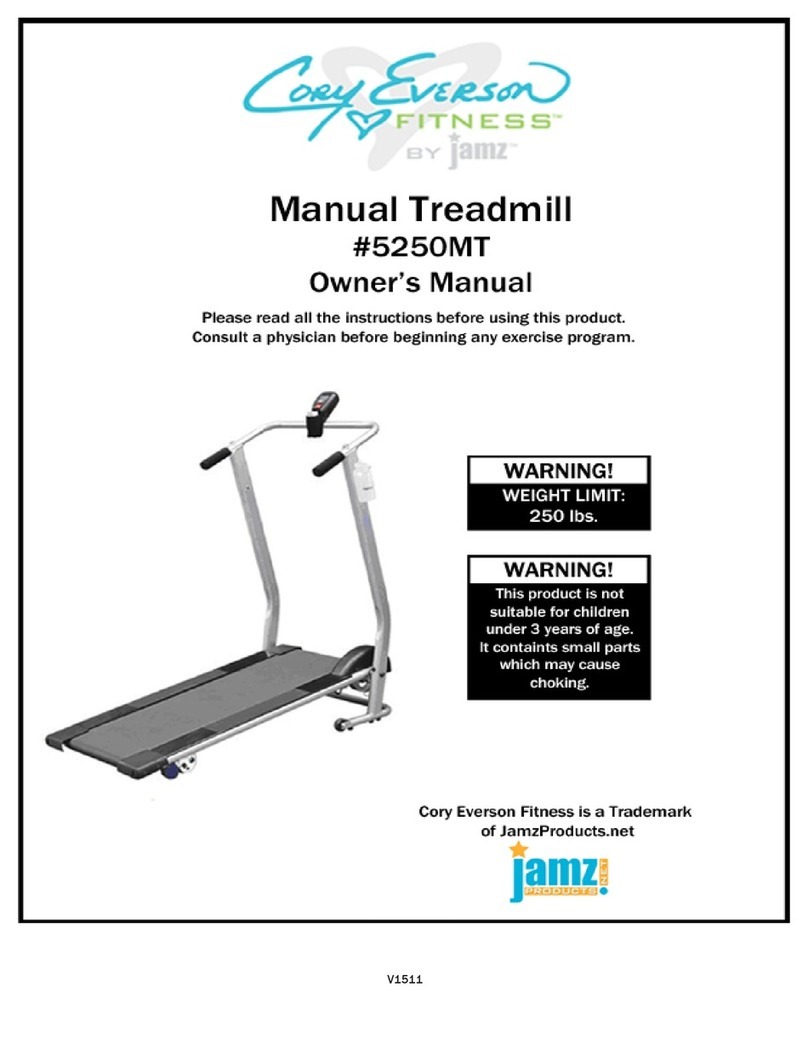
Cory Everson 5250MT User manual


1
TABLE OF CONTENTS
Introduction/Customer Service Information ……………2
Warranty Information …………………………………….……....3
Warnings/Safety Pre-cautions…………………………….. .4-5
Product/Hardware Overview………………………………….6-7
Hardware Packing List/Parts List………………………..….8-9
Instructions………………………………………………………….9-13
Assembly
Folding & Moving
Running Belt Adjustments
Operating Instruction
Computer Instruction
Maintenance………………………………………………………….14
Warm Up Exercises……………………………………………15-16
Frequently Asked Questions……………………………………..17

2
INTRODUCTION/CUSTOMER SERVICE INFORMATION
Thank you for purchasing our product.
At JamzProducts.net, we want all of our customers to be completely satisfied with their
purchase. Please take time to review the contents of the product you just received to
make sure that all of the parts are included. If you find that any parts are missing or
damaged, we will provide replacement parts at no charge within 30 days of purchase.
To order these parts, or if you have any other questions or concerns about this
JamzProducts.net product, please e-mail the JamzProducts.net customer service
department at customerservice@jamzproducts.net or contact us at 1-866-498-5269.
If you request replacement parts, please be sure to include the following information in
your correspondence:
• YOUR NAME
• YOUR MAILING ADDRESS
• YOUR EMAIL ADDRESS
• RETAILER WHERE YOU PURCHASED PRODUCT
• ORDER # IF AVAILABLE
• PRODUCT’S MODEL # (located in manual)
• THE NAME OF THE PRODUCT
• PRODUCT SERIAL #___________________________
• THE PARTS MODEL # (located in manual)
• THE QUANITITY NEEDED
• PROVIDE A PICTURE OF DAMAGED PART(s) –Email, Fax, or Mail
Again, thank you for purchasing a JamzProducts.net product.
Sincerely,
Customer Service
JamzProducts.net
www.JamzProducts.net
1-866-498-5269

3
LIMITED WARRANTY
JamzProducts.net warrants this product to be free from defects in workmanship and
materials under normal use and conditions for a period of 90 DAYS FROM THE DATE OF
ORIGINAL PURCHASE. This Limited Warranty is not transferable and is available only for
the original purchaser of the Product. The Company’s obligation under this warranty is
limited to replacing or repairing the Product, at the discretion of the Company.
All warranty coverage extends only to the original retail purchaser from the date of
purchase. Cory Everson Fitness™ obligation under this Warranty is limited to replacing
or repairing, at Cory Everson Fitness™ option, the product at one of its authorized
service centers. All products for which a warranty claim is made must be received by
Cory Everson Fitness™ at one of its authorized service centers and accompanied by
sufficient proof of purchase (photocopy of the original store receipt, indicating the date
of purchase). All freight and handling fees are the responsibility of the consumer to pay,
both to and from Cory Everson Fitness™. All warranty claims must be preauthorized by
Cory Everson Fitness™. Preauthorization can be obtained by calling 866-498-5269. This
warranty does not extend to any product or damage to a product caused by or
attributable to freight damage, abuse, misuse, improper or abnormal usage, or repairs
not provided by a Cory Everson Fitness™ authorized service center or for products used
for commercial or rental purposes. This warranty does not cover ordinary wear and tear,
weathering, failure to follow directions, improper installation, improper maintenance, or
acts of Nature (such as damage caused by wind, lightning, snow, water, or ice). Weather
damage, damage caused by unauthorized repair work or damage caused by improper
use of the products are not covered by the product warranty. No other Warranty beyond
that specifically set forth above is authorized by Cory Everson Fitness™.
CORY EVERSON FITNESS™ IS NOT RESPONSIBLE OR LIABLE FOR INDIRECT, SPECIAL
OR CONSEQUENTIAL DAMAGES ARISING OUT OF OR IN CONNECTION WITH THE USE OR
PERFORMANCE OF THE PRODUCT OR OTHER DAMAGES WITH RESPECT TO ANY
ECONOMIC LOSS, LOSS OF PROPERTY, LOSS OF REVENUE OR PROFITS, LOSS OF
ENJOYMENT OR USE, COST OF REMOVAL, INSTALLATION OR OTHER CONSEQUENTIAL
DAMAGES. SOME STATES DO NOT ALLOW THE EXCLUSION OR LIMITATION OF
INCIDENTAL OR CONSEQUENTIAL DAMAGES. ACCORDINGLY,
THE ABOVE LIMITATION MAY NOT APPLY TO YOU. THE WARRANTY EXTENDED
HEREUNDER IS IN LIEU OF ALL OTHER WARRANTIES AND CORY EVERSON FITNESS™
SPECIFICALLY DISCLAIMS ANY IMPLIED WARRANTY OF MERCHANTABILITY
OR FITNESS FOR A PARTICULAR PURPOSE IS LIMITED IN ITS SCOPE AND DURATION TO
THE TERMS SET FORTH HEREIN. SOME STATES DO NOT ALLOW LIMITATION ON HOW
LONG AN IMPLIED WARRANTY LASTS. ACCORDINGLY, THE ABOVE LIMITATION MAY NO
APPLY TO YOU.
This warranty gives you specific legal rights. You may also have other rights, which vary
from state to state.

4
WARNING
While every attempt is made to ensure
the highest degree of protection in all
equipment, we cannot guarantee
freedom of injury. The user assumes all
risks of injury due to use. All merchandise
is sold on this condition, which no
representative of the company can waive
or change.

5
PRECAUTIONS/SAFETY INSTRUCTIONS/WARNINGS
Dear Customer,
Please read instructions very carefully before using this item. You will find important
information regarding your safety of use of this product.
PORTAN
IMPORTANT SAFETY INSTRUCTIONS
T TYUCTIONS
Please read the instructions before use and retain for future reference.
This manual is designed to help you assemble, adjust, maintain and use the product.
This machine is intended for home use only and not designed for commercial use.
Before using this product, Inspect your machine; make sure that all nuts and bolts
are tight and in working order, replace any worn, defective or missing parts.
Do NOT allow small children to use this product.
Ensure that the product is on level ground.
Do NOT exceed the recommended MAXIMUM WEIGHT limit of 250lbs (113kgs)
Warm up at least 5-10 minutes before each workout and to cool down for at least 5-
10 minutes afterwards. Never hold your breath while exercising
Rest adequately between workouts to allow your muscles to tone and develop.
Do NOT wear loose fitting clothing, belt buckles, or jewelry, including but not limited
to rings, chains, and pins before commencing exercise; this can be extremely
dangerous.
WARNING
Consult your physician before beginning any exercise program.
• Evaluate your present fitness level and determine the exercise program that is
most appropriate for your particular age and condition.
• If you experience any pain or tightness in your chest, irregular heartbeats, shortness
of breath, faintness or other unusual discomfort while exercising, stop and consult
your physician before continuing.
MAXIUM WEIGHT CAPACITY
The maximum recommended weight capacity for your product is:
• 250 Pounds

6
OVERVIEW DRAWING

7
HARDWARE PACKING LIST

8
PARTS LIST
No.
Description
Qty
No.
Description
Qty
1
Main frame
1
32
End plug
1
2
Left handlebar support
1
33
Buffer cushion
4
3
Right handlebar support
1
34
Emery cloth
2
4
Front handlebar
1
35
Magnetic sensor
1
5
Computer
1
36
Sensor
1
6
Base support
1
37
M8X35 Bolt
2
7
Ball bearing
2
38
M6X75 Bolt
2
8
Ball bearing
2
39
M4X10 Crosshead bolt
2
9
Connection bolt
2
40
Screw M4X15
6
10
Flywheel cover
1
41
M3.5X12 Screw
2
11
Running deck
1
42
M8X40 Bolt
2
12
Running belt
1
43
M10X40 Bolt
4
13
Ф25×Ф12.5×2 washer
2
44
M6 X35 Bolt
6
14
Ф25×Ф15×2 washer
2
45
M8 Lock nut
2
15
Roller’s bearing bracket
3
46
M6 Lock nut
6
16
Right rail
1
47
Ф8 Flat washer
2
17
Right end cap
1
48
Ф10 Flat washer
2
18
Foot cushion
2
49
Ф8 Arc washer
2
19
Hole plug
2
50
Ф6 Flat washer
8
20
Handlebar end plug
2
51
Ф4 Flat washer
10
21
Left end cap
1
52
Sensor wire II
1
22
Front end cap
1
53
M4X10 Screw
2
23
Lock knob
1
54
Spring bolt
2
24
Hand foam
2
55
Sensor wire I
1
25
Screw M4X15
6
56
Bottle holder
1
26
Front roller axis
1
57
Water bottle
1
27
Front roller
1
58
Wrench
1
28
Rear roller axis
1
59
Screwdriver (S=5)
1
29
Rear roller
1
60
Washer Φ10.5×Φ20×t2.0
4
30
Left rail
1
61
iPOD holder
1
31
Front wheel
2
62
Incline Pin
2
63
End cap
2

9
ASSEMBLY INSTRUCTIONS
Place all the parts on the floor, and follow the assembly instructions below.
Step 1: Install the Flywheel Cover
Attach the Flywheel cover (10) to the
Main frame (1) with two Screws (40) and
Flat washers (51).
(See figure 1).
Step 2: Install the Base Support
Attach the Base support (6) to the Left
and Right handlebar supports (2,3) with
four Bolts (43).
(See figure2).
Step 3: Install the Main Frame
Raise up the front part of Main frame (1)
*Ask for help if you cannot do this alone.
Attach the front part of Main frame (1) to
Left and Right handlebar supports (2,3)
using two Connection bolts (9) and Flat
washers (48).
Attach the Lock Knob (23) to the lower
hole at the Left handlebar (2) and secure
it with the Main frame (1).
Connect the Sensor wire (55) from the
Right handlebar support (3) to the Sensor
(36) from the Main frame (1).
*Do not tighten Connection bolts until
after you complete step 4. (See figure 3)
*After Treadmill frame is complete:
Plug End caps (63) to each side of
connection bolts (9) after they are
tightened.

10
ASSEMBLY INSTRUCTIONS CONTINUED
Step 4: Install the Front Handlebar
Connect the Sensor wire I (55) from the
Right handlebar support (3) to the Sensor
wire II (52) from the Front handlebar (4).
(See figure 4a).
Attach the Front handlebar (4) on the arc
plates of Left and Right handlebar
supports (2,3) with two Bolts (37) and Arc
washers (49). Finally, cover with two Hand
foams (24) to the Front handlebar (4). You
can now tighten Left and Right Handlebar
supports.
(See figure 4b).
Step 5: Install the Computer
Connect the Sensor wire II (52) to the wire
that comes from the Computer (5). Insert
the Computer (5) to the computer plate of
Front handlebar (4).
(See figure 5).
Step 6: Install the Bottle holder and Water
bottle
Connect the Bottle holder (56) with two
M4X20 Screw (58) and Ф4 Flat washer
(51), then put the Water bottle
(57) in the holder.
(See figure 6).

11
ASSEMBLY INSTRUCTIONS CONTINUED
Step 7: Adjusting the Incline
Using the Incline Pin (62) you can adjust
the incline on the back of the treadmill.
Simply remove the pin by pulling the pin
from the base. Put pin into the next hole to
adjust the incline, there are three levels of
incline.
(See figure 7).
FOLDING AND MOVING
Folding: To fold turn the Lock knob (23) counterclockwise and remove it from the Left
handlebar support (2). Raise the rear part of the Main frame (1) all the way up by your
right hand then insert the Lock knob (23) to the upper hole of Left handlebar support
(2) and tighten it. (See figure a).
Moving: After folding up the treadmill, hold the handlebars, lean the treadmill back,
then you can move it when the wheels touch the ground. (See figure b).
WARNING
1. Make sure the Lock knob is inserted correctly when folding or unfolding the
equipment, and then tighten the Lock knob.
2. DO NOT LEAVE CHILDREN UNATTENDED BY EQUIPMENT at ANY TIME.

12
RUNNING BELT ADJUSTMENT
IF the belt is STRAYING, MOVING TOO FAST or TOO SLOW:
After assembly, please try running and check the following points:
1. Check if the running belt turns smoothly and isn’t straying from the sides. Under
normal conditions, the running belt will turn freely and keep its position in the
middle since the belt is adjusted before sold. Freight travel may cause the belt to
stray. To adjust; refer to (Figure C.)
2. If the running belt is straying to the left side, insert an alan wrench into the black
end cap hole at the left or right side of the rear roller. Turn 1/2 circle
counterclockwise in the right side, try running again till the belt runs in the middle;
or turn 1/2 circle clockwise in the left side, try running again. Please reverse if the
belt is straying to the right side.
3. Tightening the belt will slow it down, Loosening it will speed it up. Both screws need
to be aligned together. You can’t turn one and not the other, they need to both be
turned for the belt to be tightened or loosened. Do not turn them at the same time;
turn them one at a time but make sure you turn both.

13
OPERATING INSTRUCTION
1. Unfold the equipment, place on level ground, tighten the knob, inspect and
make necessary adjustments then begin your warm-up..
2. When WALKING: hold onto the handlebars, lean your body forward a little, and
begin.
3. When JOGGING: hold onto the handlebars, straighten your body and begin.
4. When RUNNING: hold onto the handlebars and begin.
We RECOMMEND that ALWAYS hold onto the handlebars, removing your hands is at
YOUR OWN RISK. Use Caution when stepping on running belt.
COMPUTER INSTRUCTION
FUNCTIONS:
SCAN-Press Mode button until the triangle sign appears. You can rotate through each
setting. Time, speed, distance, calorie and total distance, each display will be held for
four seconds.
TIME-Display the time from start to end.
SPEED-Display the current speed. (Mile/H)
DIST-Display the exercise distance from start to end. (mile)
CAL-Display the consumed calories from start to end.
TOTAL DIST-Display the total distance after loading the batteries. (mile)
AUTO ON/OFF-Without any signal for 8 minutes, the power will turn off automatically.
As long as the flywheel is in motion or press the button, the monitor will be active.
REPLACING THE BATTERY:
Open the battery cover and place two “AA“ batteries when screen is blank or not
displaying properly.
Note: The computer display can recover 15 seconds later.

14
MAINTENANCE
The running belt and plate need to be cleaned and lubricated as this prevents the
running belt resistance from loosing. User’s normal maintenance is essential.
Be sure to clean and lubricate the belt and belt plate as below:
1. Raise up the belt in one side, spray some WD40 to the belt plate and do it the same
in the other side. DO NOT SPRAY DIRECETLY ONTO BELT.
2. Check the bolts in each part of the equipment regularly, and tighten them. The
moving parts should turn freely and quietly. Abnormality of moving parts will affect
the safety of the equipment.
3. Keep the equipment clean. Do NOT clean the equipment with a strong solvent.
4. The running belt will eventually wear out. Inspect equipment before use.
with replacing part. You should not use the equipment until the belt is repaired.
Malfunction
Reason
Treatment
Base is unstable.
1. The ground is not flat and secure.
2. The lock knob is not tightened.
1. Remove the objects.
2. Tighten the lock knob at the
bottom of the treadmill.
The running belt
strays when
operating.
See figure C.
See figure C.

15
WARM UP EXERCISES
A successful exercise program consists of a warm-up, aerobic exercise, and a cool-
down. Do the entire program at least two and preferably three times a week, resting for
a day between workouts. After several months, you can increase your workouts to four
or five times per week.
Warming up is an important part of your workout, and should begin every session. It
prepares your body for more strenuous exercise by heating up and stretching out your
muscles, increasing your circulation and pulse rate, and delivering more oxygen to your
muscles. At the end of your workout, repeat these exercises to reduce sore muscle
problems. We suggest the following warm-up and cool-down exercises:
Inner Thigh Stretch
Sit with the soles of your feet together
with your knees pointing outward. Pull
your feet as close into your groin as
possible. Gently push your knees towards
the floor. Hold for 15 counts.
Hamstring Stretch
Sit with your right leg extended. Rest the
sole of your left foot against your right
inner thigh. Stretch toward your toe as far
as possible. Hold for 15 counts. Relax and
then repeat with left leg extended.
Head Roll
Rotate your head to the right for one
count, feeling the stretch up the left side
of your neck. Next, rotate your head back
for one count, stretching your chin to the
ceiling and letting your mouth open.
Rotate your head to the left for one count,
and finally, drop your head to your chest
for one count.
Shoulder Lift
Lift your right shoulder up toward your ear
for one count. Then lift your left shoulder
up for one count as you lower your right
shoulder.

16
WARM UP EXERCISES CONTINUED
Calf-Achilles Stretch
Lean against a wall with your left leg in
front of the right and your arms forward.
Keep your right leg straight and the left
foot on the floor; then bend the left leg
and lean forward by moving your hips
toward the wall. Hold, then repeat on the
other side for 15 counts.
Toe Touch
Slowly bend forward from your waist,
letting your back and shoulders relax as
you stretch toward your toes. Reach down
as far as you can and hold for 15 counts.
Side Stretch
Open your arms to the side and continue
lifting them until they are over your head.
Reach your right arm as far upward toward
the ceiling as you can for one count. Feel
the stretch up your right side. Repeat this
action with your left arm.

17
FREQUENTLY ASKED QUESTIONS
Question: How do I adjust the tension?
Answer: There is no tension control on the manual treadmill. The only way to slow it
down or speed it up would be to adjust the belt tension. See “Running Belt
Adjustment,” section of the manual.
Question: My monitor doesn’t work, how do I fix it?
Answer: Check the two Double AA Batteries. Please double check that all your
connections to the monitor are correct. You should have a total of three wires; all
connected to each other.
Question: The Flywheel cover is not securely attached to the frame.
Answer: Please make sure your using the correct screws; #40 (they are the smaller then
#58, the water bottle screws.)
Question: Why doesn’t the front handlebar #4 fit on to the treadmill?
Answer: Do not tighten the left and right handle bar supports #2 and #3; until after you
have the front handlebar attached to the frame.
Question: What size bolts do I use to put the handle bar supports on?
Answer: Make sure you have two #9 bolts.
Question: What kind of oil do I need for the belt wheel/rollers?
Answer: CAUTION! DO NOT SPRAY THE BELT!!! If you have to spray the wheel rollers
use; WD40
Question: Where do I put the small pin’s that look like a key ring?
Answer: They are used to adjust the incline, see step 7.
Other manuals for 5250MT
1
Table of contents
Other Cory Everson Treadmill manuals
Popular Treadmill manuals by other brands

SportsArt Fitness
SportsArt Fitness T652 manual

Progear Fitness
Progear Fitness 3005 manual

Woodway
Woodway 4Front operating manual

Sears, Roebuck and Co.
Sears, Roebuck and Co. 831.297830 HealthRider Soft Strider LE user manual

Energetics
Energetics PR 9000 HRC Computer Manual

Livestrong
Livestrong LSPRO2 owner's manual