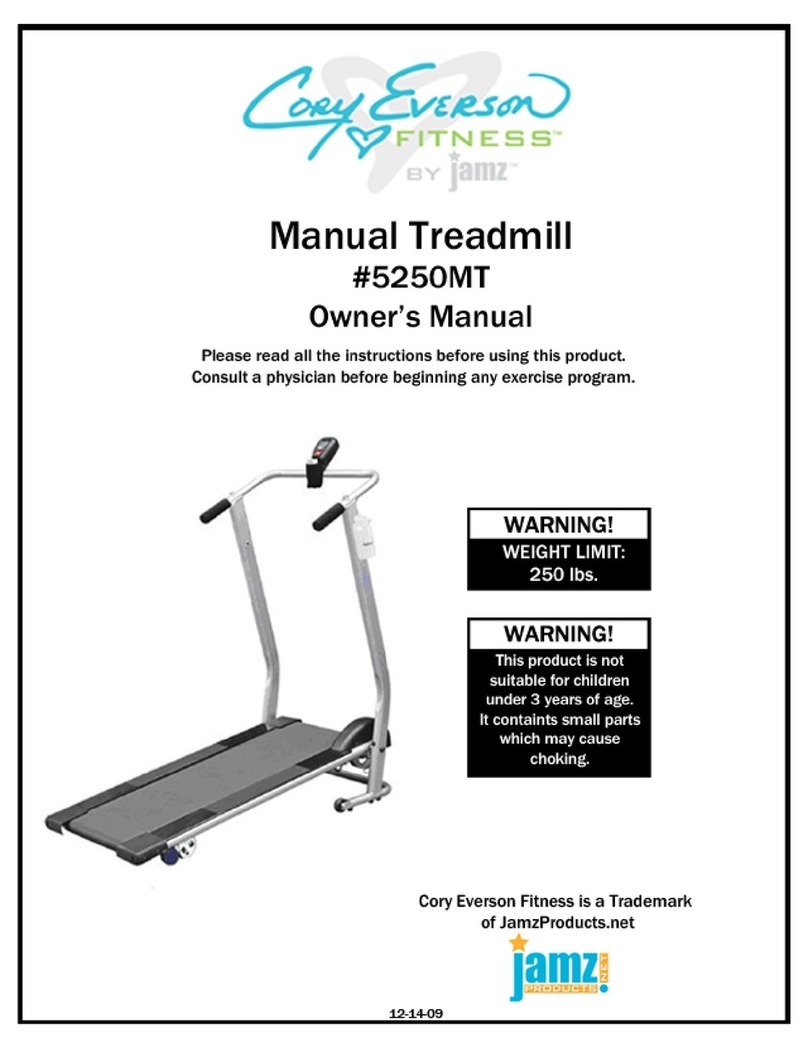
Cory Everson 5250MT User manual

V1511

1
TABLE OF CONTENTS
Customer Service Information …………………………………………………………2
Warranty Information …………………………………….……................................3
Warnings/Safety Precautions……………………………………………………….4-5
Overview Diagram…………………………………………………………………………6-7
Hardware Packing List/Parts List………………………………………………….7-8
Assembly Instructions………………………………………………………………..9-10
Care & Use Instructions…………………………………………………………....11-13
Folding & Moving
Adjusting the Incline
Running Belt Adjustments
Operating Instructions
Meter/Display Instructions
Maintenance…………………………………………………………………………….......14
Warm Up Exercises…………………………………………………………………..15-16
Frequently Asked Questions…………………………………………………………..17

2
CUSTOMER SERVICE INFORMATION
Thank you for purchasing our Cory Everson Fitness™ Manual Treadmill.
At JamzProducts.net, we want all of our customers to be completely satisfied with their purchase. Please take
time to review the contents of the product you just received to make sure that all of the parts are included. If
you find that any parts are missing or damaged, we will provide replacement parts at no charge within 30
days of purchase.
To order these parts, or if you have any other questions or concerns about this JamzProducts.net product,
please e-mail the JamzProducts.net customer service department at: customerservice@jamzproducts.net or
call us at 1-866-498-5269. You can also visit our website at: www.jamzproducts.net
If you request replacement parts, please be sure to include the following information in your correspondence:
•YOUR NAME
•YOUR MAILING ADDRESS
•YOUR EMAIL ADDRESS
•RETAILER WHERE YOU PURCHASED PRODUCT
•PROOF OF PURCHASE (purchase date and item must be on paperwork)
•ORDER # IF AVAILABLE
•PRODUCT MODEL No.: 5250MT
•SERIAL No.
•NAME OF THE PRODUCT : Manual Treadmill
•PART NUMBER(s) (located in manual)
•QUANTITY NEEDED
•A PICTURE OF DAMAGED PART(s) –send by Email , Fax, or Mail
Again, thank you for purchasing a JamzProducts.net product.
Sincerely,
Customer Service
JamzProducts.net
www.jamzproducts.net
Phone: 1-866-498-5269
Email: customerservice@jamzproducts.net
Fax: 1-561-833-1996

3
LIMITED WARRANTY
JamzProducts.net warrants this product to be free from defects in workmanship and materials under normal
use and conditions for a period of 90 DAYS FROM THE DATE OF ORIGINAL PURCHASE. This Limited Warranty
is not transferable and is available only for the original purchaser of the Product. The Company’s obligation
under this warranty is limited to replacing or repairing the Product, at the discretion of the Company.
All warranty coverage extends only to the original retail purchaser from the date of purchase. Cory Everson
Fitness™ obligation under this Warranty is limited to replacing or repairing, at Cory Everson Fitness™ option,
the product at one of its authorized service centers. All products for which a warranty claim is made must be
received by Cory Everson Fitness™ at one of its authorized service centers and accompanied by sufficient
proof of purchase (photocopy of the original store receipt, indicating the date of purchase). All freight and
handling fees are the responsibility of the consumer to pay, both to and from Cory Everson Fitness™. All
warranty claims must be preauthorized by Cory Everson Fitness™. Preauthorization can be obtained by calling
866-498-5269. This warranty does not extend to any product or damage to a product caused by or
attributable to freight damage, abuse, misuse, improper or abnormal usage, or repairs not provided by a Cory
Everson Fitness™ authorized service center or for products used for commercial or rental purposes. This
warranty does not cover ordinary wear and tear, weathering, failure to follow directions, improper installation,
improper maintenance, or acts of Nature (such as damage caused by wind, lightning, snow, water, or ice).
Weather damage, damage caused by unauthorized repair work or damage caused by improper use of the
products are not covered by the product warranty. No other Warranty beyond that specifically set forth above
is authorized by Cory Everson Fitness™.
CORY EVERSON FITNESS™ IS NOT RESPONSIBLE OR LIABLE FOR INDIRECT, SPECIAL OR CONSEQUENTIAL
DAMAGES ARISING OUT OF OR IN CONNECTION WITH THE USE OR PERFORMANCE OF THE PRODUCT OR
OTHER DAMAGES WITH RESPECT TO ANY ECONOMIC LOSS, LOSS OF PROPERTY, LOSS OF REVENUE OR
PROFITS, LOSS OF ENJOYMENT OR USE, COST OF REMOVAL, INSTALLATION OR OTHER CONSEQUENTIAL
DAMAGES. SOME STATES DO NOT ALLOW THE EXCLUSION OR LIMITATION OF INCIDENTAL OR
CONSEQUENTIAL DAMAGES. ACCORDINGLY,
THE ABOVE LIMITATION MAY NOT APPLY TO YOU. THE WARRANTY EXTENDED HEREUNDER IS IN LIEU OF ALL
OTHER WARRANTIES AND CORY EVERSON FITNESS™ SPECIFICALLY DISCLAIMS ANY IMPLIED WARRANTY OF
MERCHANTABILITY
OR FITNESS FOR A PARTICULAR PURPOSE IS LIMITED IN ITS SCOPE AND DURATION TO THE TERMS SET
FORTH HEREIN. SOME STATES DO NOT ALLOW LIMITATION ON HOW LONG AN IMPLIED WARRANTY LASTS.
ACCORDINGLY, THE ABOVE LIMITATION MAY NO APPLY TO YOU.
This warranty gives you specific legal rights. You may also have other rights, which vary from state to state.

4
WARNING
While every attempt is made to ensure the highest
degree of protection in all equipment, we cannot
guarantee freedom of injury. The user assumes all
risks of injury due to use. All merchandise is sold on
this condition, which no representative of the
company can waive or change.

5
OWNER’S MANUAL
PRECAUTIONS/SAFETY INSTRUCTIONS/WARNINGS
Dear Customer,
Please read these instructions very carefully before using this item. You will find important information
regarding your safety and your use of this product. P
ORTANPORTAN
IMPORTANT SAFETY INSTRUCTIONS
T TYUCTIONS
Read this manual in its entirety before assembly or use and retain for future reference.
This manual is designed to help you assemble, adjust, maintain and use the product and its accessories.
This machine is intended for indoor home use only. It is NOT intended for commercial applications and/or in
public areas such as schools/community centers, parks, and commercial/communal gyms.
Before each use of this product, inspect your Treadmill; make sure that all nuts and bolts are tight and in
working order and the Running Belt and Rollers turn freely. Replace any worn, defective or missing parts.
Refer to the Care and Use section of this manual and follow the instructions therein.
DO NOT allow children under the age of 12 to use this product.
ALWAYS ensure that the product is on level ground.
ALWAYS ensure that your workout area is well lit.
DO NOT exceed the recommended MAXIMUM WEIGHT limit of 250lbs (113kgs)
ALWAYS warm up at least 5-10 minutes before each workout and to cool down for at least 5-10 minutes
afterwards. Never hold your breath while exercising
Rest adequately between workouts to allow your muscles to tone and develop.
ALWAYS wear appropriate clothes when exercising. Do not wear loose clothes that could become caught on
the Treadmill.
ALWAYS wear athletic shoes when using the Treadmill; do not use the Treadmill with bare
feet, wearing only stockings, or in sandals.
If you feel pain or dizziness while exercising, stop immediately and begin cooling down.
ALWAYS hold the handrail when mounting, dismounting, or exercising on the Treadmill.
DO NOT store your Treadmill outside or where exposed to moisture or extreme temperatures.
ALWAYS store your Treadmill in the Upright and Locked position, and in a location where it will not present a
tripping or obstacle hazard.
WARNING
Consult your physician before beginning any exercise program.
• Evaluate your present fitness level and determine the exercise program that is
most appropriate for your particular age and condition.
• If you experience any pain or tightness in your chest, irregular heartbeats, shortness
of breath, faintness or other unusual discomfort while exercising, stop immediately and consult
your physician before continuing.
MAXIUM WEIGHT CAPACITY
The maximum recommended weight capacity for your product is:
• 250 Pounds

6
OVERVIEW DRAWING

7
HARDWARE PACKING LIST
PARTS LIST
No.
Description
Qty
No.
Description
Qty
1
Treadmill Platform
1
32
End plug
1
2
Left support bar
1
33
Buffer cushion
4
3
Right support bar
1
34
Emery cloth
2
4
Handlebar
1
35
Magnetic sensor
1
5
Meter
1
36
Main Sensor Wire
1
6
Base support
1
37
Handlebar bolts M8X35
2
7
Ball bearing
2
38
M6X75 Bolt
2
8
Ball bearing
2
39
M4X10 Crosshead bolt
2
9
Large Connection bolts
2
40
Flywheel Screws ST4X16
2
10
Flywheel cover
1
41
M3.5X12 Screw
2
11
Running deck
1
42
M8X40 Bolt
2
12
Running belt
1
43
Medium Bolts M10x40
4
13
Ф25×Ф12.5×2 washer
2
44
M6 X35 Bolt
6
14
Ф25×Ф15×2 washer
2
45
M8 Lock nut
2
15
Roller’s bearing bracket
3
46
M6 Lock nut
6
16
Right rail
1
47
Ф8 Flat washer
2
17
Right end cap
1
48
Large Flat Washers ф10
2
18
Base Support Bumper
2
49
Arc washers ф8
2
19
Hole plug
2
50
Ф6 Flat washer
8
20
Handlebar end plug
2
51
Ф 4 Washer
10
21
Left end cap
1
52
Upper Sensor wire
1

8
22
Front end cap
1
53
M4X10 Screw
2
23
Lock knob
1
54
Spring bolt
2
24
Handle foam
2
55
Lower Sensor wire
1
25
Screw M4X15
6
56
Bottle holder
1
26
Front roller axis
1
57
Water bottle
1
27
Front roller
1
58
Multi-tool
1
28
Rear roller axis
1
59
Allen Wrench
1
29
Rear roller
1
60
Small Flat Washers ф4
4
30
Left rail
1
61
Accessory holder
1
31
Transport wheel
2
62
Incline Pin
2
63
Safety End Caps
2
ASSEMBLY INSTRUCTIONS
Place all the parts on the floor, and follow the assembly instructions below:
Step 1: Install the Flywheel Cover
Locate Flywheel Cover, 2x Flywheel Screws and 2x Small Flat
Washers.
Attach the Flywheel cover (10) to the Treadmill Platform
(1) with 2x Flywheel Screws (40) and Small Flat Washers
(60).
Note: The Screws and washers may be located in their
attachment holes on the Treadmill Platform. If so,
unscrew them before placing the Flywheel cover and use
them to secure the cover.
Step 2: Install the Base Support
Locate Base Support, Left and Right Handlebar Supports, and 4x
Medium Bolts.
Attach the Base support (6) to the Left support bar and
Right support bar (2,3) with four Medium Bolts (43) and
4 Washers (if supplied)
NOTE: DO NOT FULLY TIGHTEN THESE BOLTS UNTIL
AFTER ATTACHING THE HANDLEBAR IN STEP 4.
NOTE: For your convenience, your Manual Treadmill comes
partially assembled. Most of the parts on this page and the
previous Overview page are already installed, so they will not be
found in the Hardware Pack which came with your Treadmill.
The parts needed to assemble your Treadmill are shown in the
list above shaded and in italics.

9
Step 3: Install the Main Frame
Locate the Treadmill Platform (1), 2x Large Flat Washers (48), 2x
Large Connection Bolts (9), and Lock Knob (23).
Lift the front end of the Treadmill Platform (1) and place in
between the assembled Support piece from Step 2. Line
up the Treadmill Platform to the 2nd (top) bolt hole in the
lower Left Support Bar (2) and the corresponding bolt hole
on the lower Right Support Bar (3). Attach with 2x Large
Flat Washers (48) and 2x Large Connection Bolts (9)
Attach the Lock Knob (23) to the bottom hole on the Left
Support and secure to the Treadmill Platform (1).
Connect the Lower Sensor wire (55) from the Right
support bar (3) to the Main Sensor Wire (36).
D. Insert the Incline Pins (62) into the middle hole of
the Rear Feet. If desired, you can adjust these later
before beginning use of the Treadmill.
NOTE: DO NOT FULLY TIGHTEN THESE BOLTS UNTIL
AFTER ATTACHING THE HANDLEBAR IN STEP 4.
ASSEMBLY INSTRUCTIONS CONTINUED
Step 4: Install the Handlebar
Locate the Handlebar (4), 2x Arc Washers (49), and 2x Handlebar
Bolts (37).
Connect the Upper Sensor Wire (52); found underneath the
right side of the Handlebar (4), to the top of the Lower
Sensor Wire (55); found on the top of the Right Support Bar
(3).
(Figure 4a)
Gently thread the now attached cables down into the
Lower Sensor Wire hole in the Right Support Bar so they
do not become pinched or undone.
Attach the Handlebar (4) to the Left and Right Support
Bars (2, 3) with 2x Arc washers (49) and 2x Handlebar
Bolts (37). SEE NOTE BELOW.
(Figure 4b)
NOTE: ONCE HANDLEBAR IS ATTACHED, FULLY TIGHTEN
BOLTS FROM STEPS 2 & 3 BEFORE PROCEEDING!
Once tightened, cover the exposed Large Bolt heads (9)
on each Support Bar with 2x Safety Caps (63).

10
Step 5: Install the Meter
Locate the Meter (5).
Connect the Upper Sensor wire (52) to the Meter Wire in
the back of the Meter (5). Slide the Meter (5) onto the
Meter plate on the center of the Handlebar (4). Make sure it
is securely attached.
Step 6: Install the Bottle holder and Water bottle
Locate the Water Bottle (57) and the Bottle Holder (56).
Connect the Bottle holder (56) with the 2x Accessory
Screws found already in their respective attachment holes
on the Left Support Bar and 2x Small flat washers ф4 (51).
Place the Water bottle (57) in the Bottle holder (56).
CARE AND USE INSTRUCTIONS
Folding and Moving your Treadmill:
Folding: To fold, turn the Lock Knob counterclockwise until you are able to fully remove it from the bottom of the
Left Support Bar. Next, raise the rear part of the Treadmill Platform until it is in an upright position. Insert the Lock
Knob into the Upright Locking Hole, located near the top of the Left Support Bar (See figure A), and fully tighten it.
*When folding, NEVER leave the Treadmill in the upright position or attempt to move the Treadmill without the
Lock Knob fully secured into the Upright Locking Hole.*
Moving: After folding the Treadmill into the upright position and securing the Lock Knob into the Upright Locking
Hole, grab a firm hold on the handlebars, and carefully tilt the treadmill back until the wheels touch the ground
(See figure B).
Unfolding: When unfolding your Treadmill, make sure you maintain a firm grip on the Treadmill Platform when
loosening the Lock Knob. If you do not maintain firm control on the Treadmill Platform, it may suddenly drop,
resulting in injury and/or damage to the Treadmill.
*When unfolding, ALWAYS use the Lock Knob to lock the Treadmill in the Down position.*

11
Adjusting the Incline:
Running Belt Adjustment:
After assembly, please try a brisk walk on your Treadmill to check for the following:
1. Check if the running belt turns smoothly and make sure it isn’t sliding off center. Each Treadmill is tested before
it leaves the factory, and under normal conditions, the running belt will turn freely and keep its position in the
middle. However, freight travel may cause the Belt to become askew.
2. If the Running Belt is straying to one side, the Rear Roller or Belt may have shifted during transport. To make
adjustments, fold and lock the Treadmill in the upright position. Lift the underside of the Belt so you can see the
rear roller underneath. Make sure that the roller is level. If it isn’t, follow the instructions in 3a for Rear Roller
adjustments. If the Rear Roller appears to be perfectly level, you may have to adjust the Running Belt. Follow the
instructions in 3b to adjust the Belt.
3a. To adjust the Rear Roller, refer to Figure C. The two holes in the rear end caps have Adjustment Bolts therein.
Turning the Bolt counterclockwise (left) will move the corresponding side of the roller down, towards the front of
the unit. Turning the Bolt clockwise (right) will raise the roller, or move it towards the rear of the Treadmill. The
Rear Roller must be as level as possible to prevent shifting of the Treadmill Belt.
3b. To adjust the Running Belt, refer to Figure C. If the Rear Roller is level, loosen both the Adjustment Bolts found
in the holes in the rear End Caps as evenly as possible by turning each one an even full turn counterclockwise until
you have just enough slack in the Belt to shift it over. Move the Running Belt towards the center of the Platform,
Use the provided Incline Pins to adjust the incline of the Treadmill. Remove the pins
that you inserted into the Rear Feet in Step 3 of the Assembly Instructions by pulling
the pin rings. Evenly adjust each foot to the desired position and reinsert the Incline
Pins into the corresponding holes (See figure 7, on right). Make sure to place the Left
and Right Feet in the same incline position when inserting the Incline Pins.
This Treadmill has three levels of incline. You may actually find it easier to move the
belt on your Manual Treadmill with a greater incline, as you will have more traction to
assist you in moving the belt.

12
making sure that the Running Belt is still underneath the plastic rails on the top of the Treadmill Platform, and
between, but not underneath the V-shaped hooks on the bottom of the Treadmill Platform. Once it is in the proper
position, make even clockwise half turns on each Adjustment Bolt to raise the Rear Roller until the Belt is taut.
Make sure the Rear Roller is level. Use the Treadmill. If the belt is still straying to one side, the Rear Roller is not
raised enough. Keep centering the mat and turning each bolt an even half turn in a clockwise direction until the
Belt stops straying. If the Belt will not move smoothly, the Adjustment Bolts are too tight. Loosen each Bolt an
even half turn in the counterclockwise direction until it moves smoothly.
General Belt Adjustment:
Keep in mind that the Treadmill may require some use before the factory applied lubricant fully works its way
around each axis bar of the Front and Rear Rollers. In rare cases, it may take up to an hour of general use before
the Treadmill reaches its optimal performance.
Tightening the belt will slow it down, Loosening it will speed it up. Turning the Adjustment Bolts clockwise (right)
will tighten the Belt, and counterclockwise (left) will loosen it. Both Adjustment Bolts need to be aligned evenly
together during the adjustment. If you turn one Bolt, you must turn the other the same amount (half turn, full turn,
etc.) and in the same direction (clockwise or counterclockwise) to keep the Rear Roller level. Do not turn them at
the same time.
General Use Instructions:
1. Ensure workout area is well-lit, free from obstacles or hazards and on level ground. Unfold the
Treadmill and secure the Adjustment Knob in the Lower Lock Hole. Begin your 5-10 Minute warm-up
using stretches, and/or or other warm-up procedures.
2. When WALKING: Hold onto the Handlebar, lean your body forward a little, and begin.
3. When JOGGING: Hold onto the Handlebar, straighten your body and begin.
4. When RUNNING: Hold onto the Handlebars and begin.
ALWAYS hold onto the handlebar grips, removing your hands from the grips may result in loss of balance
and injury from falling.
ALWAYS use caution whenever stepping on the Running Belt.
ALWAYS wear well fitting, appropriate exercise wear and athletic footwear.
ALWAYS start your exercise with a slow walk and gradually build to a brisk walk, jog, and/or run to make
sure that the Running Belt, Front Roller and Rear Roller are all operating normally.
Meter Instructions:
MODE BUTTON:

13
Press the MODE button to turn the Meter on, cycle through the various functions, and to reset specific functions as
described below.
RESET FUNCTION DATA:
Press and hold the MODE button for ~10 seconds to reset the data for the function you are currently on (Not
available on all models). To Reset ALL functions, tap the MODE button until the indicator is next to SCAN, and then
press and hold the MODE button for ~10 seconds. You can also remove and replace the batteries to reset function
data, or to reset the TOTAL DISTANCE function data.
FUNCTIONS:
SCAN: Press the MODE button until the indicator is next to SCAN. The Meter will automatically cycle through
each function, displaying your current Time, speed, distance, calorie and total distance. Each function will be
displayed for ~4 seconds.
TIME: Display the total time for your current exercise.
SPEED: Display your current speed.
DIST: Display the distance travelled for the current exercise.
CAL: Display the total calories burned for the current exercise.
TOTAL DIST: Display the total distance travelled from your first workout.
AUTO ON/OFF: The Meter will turn on whenever it receives a signal input from the Magnetic Sensor or if the MODE
button is pressed. The Meter will shut itself off after ~6 Minutes of no Sensor input.
Batteries:
2x AA
MAINTENANCE
The Front and Rear Rollers must be periodically lubricated and the Running Board should be occasionally
cleaned to remove dust and grime. This prevents the Running Belt from sticking or becoming difficult to
move. Please refer to the directions below for proper Roller, Running Board and General Maintenance
methods.
1. Running Board: Raise up the belt on one side, use a duster to remove light dust particles or grime from
the board. For more intensive cleaning, use a soft cloth and soapy water to clean the finished side of the
running board. Make sure to let the equipment completely dry and remove all soap residue before
commencing use.
2. Remove the End Caps from the rear of the Treadmill Platform, and use a household lubricant to spray the
joints of the Front and Rear Rollers. Do not spray the Running Belt directly.
3. Check the main attaching bolts on the equipment regularly and tighten them if they are loose. Also be
aware of any of the moving parts. They should turn freely and quietly. Abnormality of moving parts will
affect the safety of the equipment. Contact customer service (info on last page) with any questions about
your Treadmill.

14
4. Keep the equipment and frame clean. Do NOT clean the equipment with a strong solvent.
5. The running belt will eventually wear out. If your belt becomes worn or is broken, contact
customerservice@jamzproducts.net to assist with replacing this part. Do not use the equipment until the
belt is repaired.
Malfunction
Reason
Treatment
Treadmill Platform
is unstable.
1. The ground is not level.
2. The Lock Knob is not fully
tightened.
3. Rubber Bumper on Base
Support is missing.
1. Relocate Treadmill or
remove items from
underneath.
2. Tighten the lock knob at
the bottom of the treadmill.
3. Contact Customer
Service.
The Running Belt
is off-center when
in use.
1. Rear Roller is askew
2. Belt is too loose.
See section on Running
Belt Adjustment (page 11)
The Running Belt
is too hard to
move.
1. Belt is too tight
2. Lubricant has not worked its
way into the Roller Axis yet.
1. See section on Running
Belt Adjustment (page 11)
2. Use the Treadmill for
about an hour for full
lubrication.
WARM UP EXERCISES
A successful exercise program consists of a warm-up, aerobic exercise, and a cool-down. Do the entire
program at least two and preferably three times a week, resting for a day between workouts. After several
months, you can increase your workouts to four or five times per week.
Warming up is an important part of your workout, and should begin every session. It prepares your body for
more strenuous exercise by heating up and stretching out your muscles, increasing your circulation and pulse
rate, and delivering more oxygen to your muscles. At the end of your workout, repeat these exercises to
reduce sore muscle problems. We suggest the following warm-up and cool-down exercises:
Inner Thigh Stretch
Sit with the soles of your feet together
with your knees pointing outward. Pull
your feet as close into your groin as
possible. Gently push your knees towards
the floor. Hold for 15 counts.

15
Hamstring Stretch
Sit with your right leg extended. Rest the
sole of your left foot against your right
inner thigh. Stretch toward your toe as far
as possible. Hold for 15 counts. Relax and
then repeat with left leg extended.
Head Roll
Rotate your head to the right for one
count, feeling the stretch up the left side
of your neck. Next, rotate your head back
for one count, stretching your chin to the
ceiling and letting your mouth open.
Rotate your head to the left for one count,
and finally, drop your head to your chest
for one count.
Shoulder Lift
Lift your right shoulder up toward your ear
for one count. Then lift your left shoulder
up for one count as you lower your right
shoulder.
WARM UP EXERCISES CONTINUED
Calf-Achilles Stretch
Lean against a wall with your left leg in
front of the right and your arms forward.
Keep your right leg straight and the left
foot on the floor; then bend the left leg
and lean forward by moving your hips
toward the wall. Hold, then repeat on the
other side for 15 counts.

16
Toe Touch
Slowly bend forward from your waist,
letting your back and shoulders relax as
you stretch toward your toes. Reach down
as far as you can and hold for 15 counts.
Side Stretch
Open your arms to the side and continue
lifting them until they are over your head.
Reach your right arm as far upward toward
the ceiling as you can for one count. Feel
the stretch up your right side. Repeat this
action with your left arm.
FREQUENTLY ASKED QUESTIONS
Question: “How do I adjust the Belt tension?”
Answer: There is no tension control on this Manual Treadmill. The only way to “slow it down”or “speed it
up”would be to adjust the Belt tension. See “Running Belt Adjustment” on Page 11 of this manual.
Question: “The Belt is too hard to move” or “The Belt will not stay centered, what can I do?”
Answer: See “Running Belt Adjustment” on Page 11 of this manual.
Question: “My Meter turns on, but doesn’t work, how do I fix it?”
Answer: Replace the 2x AA Batteries in the Meter. If the problem persists,double check that all your
connections to the Meter are correct. There are three connections, one at the bottom of the Treadmill by
the Flywheel Cover, one under the Right side of the Handlebar (you will have to remove the Right

17
Handlebar bolt, and loosen the Left to check this connection), and the last in the back of the Meter. Also
make sure there are no exposed, pinched or cut wires.
Question: “Why is the Flywheel Cover not securely attached to the Treadmill Platform?”
Answer: Please make sure you’re using the correct Flywheel Cover Screws (Part #40).
Question: “Why doesn’t the Handlebar (Part #4) properly fit on to the Treadmill?
Answer: As stated in the assembly instructions, do not tighten the bolts on the Left and Right Support
Bars (Parts #2 and #3) until after you have the Handlebar attached to the frame.
Question: “What kind of lubricant do I need for the Rollers?”
Answer: Use a common household lubricant (preferably a spray lubricant with a directional nozzle/straw
attachment) to lubricate the Rollers. CAUTION! DO NOT SPRAY THE BELT!
Question: “What are the Incline Pins for?” and “Where do I put the Metal Pins that have a ring on the
end?”
Answer: These are used to adjust the incline. For instructions on how to use the Incline Pins, see
“Adjusting the Incline” on Page 11.
Question: “I had an Assembly part missing from my packaging” or “Something was damaged in shipping,
can you send it to me?”
Answer: Make sure it is one of the “shaded parts” in the list that is missing. Your treadmill comes
partially assembled, and only the parts that are shaded in the Parts List are required for assembly. If you
are missing one of the assembly parts and it has been 30 days or less from the date of your initial
purchase, you can contact Customer Service (info below) for a replacement part to be issued.
CUSTOMER SERVICE CONTACT INFO:
Email: [email protected]t
Telephone: 866-498-5269
Fax: 561-833-1996
Website: http://www.jamzproducts.net
Other manuals for 5250MT
1
Table of contents
Other Cory Everson Treadmill manuals
Popular Treadmill manuals by other brands

SportsArt Fitness
SportsArt Fitness T652 manual

Progear Fitness
Progear Fitness 3005 manual

Woodway
Woodway 4Front operating manual

Sears, Roebuck and Co.
Sears, Roebuck and Co. 831.297830 HealthRider Soft Strider LE user manual

Energetics
Energetics PR 9000 HRC Computer Manual

Livestrong
Livestrong LSPRO2 owner's manual