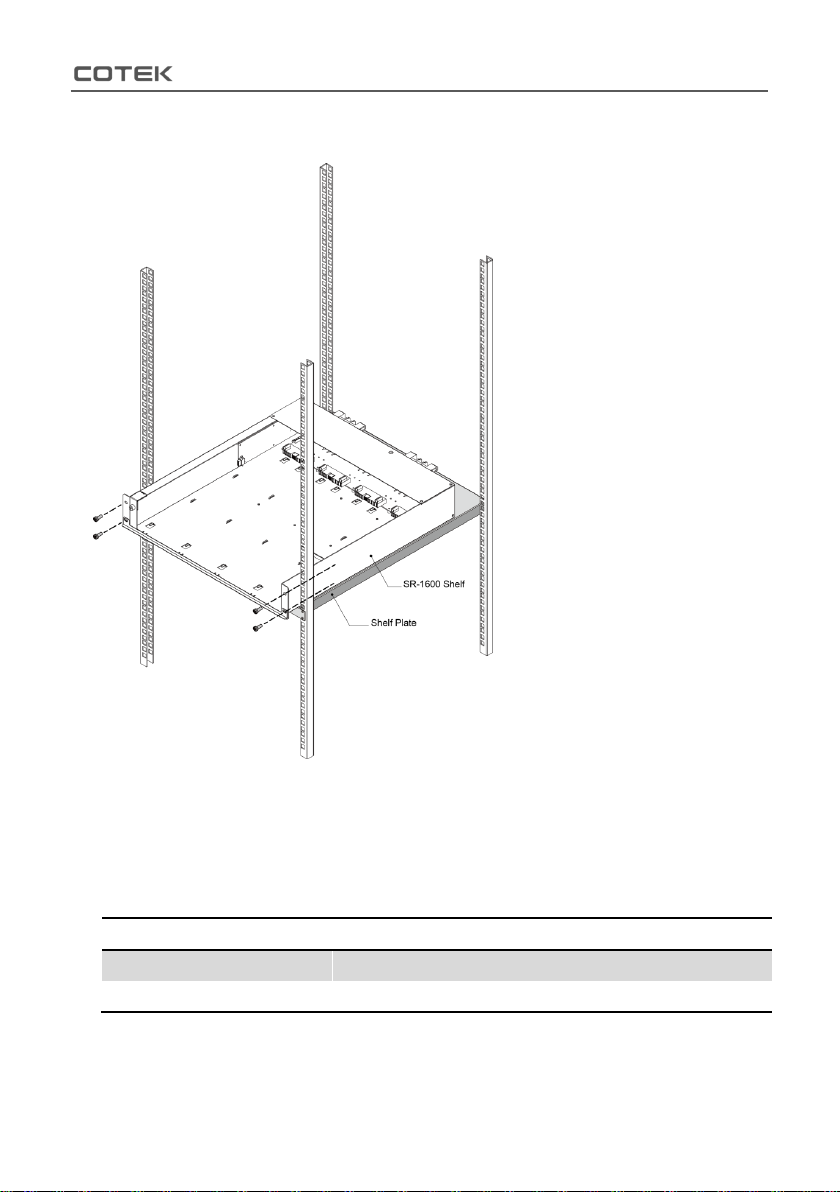
1. Safety Instructions
1
1. Safety Instructions
1-1. General Safety Precautions
Warning! Before using the Inverter, read the safety instructions.
Do not expose the inverter to rain, snow, spray or dust. To reduce
the risk of fire hazard, do not cover or obstruct the ventilation
openings and do not install the inverter in a zero-clearance
compartment.
To avoid the risk of fire and electric shock, make sure that the
existing wiring is in good electrical condition, and the wire size is not
undersized.
This equipment contains components which can produce arcs or
sparks. To prevent fire or explosion do not install in compartments
containing batteries or flammable materials or in locations which
require ignition protected equipment. This includes any space
containing gasoline-powered machinery, fuel tanks, or joints, fittings,
or other connection between components of the fuel system.
Depending on the user scenario, the AC output of the inverter may
require user installed breaker or fuse. In AC output hardwire
application, AC socket will not be provided. The inverter incorporates
standard AC short circuit protection.
The following precautions should be taken when working on the
inverter:
Step 1 Remove watches, rings, or other metal objects
Step 2 Use tools with insulated handles
Step 3 Wear rubber gloves and boots