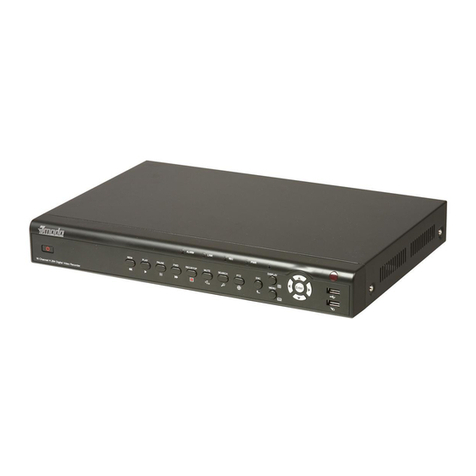
CP Plus Orange User manual

Network Video Recorder
User Manual
Version 1.0.1

Foreword
General
This manual introduces the functions and operations of the NVR device (hereinafter referred to as "the Device").
Safety Instructions
The following categorized signal words with defined meaning might appear in the Manual.
Signal Words
Meaning
DANGER
Indicates a high potential hazard which, if not avoided, will
result in death or serious injury.
WARNING
Indicates a medium or low potential hazard which, if not
avoided, could result in slight or moderate injury.
CAUTION
Indicates a potential risk which, if not avoided, could result
in property damage, data loss, lower performance, or
unpredictable result.
TIPS
Provides methods to help you solve a problem or save you
time.
NOTE
Provides additional information as the emphasis and
supplement to the text.

About the Manual
⚫The manual is for reference only. If there is inconsistency between the manual and the actual product, the
actual product shall prevail.
⚫We are not liable for any loss caused by the operations that do not comply with the manual.
⚫The manual would be updated according to the latest laws and regulations of related regions. For
detailed information, see the paper manual, CD-ROM, QR code or our official website. If there is
inconsistency between paper manual and the electronic version, the electronic versionshall prevail.
⚫All the designs and software are subject to change without prior written notice. The product updates might
cause some differences between the actual product and the manual. Please contact the customer service for
the latest program and supplementary documentation.
⚫There still might be deviation in technical data, functions and operations description, or errors in print. If
there is any doubt or dispute, please refer to our final explanation.
⚫Upgrade the reader software or try other mainstream reader software if the manual (in PDF format) cannot
be opened.
⚫All trademarks, registered trademarks and the company names in the manual are the properties of their
respective owners.
⚫Please visit our website, contact the supplier or customer service if there is any problem occurred when
using the device.
⚫If there is any uncertainty or controversy, please refer toour final explanation.

Important Safeguards and Warnings
The following description is the correct application method of the device. Read the manual
carefully before use to prevent danger and property loss. Strictly conform to the manual
during application and keep it properly after reading.
Operating Requirement
•Install the PoE front-end device indoors.
•The device does not support wall mount.
•Do not place and install the device in an area exposed to direct sunlight or near heat
generating device.
•Do not install the device in a humid, dusty or fuliginous area.
•Keep its horizontal installation, or install it at stable places, and prevent it from falling.
•Do not drip or splash liquids onto the device; do not put on the device anything filled with
liquids, in order to prevent liquids from flowing into the device.
•Install the device at well-ventilated places; do not block its ventilation opening.
•Use the device only within rated input and output range.
•Do not dismantle the device arbitrarily.
•Transport, use and store the device within allowed humidity and temperature range.
Power Requirement
•Make sure to use the designated battery type. Otherwise there may be explosion risk.
•Make sure to use batteries according to requirements. Otherwise, it may result in fire,
explosion or burning risks of batteries!
•To replace batteries, only the same type of batteries can be used.
•Make sure to dispose the exhausted batteries according to the instructions.
•The product shall use electric wires (power wires) recommended by this area, which shall
be used within its rated specification.
•Make sure to use standard power adapter matched with this device. Otherwise, the user
shall undertake resulting personnel injuries or device damages.
•Use power supply that meets SELV (safety extra low voltage) requirements, and supply
power with rated voltage that conforms to Limited Power Source in IEC60950-1. For
specific power supply requirements, please refer to device labels.
•Products with category I structure shall be connected to grid power output socket, which
is equipped with protective grounding.
•Appliance coupler is a disconnecting device. During normal use, please keep an angle
that facilitates operation.

Contents
FEATURES ................................................................................................................ 7
OVERVIEW ............................................................................................................... 7
FEATURES ................................................................................................................ 7
LOCAL BASIC OPERATION ........................................................................................... 8
GETTING STA RT E D ...................................................................................................... 8
BOOT UP ................................................................................................................. 8
2.2.1. Dev ice Initialization ......................................................................................... 8
2.2.2. Rese t P ass word .............................................................................................. 12
2.2.3. Enabling Pa sswo rd Reset Function ................................................................... 12
2.2.4. Rese tting Pas sword on Local In terface ............................................................. 13
2.2.5. Rese t Butto n .................................................................................................. 17
2.2.6. Quic k S etting s ................................................................................................ 18
2.2.7. Gene ral ......................................................................................................... 18
PRE PARATION .......................................................................................................... 23
2.3.1. INST AON ....................................................................................................... 26
2.3.2. Client O perat ion ............................................................................................ 27
2.3.3. Regi stration .................................................................................................. 30
2.3.4. Schedule ....................................................................................................... 34
2.3.5. Reco rd Cont rol ............................................................................................... 41
CAMERA ................................................................................................................ 42
2.4.1. Connec tion .................................................................................................... 42
2.4.2. Chan ging IP add res s ....................................................................................... 43
2.4.3. IP Export ....................................................................................................... 44
2.4.4. IP Im port ....................................................................................................... 45
2.4.5. Remote De vice Initializa tion ............................................................................ 46
2.4.6. Sho rt -Cu t Menu to Reg ister Camera .................................................................. 49
2.4.7. Image ........................................................................................................... 50
2.4.8. Enc ode .......................................................................................................... 53
2.4.9. Chan nel N ame ................................................................................................ 57
2.4.10. Remote Upg rade ......................................................................................... 58
2.4.11. Remote De vice In fo ..................................................................................... 59
LIVE VIEW .............................................................................................................. 60
2.5.1. Previe w ......................................................................................................... 60
2.5.2. Navig ation ba r ............................................................................................... 61
2.5.3. Chan nel In fo .................................................................................................. 62
2.5.4. USB Ma nage r ................................................................................................. 63
2.5.5. Previe w Cont rol Int erface ............................................................................... 64
PTZ ..................................................................................................................... 70
2.6.1. PTZ S etting s .................................................................................................. 70
2.6.2. PTZ Cont rol ................................................................................................... 72
2.6.3. Con figu ring PTZ Fu nctio ns ............................................................................... 74
2.6.4. Calling PT Z Funct ion s ..................................................................................... 76
RECORD FILE ........................................................................................................... 78
PLAYBACK AND SEA RC H .............................................................................................. 78
2.8.1. Instant Pla yback ............................................................................................ 78
2.8.2. Se arch Inte rfac e ............................................................................................. 78
2.8.3. Pla yback Con trol ............................................................................................ 81
2.8.4. Searc h Type..................................................................................................... 82
2.8.5. Reco rd Backup ............................................................................................... 83
2.8.6. Sma rt Search P layback .................................................................................... 84
2.8.7. Ma rk P laybac k ............................................................................................... 85
2.8.8. Pla yback Image .............................................................................................. 86

2.8.9. Splice Pla yback .............................................................................................. 86
2.8.10. File L ist ...................................................................................................... 87
2.8.11. Lock o r Unlock Fi le ...................................................................................... 88
2.8.12. Other Aux Functions ..................................................................................... 89
AI ....................................................................................................................... 90
2.9.1. AI Searc h........................................................................................................ 90
2.9.2. IVS ................................................................................................................ 92
2.9.3. Huma n Bod y Det ectio n .................................................................................... 93
2.9.4. Non-mo tor Vehicle Detection ............................................................................. 95
2.9.5. People Counting ............................................................................................. 97
2.9.6. Heat map....................................................................................................... 98
2.9.7. Parameter s .................................................................................................... 99
2.9.8. IVS ( Genera l Be havio r Analy tics) .....................................................................105
EVENT MANAGER ...................................................................................................119
2.10.1. Alarm In fo ................................................................................................. 119
2.10.2. Alarm Statu s .............................................................................................119
2.10.3. Alarm Inpu t ...............................................................................................120
2.10.4. Alarm Control ............................................................................................122
2.10.5. Video Detection .........................................................................................12 3
2.10.6. Audio De tect .............................................................................................131
2.10.7. Thermal Alarm ...........................................................................................13 3
2.10.8. Abnorma lity ..............................................................................................136
POS .................................................................................................................139
2.11.1. Search ......................................................................................................139
2.11.2. Settings ....................................................................................................140
OPERATION AND MAINTENANCE ................................................................................143
2.12.1. Log ...........................................................................................................143
2.12.2. System ......................................................................................................144
2.12.3. Network ....................................................................................................148
2.12.4. Maintenan ce and Man agem ent ...................................................................150
FILE BACKUP .......................................................................................................156
NETWORK ..........................................................................................................157
2.14.1. TCP/IP ......................................................................................................15 7
2.14.2. Port ..........................................................................................................159
2.14.3. PPPoE .......................................................................................................160
2.14.4. DDNS ........................................................................................................161
2.14.5. UPn P ........................................................................................................163
2.14.6. Email ........................................................................................................165
2.14.7. SNMP ........................................................................................................166
2.14.8. Multica st ..................................................................................................168
2.14.9. Alarm Cen tre .............................................................................................169
2.14.10. Register ....................................................................................................17 0
2.14.11. INSTAON ...................................................................................................17 1
2.14.12. Mobile APP Ope ration .................................................................................172
2.14.13. 80 2.1X ......................................................................................................173
STORA GE ...........................................................................................................174
2.15.1. Basic ........................................................................................................175
2.15.2. Schedule ...................................................................................................17 6
2.15.3. HDD ..........................................................................................................176
2.15.4. Record Cont ro l ...........................................................................................176
2.15.5. HDD Detect ...............................................................................................176
2.15.6. RAID .........................................................................................................178
2.15.7. Ca lcula ting HDD Capacity for Storage................................................................. 180
SYSTEM .............................................................................................................183
2.16.1. Genera l .....................................................................................................183
2.16.2. RS232 .......................................................................................................183
SECURITY ...........................................................................................................185

2.17.1. Securit y Stat us ..........................................................................................185
2.17.2. System Se rvice ...........................................................................................187
2.17.3. Attack De fense ..........................................................................................190
2.17.4. CA Certific ate ............................................................................................195
2.17.5. Audio/Video Enc rypti on ..............................................................................196
2.17.6. Securit y Wa rning .......................................................................................19 8
ACCOUNT ..........................................................................................................201
2.18.1. User .........................................................................................................20 1
2.18.2. Group .......................................................................................................204
2.18.3. Reset Pas sword ..........................................................................................205
2.18.4. ON VIF U ser ................................................................................................206
OUTPUT AND DISP LAY ............................................................................................208
2.19.1. Display .....................................................................................................20 8
2.19.2. Tour .........................................................................................................20 9
2.19.3. Cu stom ized Display ....................................................................................21 0
AUDI O ..............................................................................................................213
2.20.1. File Man age ...............................................................................................213
2.20.2. Schedule ...................................................................................................21 4
2.20.3. Broad ca st ..................................................................................................21 6
USB DEVICE AUTO POP-UP ........................................................................................218
SHUTDOWN ........................................................................................................219
2.22.1. Op erations ................................................................................................21 9
2.22.2. Auto Resume after Po wer Fai lure ...................................................................220
WEB OPERATION .....................................................................................................221
NETWORK CON NEC T ION ...............................................................................................221
WEB LOGIN ...........................................................................................................221
RESET PASSWORD ....................................................................................................222
WEB MAIN MENU .....................................................................................................225
GLOSSARY .............................................................................................................227
APPENDIX 1 CYBERSECURITY RECOMMENDATIONS ........................................................228
APPENDIX 3 COMPATIBLE NETWORK CAMERA LIST ...........................................................231

Features
Overview
Thisseries NVR is a high-performance networkvideo recorder. This series product support local preview, multiple-window
display, recorded file local storage, remote control and mouse shortcut menu operation, and remote management and
control function.
This series product supports center storage, front-end storage and client-end storage. The monitor zone in the front-end
can be set inanywhere. Working with other front-end devicessuch as IPC, NVS, this series product can establish a strong
surveillance network via the CMS. In the network system, there is only one network cable from the monitor center to
the monitor zone in the whole network. There is no audio/video cable from the monitor center to the monitor zone.
The whole project is featuring of simple connection, low-cost, low maintenance work.
This series NVR can be widely used in many areas such as public security, water conservancy, transportation and
education.
Features
Cloud
Upgrade
•For the NVR connected with the Internet, it supports online upgrade
to update applications.
Real-time
Surveillance
•VGA, HDMI port. Connect to monitor to realize real-time
surveillance.
•Some series support TV/VGA/HDMI output at the same time.
•Short-cut menu when preview.
•Support popular PTZ decoder control protocols. Support preset,
tour and pattern.
Playback
•Support each channel real-time record independently, and at the same
time it can support search, forward play, network monitor, record
search, download and etc.
•Support various playback modes: slow play, fast play, backward play
and frame by frame play.
•Support time title overlay so that you can view event accurate occurred
time
•Support specified zone enlargement.
User
Management
•Each group has different management powers that can be edited
freely.
•Every user belongs to an exclusive group.
Storage
•Via corresponding setup (such as alarm setup and schedule setup),
you can backup related audio/video data in the network video recorder.
•Support Web record and record local video and storage the file in the
client end.

Local Basic Operation
Slight difference may be found on the user interface. The following figures for reference only.
Getting Started
This chapter introduces device initial settings such as boot up, device initialization, reset password, and quick settings.
Boot up
For device security, connect the NVR to the power adapter first and then connect the device to the power socket. The rated
input voltage matches the device power button. Make sure the power wire connection is OK. Then click the power button.
Always use the stable current, if necessary, UPS is a best alternative measure.
Step 1 Connect the device to the monitor and then connect a mouse.
Step 2 Connect power cable.
Step 3 Click the power button at the front or rear panel andthen boot up the device.After device booted up, the system is
in multiple-channel display mode by default.
2.2.1. Device Initialization
If it is your first time to use the device, set a login password of admin (system default user). You can select to use unlock
pattern to login or not at your own choosing.
For your device safety, keep your login password of admin well after the initialization steps, and change the password
regularly.
Step 1 Boot up NVR.
The Device Initialization interface is displayed. See Figure 2.1.

Figure 2.1
Step 2 Set system time zone according to the actual environment.
Click to shut down the device. It is suitable for the system integrator or the user to shut
down directly after setting the time zone
Step 3 Click Next.
The Device Initialization interface is displayed. See Figure 2.2.
Figure 2.2

Step 4 Set login password of admin.
Parameter
Description
User
By default, the user is admin.
Password
In the Password box, enter the password for admin.
The new password can be set from 8 characters through 32
characters and contains at least two types from number, letter
and special characters (excluding"'", """, ";", ":" and "&").
Confirm Password
Prompt Question
In the Prompt Question box, enter the information that can
remind you of the password.
On the login interface, click , the prompt will display to help
you reset the password.
For your device ownsafety, createa strong password of your own choosing. We also recommendyouchange your password
periodically especially in the high security system.
Step 5 Click Next.
The Unlock Pattern interface is displayed. See Figure 2.3.
Figure 2.3
Step 6 Set unlock pattern.
After set unlock pattern, the Password Protection interface is displayed. See Figure 2.4.

The pattern that you want toset must cross at least four grids. If you do not want to configure the unlock pattern, click Skip.
Once you have configured the unlock pattern, the system will require the unlock pattern as the default login method.
If you skip this setting, enter the password for login.
Figure 2.4
Step 7 Set security questions.
After configuration, if you forgot the password for admin user, you can reset the password through the reserved
email address or security questions. If you do not want to configure the settings, disable the email address and security
questions functions on the interface.
.
Password
Protection Mode
Description
Email Address
Enter the reserved email address.
In the Email Address box, enter an email address for password
reset. If you forget the password, enter the security code that you
will get from this reserved email address to reset the password
of admin.
Security
Questions
Configure the security questions and answers.
If you forget the password, enter the answers to the questions
can allow you to reset the password.
Step 8 Click Save to complete the device initialization setup.

Step 9 Device goes to startup wizard interface.
2.2.2. Reset Password
You can reset the password by the following methods when you forgot the password for admin account. If the password
reset function is enabled, you can use mobile phone to scan the QR code to reset the password.
If the password reset function is disabled, there are two situations:
oIf you configured security questions, you can reset the password by the security questions.
oIf you did not configure the security questions, you can only use the reset button on the mainboard to restore
the Device to factory default.
Reset button is for some series product only.
2.2.3. Enabling Password Reset Function
After enabling password reset function, you can scan QR code on the local menu to reset password.
Step 1 Select Main Menu →Account →Reset Password.
The Reset Password interface is displayed. See Figure 2.5
Figure 2.5
Step 2 Check the box to enable reset function.
This function is enabled by default.
Step 3 Click Apply to set settings.
If the password reset function is disabled, you can follow the ways listed below to reset password.

Device supports Reset button on the main board: You can answer the security question on the local menu or click
the Reset button on the main board to reset password.
•Device does not support Reset button on themain board: You can only answer the security question on the local
menu to reset password. (Make sure you have set security questions).
2.2.4. Resetting Password on Local Interface
Step 1 Enter the SYSTEM LOGIN interface.
•If you have configured unlock pattern, the unlock pattern login interface is displayed.
•See Figure 2.6. Click Forgot Pattern, the password login interface is displayed. See Figure 2.7.
•If you did not configure unlock pattern, the System Login interface is displayed. See Figure 2.7.
To login from other user account, on the unlock pattern login interface, click Switch User, or on the password
login interface, in the Switch User list, select another user to login.
Figure 2.6
Figure 2.7

Step 2 Click .
•If you have set the reserved email address, the Prompt interface is displayed. See Figure 2.8.
•If you did not set thereservedemail address, the email entering interface is displayed. See Figure 2.9.
•Enter the email address, and then click Next, the Prompt message interface is displayed. See Figure 2.8.
Figure 2.8
Figure 2.9
Step3 Click Next.
The Reset Password interface is displayed. See Figure 2.10.

After clicking Next, the system will collect your information for password reset, purpose and the information includes but
not limited to email address, MAC address, and device serialnumber. Read the prompt carefully before clicking Next.
Figure 2.10
Step 4 Reset the password.
•QR code - Follow the onscreen instructions to get the security code in your reserved email address. In the Security
code box, enter the security code.
•You can get the security code twice by scanning the same QR code. If you need to get the security code once again,
refresh the interface.
•Use the security code received in your email box to reset the password within 24 hours; otherwisethe security
code becomes invalid.
•Security questions
On the Reset password interface as shown in Figure 2.11, in the Reset Type list, select Security
Questions, the Security Questions interface is displayed.
If you did not configure the security questions before, in the Reset Type list, there is no Security
Questions.

Figure 2.11
Step 5 Click Next.
The Reset Password interface is displayed. See Figure 2.12.
Figure 2.12
Step 6 In the New Password box, enter the new password and enter it again in the Confirm
Password box.
Step 7 Click Save. The password resetting is complete.
Apop-up message is displayed asking if you want to sync the password with the remote devices. See Figure 2.13.

Figure 2.13
2.2.5. Reset Button
You can always use the reset button on the mainboard to reset the Device to the factory default settings.
Reset button is for some series products only.
Step 1 Disconnect the Device from power source, and then remove the cover panel. For details about removing the cover
panel, see "3.4 HDD Installation."
Step 2 Find the reset button on the mainboard, and then connect the Device to the power source again.
Step 3 Press and hold the reset button for 5 seconds to 10 seconds. See Figure 2.14 for the location of the reset button.
Figure 2.14

Step 4 Reboot the Device.
After the Device is rebooted, the settings have been restored to the factory default. You can start resetting the password.
2.2.6. Quick Settings
After you successfully initialized thedevice, it goesto startup wizard. Here you canquickly configure your device. Click Next,
device goes to General interface.
The startup wizard interface only displays after you first login the device and have set the admin password. See Figure 2.15.
Figure 2.15
If you select the Auto-check for updates check box, the system will notify you automatically when updates are available.
After the auto-check function is enabled, to notify you to update timely, the system will collect the information such as IP
address, devicename, firmwareversion,anddeviceserialnumber.Thecollectedinformationis only usedtoverifythelegality
of the Device and push upgrade notices.
If you cancel the Auto-check for updates check box, the system will not perform automatic checks.
2.2.7. General
You can set NVR basic information such as system date, holiday etc. You can also configure general settings by selecting
Main Menu→SYSTEM →General.
General
You can set device basic information such as device name, serial number.
Step 1 Click Next.
The General interface is displayed. See Figure 2.16.

Figure 2.16
Step 2 Set parameters.
Parameter
Description
Device Name
In the Device Name box, enter the Device name.
Device No.
In the Device No. box, enter a number for the Device.
Language
In the Language list, select a language for the Device system.
Video Standard
In the Video Standard list, select PAL or NTSC according to your actual
situation.
Sync to Remote
Device
Enable this function; the NVR can synchronize information with
the remote device such as Language, video standard, time zone.
Instant Play (Min.)
In the Instant Play box, enter the time length for playing back
the recorded video. The value ranges from 5 to 60.
On the live view control bar, click the instant playback button to play
back the recorded video within the configured time.
Auto Logout (Min.)
In the Auto Logout box, enter the standby time for the Device.
The Device automatically logs out when it is not working for the
configured time period. You need to login the Device again.
The value ranges from 0 to 60. 0 indicates there is not standby time
for the Device.
Click Monitor Channel(s) when logout. You can select the
channels that you want to continue monitoring when you logged
out.
IPC Time Sync
Syncs the Device time with IP camera.
Other manuals for Orange
3
Table of contents
Other CP Plus DVR manuals
CP Plus
CP Plus Indigo User manual
CP Plus
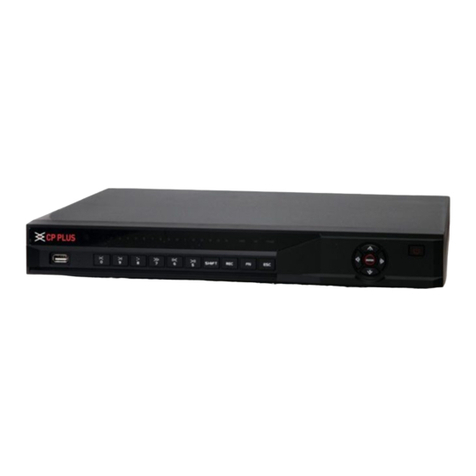
CP Plus CP-UNR-4K2042-V2 User manual
CP Plus
CP Plus Orange User manual
CP Plus
CP Plus CP-RMC-D12 User manual
CP Plus
CP Plus Cosmic User manual
CP Plus
CP Plus Indigo JRC-27F User manual
CP Plus
CP Plus 4/8/16 Channel DVR User manual

CP Plus
CP Plus CP-UNR-4K2082-V2 User manual
