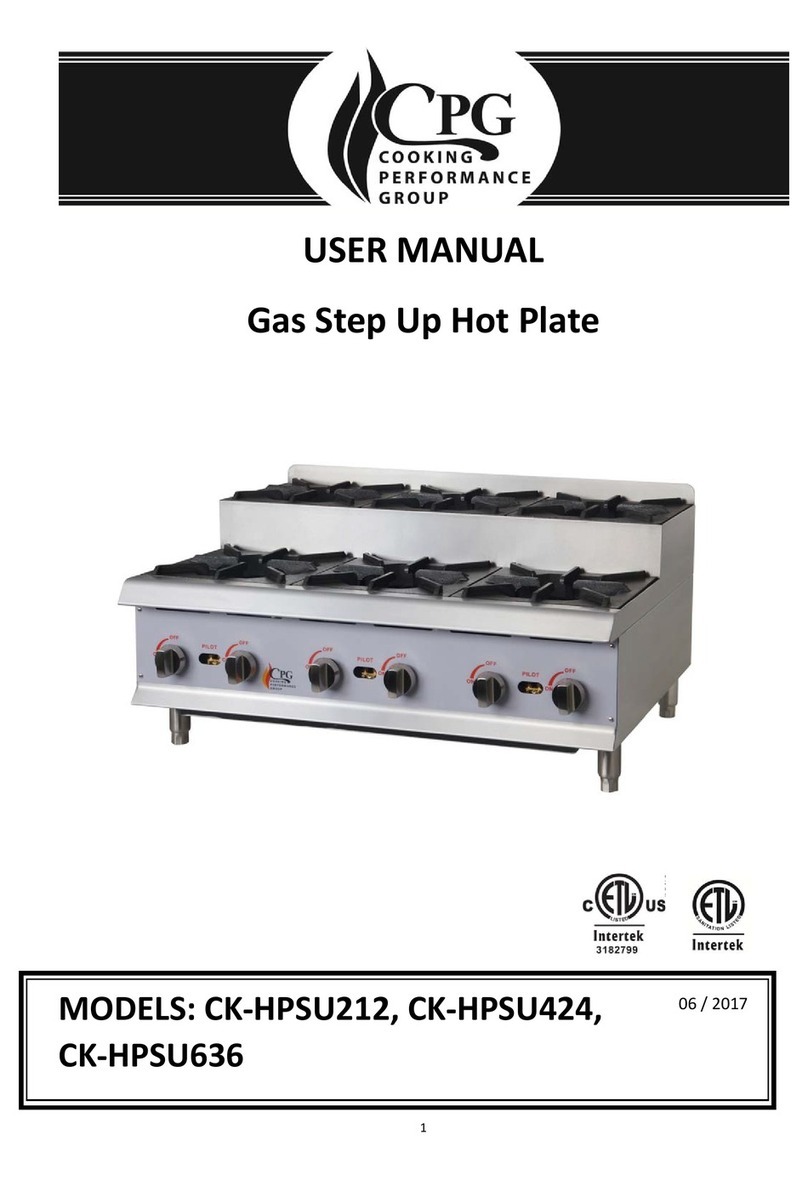
CPG CK-HPSU212 User manual

1
USERMANUAL
GasStepUpHotPlate
MODELS:CK‐HPSU212,CK‐HPSU424,
CK‐HPSU636
06/2017

2
IMPORTANTFORFUTUREREFERENCE
Pleasecompletethisinformationandretainthismanualforthelifeoftheequipment.ForWarranty
Serviceand/orparts,thisinformationisrequired.
ModelNumberSerialNumberDatePurchased
WARNING:Foryoursafety,donotstoreorusegasolineorotherflammablevaporsor
liquidsinthevicinityofthisoranyotherappliances.Keeptheareafreeandclearof
combustibles.(SeeANSIZ83.14B,1991).
WARNING:Improperinstallation,adjustment,alteration,serviceormaintenancecan
causepropertydamage,injury,ordeath.Readtheinstallationoperatingand
maintenanceinstructionsthoroughlybeforeinstalling,orservicingthisequipment.
WARNING:Instructionsmustbepostedinaprominentlocation.Allsafetyprecautions
mustbetakenintheeventtheusersmellsgas.Safetyinformationcanbeobtainedfrom
yourlocalgassupplier.
CAUTION:Thesemodelsaredesigned,built,andsoldforcommercialuseonly.Ifthesemodels
arepositionedsothegeneralpubliccanusetheequipment,makesurethatcautions,
warnings,andoperatinginstructionsareclearlypostedneareachunitsothatanyone
usingtheequipmentwilluseitcorrectlyandnotinjurethemselvesorharmtheequipment.
GASPRESSURE
Theapplianceandit’sindividualshutoffvalve(tobesuppliedbyuser)mustbedisconnectedfrom
thegassupplypipingsystemduringanypressuretestingofthatsystemattestpressuresinexcessof
½psi(3.45kPa).
Theappliancemustbeisolatedfromthegassupplypipingsystembyclosingit’sindividualmanual
shut‐offvalveduringanypressuretestingofthegassupplypipingsystemattestpressuresequalto
orlessthan½psi(3.45kPa).
WARNING:Afactoryauthorizedagentshouldhandleallmaintenanceandrepair.Before
doinganymaintenanceorrepair,contactyourauthorizedservicerepresentative.

3
CongratulationsonyourpurchaseofCPGcommercialcookingequipment.CPGtakesprideinthe
designandqualityofourproducts.Whenusedasintendedandwithpropercareandmaintenance,
youwillexperienceyearsofreliableoperationfromthisequipment.Toensurebestresults,itis
importantthatyoureadandfollowtheinstructionsinthismanualcarefully.
TABLEOFCONTENTS:
ITEMPAGEITEMPAGE
Safetyprecautions 4Cleaning&Maintenance8
GeneralInstallationInstructions5Service/Repair8
Specifications&Dimensions5ExplosionViewDrawing9
Conversion6SparePartsList10‐11
LightingInstructions7Warranty12

4
LOCATIONOFDATAPLATE
Thedataplateislocatedonthesidepanel.
IMMEDIATELYINSPECTFORSHIPPINGDAMAGE
Equipmentshouldbeexaminedfordamagebeforeandduringunloading.Thefreightcarrierhas
assumedresponsibilityforitssafetransitanddelivery.Ifequipmentisreceiveddamaged,either
apparentorconcealed,aclaimmustbemadewiththedeliveringcarrier.
A)Apparentdamageorlossmustbenotedonthefreightbillatthetimeofdelivery.Itmustthenbe
signedbythecarrierrepresentative(Driver).Ifthisisnotdone,thecarriermayrefusetheclaim.The
carriercansupplythenecessaryforms.
B)Ifconcealeddamageorlossisnotapparentuntilafterequipmentisuncrated,arequestfor
inspectionmustbemadetothecarrierwithin15days.Thecarriershouldarrangeaninspection.Be
certaintoholdallcontentsandpackagingmaterial.
Installationshouldbeperformedbyaqualifiedinstallerwhothoroughlyread,understandsand
followstheseinstruction.
Ifyouhavequestionsconcerningtheinstallation,operation,maintenanceorserviceofthisproduct,
visitCookingPerformanceGroup’swebsiteatwww.CookingPerformanceGroup.com.
SAFETYPRECAUTIONS
DANGER:Thissymbolwarnsofimminenthazardwhichwillresultinseriousinjuryor
death.
WARNING:Thissymbolreferstoapotentialhazardorunsafepractice,whichcouldresult
inseriousinjuryordeath.
CAUTION:Thissymbolreferstoapotentialhazardorunsafepractice,whichcouldresult
inminorormoderateinjuryorproductorpropertydamage.
NOTICE:Thissymbolreferstoinformationthatneedsspecialattentionormustbefully
understoodeventhoughnotdangerous.
NOTICE:Thisproductisintendedforcommercialuseonly.Notforhouseholduse.
NOTICE:Localcodesregardinginstallationvarygreatlyfromoneareatoanother.TheNational
FireProtectionAssociation,Inc.,statesinitsNFPA96latesteditionthatlocalcodesare
“AuthorityHavingJurisdiction”whenitcomestorequirementforinstallationof
equipment.Therefore,installationshouldcomplywithalllocalcodes.

5
GENERALINSTALLATIONINSTRUCTIONS
Ensuregassupplyandgastype,asshownonunitnameplate,match.
UnitinstallationmustconformwiththeNationalFuelGasCode,ANSIZ223.1/NFPA54,theNational
GasInstallationCode,CSA‐B149.1,orthePropaneInstallationCode,CSA‐B149.2asapplicableand
inaccordancewithlocalcodes.
Screwlegsintothepermanentlyfastenednutsonthefourcornersoftheunitandtightenbyhand.
Leveltheunitbyturningtheadjustmentscrewatthebottomofeachleg.Donotslideunitwithlegs
mounted,liftifnecessarytomoveunit.
Pipethreadingcompoundmustberesistanttotheactionofliquefiedpetroleumgases.
Caution:DONOTuseanopenflametocheckforleaks.Checkallgaspipingforleakswithasoapand
watersolutionbeforeoperatingunit.
THESEUNITSARESUITABLEFORINSTALLATIONONNON‐COMBUSTIBLESURFACESONLY.
Combustibleclearances:
6"sides(152mm)6"rear(152mm) 4"floor(102mm)
Noncombustibleclearances:
0"sides(0mm) 0"rear(0mm)4"floor(102mm)
Donotobstructtheflowofcombustionandventilationair,undertheunitbythelegsorbehindthe
unitbytheflue.
Adequateclearanceforairopeningsintothecombustionchamberisrequired.Donotplaceobjects
betweenthebottomoftheunitandthecountertop.
Theremustbeadequateclearanceforremovalofthefrontpanel.Allmajorpartsexcepttheburners
areremovablethroughthefrontifthegaslineisdisconnected.
SPECIFICATIONANDDIMENSIONS
MODELWIDTH
IN.(MM)
DEPTH
IN.(MM)
HEIGHT
IN.(MM)
#OF
BURNERS
BTU/PER
NAT/LP TOTAL
BTU/ Hr
W.C.
IN.
CK‐HPSU21212(305)26.8(680)18.9(480)230,000 60,000 6/10
CK‐HPSU42424(610)26.8(680)18.9(480)430,000 120,000 6/10
CK‐HPSU63636(915)26.8(680)18.9(480)630,000 180,000 6/10
Note:regulator–75mm/3.25inchdepth.Dimensionsabovedonotincluderegulator.

6
CONVERSION
InstructionsareforconversionfromNaturalGastoPropane(L.P.)onallmodels.Theconversion
shouldbedonebeforeconnectingtheunittothegassupply.
Unitsareshippedfromthefactoryequippedforusewithnaturalgas.OrificesnecessaryforLP
(propane)areprovidedinabagtiedtothevalveonthefrontpanel.
1.
Remove
the
knobs
and
front
panel.
2
.
Uns
2.Remove the burner from the top
of the gas pipe.
1. Remove the trivets from the
top of the appliance.
Note:UnitNumberonside
oforificefittings.
PlasticInsert
3.Replacetheorifice
fittin
g
sintothevalve.
5.Beforeinstallingtheregulator,
unscrewtheoctagonalcapup,youcan
read(NAT)ontheplasticinsertoutof
thecap,flipitoverandsnapbackin
6.Continuewith
installation.
RegulatorwithbrasscapL.PPositionofinsert
4.Installthefront
p
anelknobs

7
LIGHTINGINSTRUCTIONS
Lightingpilot
Thepilotlightontheappliancehasbeensetatthefactory.Ascrewdrivermayberequiredforthe
firstlightingtoadjusttheflameforyourelevation.
1.Turnoffthemanualvalveandwait5minutestoclearthegas.
2.Turnallknobstothe"OFF"position.
3.Holdanignitionsource(match)atthepilot.Whentheflameisestablished,removetheignition
source.
4.Turntheburnerknobsto"ON".Iftheburnerdoesnotignite,promptlyopenthepilotvalve
more.Ifthepilotflameappearslargerthannecessary,turnitdownandresetburnerignition.The
pilotflameshouldbeassmallaspossiblebutlargeenoughtoguaranteereliableignitionofthe
burnerswhentheknobsareturnedto"ON".
Lightingmainburner
Tolightburner,turnknobto“ON.”Thenbackofftothedesiredflamelevel.Therangeofadjustment
isvirtuallyinfinitebetween“ON”and“OFF”.
Mainburnerairsupply:
1.Forefficientburneroperation,aproperbalanceofgasvolumeandprimaryairsupplymustbe
maintainedwhichwillresultincompletecombustion.Insufficientairsupplyresultsinayellow
streamingflame.Primaryairsupplyiscontrolledbyanairshutteronthefrontoftheburner.
2.Loosenthescrewsonthefrontoftheburnerandadjusttheairshuttertoeliminatetheyellow
tipsoftheburnerflame.Locktheairshutterinplacebytighteningthescrews.
CAUTION
Allburnersarelitfromconstantlyburningpilots.Turningthevalvetothedesiredflameheightisall
thatisrequiredtoputtheunitinservice.
Donotpermitfanstoblowdirectlyattheunit.Whereverpossible,avoidopenwindowsnexttothe
units'sidesorback.Avoidwalltypefanswhichcreateaircross‐currentswithinaroom.
Itisalsonecessarythatsufficientairshouldbeallowedtoentertheroomtocompensateforthe
amountofairremovedbyanyventilatingsystem.Otherwise,asubnormalatmosphericpressurewill
occur,affectingoperationandcausingundesirableworkingconditions.
Aproperlydesignedandinstalledhoodwillactastheheartoftheventilatingsystemfortheroom
orareainwhichtheunitisinstalled,andwillleavetheunitindependentofchangingdraft
conditions.
Allvalvesmustbecheckedandlubricatedperiodically.Thismustbedonebyanauthorizedservice
representativeinyourarea.

8
CLEANING&MAINTENANCE
CAUTION:Useonlynon‐abrasivecleaners.Abrasivecleanerscouldscratchthefinishofyourunit,
marringit’sappearanceandmakingitsusceptibletodirtaccumulation.Donotusesteel
wool,otherabrasivecleanersorcleaners/sanitizerscontainingchlorine,iodine,
ammoniaorbrominechemicalsasthesewilldeterioratethestainlesssteelandglassmaterialand
shortenthelifeoftheunit.
Daily
1. Thoroughlycleanback,sides,topandfrontofunit.
2. Cleangratesdaily.
Weekly
1. Cleanunitthoroughly.Cleanstainlesssteelorchromedsurfaceswithadampclothandpolish
withasoft,drycloth.Adetergentmaybeusedforcleaning.Toremovediscolorations,usea
non‐abrasivecleaner.
2. Tocleanthedrippan:removethedrippanbygrabbingthehandleandpullingitoutofthe
openinginthefrontpanel.Toreplacethepan,reversethisprocedure.
3. Burnerairshutteropeningsmustbekeptclean.Mainburnerportsmustbekeptclean.Toclean
burners,boiltheminastrongsolutionoflyewaterfor15to20minutes.Theneitherbrushwith
awirebrushorcleangasportswithasharp‐pointedmetalinstrumenttoensureopenports.
CAUTION:Cleantheregulatoratleastonceamonth.Makesuretheventopeningisopen
andnotblockedinanyway.Failuretodosowillcausevariationsinpressure.Yourunit
willnotfunctionaswellanditcouldshortenthelifeoftheproduct.
SERVICE/REPAIR
NOTE:THISAPPLIANCEMUSTONLYBESERVICEDBYANAUTHORIZEDAGENT.
NOTE:Partsprotectedbythemanufacturerorhisagentarenottobeadjustedbytheinstaller
unlesstheinstallerisanauthorizedserviceagent.
IfyouhaveanyquestionsorproblemscontactyournearestServiceRepresentative.

9
EXPLOSIONVIEWDRAWING
MODEL:CK‐HPSU424

10
Spare Parts List
NO. DESCRIPTION MODEL CODE QTY
1 Dial CK-HPSU212
CK-HPSU424
CK-HPSU636 06.05.1472429 2
4
6
2 Tray CK-HPSU212
CK-HPSU424
CK-HPSU636
01.05.1029410
01.05.1029318
01.05.1029365 1
3 Foot CK-HPSU212
CK-HPSU424
CK-HPSU636 01.02.1005373 4
4 Regulator CK-HPSU212
CK-HPSU424
CK-HPSU636 01.22.1069501 1
5 Orifice
CK-HPSU212-NAT
CK-HPSU424-NAT
CK-HPSU636-NAT 01.20.1068643 2
4
6
CK-HPSU212-LPG
CK-HPSU424-LPG
CK-HPSU636-LPG 01.20.1068652 2
4
6
6 Burner CK-HPSU212
CK-HPSU424
CK-HPSU636 06.05.1472521 2
4
6
7 Grate CK-HPSU212
CK-HPSU424
CK-HPSU636 01.03.1015096 2
4
6
8 Pilot pipe assy.-Rear CK-HPSU212
CK-HPSU424
CK-HPSU636 01.24.1071026 1
2
3
9 Orifice connection-Front CK-HPSU212
CK-HPSU424
CK-HPSU636 01.18.1067402 1
2
3
10 Orifice connection-Rear CK-HPSU212
CK-HPSU424
CK-HPSU636 01.18.1067404 1
2
3

11
11 Pilot pipe assy.-Front CK-HPSU212
CK-HPSU424
CK-HPSU636 01.24.1071015 1
2
3
12 Main pipe assy.-Front CK-HPSU212
CK-HPSU424
CK-HPSU636 06.05.1473192 1
2
3
13 Main pipe assy.-Rear CK-HPSU212
CK-HPSU424
CK-HPSU636 06.05.1473193 1
2
3
14 Valve connection CK-HPSU212
CK-HPSU424
CK-HPSU636 66.04.1820085 2
4
6
15 Valve CK-HPSU212
CK-HPSU424
CK-HPSU636 01.20.1068502 2
4
6
16 Pilot valve CK-HPSU212
CK-HPSU424
CK-HPSU636 01.20.1068508 1
2
3
CookingPerformanceGroup
Lancaster,Pennsylvania
website:www.cookingperformancegroup.com
This manual suits for next models
2
Table of contents
Other CPG Cooktop manuals
