CRAFTMASTER Mirage Trio User manual

THE MIRAGE TRIO USB CHARGING STATION
Congratulations on your purchase of the Mirage Trio Trio USB Charging Station. The Mirage Trio
Trio lets you simultaneously charge up to 3 devices, and it's all contained in a handsome camera
replica so realistic that you'll feel you can pick it up and start taking pictures! The rear platform can
charge Apple Lightning or Android devices, a full-sized USB jack on the side will charge any USB
device, and there's an integrated compartment within the replica lens for an Apple Watch charger.
The Mirage Trio Trio is very simple to use, with a robust build to ensure years of trouble-free
service. The rear charging platform and the replica eyepiece are soft silicone to keep your phone
safe and scratch free. Please take a few moments to read these instructions before using the Mirage
Trio with your specific phone. We have included several options to customize the Mirage Trio to
your specific phone and phone case.
IN THE BOX
Please familiarize yourself with the various components of the Mirage Trio USB Charging Station,
refer to the included pamphlet in the box. It takes only a few minutes to make the Mirage Trio the
perfect fit for your phone and case.
GETTING STARTED
First, let’s mount the replica lens on the Mirage Trio camera body. Remove the circular cap from
the camera body by turning it counter clockwise.
Install the lens by lining up the red dot at the rear of the
lens with the red dot on the camera body. Insert and turn
clockwise until Apple Watch Charger compartment is
facing upwards. Remove the lens cap to reveal the
simulated front lens.
You’re now ready to start charging your phone!
PRO TIP: The lens connection on the Mirage
Trio is styled after a Sony E-Mount. You can
mount a genuine E-Mount lens, or any other
brand lens via a lens adapter. See our demo
video on YouTube!
APPLE iPhone
The Mirage Trio ships pre-configured to charge Apple Lightning phones. Simply plug the included
AC adapter's plug into the side of the Mirage Trio (AC jack is located under the side USB
connection), and the other end into an outlet. Connect your phone to the platform's built-in
Lightning connector, and lean your phone against the silicone replica "eyepiece". Your phone will
charge as normal.
CHARGING ANY USB DEVICE
There is an additional full-sized USB type A connector on the side of the camera that can charge
tablets, game consoles - anything USB! The Mirage Trio features 1amp on all USB connectors for
added charging speed
HOW-TO VIDEOS, AND MORE!
Visit Youtube.com and search “Fotodiox Mirage” for our how-to assembly
videos. We’ll show you how to add a real vintage lens onto your Mirage Trio for
an authentic look, as well as some of the crazy USB devices that we’ve plugged
into ours!
ANDROID PHONE & ANDROID PHONE IN A CASE
You can configure the Mirage Trio Trio USB Charging Station to charge Android phones, whether
installed in a case or not. The Mirage Trio ships from our factory pre-configured for Apple
Lightning phones. Follow these steps to make the Mirage Trio ready to charge your Android
devices.
Carefully peel off the protective feet from the bottom of the Mirage Trio, revealing four screws.
Using the kit's included screwdriver, unscrew the four screws to remove the bottom of the Mirage Trio.
Carefully peel off the rear platform's protective rubber mat, just far enough to expose the black plastic
Cable Support (black plastic support holding the charger cable vertically).
Unplug and remove the Apple Lightning cable and the Cable Support, and set both aside in a safe place.
We will be replacing both for Android devices.
Your Mirage Trio kit includes an Android cable, and the special Cable Support for it.
Insert the Android Cable into its custom-fitted Cable Support. If your phone is in a thicker case, you may
need to use a Cable Riser Insert clip (round white clip with alignment tab) from your kit to provide
additional height for the Micro USB connector.
Ensure that the Micro USB connector is firmly seated inside the Cable Support, and reseat the Cable
Support back into the base. Replace the cable into the Strain Relief Channel, and plug into the internal
USB jack.
Screw the bottom back onto the Mirage Trio.
Reinstall the four protective feet back over the screw holes, and replace the rear platform's protective mat
(there are spares of each included in the kit if you need them)
1.
2.
3.
4.
5.
6.
7.
8.
9.
Carefully peel off the protective feet from the bottom of the Mirage Trio, revealing four screws.
Using the kit's included screwdriver, unscrew the four screws to remove the bottom of the Mirage Trio.
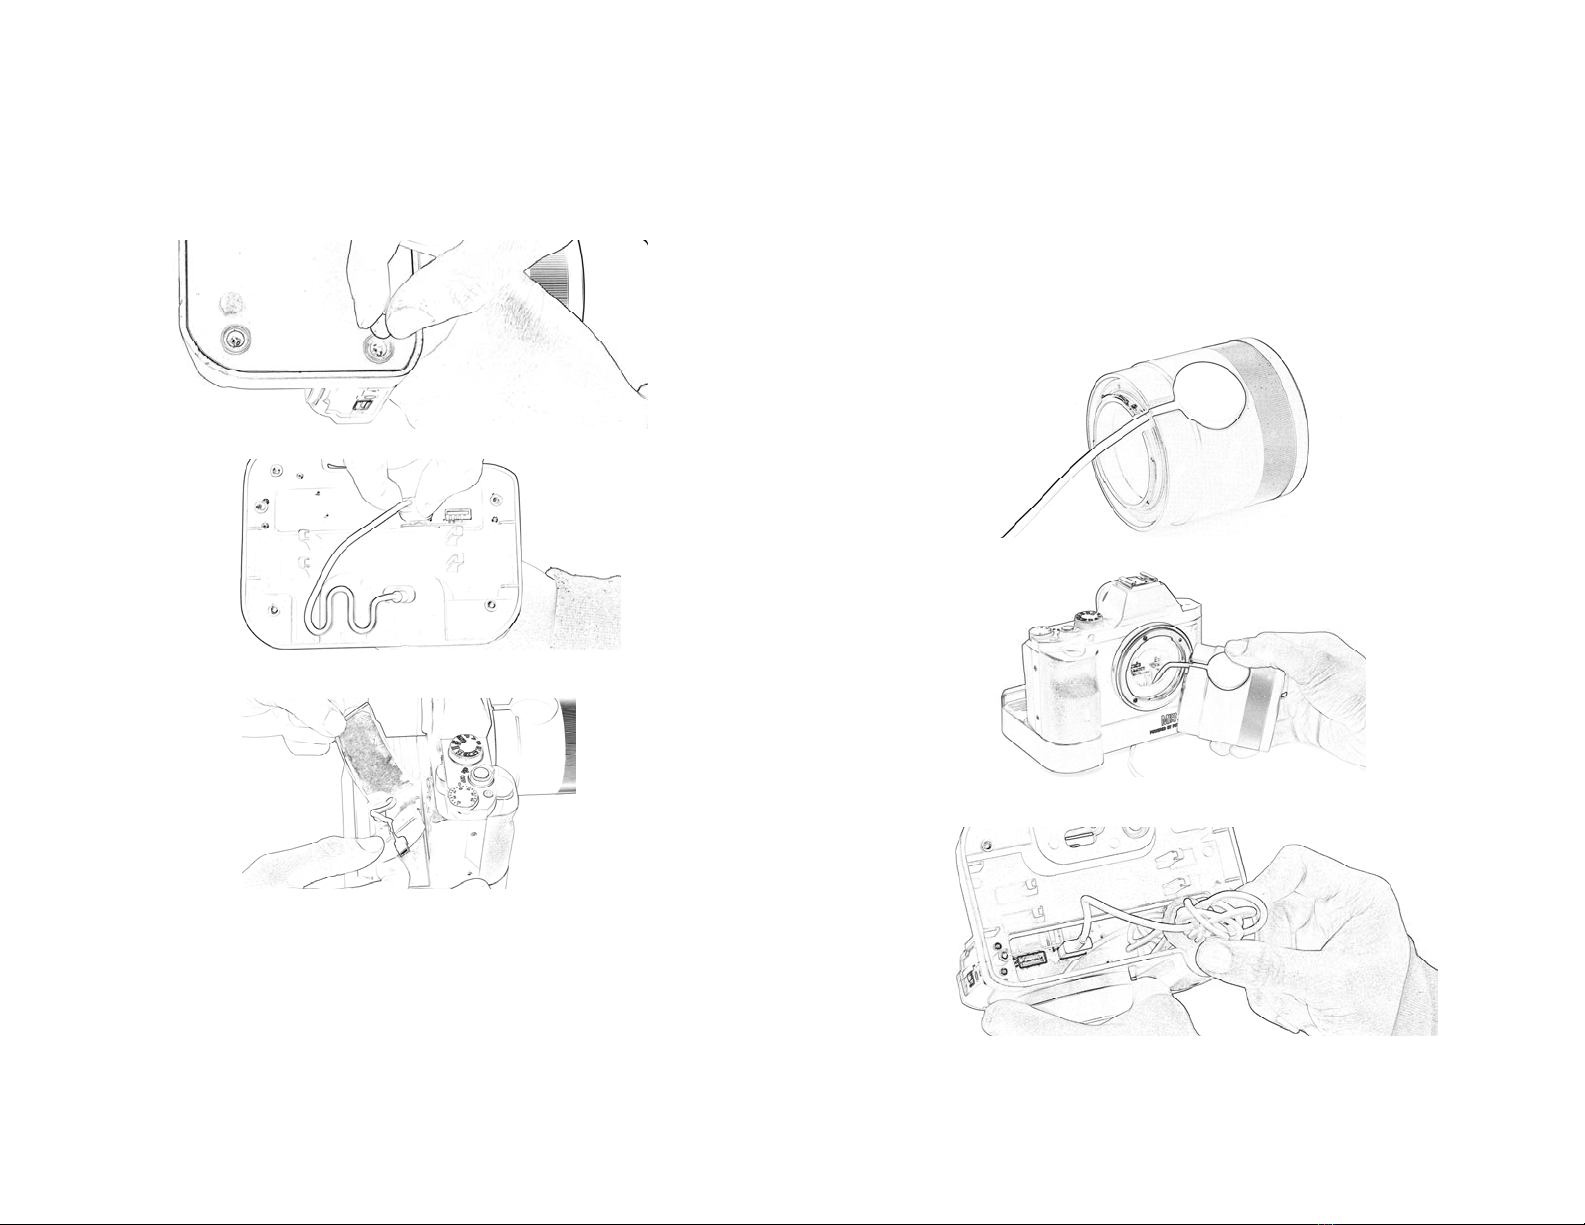
Apply one side of the round double-sided adhesive disc from the kit to the bottom of your Watch charger
(not included).
Remove the Mirage Trio's "lens" from the camera body. The Watch charger’s cable out fits into the
channel at the rear of the “lens”. Peel to expose the adhesive on your Watch Charger, and insert the
charger firmly into its special compartment, and press down.
Thread the excess cable through the Mirage Trio's lens opening, and reattach the lens.
Wrap the excess Watch Charger's cord around the posts in the Mirage Trio's base. Alternatively, you can
gather the excess cable with a rubber band and fit it into the open space inside the camera’s body.
Plug the cable into the free internal USB port.
Replace the bottom cover, and reinstall screws and rubber feet. (there are spare rubber feet included in the
kit if you need them).
1.
2.
3.
4.
5.
6.
7.
8.
APPLE WATCH CHARGER
The replica lens that's part of the Mirage Trio USB Charger has a built-in compartment for your
Apple Watch's charger. Follow these steps to install your Watch charger into the Mirage Trio, and
then you can recharge your watch by simply placing it around the lens!
ADJUSTING THE HEIGHT OF THE APPLE LIGHTNING CONNECTOR
Some iPhone cases are thick enough to interfere with the phone's ability to firmly seat onto the
Mirage Trio's Lightning connector. We have included a Cable Riser Insert (a small white ring with
an outer tab) for this situation. Here's how to install it:
Carefully peel off the protective feet from the bottom of the Mirage Trio, revealing four screws.
Using the kit's included screwdriver, unscrew the four screws to remove the bottom of the Mirage Trio.
Inside the Mirage Trio, temporarily unplug the short USB cord from the internal USB jack.
Remove the cable from the Strain Relief Channel.
Carefully peel off the rear platform's protective rubber mat, just far enough to expose the black plastic
Cable Support (black plastic support holding the charger cable vertically).
Push the Lightning cable slightly out of the Cable Support, and clip on the white Cable Riser Insert. One
Cable Riser Insert is already installed. Depending on your needs, you can add the second Cable Riser
Insert, or remove them altogether.
Slide everything back into the Cable Support, ensuring that the Cable Rise Insert's tab fits into the Cable
Support's groove.
Ensure that the lighting connector is firmly seated inside the Cable Support, and reseat the Cable Support
back into the base. Replace the cable into the Strain Relief Channel, and replace plug in the internal USB
jack.
Screw the bottom back onto the Mirage Trio.
Reinstall the four protective feet back over the screw holes, and replace the rear platform's protective mat
(there are spares of each included in the kit if you need them)
1.
2.
3.
4.
5.
6.
7.
8.
9.
10.


