manuals.online logo
Brands
  1. Home
  2. •
  3. Brands
  4. •
  5. Craftsman
  6. •
  7. Log Splitter
  8. •
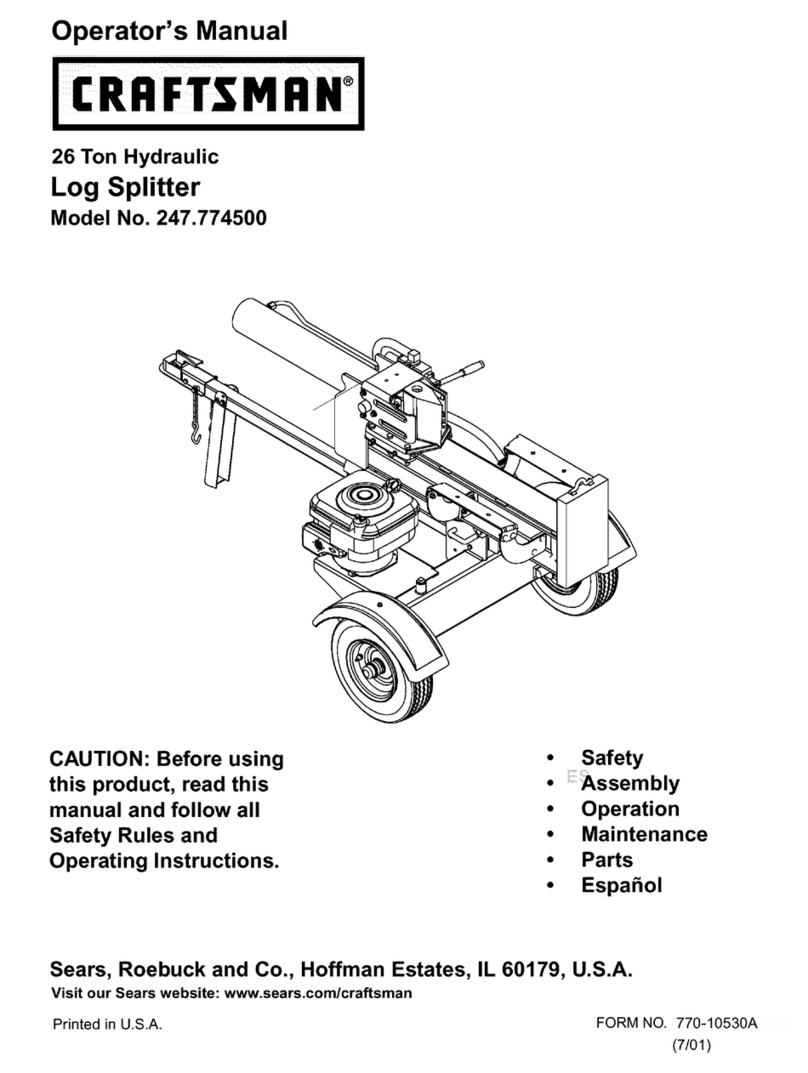
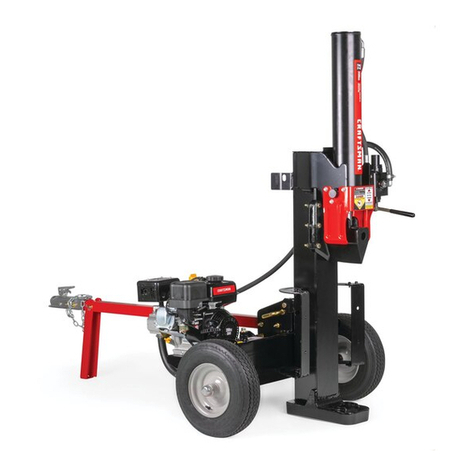
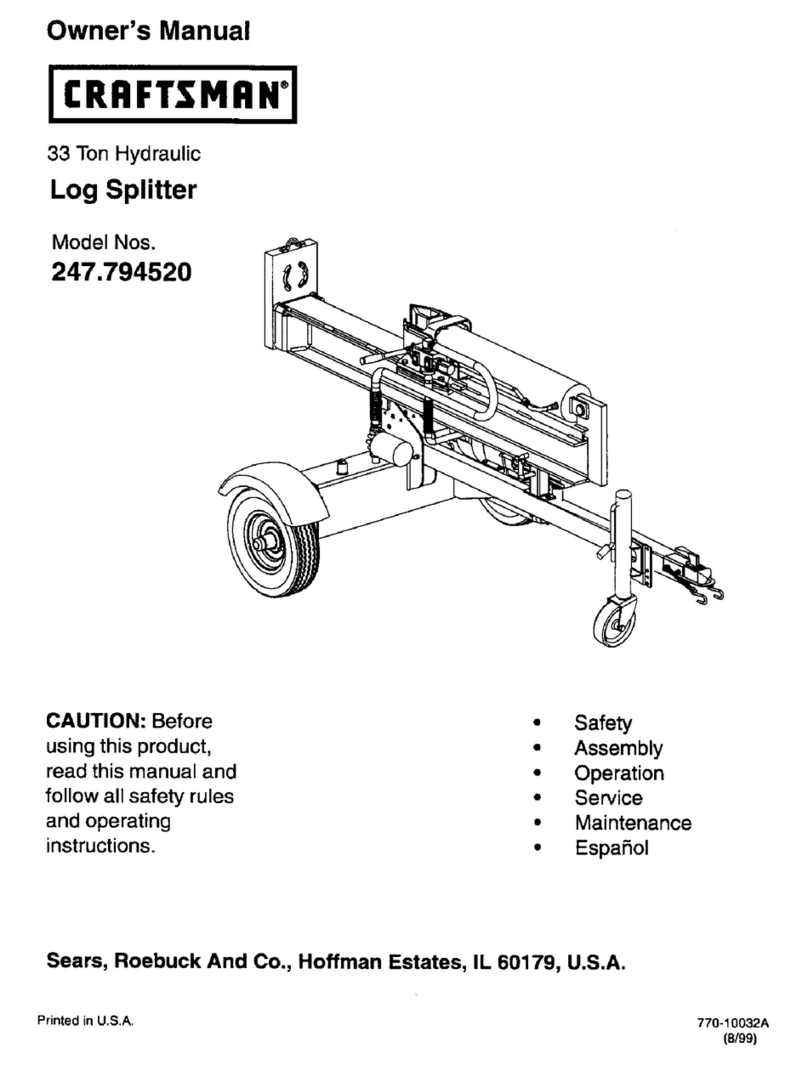
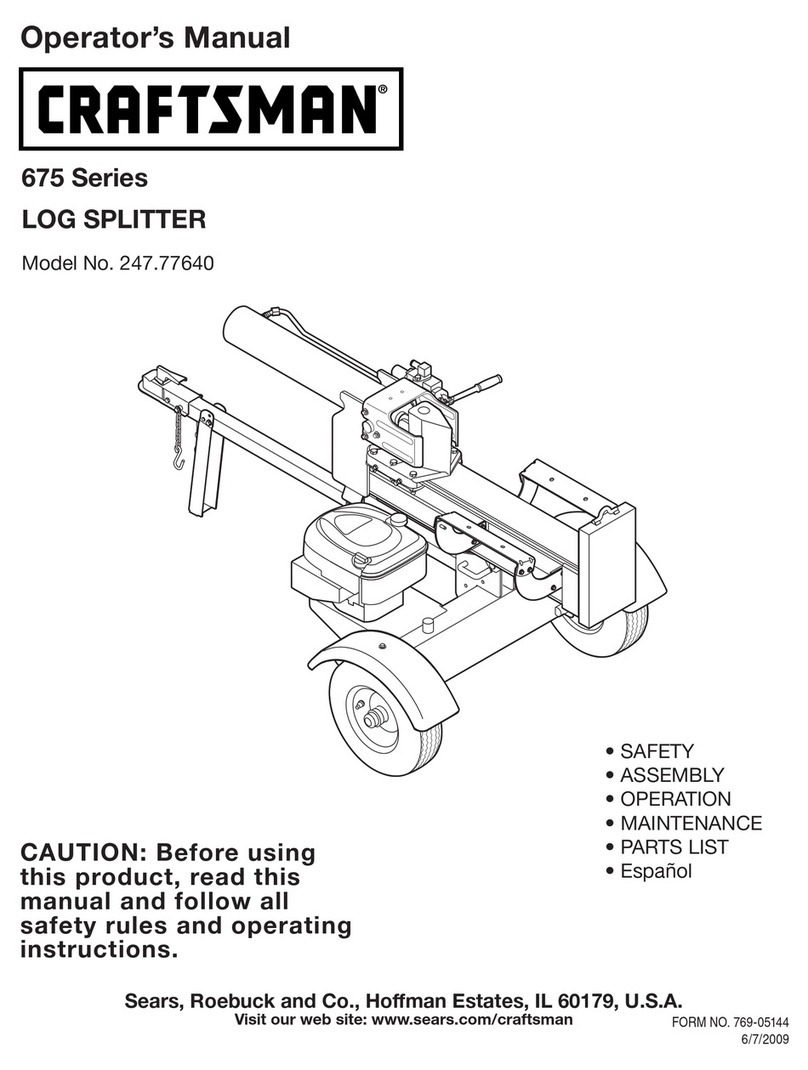
  9. Craftsman 247.794510 User manual

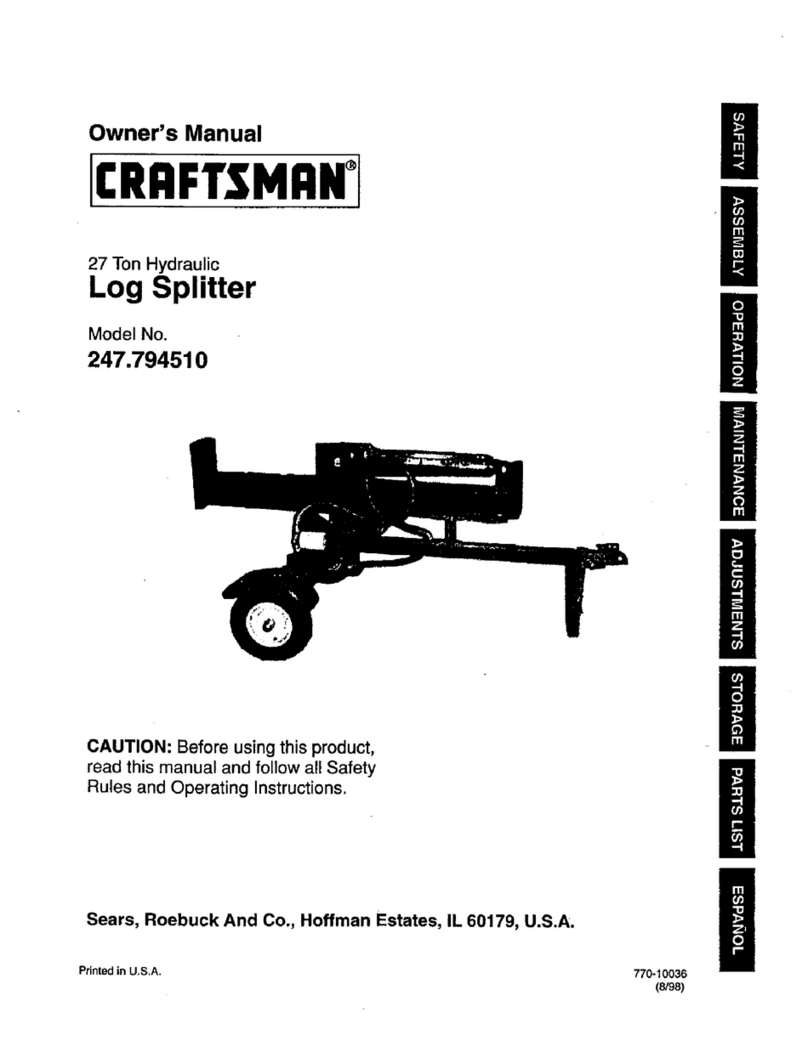
Craftsman 247.794510 User manual

Owner's Manual
ICRRFTSHRN_
27 Ton Hydraulic
Log Splitter
Model No.
247.794510
li
U
m
Ii
CAUTION: Before using this product,
read this manual and follow all Safety
Rules and Operating Instructions.
Sears, Roebuck And Co., Hoffman Estates, IL 60179, U.S.A.
Printed in U.S.A. 770-10036A
(7/99)
I!
/
m
Content Page
Warranty information......................................... 2
Safe Operation Practices ................................... 3
Accessories ....................................................... 6
Assembly ........................................................... 7
Operation ........................................................... 9
Content Page
Maintenance ...................................................... 13
Service & Adjustment ........................................ 16
Off-Season Storage ........................................... 18
Troubleshooting ................................................. 19
Parts List............................................................ 21
ONE-YEAR WARRANTY ON CRAFTSMAN LOG SPLITTER
For one year from the date of purchase, when this Craftsman log splitter is maintained, lubricated, and tuned up
according to the operating and maintenance instructions in the operator's manual, Sears will repair, free of
charge, any defect in material or workmanship.
This warranty excludes the tires, spark plug, oil filter and air cleaner, which are expendable parts and become
worn during normal use.
If this log splitter is used for commercial or rental purposes, this warranty applies for only 30 days from the date
of purchase.
WARRANTY SERVICE IS AVAILABLE BY CONTACTING THE NEAREST SEARS SERVICE CENTER IN THE
UNITED STATES. THIS WARRANTY APPLIES ONLY WHILE THIS PRODUCT IS IN USE IN THE UNITED
STATES.
This warranty gives you specific legal rights, and you may also have other rights which vary from state to state.
Sears, Roebuck and Co., Dept. 817WA, Hoffman Estates, IL 60179
Horsepower: ......................... 6.5
Engine Oil .............................. SAE 30/1.25 pints
Fuel Capacity: ....................... unleaded/1.5 quarts
Hydraulic Fluid ...................... Dexron III/4 gallons
Tire Pressure ......................... 30 p.s.i, maximum
Spark Plug (Gap .030") .......... Champion RJ 19LM
Magnetron Ignition Air Gap..,..0125"
Model Number. 247.794510
Serial Number ...........................................................
Date of Purchase ......................................................
Record model number, serial number and date of
purchase of the log splitter and keep in a safe place
for future reference.
2
This symbol points out important safety instructions which, if not followed, could endanger the per-
sonal safety and/or property of yourself and others. Read and follow all instructions in this manual before
attempting to operate your log splitter• Failure to comply with these instructions may result in personal injury.
When you see this symbol--heed its warning.
WARNING:
Your log splitter was built to be operated according to the rules for safe operation in this
manual. As with any type of power equipment, care]essness or error on the part of the oper-
ator can result in serious injury. If you violate any of these rules, you may cause serious
injury to yourself or others.
,_ The engine exhaust from this product contains chemicals known tothe state of California to cause
cancer, birth defects or other reproductive harm.
Towing
This unitshouldnot be towed on any street,
highwayor publicroadwithout checkingthe
existingfederal, localor state requirements.
Such informationmay be obtainedby callingyour
state or localbureau ofmotorvehicles. Any
licensingor modifications needed to complywith
federal, local orstate vehicle requirements isthe
sole responsibilityofthe purchaser.
Make sure you follow the wiringdiagram color
codes when installingthe lightkiton the log
splitter.(e.g. ground toground, leftturn toleft
turn, etc.). Failureto wire unitcorrectlymay
cause the towvehicle wiringto overheat and/or
the tog splitterlights to operate incorrectly.Itmay
be necessary to replace the turnsignal flasher
unitinyour towvehicle ifit isnotcapable of
operating theadditional lightson the logsplitter.
•Beforetowingthe logsplitterona street, highway
or publicroad, verifythat all lightsare functioning
properly and the yellowside reflectorsare in
position.Replace bulbsifthey are burntout.
•Beforetowing, always check to be certain the log
splitteriscorrectly and securely attached to the
tow vehicle, and safety chainsare in place.
Leave slack inchains for turning allowance.
Use a class Ior higherhitchwith a 1-7/8" ball.
Keep ballsocketand clamp face lubricatedwith
chassis grease.
Be sure the coupler is secured to the hitch ball
and the lock lever is down tight and locked.
Check vehicle hitch, ball and coupler for signs of
wear or damage. Replace any parts that are worn
or damaged before towing.
The coupler must be secured to the log splitter
tongue tube with the original equipment bolts and
nuts. See your authorized service dealer for
replacement parts. Coupler nuts should be
tightened securely (20 foot pounds).
• Make sure beam assembly is securely latched in
the horizontal position and jack stand (if provided)
is pivoted and secured in the up position before
towing log splitter. Never tow with the beam in
vertical position.
Do not tow the log splitter faster than 45 MPH.
Higher speeds may damage log splitter.
Excessive high speeds may cause the log splitter
to "fishtail" or otherwise become unstable.
Check the tire pressure on the log splitter tires. It
must be 30 p.s.i, maximum for highway travel.
When parking, storing or using your log splitter,
keep the coupler off the ground so dirt will not
build up in the ball socket.
• Do not allow anyone to sit or ride on your log
splitter. They can easily fall off and be seriously
injured.
Training
• Before operating this log splitter, read and
understand this operator's manual completely.
Become familiar with it for your own safety. To fail
to do so may cause serious injury. Do not allow
anyone to operate your log splitter who has not
read this manual. Keep this manual in a safe
place for future and regular reference and for
orderingreplacement parts.
Never use your splitter for any other purpose than
splitting wood. Itis designed for this use and any
other use may cause an injury. Your log splitter is
a precision piece of power equipment, not a toy.
Therefore, exercise extreme caution at all times.
Never allow children to operate your log splitter.
Do not allow adults to operate it without proper
instruction. Only persons well acquainted with
these rules of safe operation should be allowed to
use your log splitter.
••Only the operator isto be near your log spSitter
during use. Keep all others, including pets and
children, a minimum of 20 feet away from your
work zone. Flying wood can be hazardous. If a
3
helperisassistinginloadinglogs,neveractivate
thecontroluntilthehelperisclear of the area.
More accidents occur when more than one
person operates the log splitter than at any other
time.
No one should operate this unit while intoxicated
or while taking medication that impairs the
senses or reactions. A clear mind is essential for
safety. Never allow a person who is tired or
otherwise not alert to use your log splitter.
Preparation
• Never wear loose clothing or jewelry that can be
caught by moving parts of your log splitter and
pull you into it. Keep clothing away from all
moving parts of your log splitter.
• Wear proper head gear to keep hair away from
moving parts. Always wear protective hearing
devices as needed.
• Always wear safety shoes. A dropped log can
seriously injure your foot.
•Always wear safety glasses or goggles while
operating your splitter. A piece of splitting log
could fly off and hit your eyes.
Wear leather work gloves. Be sure they are tight
fitting without loose cuffs or draw strings.
• Use your logsplitter in daylight, or under good
artificial light.
•Never operate your splitter on slippery, wet,
muddy or icy surfaces. Safe footing is essential
in preventing accidents.
• Never operate your splitter while attached to a
towing vehicle.
•Only operate your splitter on level ground and
not on the side of a hill. Itcould tip, or rolling logs
or poor footing could cause an accident.
Operating the splitter on level ground also
prevents the spillage of gasoline from the fuel
tank.
• Never attempt to move the log splitter over hilly
or uneven terrain without a tow vehicle or
adequate help.
Always block the wheels to prevent movement
of log splitter while in operation.
• Check the fuel before starting the engine.
Gasoline is an extremely flammable fuel. Do not
fill the gasoline tank indoors,when the engine is
running, or while the engine isstill hot. Replace
gasoline cap securely and wipe off any spilled
gasoline before starting the engine as it may
cause afire or explosion.
Both ends of each log must be cut as square as
possible to help prevent the log from riding out of
the splitter during operation.
Operation
Vertical Operating Position: Stand in front of
the log splitter.
Horizontal Operating Position: Stand behind
the reservoir tank. See illustrations,
Know how to stop the unit and disengage the
controls.
Never place hands or feet between log and
splitting wedge or between logand end plate
during forward or reverse stroke. To do so may
result in crushed or amputated fingers or toes, or
worse, you may lose an arm or foot.
Do not straddle the splitter when using it. A slip
in any position could result in a serious injury.
Do not step over your log splitter when the
engine is running. You may trip or accidentally
activate the splitting wedge if you step over. If
you need to get to the other side, walk around.
Never try to split two logs on top of each other.
One may fly out and injure you.
When loading the log splitter, place your hands
on the side of the log, not at the ends. Never
attempt to load your splitter while the splitting
wedge is in motion. You may get caught by the
wedge and injured.
Only use your hand to operate the splitting
wedge or control lever. Never use your foot or a
rope or any other extension device. This could
result in your inability to stop your splitter quickly
enough to avoid injury.
Always keep fingers away from any cracks that
open in the log during splitting operation. They
can quickly close and pinch or amputate your
fingers.
Neverattempttosplitwoodsacrossthegrain.
Sometypesofwoodmayburstorflyoutofyour
splitterandresultininjurytoyouorabystander.
Forlogsthatarenotcutsquare,thelongest
portionofthelogshouldberotateddownand
themostsquareendplacedagainstthesplitting
wedge.
Keepyourworkareaclean.Immediately
removesplitwoodaroundyoursplittersothat
youdonotstumbleoverit.Cleanchipsanddirt
offendplate(woodplatform)aftereachlogis
split,orwhenevernecessarytomaintainflat
contactbetweenwoodandendplate(platform).
Nevermovethelogsplitterwhiletheengineis
running.
Neverleaveyourlogsplitterunattendedwiththe
enginerunning.Shutofftheengineifyouare
leavingyoursplitter,evenforashortperiodof
time.Someonecouldaccidentallyactivatethe
splittingwedgeandbeinjured.
Donotrunengineinanenclosedarea.Exhaust
gasescontaincarbonmonoxide.Thisodorless
gascanbedeadlywheninhaled.
Becarefulnottotouchthemufflerafterthe
enginehasbeenrunning.ItwillbeHOT!
Iftheequipmentshouldstarttovibrate
abnormally,stoptheengineandcheck
immediatelyforthecause.Vibrationisgenerally
awarningoftrouble.
Whencleaning,repairingorinspecting,make
certainallmovingpartshavestopped.
Disconnectthesparkplugwireandkeepthe
wireawayfromtheplugtopreventaccidental
starting.
Customer Responsibilities
• Do not operate your splitter in poor mechanical
condition or when in need of repair.
Periodically check that all nuts, bolts, screws,
hose clamps and hydraulic fittings are tight to be
sure equipment is in safe working condition.
Where appropriate, check all safety guards and
shields to be sure they are in the proper position.
Never operate your splitter with safety guards,
shields or other protective features removed.
These safety devices are for your protection.
Replace all damaged or worn parts such as
hydraulic hoses and fittings immediately with
manufacturer approved replacement parts.
Do net change the engine governor settings or
overspeed the engine. This increases the
hazard of personal injury. The maximum engine
speed is preset by the manufacturer and is
within safety limits.
Do not alter your log splitter in any manner such
as attaching a rope or extension to the control
lever or adding to the width or height of the
wedge. Such alterations may cause your splitter
to be unsafe.
Perform all recommended maintenance
procedures before you use your splitter.
Do not service or repair your log splitter without
disconnecting the spark plug wire and moving it
away from the spark plug.
• Never store the equipment with gasoline in the
tank inside of a building where ignition sources
are present, such as hot water and space
heaters, clothes dryers and the like. Allow the
engine to cool before storing in any enclosure.
•Always store gasoline in an approved, tightly
sealed container. Store the container in a cool,
dry place. Do not store in a building where
ignition sources are present.
• To reduce fire hazard, keep engine free of grass,
leaves, wood chips, and excessive grease and
oil.
The hydraulic system of your leg splitter requires
careful inspection, along with the mechanical
parts. Be sure to replace frayed, kinked, or
otherwise damaged hydraulic components.
• Fluid escaping from a very small hole can be
almost invisible. Do not check for leaks with your
hand. Escaping fluid under pressure can have
sufficient force to penetrate skin, causing
serious personal injury. Leaks can be located by
passing a piece of cardboard or wood over the
suspected leak and looking for discoloration.
Should it become necessary to loosen or
remove any hydraulic fitting or line, be sure to
relieve all pressure by shutting off the engine
and moving the control handle back and forth
several times.
• Do not remove the cap from the hydraulic tank or
reservoir while your log splitter is running. Hot oil
under pressure could cause injury.
• The pressure relief valve on your splitter is
preset at the factory. Do not adjust the valve.
Only a qualified service technician should
perform this adjustment.
• Completely drain fuel tank prior to storage. This
guards against accumulation of fuel fumes
which could result in a fire hazard.
• Never store log splitter outside without a
waterproof cover. Rain will cause rust on the
inside of the cylinder.
Important Information
Always:
Use clean fluid and check fluid level regularly.
Use Dexron Ill Automatic Transmission Fluid or
lOW non-foaming hydraulic fluid.
Use a filter (clean or replace regularly).
Use a breather cap on fluid reservoir.
5
• Make certain pump is mounted and aligned
properly.
•Use a flexible "spider" type coupling between
engine and pump drive shafts.
Keep hoses clear and unblocked.
Bleed air out of hoses before operating.
Flush and clean hydraulic system before start-
up after any malfunction or servicing.
• Use "pipe dope" on all hydraulic fittings.
Allow time for warm-up before splitting wood.
• Prime the pump before initial start-up by turning
over the engine with spark plug disconnected.
• Split wood with the grain (lengthwise) only.
Never:
Use when fluid is below 20° F, or above 150° F.
Use a solid engine/pump coupling.
Force pump when mounting.
Operate through relief valve.
Attempt to adjust unloading or relief valve
settings without pressure gauges.
Operate with air in hydraulic system.
Use Teflon tape on hydraulic fittings.
Attempt to cut wood across the grain.
These accessories were available when the log splitter was purchased. These are also available at most Sears
retail outlets, catalog and service centers. Most Sears stores can order repair parts for you when you provide the
model number of your log splitter.
Stabilizer
Gasoline Can
Tailight Kit
IMPORTANT: This unit is shipped without gasoline
in the engine. After assembly, see OPERATION
section of this manual for proper fuel fill-up.
Tools and Other Items Required
1. Crowbar or Large Screwdriver
2. Apair of 9/16" or Adjustable Wrenches*
3. Screwdriver
4. Cutters
5. Engine Oil (the equipment is shipped with oil in
the engine for starting)
6. Unleaded Gasoline
7. Dexron III Automatic Transmission Fluid or 10W
Non-Foaming Hydraulic Fluid (Approximately 7
gallons)
Unpacking from Crate
WARNING; Exercise extreme caution as
parts are very heavy. Mechanical handling
equipment or sufficient manpower should
be used to prevent injury.
Pry the top, sides and ends off crate using a
crowbar or large screwdriver.
Set panels aside to avoid tire punctures or
personal injury.
Remove and discard plastic bag that covers
unit.Note: Do not remove the banding from
around the tank until the log splitter is
assembled.
Disconnecting Spark Plug
Before you proceed with the assembty
procedure, disconnect the spark plug wire from
the spark plug onthe log splitter engine and
move the wire away from the spark plug. This
will prevent accidental starting. See Figure 1.
Remove the two bolts, lock washers and hex
nuts that secure the tongue assembly to the
beam assembly. See Figure 2.
Unlock the two beam locks by pulling out on the
beam locks and pivoting them down. Remove
the tongue assembly,
Tongue
Assembly
!1¸¸ .ex
Lock Washers
and Hex Nuts
Figure 2
Place the end of the tongue assembly in
between the brackets on thewheel and reservoir
tank assembly. Secure with hardware removed
earlier. See Figure 3.
Bracket
Tongue
Disconnect spark Engine
plug wire here
Figure 1
Setting Up Log Splitter
NOTE: All hardware needed forassembling your
Craftsman log splitter has been placed in position on
the equipment. 7
Nuts
Lock
Washers
Bolts
Figure 3
Remove the spring clip and the clevis pin from
the jack stand. Pivot the jack stand to the
operating position (90°), end secure with the
spring clip and clevis pin. See Figure 4.
Clevis !
! Tongue
Assembly Spring
P Clip
Jack Stand
Figure 4
Cut the two straps from around the reservoir
tank assembly.
•Remove the lag screw and washer which
secures the beam assembly to the bottom of the
crate.
•Lower the beam assembly to its horizontal
position. Make certain the beam is locked
securely with the horizontal beam lock, See
Figure 5.
•Pu_the log splitter off the pallet.
Figure 5
Final Assembly
Tire Pressure
The tires may have been over-inflated for shipping
purposes. Maximum tire pressure should not exceed
30 p.s.i. Check tire pressure regularly,
Preparing the Engine
Place the logsplitter on a firm, level surface.
Check engine oil as instructed on page 10.
Fill engine with gasoline as instructed on
page 10.
Preparing the Log Splitter
Lubricate the beam area where the splitting
wedge will slide with engine oil (do not use
grease). Make certain to oil both front and back
of the beam face.
Remove reservoir vent plug. See Figure 6.
Fill hydraulic
:luidhere
Reservoir
Tank
Reservo_ir Vent 9
Plug
Figure 6
Fill the reservoir tankto about 2" from the top
with Dexron ill automatic transmission fluid,or
10W non4oaming hydraulic fluid. Replace vent
plug securely.
Disconnect the spark plug wire. Prime the pump
by pullingthe recoil starter as far as it will go.
Repeat approximately 10 times.
Reconnect the spark plug wire and start engine.
Refer to starting instructions on page 11.
Use the control handle to engage the wedge to
the far extended position. Refer to Figure 8.
• Retract the wedge.
Refill tank to within 1-1/2" to 2"from the top of
the tank.
Extend and retract the wedge 12 complete
cycles to remove trapped air in the system
(system is "se_f-b_eeding").
Refill the reservoir to within 1-1/2" to 2" from the
top of the tank. Much ofthe original fluid has
been drawn into the cylinder and hoses. Make
certain to refill the reservoir, to prevent extreme
damage to the hydraulic pump.
NOTE: Some fluid may overflow fromthe vent plug as
the system builds heat and the fluid expands and
seeks a balanced level.
Move control handle BACK or UP to return the
wedge. See Figure 8 on page 10.
8
Know Your Log Splitter
Read this owner's manual and safety rules before operating your log splitter. Compare the
illustrationson this page with your equipment to familiarize yourself with the location of
various controls and adjustments. Save this manual for future reference,
The operation of any log splitter can result in foreign objects being thrown into the eyes,
which can result in severe eye damage. Always wear safety glasses, for operating your
log splitter, or while performing any adjustments or repairs on it,
_-_'_-_SpliHing Wedge
End
Plate
Beam
Lock
Reservoir Tank
\_\\\ \
Tong_ue
Assembly
Jack Stand
Control
Handle Hose
Guard Beam
Lock
fOil Fill
Spark
Plug
Plug
Figure 7
MEETS ANSI SAFETY REQUIREMENTS
Sears log splitters conform to the safety standards B71.7-19B5 of the American National Standards Institute.
9
Operating Controls
(See Figure7.)
,_ WARNING: Before using your log splitter,
again refer to the safety rules on page 3 4.
and 5 ofthis manual. Always be careful.
Do not operate the log splitter withoutthe
proper amount ofhydraulic oil in the
reservoir tank. Failure to refill the tank will
void your warranty.
Beam Locks
Used to secure the beam in the horizontal or the
vertical position. There are two beam locks, one for
each operating position. The vertical beam lock is
located next to the oil filter. The horizontal beam lock
is located on the beam support latch racket.
Primer
Used to start a coldengine. Do not use it to restart a
warm engine aftera short shut-down.
Starter Handle
Used to manually start the engine.
Control Handle
The control handle has three positions. See Figure 8.
Reversel _
To retprn wedge
_J Neutral ITo stop
tt wood
Control I [
Handle Forward r_v
Figure 8
Move control handle FORWARD or DOWN to
move wedge down to split wood.
NOTE: Control handle will return to neutral position
as soon as handle is released.
Release the control handle to stop the wedge
movement.
• Move control handle BACK or UP to return the
wedge.
Stopping Engine
Move throttle control lever to STOP position.
Disconnect spark plug wire and move away
from spark plug to prevent accidental starting
while equipment is unattended.
Before Starting
Oil Fill-Up
Only use high quality detergent oil rated with API
service classification SF, SG or SH. Select the
oil's viscosity grade according to the expected
operating temperature. Follow the chart below.
Colder _ 40°F_ Warmer
5W30 ! SAE 3O
NOTE: Although multi-viscosity oils(5W30, 10W30,
etc.) improve starting in cold weather, these multivis-
cosity oils will result in increased oil consumption
when used above 40°F. Check the oil level more fre-
quently toavoid possible engine damage from
running low on oil.
&WARNING: SAE 30 oil, if used below 40°F,
will result in hard starting and possible
engine bore damage due to inadequate
lubrication.
Fill engine with the appropriate oil as follows:
Remove oil fill dipstick.
• With log splitter on level ground, use a funnel to
fill engine oil to FULL mark on dipstick. Capacity
is approximately 1.25 pints or 21 ounces. Be
careful not to overfill,
Replace the dipstick on to the engine and
tighten. Then remove the dipstick again and
wipe off the oil from the end of the dipstick with a
clean cloth.
Screw the dipstick firmly back to place. Remove
to check the oil level.
• Refill oil to FULL mark on dipstick if necessary.
Replace dipstick and tighten.
WARNING: To avoid engine damage, never
run engine unless oil level isbetween FULL
and Add marks on the dipstick.
Gasoline Fill-Up
Remove fuel cap.
Make certain the gasoline container is clean and
free from rust or foreign particles. Never use
gasoline that may be stale from long periods of
storage in the container.
• Fill fuel tank with about 1.5 quarts of clean,
fresh, lead-free grade automotive gasoline. DO
NOT use Ethyl or high octane gasoline.
NOTE: DO NOT use gasoline containing methanol
Gasofine containing up to about 10% ethanol or up to
15% methyl tertiary butyl ether (MTBE) may be used,
but will require special care when engine is left
unused for extended period. Refer to Storage
instructions on page 18.
Replace fuel cap.
10
WARNING: Do not fill closer than 1/2 inch of
top of fuel tank to prevent spills and to allow
for fuel expansion. If gasoline is accidently
spilled, move log splitter away from area of
spill. Avoid creating any source of ignition
until gasoline vapors have disappeared.
Starting Engine
Attach spark plugwire and rubberboottothe
spark plug.
• Place the throttle control lever in START
position.
• Push the primer three times, wait about two
seconds between each push. Incold weather
with temperatures below 55° F, prime engine
five times.
• Grasp the starter handle and pull rope out slowly
until engine reaches start of the compression
cycle (rope will pull slightly harder at this point).
Let the rope rewind slowly.
Pull rope with a rapid, continuous, full arm
stroke. Keep a firm grip on the starter handle.
Let rope rewind slowly. Do not let starter handle
snap back against starter.
NOTE: If engine does not fire after three attempts,
repeat above instructions.
Stopping Engine
• Move throttle control lever to STOP position.
Disconnect spark plug wire and move away
from spark plug to prevent accidental starting
while equipment is unattended.
Raising and Lowering Beam
W,c.,
Beam
>
• Use control handle to run wedge up and down
beam 6 to 8 times to circulate the hydraulic fluid,
which will warm and thin the fluid.
Place log splitter on a firm, level surface.
• To raise the beam: Pull out the beam lock on
the tongue and pivot it down to release the
beam.
Move the beam to the vertical position. Secure it
with the beam lock on the reservoir tank
assembly. See Figure 9.
• To lower the beam: Pull out the beam lock on
the reservoir tank.
Pivot beam lock down to release the beam.
Carefully pull back on beam and lower itto the
horizontal position. See Figure 9.
• Pull out the beam lock on the tongue, pivot it
upwards and release it to hold the beam. Make
certain it is latched securely.
_. WARNING: Always use the log splitter in the
vertical position only when splitting heavy
logs.
Operating Position
Vertical
Pull the horizontal beam lock out and pivot it
down to release the beam. Pivot the beam to the
vertical position.
Lock the beam in the vertical position, by pulling
out on the vertical beam lock and pivoting it to
the left. See Figure 10.
Stand in front of the log splitter. Operate the
control handle with your right hand and stabilize
the log, if necessary, with your left hand. See
Figure 10.
Tongue
Horizontal Beam Lock
Figure 9
Figure 10
Horizontal
Pull the vertical beam lock out and pivot itdown.
Pivot the beam to the horizontal position.
Lock the beam in the horizontal position, by
pulling out on the horizontal beam lock and
pivoting it upwards.
11
Stand behind the reservoir tank. See Figure 11.
Operate the control handle with your right hand
and stabilize the log, if necessary, with your left
hand.
Figure 11
Before Each Use
• Remove the vent plug and check hydraulic fluid
level. Refill it necessary.
• Check engine oil level. Refill if necessary.
Fill up gasoline if necessary.
• Lubricate with engine oil the beam area where
splitting wedge will slide. Do not use grease to
lubricate. Make sure to lubricate both the front
and the back of the beam face.
• Attach spark plug wire tothe spark plug.
Operating the Log Splitter
WARNING= Wear leather work gloves,
safety shoes and safety glasses to operate
the _ogsplitter. Watch your tooting during
operation and while handling the log.
Place the log splitter on a dry, firm, level surface.
• Block the front and back of the wheels when
operating (and when storing) to prevent it from
moving or rolling away.
• Lock in either the horizontal or vertical position.
Set the engine throttle at maximum speed.
Place the log against the end plate. Only split
wood in the direction of the grain.
• Stabilize the log, when needed, by holding the
sides of the log with your free hand. Never place
your hands between the log and the splitting
wedge.
•Only one adult should stabilize the log and
operate the control handle so thatthe operator
hasfull controlover the logand the wedge.
AWARNING: If the hydraulic fluid becomes
very hot at any time during the operation,
stop the unit and allow the fluid to cool
down. Otherwise the performance of your
log splitter will be affected.
Transporting the Log Splitter
• Lower the beam to its horizontal position. Make
certain the beam is locked securely with the
horizontal beam lock.
• Raise or lower jack stand to attach the hitch to a
towing vehicle. Make certain to latch securely.
Remove spring pin and clevis pin securing the
jack stand to the tongue assembly and pivot the
jack stand to transport position. Secure with
hardware just removed.
Attach the safety chains to the towing vehicle.
Refer to Page 3.
12
Maintenance Schedule
_'_ <'_ /_/_'9 /_//Fill""lnsarvlce"dates here
. ;
_1 _(E Check hydraulic fluid _" I
__'_ Changehydraulicfluid
Chang hyd auliof,te d
d
Check hoseclamps
Lubricatebeamandwedge ,_
Checkengineoil ,l_
Changeengine Oil _
"_ Serviceaircleaner ,,_
I,,IJ Cleanengine ,_
Service sparkplug ,_
Cleanengine linkages ,_
General Recommendations
•Always observe safety rules when performing
any maintenance.
• The warranty on this log splitter does not cover
items that have been subjected to operator
abuse or negligence. To receive full value from
the warranty, operator must maintain the log
splitter as instructed in this manual.
• Some adjustments will need to be made
periodically to maintain your unit properly.
• All adjustments in the Service and Adjustments
section of this manual should be checked at least
once each season.
•Followthe maintenance schedule given above.
Periodically check all fasteners and make sure
these are tight.
WARNING: Always stop the engine and
disconnect spark plug wire before
performing any maintenance or adjustments.
Splitter Mechanism
Hydraulic Fluid
Check the hydraulic fluid level in the log splitter
reservoir tank before each use. Fluid level should
be 1.5" to 2"from the top of the tank ( four gallons
approximately).
• Change the hydraulic fluid in the reservoir every
100 hours of operation.
• Disconnect the suction hose fromthe bottom of
the reservoir tank, and drain the fluid into a
suitable container.
• Refill using only Dexron Ill automatic
transmission fluid or 10W non-foaming hydraulic
fluid. Also, make certain to change the hydraulic
filter.
NOTE: Drain the fluid and flush the reservoir tank and
hoses with kerosene whenever any repair work is
performed on the tank, hydraulic pump or valve.
Contaminants in the fluid will damage the hydraulic
components. Repairs to hydraulic components should
be performed by a Sears service center.
Hydraulic Filter
Change the hydraulic filter every 50 hours of
operation. Use only a 10 micron hydraulic filter.
Hose Clamps
Check the hose clamps on the suction hose
(attached to the side of the pump) for proper
tightness before each use.
13
Check the hose clamps on the return hose at
least once a season.
Beam And Splitting Wedge
Lubricate both sides of the beam where it
contacts the splitting wedge with engine oil
before each use to obtain years of service.
However, normal wear will occur.
Periodically check the bolts on the side of the
wedge plate to eliminate excess space between
the wedge plate and the beam.
The wedge plate on the log splitter is designed
so the gib blocks on the side of the wedge plate
can be easily removed and rotated or turned
over for even wear. You can locate these two gib
blocks behind the gib plate shown in the figure
below. Make certain to readjust the adjustment
bolts so wedge moves freely, but no excess
space exists between the wedge plate and
beam. See Figure 12.
Hex Bolt
When engine is drained of all oil, replace drain
plug securely.
Refill with fresh oil. Refer to GAS AND OIL FILL-
UP section of this manual.
Replace dipstick.
Service air cleaner
The air cleaner prevents damaging dirt, dust, etc.,
from entering the carburetor and being forced intothe
engine and is important to engine life and
performance. The air cleaner consists pf a paper pre-
cleaner and a foam filter cartridge.
,_ WARNING: Never run your engine withoutair cleaner completely installed on engine.
Replace paper pre-cleaner once a year or every
100 operating hours. Replace more frequently if
operating under dusty conditions. Replacement
filters are available at any Sears service center.
Do not attempt to clean or oil the paper pre-
cleaner element,
Service cartridge every three months or every
25 operating hours. Service cartridge more often
under dusty conditions.
To service foam cartridge: Loosen air cleaner
cover screws. Do not remove screw from cover.
Swing cover down to remove from hinge. See
Figure 13.
Cover Screw
Adjustment Bolt /
Gib Plate Back Plate
Figure 12
Engine
Changing engine oil
Only use high quality detergent oil rated with
API service classification SF, SG or SH. Select
the oil's viscosity grade according to the
expected operating temperature. Refer to
page 10 of this manual for viscosity chart.
•Stop engine and wait several minutes before
checking oil level. With engine on level ground,
the oil must be to FULL mark on dipstick.
Change engine oil after the first five hours of
operation, and every 25 hours thereafter.
Change oil more frequently if the engine is
operated under heavy load, or in high ambient
temperatures.
Drain oil while engine is warm. Follow the instructions
given below.
Remove oil drain plug and dipstick. Catch oil in a
suitable container.
14
Cove'r Foam Filter Cover
Body Paper
Filter
Figure 13
Inspect filter for discoloration or dirt
accumulation. If either is present, proceed as
follows.
Clean inside of body and cover thoroughly.
Remove foam cartridge. Wash in liquid
detergent and water. Squeeze dry in a clean
cloth. Saturate in engine oil. Squeeze (don't
twist) in a clean, absorbent cloth to remove all
excess oil.
Reassemble foam cartridge and paper pre-
cleaner in the body. Swing cover down and
tighten the two screws loosened earlier.
,_ WARNING: Temperature of muffler and
nearby areas may exceed 150° F(65°C).
Avoid these areas.
Clean engine
Clean engine periodically. Remove dirt and
debris with a cloth or brush. Cleaning with a
forceful spray of water is not recommended as
water could contaminate the fuel system.
To ensure smooth operation of the engine, keep
the governor linkage, springs and controls free
of debris. See Figure 14.
Every 100 hours of operation, remove
combustion deposits from top of cylinder,
cylinder head, top of piston and around valves.
Fins Cooling
Clean Air Intake
._reen
and Linkages
Figure 14
Spark Plug
Clean spark plug and reset the gap to .030" at
least once a season or every 50 hours of
operation. See Figure 15. Spark plug
replacement is recommended at the start of
each season. Refer to engine parts list for
correct spark plug type.
NOTE: Do not sandblast spark plug. Spark plug
should be cleaned by scraping or wire brushing and
washing with a commercial solvent.
.030" Feeler Gauge
Figure 15
15
WARNING: Always stop engine,
disconnect spark plug wire, and move it
away from spark plugbefore performingany
adjustments or repairs.
Tires
•See sidewall oftire for recommended pressure.
Maximum tire pressure under any
circumstances is 30 p.s.i. Equal tire pressure
should be maintained on all tires.
WARNING; Excessive pressure (over 30
p.s.i.) when seating beads may cause tire/
rim assembly to burst with force sufficient to
cause serious injury.
Flexible Pump Coupler
The flexible pump coupler is a nylon "spider" insert,
located between the pump and engine shaft, Over a
period of time, the coupler will harden and
deteriorate. Replace the coupler ifyou detect
vibration or noise in the area between the engine and
the pump. If the coupler fails completely, you will
experience a loss of power.
,_ WARNING: Never hit the engine shaft in
any manner, as a blow will cause permanent
damage to the engine.
IMPORTANT: Ifyou do not have the right tools or are
otherwise uncomfortable with the procedure, contact
Sears service center.
When replacing the flexible pump coupler, proceed
as follows. Follow the instructions carefully as the
alignmentis critical.
•Disconnect the spark plug wire, and secure it
away from the spark plug.
•Drain gasoline from fuel tank or place a piece of
plastic film underneath the gas cap to prevent
gasoline from _eaking.
• Using a 1/2 inch socket with an extension,
remove the three bolts securing the engine to
the engine mounting bracket. The three bolts
can be found under the engine mounting
bracket.
Carefully lift engine off mounting bracket and set
aside on a sturdy, level surface.
• Remove the nylon spider insert from the pump
shaft. You may need a pair of needle nose
pliers to grasp the insert.
Place a new "spider" insert intothe pump coupling
half. See Figure 16,1. Make sure the key ison the
pump shaft. The key way in the lower coupling
half has to fit over the key on the pump shaft.
Re-seat the engine making sure to align the
pump and engine coupling halves. There must 16
be space between end oftheengine and the
coupling haft. See Figure 16,2.
\\"\
Engine j, __
Mountingj
Bracket
Look under this
for engine bolts
Figure 16
NOTE: The pump coupling half can be rotated by
hand to aid in alignment. If the two parts are not
aligned the unit will not operate properly and damage
could occur.
Set .035-.060 inchclearance between the
coupling halves by sliding a matchbox cover
between the jaws of the upper and the lower
coupling halves.
NOTE: Before securing the set screw, apply some
LoctiteTM on the threads of thescrew.
Tighten the set screw to 78 inch-pounds torque.
Secure engine with three bolts removed earlier.
Torque bolts to 200 to 450 inch-pounds.
Reattach spark plug wire to spark plug. Be sure
to remove plastic film from under gas cap if
necessary.
Beam & Splitting Wedge
The wedge plate is subject to normal wear.
Periodically adjust the bolts on the wedge plate
making sure that the wedge moves freely. Also make
sure that no excess space exists between the wedge
plate and the beam,
To adjust:
•Loosen three hex bolts on top ofthe wedge plate
(beneath the splittingwedge). See Figure 17.
• Loosen the lock nuts on the two adjustment
bolts on the side of the gib plate, located
beneath the splitting wedge. See Figure 17.
Turn the adjustment bolts in until snug, then
back them off slowly until the wedge assembly
will slide on the beam.
• Tighten the lock nuts securely against the gib
plate to hold adjustment bolts in this position.
Retighten the three hex bolts on top of the
wedge plate.
Hex Bolt
Adjustment Bolt Wedge Plate
Gib Plate Back Plate
Figure 17
To replace:
Periodically remove and replace the "gibs" (spacers)
between the wedge plate and the back plate as
follows.
NOTE: If desired, the gibs may be rotated and/or
turned over for even wear.
• Remove the center bolt on top of the wedge
plate. Slide the gib plate out. See Figure 17.
• Remove and replace the gibs. Reassemble the
gib plate, making certain flat washer is in place
under the gib plate.
Readjust the bolts on the side of the wedge plate as
instructed previously.
Adjusting Carburetor
AWARNING: Ifyou make any adjustments to
the engine while it isrunning, keep clear of all
moving parts to avoidinjury. Be careful of
heated surfaces and muffler.
If the engine carburetor needs adjustment, contact
your nearest Sears service center.
Engine performance may be affected in altitudes
above 4,000 feet. To improve engine performance,
install a high altitude adjustment kit. This kit is
available at Sears service centers.
Engine Speed
The engine speed on your log splitter has been set by
the engine manufacturer. Do not attempt to increase
engine speed or it may result in personal injury. If you
believe the engine is running too fast or too slow,
contact Sears service center for repair and
adjustment.
,_ IMPORTANT: Changing of engine governed
speed by the customer will void engine
warranty.
17
Prepare your log splitter for storage at the end of the
season or if the log splitter will not be used for 30 days
or more.
WARNING: Never store machine with fuel
in the fuel tank inside of building where
fumes may reach an open flame or spark, or
where ignition sources are present such as
hot water and space heaters, furnaces,
clothes dryers, stoves, electric motors, etc.
NOTE: A yearly check-up by your local Sears Service
Center is a good way to make certain your log spfitter
willprovide maximum performance for the next
season.
LOG SPLITTER
Clean the log splitter thoroughly.
Wipe unit with an oiled rag to prevent rust,
especially wedge and beam.
ENGINE
IMPORTANT: It is important to prevent gum deposits
from forming in essential fuel system parts such as
carburetor, fuel filter, fuel hose, or tank during
storage. Also, experience indicates that alcohol
blended fuels (called gasohol or using ethanol or
methanol) can attract moisture which leads to
separation and formation of acids during storage.
Acidic gas can damage the fuel system of an engine
while in storage.
•Drain the fuel tank.
• Start the engine and let it run until the fuel lines
and carburetor are empty.
• Drain carburetor by pressing upward on bowl
drain which is located below the carburetor.
•Never use engine or carburetor cleaner products
in the fuel tank or permanent damage may
Occur.
• Use fresh fuel next season.
NOTE: Fuel stabilizer is an acceptable alternative in
minimizing the formation of fuel gum deposits during
storage.
Add stabilizer to gasoline in fuel tank or storage
container.
Always follow the mix ratio found on stabilizer
container.
• Run engine at least 10 minutes after adding
stabilizer to allow the stabilizer to reach the
carburetor.
• Do not drain the gas tank and carburetor if using
fuel stabilizer. Drain all the oil from the
crankcase (this should be clone after the engine
has been operated and is still warm) and refill
the crankcase with fresh oil.
Ifyou have drained the fuel tank, protect the
inside of the engine as follows.
• Remove spark plug, pour approximately 1/2
ounce (approximately one tablespoon) of engine
oil into cylinder and crank slowly to distribute oil.
Replace spark plug.
OTHER
Do not store gasoline from one season to
another.
• Replace your gasoline can if itstarts to rust.
Rust and/or dirt in the gasoline will cause
problems. Store unit in a clean, dry area. Do not
store next to corrosive materials, such as
fertilizer.
NOTE: If storing in an unventilated or metal storage
shed, be certain to rustproof the equipment by coating
with a light oil or silicone.
18
Problem Corrective Action
Cylinder rod will not move
Possible Cause
1, Broken Drive shaft.
I2. Shipping plugs left in hydraulic hoses
Cylinder shaft speed slow while
extending and retracting
Engine runsbut woodwill not split,
or splits too slowly
Engine stalls during splitting wood
Engine will not turnor stalls under
low load
Leaking pump shaft seal
3. Set screws in coupling not adjusted
properly.
4. Loose shaft coupling.
5. Gear sections damaged.
6. Damaged relief valve.
7. Hydraulic lines blocked.
8. Incorrect oil level.
9. Damaged or blocked directional
valve.
1. Gear sections damaged.
2. Excessive pump inlet vacuum.
3. Slow engine speed.
4. Damaged relief valve.
5. Incorrect oil level.
6. Contaminated oil,
7. Directional valve leaking internally.
8. Internally damaged cylinder.
1. Small gear section damaged.
2. Pump check valve leaking.
3, Excessive vacuum in pump inlet.
4. Incorrect oir level.
5. Contaminated oil.
6. Directional valve leaking internally.
7, Internally damaged cylinder,
8. Overloaded cylinder.
2.
1. Return unit to Sears service center.
2. Disconnect hydraulic hose, remove
shipping plugs, and reconnect hose.
3. Refer to adjustment section of this
manual and adjust the couplers
4. Correct engine/pump alignment.
5. Return unit to Sears service center.
6. Return unittoSears servicecenter.
7. Flush and clean hydraulicsystem.
8, Check oil level. Refillif necessary.
9. Return unit to Sears service center
Low horsepower/weak engine. 1.
Overloaded cylinder 2.
1. Engine/pump misaligned.
2. Frozen or seized pump.
3. Weak engine.
4. Hydraulic lines blocked.
5. Blocked directional valve.
1. Broken drive shaft.
2. Engine/pump misaligned.
3, Gear sections damaged.
4. Poorly positioned shaft seal.
5. Oil breather plugged.
1. Return unit to Sears service center.
2. Make certain that the pump inlet
hoses are clear and unblocked. Use
short, large diameter inlet hoses.
3. Return unit to Sears service center.
4. Return unit to Sears service center.
5. Check oil level. Refill if necessary.
6. Drain oil,clean reservoir, refill, make
certain oil return tube isbelow oil
level.
7. Return unit to Sears service center.
8. Return unit to Sears service center.
1. Return unit to Sears service center.
2. Return unit to Sears service center.
3. Make certain that the pump inlet
hoses are clear and unblocked. Use
shod, large diameter inlet hoses.
4. Check oil level. Refill if necessary.
5. Drain oil, clean reservoir, refill, make
certain oil return tube is below oil
level.
6. Return unit to Sears service center.
7. Return unit to Sears service center.
8. Do not attempt to split wood against
the grain.
Return unit to Sears service center.
Do not attempt to split wood against
the grain. If engine stalls repeatedly,
contact Sears service center.
1. Correct alignment.
2. Return unit to Sears service center.
3. Return unit to Sears service center.
4. Flush and clean hydraulic system.
5. Return unit to Sears service center
1. Return unit to Sears service center.
2. Correct alignment,
3. Return unit to Sears service center.
4. Return unit to Sears service center.
5. Make certain reservoir is properly
vented.
19
Troubleshooting Guide continued
Problem Corrective Action
Engine fails to start
Engine runs erratic.
IEngine overheats
Will not splitlogs
Leaking cylinder
Possible Causes
1. Didy air cleaner.
2. Fueltank empty, or stale fuel.
I 3. Blocked fuel line.
4. Spark plug wire disconnected.
5. Faulty spark plug.
1. Spark plug wire loose.
2. Blocked fuel line or stale fuel.
3. Dirty air cleaner.
4. Carburetor out of adjustment
1, Engine oil levellow.
2. Dirty air cleaner+
3. Carburetor out of adjustment.
4+ Airflow restricted.
1. Reservoir fluid level low.
t. Broken seals.
2. Scored cylinder
1. Serviceair cleanerfollowing instructions
on page 14 ofthismanual.
2. Fill tank with fresh fuel.
3. Clean fuel line.
4. Connect spark plug wire to spark
plug.
5. Service spark plug following
instructions on page 15.
1. Connect and tighten spark plug wire.
2, Clean fuel line. Fill tank with fresh
fuel.
3. Service air cleaner following
instructions on page 14.
4. Contact Sears service center.
1, Fill crankcase with proper oil.
2. Service air cleaner following
instructions on page 14.
3. Contact Sears service center.
4. Stop engine, disconnect spark plug
wire, move blower housing, and
clean.
1. Refillwith Dexron IIIautomatic
transmission fluid.
1. Return unit to Sears service center.
2. Return unitto Sears service center.
For repairs beyond the minor adjustments listed above,
please contact your nearest SEARS service center.
20

Other manuals for 247.794510

1

Other Craftsman Log Splitter manuals

Craftsman 247.34625 User manual

Craftsman

Craftsman 247.34625 User manual

Craftsman 247.794520 User manual

Craftsman

Craftsman 247.794520 User manual

Craftsman 247.77466 User manual

Craftsman

Craftsman 247.77466 User manual

Craftsman 247.77661 User manual

Craftsman

Craftsman 247.77661 User manual

Craftsman 247.77466.1 User manual

Craftsman

Craftsman 247.77466.1 User manual

Craftsman 675 Series User manual

Craftsman

Craftsman 675 Series User manual

Craftsman 247.77641 User manual

Craftsman

Craftsman 247.77641 User manual

Craftsman 247.287751 User manual

Craftsman

Craftsman 247.287751 User manual

Craftsman 247.77641 User manual

Craftsman

Craftsman 247.77641 User manual

Craftsman 247.77640 User manual

Craftsman

Craftsman 247.77640 User manual

Craftsman 486.24540 User manual

Craftsman

Craftsman 486.24540 User manual

Craftsman 247.776411 User manual

Craftsman

Craftsman 247.776411 User manual

Craftsman 247.794510 User manual

Craftsman

Craftsman 247.794510 User manual

Craftsman 247.77466.1 User manual

Craftsman

Craftsman 247.77466.1 User manual

Craftsman 247.774500 User manual

Craftsman

Craftsman 247.774500 User manual

Craftsman 247.776411 User manual

Craftsman

Craftsman 247.776411 User manual

Craftsman 675 Series 247.77640 User manual

Craftsman

Craftsman 675 Series 247.77640 User manual

Craftsman 247.794500 User manual

Craftsman

Craftsman 247.794500 User manual

Craftsman 675 Series User manual

Craftsman

Craftsman 675 Series User manual

Craftsman 675 Series User manual

Craftsman

Craftsman 675 Series User manual

Craftsman 247.79452 User manual

Craftsman

Craftsman 247.79452 User manual

Craftsman 675 Series User manual

Craftsman

Craftsman 675 Series User manual

Craftsman 247.77640 User manual

Craftsman

Craftsman 247.77640 User manual

Craftsman 24BF570L099 User manual

Craftsman

Craftsman 24BF570L099 User manual

Popular Log Splitter manuals by other brands

Swisher LSRH4422 owner's manual

Swisher

Swisher LSRH4422 owner's manual

Iron & Oak BHVH2216GX owner's manual

Iron & Oak

Iron & Oak BHVH2216GX owner's manual

DR K10 RAPIDFIRE operating instructions

DR

DR K10 RAPIDFIRE operating instructions

Swisher L111-283044 owner's manual

Swisher

Swisher L111-283044 owner's manual

Swisher LS622 owner's manual

Swisher

Swisher LS622 owner's manual

Toolland VL4001 user manual

Toolland

Toolland VL4001 user manual

Oxdale se400 Operating and maintenance instructions

Oxdale

Oxdale se400 Operating and maintenance instructions

Wallenstein WX900 Series Operator's manual

Wallenstein

Wallenstein WX900 Series Operator's manual

Powersmart PS90 instruction manual

Powersmart

Powersmart PS90 instruction manual

Z.I.P.P.ER MASCHINEN ZI-HS14TN user manual

Z.I.P.P.ER MASCHINEN

Z.I.P.P.ER MASCHINEN ZI-HS14TN user manual

Bluebird LSE 7000 Operator's manual

Bluebird

Bluebird LSE 7000 Operator's manual

Hudson HDH-1 Operator's manual

Hudson

Hudson HDH-1 Operator's manual

Welbilt 1188 owner's manual

Welbilt

Welbilt 1188 owner's manual

RADLEY WS5T owner's manual

RADLEY

RADLEY WS5T owner's manual

DETAIL K2 OPS240 user manual

DETAIL K2

DETAIL K2 OPS240 user manual

Powerhorse M1169H owner's manual

Powerhorse

Powerhorse M1169H owner's manual

GÜDE GHS 530 / 8 TED Translation of the original instructions

GÜDE

GÜDE GHS 530 / 8 TED Translation of the original instructions

King Canada KC-6LS instruction manual

King Canada

King Canada KC-6LS instruction manual

manuals.online logo
manuals.online logoBrands
  • About & Mission
  • Contact us
  • Privacy Policy
  • Terms and Conditions

Copyright 2025 Manuals.Online. All Rights Reserved.