manuals.online logo
Brands
  1. Home
  2. •
  3. Brands
  4. •
  5. Craftsman
  6. •
  7. Log Splitter
  8. •
  9. Craftsman 247.794520 User manual

Craftsman 247.794520 User manual

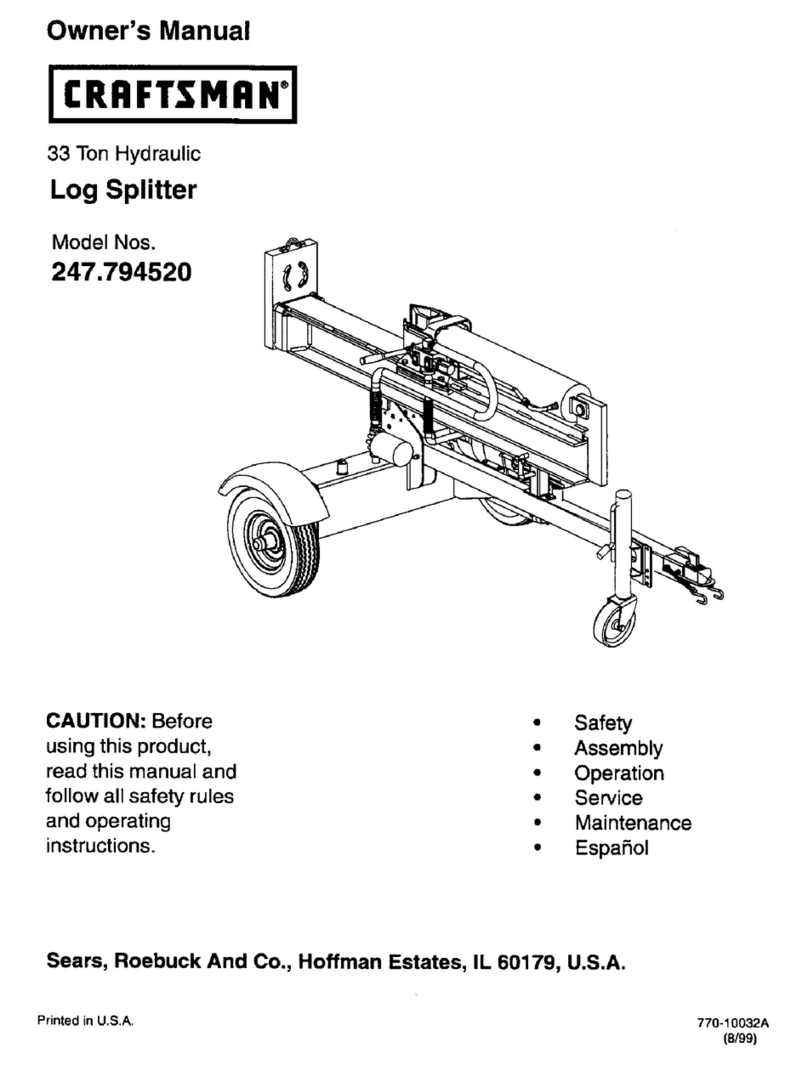
Owner's Manual
CRRFTSMRN°
33 Ton Hydraulic
Log Splitter
Model Nos'
247.794520
CAUTION: Before using this product,
read this manual and follow all Safety
Rules and Operating Instructions.
Sears, Roebuck And Co., Hoffman Estates, IL 60179, U.S.A.
Printed in U.S.A. 770-10032
(9/98)
Content Page
Warranty Information ......................................... 2
Safe Operation Practices................................... 3
Accessories....................................................... 6
Assembly........................................................... 7
Operation........................................................... 9
Maintenance ...................................................... 13
Content Page
Service & Adjustment ........................................ 15
Off-Season Storage........................................... 17
Trouble-Shooting ............................................... 18
Parts Ust............................................................ 20
Spanish version............................................... .. 27
ONE-YEAR WARRANTY ON CRAFTSMAN LOG SPLI'I-I'ER
For one year from the date of purchase, when this Craftsman logsplitter is maintained, lubricated, and tuned up
according to the operating and maintenance instructionsin the operator's manual, Sears will repair, free of
charge, any defect in material orworkmanship.
This warranty excludesthe tires, spark plug, oilfilter and air cleaner, which are expendable parts and become
worn during normal use.
If this log splitter is used for commercial or rentalpurposes, this warranty applies for only 30 days from the date
of purchase.
Warranty service is available by contactingthe nearest Sears service center in the United States. This warranty
applies only while this product is in use in the United States.
This warranty givesyou specific legal rights, and you may also have other rights which vary from state to state.
Sears, Roebuck And Co., DEPT. 817WA, Hoffman Estates, IL 60179
Horsepower: ............ :_........... 9
Engine Oil.............................. SAE 30/26 ounces
Fuel Capacity: ....................... unleeded/1 gallon
Hydraulic Fluid ...................... Daxron III/7 gallons
Tire Pressure......................... 30 p.s.i, max.
'Spark Piug(Gap .030").......... Champion RJ19LM
Model Number...247.79452..0. ...................................
Sedal Number ...........................................................
Date of Purchase ......................................................
Record model number, serial number and date of
purchase of the log splitter and keep in asafe place
for futura reference.
2
This symbol points out important safety instructions which, if not followed, could endanger the per-
sonal safety and/or property of yourself and others. Read and follow all instructions in this manual before
attempting to operate your log splitter. Failure to comply with these instructions may result in personal injury.
When you see this symbol--heed its warning. !
I_lb Yourlogsplitterwas builtto be operatedaccording to the rules for safe operation In this I
I
DANGER: manual. As withanytypeof powerequipment, carelessnessorerror onthe partoftheoper-
injury to yourself or others.
atorcan resultinserious njury.Ifyou vio ate any of these ru es, you may cause eer ous
i_ The engine exhaust from this product contains chemicals known to the state of California to cause
cancer, birthdefectsor other reproductiveharm.
Towing
• This unitshouldnotbe towed on anystreet,
highway or publicroad withoutcheckingthe
existingfederal, local or state requirements.
Such informationmay be obtained bycallingyour
state or localbureau of motorvehicles.Any
licensingor modificationsneeded tocomplywith
federal, localor state vehicle requirements isthe
sole responsibilityofthe purchaser.*
•Make sure you followthe wiringdiagram color
codes when installingthe lightkit on the log
splitter.(e.g. groundtoground, leftturnto left
turn, etc.). Failuretowire unitcorrectlymay
cause the towvehicle wiringto overheat and/or
the logsplitterlightstooperate incorrectly.Itmay
be necessary to replacethe turnsignalflasher
unitinyourtowvehicle if itisnot capable of
operatingthe additionallightson the logsplitter.
•Beforetowingthe logsplitteron a street, highway
or publicroad, vedfythat all lightsarefunctioning
properlyand the yellowside reflectorsare in
position.Replace bulbsifthey are burntout.
• Before towing, alwayscheck tobe certainthe log
splitteriscorrectlyand securely attached to the
tow vehicle, and safety chainsare inplace.
Leave slack inchains for turning allowance.
•Use a class Ior higherhitchwith a 1-7/8' ball.
Keep ballsocketand clamp face lubricatedwith
chassisgrease.
•Be sure the coupleris securedtothe hitchball
and the lock lever isdowntightand locked.
•Checkvehicle hitch, balland couplerfor signsof
wear ordamage. Replace anypartsthat are worn
or damaged beforetowing.
•The coupler mustbe securedto the logsplitter
tonguetube with theoriginalequipmentboltsand
nuts. See yourauthorizedservice dealerfor
replacement parts.Coupler nutsshouldbe
tightenedsecurely (20 foot pounds).
•Make sure beam assembly is securelylatched in
the horizontal positionandjack stand(ifprovided)
is pivoted and secured Inthe up positionbefore
towing log splitter. Never tow withthe beam in
vertical position.
•Do not towthe logsplitterfaster than 45 MPH.
Higher speeds may damage logsplitter.
Excessive highspeeds may causethe logsplitter
to "fishtail" or otherwise become unstable.
•Check the tire pressure onthe logsplittertires. It
should not exceed 30 p.s.i,for highwaytravel.
•When parking, storingor usingyour log splitter,
keep the coupleroffthe groundsodirtwillnot
buildup inthe ballsocket.
•Do not allow anyone to sitor rideon yourlog
splitter. They can easily fall off and be seriously
injured.
Training
•Before operating this logsplitter, read and
understand this operator's manual completely.
Become familiar with it for your own safety.To fail
to do so may cause serious injury. Do not allow
anyone to operate your logsplitter who has not
read this manual. Keep this manual in a safe
place for future and regular reference and for
ordering replacement parts.
•Never useyour splitterfor anyotherpurposethan
splittingwood. It isdesignedfor this useand any
other use may cause an injury.Your logsplitteris
a precision piece of powerequipment, nota toy.
Therefore, exemise extreme cautionat all times.
•Never allow children tooperate your logsplitter.
Do not allow adults to operate it withoutproper
instruction. Only persons well acquainted with
these rulesofsafe operation shouldbe allowedto
use your logsplitter.
Only the operator isto be near yourlogsplitter
during use. Keep all others, includingpetsand
children, aminimum of20 feet away fromyour
work zone. Flyingwood can be hazardous. Ifa
helper isassisting in loading logs, neveractivate
thecontroluntilthehelperisclearofthearea.
Moreaccidents occurwhen more than one
person operates the logsplitterthan at any other
time.
No one shouldoperate this unitwhile intoxicated
or whiletaking medication that impairs the
senses or reactions. A clear mind isessentialfor
safety. Never allow a person who istired or
otherwise not alert to useyour logsplitter.
Preparation
•Never wear looseclothingor jewelry that can be
caught by moving parts ofyour logsplitter and
pullyou into it. Keep clothing away from all
movingpads of your logsplitter.
• Wear proper head gear to keep hairaway from
moving parts. Always wear protective hearing
devices as needed.
•Always wear safety shoes. A dropped logcan
seriouslyinjureyour foot.
•Always wear safety glasses or goggles while
operating your splitter.A piece ofsplittinglog
couldfly offand hit youreyes.
•Wear leather work gloves. Be sure they are tight
fittingwithout loosecuffs ordraw strings.
•Use your logsplitter indaylight, or under good
artificiallight.
•Never operate your splitteron slippery, wet,
muddyor icysurfaces. Safe footingis essential
in preventing accidents.
•Never operate your splitterwhile attached toa
towingvehicle.
Onlyoperate your splitteron level ground and
not onthe side ofa hill. Itcould tip,or rollinglogs
or poor footingcould cause an accident.
Operating the splitter on level ground also
prevents the spillage ofgasoline from the fuel
tank.
Never attempt to move the logsplitter over hilly
or uneven terrain without a towvehicle or
adequate help.
•Always blockthe wheels to prevent movement
of logsplitterwhile in operation.
•Check the fuel before startingthe engine.
Gasoline is an extremely flammable fuel. Do not
fillthe gasolinetank indoors,when the engine is
running, or while the engine is stillhot. Replace
gasoline cap securely and wipe off any spilled
gasoline before startingthe engine as itmay
cause a fire or explosion.
Bothends of each log mustbe cut as square as
possibletohelp preventthe logfrom ridingoutof
the splitterduring operation.
Operation
Vertical Operating Position: Stand infrontof
the logsplitter.
Horizontal Operating Position: Stand behind
the reservoirtank. See illustrations.
• Know how tostop theunitand disengage the
controls.
•Never place handsor feet between logand
splittingwedge or between logand end plate
dudngforward or reverse stroke.To do so may
resultincrushed oramputatedfingers or toes, or
worse,you may losean armor foot.
•Do not straddlethe splitterwhen usingit.A slip
in any positioncould resultin a serious injury.
•Do notstep over yourlogsplitterwhen the
engine is running.You may tripor accidentally
activatethe splittingwedge ifyou stepover. If
you need to get totheotherside, walk around.
•Never tryto splittwo logsontop ofeach other.
One may fly out and injureyou.
•When loadingthe logsplitter,place yourhands
on the side ofthe log, notat the ends. Never
attemptto loadyoursplitterwhile thesplitting
wedge isin motion.You may get caughtbythe
wedge and injured.
•Only useyour handtooperate the splitting
wedge or controllever.Never use yourfoot or a
ropeor any other extensiondevice. Thiscould
resultinyour inabilitytostopyoursplitterquickly
enoughto avoid injury.
•Always keep fingers away from any cracksthat
open inthe log duringsplittingoperation.They
can quicklyclose and pinchor amputate your
fingers.
•Never attemptto splitwoods acrossthe grain.
Some types ofwood may burstor flyout ofyour
splitterand result ininjury toyou or abystander.
•For logsthat are not cutsquare, the longest
portionofthe logshouldbe rotateddownand
the most square end placed againstthe splitting
wedge.
•Keep your work area clean. Immediately
remove splitwood aroundyoursplittersothat
you do notstumble over it. Clean chipsand dirt
offend plate (wood platform)after each logis
split, orwhenever necessary tomaintainflat
contact between wood and end plate (platform).
•Never move the logsplitterwhilethe engine is
running.
•Never leave yourlogsplitterunattendedwiththe
engine running. Shut offthe engine ifyou are
leaving your splitter,even for a shortperiodof
time. Someone could accidentallyactivatethe
splittingwedge and be injured.
•Do not runengine Inan enclosed area. Exhaust
gases contain carbon monoxide.This ododess
gas can be deadly when inhaled.
•Be careful notto touchthe mufflerafterthe
engine has been running.Itwillbe HOT!
•If the equipment shouldstarttovibrate
abnormally, stop the engine and check
immediately for the cause. Vibration isgenerally
a warning oftrouble.
When cleaning, repairingor inspecting,make
certain all movingparts have stopped.
Disconnect the spark plugwire and keep the
wire away from the plugtoprevent accidental
starting.
Customer Responsibilities
•Do not operate your splitter inpoor mechanical
condition or when in need of repair.
• Periodically check that all nuts, bolts, screws,
hose clamps and hydraulic fittings are tight to be
sure equipment is in safe working condition.
Where appropriate, check all safety guards and
shields to be surethey are in the proper position.
Never operate your splitter with safety guards,
shields or other protective features removed.
These safety devices era for your protection.
• Replace all damaged or worn parts such as
hydraulic hoses and fittings immediately with
manufacturer approved replacement parts.
• Do not change the engine governor settings or
over_peed the engine. This increases the
hazard of personal injury. The maximum engine
speed is preset by the manufacturer and is
within safety limits.
• Do not alter your log splitter in any manner such
as attaching a rope or extensionto the control
lever or adding to the widthor height of the
wedge. Such alterations may cause your splitter
to be unsafe.
Performall recommendedmaintenance
procedures before you use yoursplitter.
Do not service or repairyour logsplitterwithout "
disconnectingthe spark plug wire and moving it
away from the spark plug.
Never storethe equipmentwith gasoline inthe
tank insideof a buildingwhere ignitionsources
are present, such as hotwater and space
heaters, clothesdryersand the like.Allowthe
engine to coolbefore stodngin any enclosure.
Always store gasolinein an approved, tightly
sealed container. Store the containerin a cool,
dry place. Do not store in abuildingwhere
ignitionsources are present.
To reducefire hazard, keep enginefree of grass,
leaves, woodchips, and excessive grease and
oil.
The hydraulicsystemofyourlogsplitterrequires
careful inspection,along withthe mechanical
parts. Be sure to replacefrayed, kinked, or
otherwise damaged hydrauliccomponents.
Fluidescaping from a vary small holecan be
almost invisible.Do notcheckfor leakswithyour
hand. Escapingfluid under pressure can have
sufficientforce to penetrate skin,causing
serious personalinjury.Leaks can be located by
passinga piece ofcardboard or woodover the
suspected leak and lookingfor discoloration.
Shoulditbecome necessary to loosenor
remove any hydraulicfitting or line, be sure to
relieveall pressure byshuttingoffthe engine
and movingthe controlhandle backand forth
several times.
Do not removethe capfrom thehydraulictankor
reservoirwhileyourlogsplitterisrunning.Hot oil
underpressure could cause injury.
The pressure reliefvalveon your splitteris
preset at the factory. Do not adjustthe valve.
Onlya qualifiedsentice technicianshould
performthisadjustment.
Completelydrain fuel tank priorto storage. This
guardsagainst accumulationoffuel fumes
whichcould resultin afire hazard.
Never store logsplitteroutside withouta
waterproofcover. Rainwillcause ruston the
insideofthe cylinder.
Important Information
Always:
•Useclean fluid and checkfluid level regularly
•Use Daxron III AutomaticTransmission Fluidor
10W non-foaminghydraulicfluid.
•Usea filter (clean or replace regularly)
Use a breather capon fluid reservoir
5
•Make certainpump ismounted and aligned
properly
• Use a flexible "spider" type couplingbetween
engine and pumpdriveshafts
•Keep hosesclear and unblocked
•Bleed airout of hosesbefore operating
•Flush and clean hydraulicsystem beforestart-
upafter any malfunctionor servicing
•Use "pipe dope" on all hydraulicfittings
•Allowtimefor warm-up beforesplittingwood
•Prime the pumpbefore initialstart-upbyturning
over the enginewith spark plugdisconnected
•Split wood withthe grain (lengthwise)only
Never:
•Use when fluid is below20° F, orabove 150°F.
•Use a solid engine/pump coupling
•Force pump when mounting
•Operate through reliefvalve for several seconds
•Attempt to adjust unloadingor reliefvalve
settings without pressure gauges
•Operate with air in hydraulic system
•Use Teflon tape on hydraulicfittings
Attempt to cutwood across the grain.
These accessodaswere available when the log
splitterwas purchased.These are also available at
mostSears retailoutlets,catalogand service centers.
Most Sears storescan orderrepair partsforyou when
you providethe model number ofyourlogsplitter.
Tailight Kit
IMPORTANT: This unitisshipped without gasoline
in the engine.After assembly, see OPERATION
section ofthis manual for properfuel fill-up.
Tools and Other Items Required
Crowbar or large screwdriver
A pair of 9/16' or adjustable wrenches*
Screwdriver
Cutters
Engine oil
Unleaded gasoline
Dexron III automatic transmission fluid or 10W non-
foaming hydraulicfluid (approximately 7 gallons)
Unpacking from Crate
WARNING: Exercise extreme caution as
parts are very heavy. Mechanical handling
equipment or sufficient manpower should
be used to prevent injury.
• Prythe top, sides and ends off crate usinga
crowbar or large screwdriver.
•Set panels aside toavoid tire puncturesor
personalinjury.
•Remove and discard plastic bag that covers
unit.
Note: Do not remove thebanding from around the
tankuntil thelogsplitter isassembled.
Disconnecting Spark Plug
•Beforeyou startthe assembly procedure,
disconnectthe spark plug wire fromthe spark
plugonthe logsplitterengine and movethe wire
away from the spark plug.This witlprevent
accidentalstarting. See Figure 1.
Disconnect spark
plug
Remove the twobolts, lockwashers and hex
nuts that Securethetongue assembly tothe
beam assembly. See Figure2. II
Unlockthe two beam locksbypullingouton the i
beam locks and pivotingthem down. Remove
the tongue assembly.
Itl ,ongue
Lock Washers
and Hex Nuts
Figure 2
Place the end ofthe tongue assembly in
between the brackets on the wheel and the
reservoirtank assembly. Secure with hardware
removed earlier. See Figure 3.
Bracket
Tongue
Assembly
Hex
Botts
Figure 1
Setting Up Log Splitter
NOTE: Allhardware needed for assemblingyour
Craftsmanlogsplitter has been placed in position on
the equipment.
7
Lock
Figure 3
Pullspring leveroutward and rotate thejack
stand counter-clockwisetillit locksintothe
upright position. Release spring lever. See
Figure 4.
Spring
Lever Jack Stand
• Lowerthe beam assembly to itshorizontal
position.Make certain the beam islocked
securelywiththe horizontalbeam lock. See
Figure5.
•Pullthe logsplitteroffthe pallet.
Figure 4
•Cut the two straps from aroundthe reservoir
tank assembly.
• Remove the leg screw and washer which
secures the beam assembly tothebottomofthe
crate.
Final Assembly
Tire Pressure
The tires may have been over-inflated for shipping
purposes.
•Check tire pressure regularly.The tire pressure
shouldnot exceed 30 p.s.L
Preparing Log Splitter
•Place the logsplitteron afirm, levelsurface.
•Lubricatethe beam area where the splitting
wedge willslidewith engine oil (do not use
grease). Make certain tooil bothfront and back
ofthe beam face.
•Fillthe reservoirwith hydraulicfluid following
instructionson page 10.
•Check engine oillevel and refill,if necessary.
Followinstructionsfor oilfill-upon page 10.
inthisdirection
Horizontal-
" Beam Lock
Beam
Assembly
Figure 5
Know Your Log Splitter "
Read this owner's manual and safety rulesbeforeoperating your logsplitter.Compare the
illustrationson this pagewithyourequipmenttofamiliarize yourselfwiththe locationof
various controlsand adjustments.Save this manual for future reference.
The operation ofany logsplittercan resultin foreignobjectsbeing thrownintothe eyes,
whichcan resultin severeeye damage. Always wear safety glasses, foroperating your
logsplitter,or whileperforminganyadjustments or repairs on it.
End
Splitting
Beam kedg e
Beam
Lock
Beam
Lock
Reservoir
Tank Jack Stand
Fuel Cap
Rlter Starter
Handle
Figure 6
MEETS ANSI SAFETY REQUIREMENTS
Sears log splitters conformto the safety standards B71.7-1985 ofthe Amedcan National Standards institute.
9
OPERATING CONTROLS
(See Figure 6.)
WARNING: Before usingyourlogsplitter,
again refertothe safety rules on pages 3-6
of thismanual. Always be careful.
Do not operate the !ogsplitterwithoutthe
properamount ofhydraulicoilinthe
reservoirtank. Failure to refillthe tankwill
void yourwarranty.
Beam Locks
Locatedon thetongue and reservoirtankassemblies,
these are usedto securethe beam inthe horizontalor
the verticalposition.
Choke Lever
Used to enrichthefuel mixtureinthe carburetorwhen
startinga coldengine.
Starter Handle
Used to manuallystartthe engine.
Throttle Control
Permitsselection offast orslow engine speed.
Control Handle
The controlhandlehasthreepositions.See Figure7.
it wood
Control I
Handle Forward
Figure 7
Move controlhandle FORWARD or DOWN to
splitwood.
NOTE: Controlhandle willreturn toneutral position
fromforwardposition as soon as handle is released.
•Release the controlhandle to stopthe wedge
movement.
•Move controlhandle BACK or UP toreturn the
wedge.
Before Starting
Oil Fill-Up
•Only use highqualitydetergent oilrated with
API service classificationSF, SG or SH. Select
the oil's viscositygrade accordingtothe
expected operating temperature. Followthe
chart below.
Colder _1_ 40°F Warmer
__ I
5W30 I SAE 30
NOTE: Although multi-viscosityoils(5W30, 10W30,
etc.) improve starting in coldweather, these
multiviscosity oilswill resultinincreased oil
consumption when used above 40°F. Check the oil
level more frequentlyto avoidpossible engine
damage fromrunninglow on oil.
AWARNING: SAE 30 oil, if used below40°F,
willresultin hardstartingand possible
engine bore damage due toinadequate
lubrication.
NOTE: Iftheunitwasshippedwithoilintheengine,
check the oillevel and refillifnecessary.
Fill engine with theappropriate oilas follows:
•Remove oilfilldipstick.
•With logsplitteron level ground,use a funnelto
fill engine oilto FULL markon dipstick.Capacity
isapproximately 26 ounces. Becareful notto
overfill.
Replace the dipstickon tothe engine and
tighten. Then remove the dipstickagain and
wipe offthe oilfromthe end ofthe dipstickwitha
clean cloth.
•Screw the dipstickfirmlybackto place. Remove
to check the oillevel.
Refill oilto FULL mark ondipstickif necessary.
Replace dipstickand tighten.
Gasoline Fill-Up
Remove fuel cap. See Figure 6.
Make certainthe gasolinecontainerisclean and
free from rustor foreign particles.Never use
gasolinethat may be stalefrom long periodsof
storage inthe container.
Fill fuel tank withabout one gallonof clean,
fresh, lead-free grade automotive gasoline. DO
NOT use Ethylor highoctane gasoline.
Replace fuel cap.
WARNING: Do notfillcloserthan 1/2 inchof
top offuel tank to preventspillsand to allow
for fuel expansion. Ifgasoline is accidently
spilled,move logsplitteraway from area of
spill.Avoid creating any source of ignition
untilgasolinevapors have disappeared.
Reservoir Fill-Up
Remove reservoirvent plug. See Figure 8.
Fill the reservoirtank to about 2"from thetop
with 7 gallons ofDexron III automatic
transmission fluid,or 10W non-foaming
hydraulicfluid. Replace vent plugsecurely.
10
•Make sure the spark plugwire is disconnected.
Pdme the pump by pullingthe recoilstarter as
far as it willgo. Repeat approximately 10 times.
•Reconnect the spark plug wire and startengine.
•Use the controlhandle to engage the wedge to
the far extended position.Refer to Figure 7.
•Retract the wedge.
•Filltank towithin 1-1/2" to 2"from the top ofthe
tank.
Fillhydraulic
fluidhere
Reservoir
Tank
BseervYen, 9
Plug Figure 8
•Extend and retract the wedge 12 complete
cycles to remove trapped air inthe system
(system is"self-bleeding").
•Refill the reservoirtowithin 1-1/2" to2" fromthe
top ofthe tank. Much ofthe originalfluid has
been drawn intothe cylinderand hoses. Make
certain to refillthe reservoirto prevent extreme
damage to the hydraulicpump.
NOTE: Some fluidmay overflow fromthe ventplug as
the system buildsheat and the fluidexpands and
seeks a balanced level.
•Move control handle BACK or UP to return the
wedge. See Figure 7.
Starting Engine
Attach spark plugwire and rubber bootto spark
plug. See Figure 9.
•Place the throttle control lever in FAST position.
See Figure 6 and Figure 9.
•Move choke lever to FULL CHOKE position.
Attachspark
•Grasp starter handle and pullrope outslowly
untilengine reaches startof compressioncycle
(ropewillpullslightlyharder at thispoint).Letthe
roperewind slowly.
•Pullropewith a rapid,continuous, fullarm
stroke. Keep a firmgrip on starter handle. Let
roperewind slowly.Do notlet starter handle
snap backagainst starter.
•Repeat precedingtwo instructionsuntilengine
fires.When engine starts, move choke lever on
engine halfwayto Halt Choke positionand then
graduallyto No Choke position.
•Ifengine falters,move choke leverto Half Choke
until engine runssmoothlyand then move itto
No Choke position.
•Runwedge up and down beam 6 to 8 timesto
circulatethe hydraulicfluid,whichwillwarm and
thinthefluid.
Stopping Engine
•Move throttlecontrollever to STOP position.
•Disconnectspark plugwire and moveaway from
spark plugto preventaccidental startingwhile
equipment isunattended.
Raising and Lowering Beam
•Place logsplitteron a firm, level surface.To
raisethe beam forverticaloperation, pulloutthe
beam lockon thetongue and pivotitdownto
release the beam.
•Move the beamtothe verticalposition. Secure it
withthe beam lockon the reservoirtank
assembly. See Figure10.
Ve_ica!
Beam
Lock
_Raise beam assembly
in this direction
Movechoke
Movethrottle rope /
controltoFAST
Figure 9 Figure 10
Lock
11
• Tolowerthebeam,pulloutthebeamlockonthe
reservoir tank and pivotitdownto release the
beam. Carefullypullbackon beam and lower it
tothe horizontalposition.See Figure10.
•PUlloutthe beam lockonthe tongue,pivotit
upwards and release itto holdthe beam. Make
certain itislatchedsecurely.
WARNING: Alwaysusethe logsplitterinthe
vertical position onlywhen splitting heavy
logs.
Transporting the Log Splitter
•Lowerthe beam to itshorizontalposition. Make
certainthe beam islockedsecurelywiththe
horizontalbeam lock.
•Raise or lowerjack standto attachthe hitchto a
towingvehicle. Make certainto latch securely.
•Pullspringleveron jackstand outwardand
rotatethejack stand clockwisetillit isparallel
with thetongue assembly. Release thespring
leverafter it locksintoposition.
•Attachthe safety chainsto thetowingvehicle.
Operating Position
Vertical
•Forvertical operation,pullout the horizontal
beam lockand pivotitdownto release the
beam. Pivotthe beamto theverticalposition.
•Lockthe beam inthe verticalposition,bypulling
out onthe verticalbeam lockand pivotingitto
the left.
•Stand infrontofthe logsplitter.Operate the .
controlhandle withyourrighthandand stabilize
the log, if necessary, withyourlefthand. See
Figure11.
Figure 11
Horizontal
•For horizontaloperation,pullout thevertical
beam lock and pivotitdown. Pivotthebeam to
the horizontalposition.
•Lockthe beam inthe horizontalposition,by
pullingout on the horizontalbeam lockand
pivotingitupwards. Refer to Figure5 forlocation
of beam locks.
•Stand behindthe reservoirtank. See Figure12.
Operate the controlhandlewithyour righthand
and stabilizethe log, ifnecessary,withyour left
hand.
•Attach spark plug wireto the sparkplug.
L
Figure 12
Before Each Use
•Remove the vent plug and checkhydraulicfluid
level. Refill ifnecessary.
•Check engine oillevel. Refill ifnecessary.
Fillup gasoline if necessary.
•Lubricate withengine oilthe beam area where
splittingwedge willslide. Do notusegrease to
lubricate. Make sure to lubricateboththefront
and the backofthe beam face.
Operating the Log Splitter
WARNING: Wear leather workgloves,
safety shoes and safety glassestooperate
the logsplitter.Watch yourfooting during
operation and while handlingthelog.
• Place the logsplitteron a dry,firm,levelsurface.
•Blockthe frontand back ofthewheels when
operating (and when storing) topreventitfrom
movingor rollingaway.
•Lock in eitherthe horizontalor thevertical
position.
•Set the engine throttle at maximum speed.
•Place the log againstthe end plate.Only split
wood inthe directionofthe grain.
•Stabilizethe logon its sides, never onthe end
between the logandthe splittingwedge.
•Only one adult should stabilize the log and
operate the control handle so thattheoperator
hasfullcontroloverthe log and the wedge.
AWARNING: Ifthe hydraulicfluid becomes
very hot at any time duringthe operation,
stop the unitand allow the fluid to cool
down. Otherwise the performanceofyour
logsplitterwillbe affected.
12
"6
,-z
"O
O
O.
G)
t-
=m
LLI
Maintenance Schedule:ooOi,ooo/U
Check reservoirfluid
Change hydraulicfluid
Change hydraulicfilter
Lubricate beam and wedge
Check engine oil V /
Change engine oil _
Service aircleaner foam filter
servicedateshere
l
Service aircleaner paper filter
Clean engine
Service spark plug
Remove combustion deposits
Service muffler '_
General Recommendations
• Always observe safety ruleswhen performing
any maintenance.
•The warranty on this logsplitterdoes not cover
itemsthat have been subjected tooperator
abuse or negligence. To receive fullvalue from
the warranty, operatormust maintainthe log
splitter as instructedinthis manual.
•Some adjustments willneed tobe made
periodicallyto maintain your unitproperly.
•All adjustments inthe Service and Adjustments
sectionofthis manual shouldbe checked at least
once each season.
•Followthe maintenance schedule givenbelow.
•Periodicallycheck all fasteners and make sure
these-are tight.
4_ WARNING: Always stopthe engine and
disconnect spark plug wire beforeperform-
ing any maintenance or adjustments.
Hydraulic Fluid
•Check the hydraulicfluid level inthe logsplitter
reservoirtank before each use. Fluidlevelshould
be 1.5"to 2" fromthe top ofthetank (seven
gallonsapproximately).
•Change the hydraulicfluid inthe reservoirevery
100 hoursofoperation. Disconnectthe suction
hosefrom the bottomofthe reservoirtank, and
drainthefluid intoa suitablecontainer. Refill
usingonly Dexmn IIIautomatictransmissionfluid
or 10W non-foaminghydraulicfluid. Also, make
sureto changethe hydraulicfilter.
NOTE: Drain thefluidand flushthereservoirtank and
hoses with kerosene whenever any repair work is
performed on the tank, hydraulicpump or valve.
Contaminantsin thefluidwill damage thehydraulic
components.Any repair tothe hydrauliccomponents
shouldbeperformedby Sears service center.
Hydraulic Filter
Change thehydraulicfilterevery50 hoursof
operation.Use onlya10 micronhydrsulicfilter.
Beam And Splitting Wedge
•Lubricatebeth sidesofthe beam (where it
contactsthe splittingwedge) withengine oil
beforeeach use.
13
However,normalwearwilloccur.Pedodicallyadjust
theboltsonthesideofthewedgeplateasfollowsto
eliminateexcessspacebetweenthewedgeplateand
thebeam.
•Loosenthelock nutson the twoadjustment
boltsonthe side ofthe gibplate, located
beneath thesplittingwedge. See Figure13.
Turn the adjustmentboltsin untilsnug, then
backthem offslowly untilthewedge assembly
willslideon thebeam.
•Tightenthe locknutssecurelyagainst the gib
plateto holdthe adjustment bolts inthis position.
Hex Bolt
WedgePlate
Ad't
Figure 13
Periodicallyremove and replacethe "gibs" (spacers)
between the wedge plate and the back plate as
follows.
NOTE: If desired,thegibsmay be rotatedand/or
turnedover for even wear.
•Remove the center boltontop ofthe wedge
plate.Slidethe gibplate out.See Figure 13.
•Remove and replacethe gibs. Reassemblethe
gibplate,makingcertainflat washer isin place
abovethe gib plate.
•Readjustthe boltsonthe side ofthe wedge
plate as instructedpreviously.
Engine Maintenance
Changing engine oil
•Only use highqualitydetergent oilratedwith
API service classificationSF, SG or SH. Select
theoil'sviscositygrade accordingtothe
expected operatingtemperature. Refer to
page 10 ofthis manualfor viscositychart.
• Stop engine and waitseveral minutesbefore
checkingoillevel.With engine on level ground,
theoil mustbe to FULL mark on dipstick.
•Change engine oilafterthefirstfive hoursof
operation,and every50 hoursthereafter.
Change oilevery 25 hours ofoperationifthe
engine isoperated under heavyload, or in high
ambienttemperatures.
14
To drain oli
Drain oilwhile engine iswarm. Followthe instructions
given below.
•Remove oildrain plugand dipstick.Catchoilin a
suitable container.
•When engine isdrained of alloil, replacedrain
plug securely.
•Refillwith fresh oil. Refer to GAS AND OIL FILL-
UP section ofthis manual.
•Replace dipstick.
Air Cleaner
The air cleaner prevents damaging dirt, dust,etc.,
from enteringthe carburetor and being fomed intothe
engine and isimpodant to engine lifeand
performance. The air cleaner consists ofa pre-
cleaner or foam filter, and a paper filter.
Never run the engine withoutair cleanercompletely
assembled.
1. Service pre-cleaner after every 25 hoursof use,
or at least once aseason.
2. Service filter every 100 hoursofuse, or at least
once a season.
3. Service pre-cleaner and filter more often under
dusty conditions.
•Remove wing nut and cover.
•Slide pre-cleaner offfilter. Clean the insideof
base and cover thoroughly.
•Clean pre-cleaner as follows: (See Figure 14.)
a. Wash in water and detergent solution,and
squeeze (donottwist)untilandirfisremoved.
b. Rinsethoroughly in clear water. Wrap in a
clean clothand squeeze (do nottwist) until
completely dry, or allow if toair dry.
c. Saturate with engineoiland squeeze (don't
twist) to distributeoiland removeexcessoil.
°mt3wiu
_Base -- Paper Filter --Cover
Figure 14
NOTE: Ifthe pre-cleaner istom or damaged in any
way, replace it.
•If necessary, replace paperfilter (do not attempt
to clean). Install newfilter on base.
•Slide pre-cleaner over filter.
•Install cover and wingnut.
Tighten wing nut securely.
Cleanengine
Cleanengineperiodically.Removedirtand
debdswithaclothorbrush.Cleaning with a
forcefulspray of water isnet recommended as
water couldcontaminate the fuel system.
Frequently remove grass clippings,dirtand
debds from coolingfins, air intake screen and
levers and linkages. See Figure 15.This will
ensure adequate cooling and correct engine
speed.
operation. See Figure16. Spark plug
replacement isrecommendedatthe startof
each season. Refer toengine parts listfor
correctspark plugtype.
NOTE: Do notsandblast sparkplug. Sparkplug
should be cleaned by scrapingor wirebrushingand
washing witha commercialsolvent.
.030" Feeler Gauge
€Plug
CoolingFind Figure 15
Spark Plug
•Clean spark plug and resetthe gap to .030" at
least once a season or every 50 hoursof
Muffler
A
Figure 16
WARNING: Do notoperate the logsplitter
without amuffler, or tamper withthe
exhaust system.Damaged mufflersor spark
arresterscould createa firehazard.
Tires
WARNING: Always stop engine,
disconnect spark plug wire, and move it
away from spark plug before performingany
adjustments or repairs.
See sidewall oftirefor recommended pressure.
Maximumtire pressure under any
cimumstances is30 p.s.i. Equal tire pressure
shouldbe maintainedon alltires.
WARNING: Excessive pressure (over 30
p.s.i.) when seating beads may cause tire/
rim assemblyto burstwith force sufficientto
cause serious injury.
Carburetor
Ifyouthinkthe carburetor on your logsplitterengine
needs to be adjusted, contact Sears service center.
Engineperformance may be affected in altitudes
above 4,000 feet. To improve engine performance,
install a High AltitudeAdjustmentKitwhich is
available at any authorizedTecumseh serviceoutlet.
Engine Speed
The engine speed on yourlogsplitterhas been set at
the factory. Do notattemptto increaseengine speed
or it may resultin personalinjury. Ifyou believethe
engine is runningtoo fast or too slow,take the
equipment to the nearest Sears servicecenter for
repair and adjustment.
Important: Changing ofengine governedspeed will
void engine warranty.
Flexible Pump Coupling
The flexible pumpcouplinghasa "spider" whichisa
nylon insert locatedbetween the pumpand engine
shaft. Over a periodoftime, this insertwillharden and
deteriorate. Replace the spiderinsertand/or the
couplinghalves ifyou detectvibrationor noisecoming
from the area between theengine andthe pump. Ifthe
15
spiderfailscompletely,youwillexperience a lossof
power.
_lb ARNING: Never hitthe engine shaftin
any manner, as a blowwillcause permanent
damage tothe engine orthe pump.
Followthe instructionscarefullyas the alignmentof
the couplingsis critical.
•Disconnect the spark plugwire fromthespark
plug, and keep itaway from the sparkplug.
•Using a 112inchwrench, removethree nuts and
lookwashers whichsecure the pumptothe
couplingshield.Two nuts are at the bottom
comers and one isinthe top center.See Figure
17. Remove the pump.
•Remove the nylonspider insertfrom the
couplingand inspectfor wear. Replaceif
necessary.
• Inspect the engine couplinghalfjawsfor signsof
wear. Replace if necessary.
Coupling Shield Rear Coupling
Support Bracket
Lock
Washer
Hex
Coupling lo
Half ck
Washer
Figure 17
•To replace engine coupling half: Rotatethe
engine bypullingstarter handle untilengine
coupling half set screw isat bottom.Loosen set
screw using 1/8 inchallenwrench. Slide
couplinghalf offengine shaft.See Figure17.
•install new couplinghalf onengine shaftmaking
sure to align key way incoupling halfwithkey in
the engine shaft.
• Slide coupler half along engine shaftuntil the
end of the shaft is flush withthe inner portion of
the coupling half. (There must be space
between end ofthe engine supportbracket and
the couplinghalf.)Apply LoctifeTM tothreads of
set screw and torqueto 78 inch-pounds.
Inspectthe pump couplinghalfjaws forsignsof
wear. Replace if necessary.
To replace pump coupling half: Loosenset
screw using1/8 inch allen wrench. Slide
coupling halfoffpumpshaft.
Install new couplinghalf on pump shaftmaking
sure to alignkey way in couplinghalfwith key in
pump shaft. Rotate couplinghalf untilset screw
faces down. Do not tightenset screw now.
Install newspider insertonto the engine
couplinghalf.
Alignpumpcouplinghalf with nylon"spider" by
rotatingengine using starter handle.
Slide couplinghalf intoplace whileguidingthree
mountingbolts through holesin pumpsupport
bracket.
Note: Thepump couplinghalf can be rotatedby hand
toaid inalignment, ff the twoparts are not aligned
dght, the unitwillnot operatepropedy and damage
couldoccur.
•Secure with nutsand washers removed earlier.
•Set .035 to .060 inchclearance between the
nylon=spider" and the engine couplinghalfby
slidingamatchboxcoverbetween the nylon
"spider" and the engine couplinghalf and
movingpumpcouplinghalf as needed. See
Figure18.
•Apply LoctiteTM tothreads of set screw. Tighten
set screwtotorque 78 inch-lbs.This should
securethe pump couplinghalf.
• Reattach sparkplug wire to spark plug.
PUMP
Set Screw
Nylon
Insert
Clearance
ENGINE
Figure 18
•Steel
Halves
16
Prepareyourlogsplitterforstorageattheendofthe
seasonorifthelogsplitterwillnotbeusedfor30days
ormore.
AWARNING: Never store machinewithfuel
in the fuel tank insideofbuildingwhere
fumes may reach an openflame orspark,or
where ignitionsources are presentsuch as
hotwater and space heaters, furnaces,
clothesdryers, stoves, electricmotors,etc.
NOTE: A yearly check-up byyour localSears service
center isa good way tomake certainyourlogsplitter
will provide maximum performance forthenext
season.
LOG SPLITTER
•Clean the logsplitterthoroughly.
•Wipe unitwRh an oiled ragto preventrust,
especially wedge and beam.
ENGINE
IMPORTANT: It is importantto preventgumdeposits
from forming in essential fuel system partssuchas
carburetor,fuel filter, fuel hose, ortank during
storage. Also, experience indicatesthat alcohol
blendedfuels (called gasoholor usingethanolor
methanol) can attract moisturewhichleads to
separation and formation of acidsduringstorage.
Acidic gascan damage the fuel systemof anengine
while in storage.
Drain the fuel tank.
Start the engine and letit rununtilthe fuel lines
and carburetor are empty.
Drain carburetor by pressingupward on bowl
drainwhich islocated belowthe carburetor.
•Never useengineor carburetorcleanerproducts
in the fueltank or permanent damage may
Occur.
•Usefresh fuel nextseason.
NOTE: Fuelstabilizaris an acceptable alternative in
minimizingtheformationoffuelgum depositsduring
storage.
•Addstabilizertogasoline infuel tank orstorage
container.
•Alwaysfollowthe mix ratiofound onstabilizer
container.
•Runengine at least 10 minutesafter adding
stabilizerto allowthe stabilizerto reachthe
carburetor.
•Do notdrainthe gastankand carburetorif using
fuel stabilizer.Drain allthe oilfrom the
crankcase (thisshouldbe done afterthe engine
hasbeen operated and isstillwarm) and refill
the crankcasewithfresh oil.
•Ifyou havedrained thefuel tank, protectthe
insideofthe engine as follows.
•Remove spark plug,pour approximately 112
ounce (approximatelyonetablespoon) ofengine
oil into cylinderand crank slowlyto distributeoil.
•Replacespark plug.
OTHER
•Do notstore gasolinefromone season to
another.
Replaceyourgasolinecan if itstartsto rust.
Rustand/ordirtinthe gasolinewillcause
problems.Store unitin a clean, dryarea. Do not
store nextto corrosivematerials, suchas
fertilizer.
NOTE: ffstoringinan unventilatedor metal storage
shed,be certaintorustprooftheequipmentby coating
witha lightoilorsilicone.
17
Problem Corrective Action
Cylinderrodwillnot move
Cylindershaftspeed slowwhile
extendingand retracting
Enginerunsbutwoodwillnotsplit,or
splitstooslowly
Engine stalls during splitting wood
Enginewillnotturnor staFIsunderlow
load
Leakingpumpshaftseal
Possible Cause
1. Brokenddva shaft.
2. Shippingplugs left in hydraulichoses,
3. Set screws in coupling not adjusted
properly.
4. Loose shaft coupling.
5. Gear sectionsdamaged.
6. Damaged reliefvalve.
7. Hydraulic lines blocked.
8. InsorrectoUlevel.
9. Damaged or blockeddirectional
valve.
1. Gear sections damaged.
2. Excessivepump inlet vacuum.
3. Slowengine speed.
4. Damaged relief valve.
5. Incorrectoil level.
I6. Contaminated oil.
7. Directionalvalve leaking internally.
8. Internallydamaged cylinder.
1. Small gear sectiondamaged.
2. Pump check valve leaking.
3. Excessive vacuum in pump inlet.
4. Incorrectoil level.
5. Contaminated oil.
6. Directionalvalve leaking internally.
7. Internallydamaged cylinder.
8. Overloaded cylinder.
1. Lowhomepower/weak engine.
2. Overloaded cylinder
1. Engine/pump misaligned.
2. Frozen orseized pump.
3. Weak engine.
4. Hydraulic lines blocked.
5. Blocked directionalvalve.
1. Brokendrive shaft.
2. Engine/pump miselignsd.
3. Gear sectionsdamaged.
4. Poody positionedshaft seal.
5. Oil breather plugged.
1. Return unitto Sears service center.
2. Disconnect hydraulic hose, remove
shipping plugs, and reconnect hose.
3. Refer to adjustment secfion ofthis
manual and adjust the oouplers
4. Correct engine/pump alignment.
5. Return unitto Sears service center.
6. Return unitto Sears service center.
7. Flush and clean hydraulicsystem.
I8. Check oil level. Refill ifnecessary.
9. Return unitto Sears servise osnter
1. Return unit toSears service center.
2. Make certain thatthe pump inlet
hoses are clear and unblocked. Use
short, large diameter inlet hoses.
3. Return unit toSears service center.
4. Return unit toSears service center.
5. Check oil level. Refill if necessary.
6. Drain oil,clean reservoir,refill,make
certain oil return tube is belowoil
level.
7. Return unitto Sears service center.
8. Return unitto Sears service center.
1. Return unittoSears service center.
2. Return unitto Sears servicecenter.
3. Make certain thatthe pumpinlet
hoses are clear and unblocked. Use
short, large diameter inlethoses.
4. Check oil level. Refill itnecessary.
5. Drainoil, clean reservoir, refill, make
certain oil return tube is belowoil
level.
6. Return unitto Sears service center.
7. Return unitto Sears service center.
8. Do notattempt tosplitwoodagainst
the grain.
1. Return unitto Sears servicecenter.
2. Do not attempt tosplitwood against
the grain. If engine stalls repeatedly,
contactSears servicecenter.
1. Correct alignment.
2. Return unitto Sears service center.
3. Return unitto Sears service center.
4. Flush and clean hydraulic system."
5. Return unitto Sears servicecenter
1. Return unitto Sears servicecenter.
2. Correct alignment.
3. Return unitto Sears service center.
4. Return unitto Sears service center.
5. Make certain reservoir isproperly
vented.
18
Trouble-Shooting Guide continued
Problem Possible Causes
Enginefailsto stad 1. Dirty air cleaner. 1.
Enginerunserratic,
Engineoverheats
Will not split logs
Leaking cylinder
2. Fuel tank empty, or stale fuel.
3. Choke not inON position.
4. BIcokedfuel line.
5. Spark plug wire disconnected.
6. Faulty spark plug.
1. Unitrunningonchoke.
2. Spark plugwire loose.
3. Blocked fuel line or stale fuel.
4. Dirty air cleaner.
5. Carburetor out of adjustment
1. Engineoil level low.
2. D)rtyair oleaner,
3. Carburetor out of adjustment.
4. Air flow restricted,
1. Reservoir fluid level low.
Correctlve Action
ServiceaircleanerfollowingInstruction,=
onpage 14ofthismanual.
2. Filltank with fresh fuel.
3. Move choke to ON.
4. Clean fuel line.
5. Connect spark plugwire to spark
plug.
6. Service spark plugfollowing
ir'.strucflonson page 15.
1. Move chokelevertoOFF position.
2. Connect and tighten spark plug wire,
3. Clean fuel line. Filltank with fresh
fuel.
4. Service aircleaner following
instructions on page 14.
5. Contact Sears servicecenter.
1.
2.
3.
4.
Fillcrankcasewithproperoil.
Service aircleaner following
instructionson page 14.
Contact Sears servicecenter.
Stop engine, disconnectspark plug
wire, move blower housing,and
clean.
1.
1.
2.
Refillwith Dexron III automatic
transmissionfluid.
1. Brokenseals. RetumunittoSearsservicecenter.
2. Scored cylinder Return unittoSears service center.
For repairs beyond the minoradjustments listedabove,
please contact your nearest SEARS service center.
19
Craftsman 9 H.P. Log Splitter Model 247.794520
35
43 42
44
20 8
46
38
1713 14
72
18
96
86
82 78
69
\81
82
2O

Other Craftsman Log Splitter manuals

Craftsman 675 Series User manual

Craftsman

Craftsman 675 Series User manual

Craftsman CMXGLAM1143200 User manual

Craftsman

Craftsman CMXGLAM1143200 User manual

Craftsman 247.77640 User manual

Craftsman

Craftsman 247.77640 User manual

Craftsman 486.2454 User manual

Craftsman

Craftsman 486.2454 User manual

Craftsman 675 Series 247.77640 User manual

Craftsman

Craftsman 675 Series 247.77640 User manual

Craftsman 247.77640 User manual

Craftsman

Craftsman 247.77640 User manual

Craftsman 486.24540 User manual

Craftsman

Craftsman 486.24540 User manual

Craftsman 675 Series User manual

Craftsman

Craftsman 675 Series User manual

Craftsman 247.77466.1 User manual

Craftsman

Craftsman 247.77466.1 User manual

Craftsman 247.794500 User manual

Craftsman

Craftsman 247.794500 User manual

Craftsman 247.774500 User manual

Craftsman

Craftsman 247.774500 User manual

Craftsman 247.77641 User manual

Craftsman

Craftsman 247.77641 User manual

Craftsman 247.77661 User manual

Craftsman

Craftsman 247.77661 User manual

Craftsman 675 Series User manual

Craftsman

Craftsman 675 Series User manual

Craftsman 247.77641 User manual

Craftsman

Craftsman 247.77641 User manual

Craftsman 247.77641 User manual

Craftsman

Craftsman 247.77641 User manual

Craftsman 247.287751 User manual

Craftsman

Craftsman 247.287751 User manual

Craftsman 247.77641 User manual

Craftsman

Craftsman 247.77641 User manual

Craftsman 247.28775 User manual

Craftsman

Craftsman 247.28775 User manual

Craftsman 247.776411 User manual

Craftsman

Craftsman 247.776411 User manual

Craftsman 247.776411 User manual

Craftsman

Craftsman 247.776411 User manual

Craftsman 675 Series User manual

Craftsman

Craftsman 675 Series User manual

Craftsman 247.77466.1 User manual

Craftsman

Craftsman 247.77466.1 User manual

Craftsman Craftsman 247.7764 User manual

Craftsman

Craftsman Craftsman 247.7764 User manual

Popular Log Splitter manuals by other brands

Iron & Oak BH2W2015GX owner's manual

Iron & Oak

Iron & Oak BH2W2015GX owner's manual

Powerhorse M1165E owner's manual

Powerhorse

Powerhorse M1165E owner's manual

MTD 24638B owner's guide

MTD

MTD 24638B owner's guide

PALDU 1100-12 operating instructions

PALDU

PALDU 1100-12 operating instructions

Powerhorse M117510C.1 owner's manual

Powerhorse

Powerhorse M117510C.1 owner's manual

Scheppach hs 800s Translation from the original instruction manual

Scheppach

Scheppach hs 800s Translation from the original instruction manual

POWER DOG QUICK SPLIT 24 owner's manual

POWER DOG

POWER DOG QUICK SPLIT 24 owner's manual

Swisher LS87528HP owner's manual

Swisher

Swisher LS87528HP owner's manual

The Handy THMLS Operator's manual and parts list

The Handy

The Handy THMLS Operator's manual and parts list

BGU USP 13-6 user manual

BGU

BGU USP 13-6 user manual

Greencut ASE12000 instruction manual

Greencut

Greencut ASE12000 instruction manual

SpeeCo 40100500 owner's manual

SpeeCo

SpeeCo 40100500 owner's manual

Logosol Smart-Line Smart-Splitter User instructions

Logosol

Logosol Smart-Line Smart-Splitter User instructions

Swisher L122-265001 owner's manual

Swisher

Swisher L122-265001 owner's manual

Texas Power Split 540H user manual

Texas

Texas Power Split 540H user manual

kinetic T20 Instruction & assembly manual

kinetic

kinetic T20 Instruction & assembly manual

Bradley LS35BS1650 owner's manual

Bradley

Bradley LS35BS1650 owner's manual

Scheppach HL800E Translation from the original instruction manual

Scheppach

Scheppach HL800E Translation from the original instruction manual

manuals.online logo
manuals.online logoBrands
  • About & Mission
  • Contact us
  • Privacy Policy
  • Terms and Conditions

Copyright 2025 Manuals.Online. All Rights Reserved.