Crane Song avocel User manual

LTD.
2117 East 5th Street
Superior, WI 54880 USA
tel: 715-398-3627
fax: 715-398-3279
www.cranesong.com
OPERATOR'S MANUAL
Version (-0.6) rough data
© 2004 Crane Song,LTD. Subject to change without notice. Printed in the U.S.A.

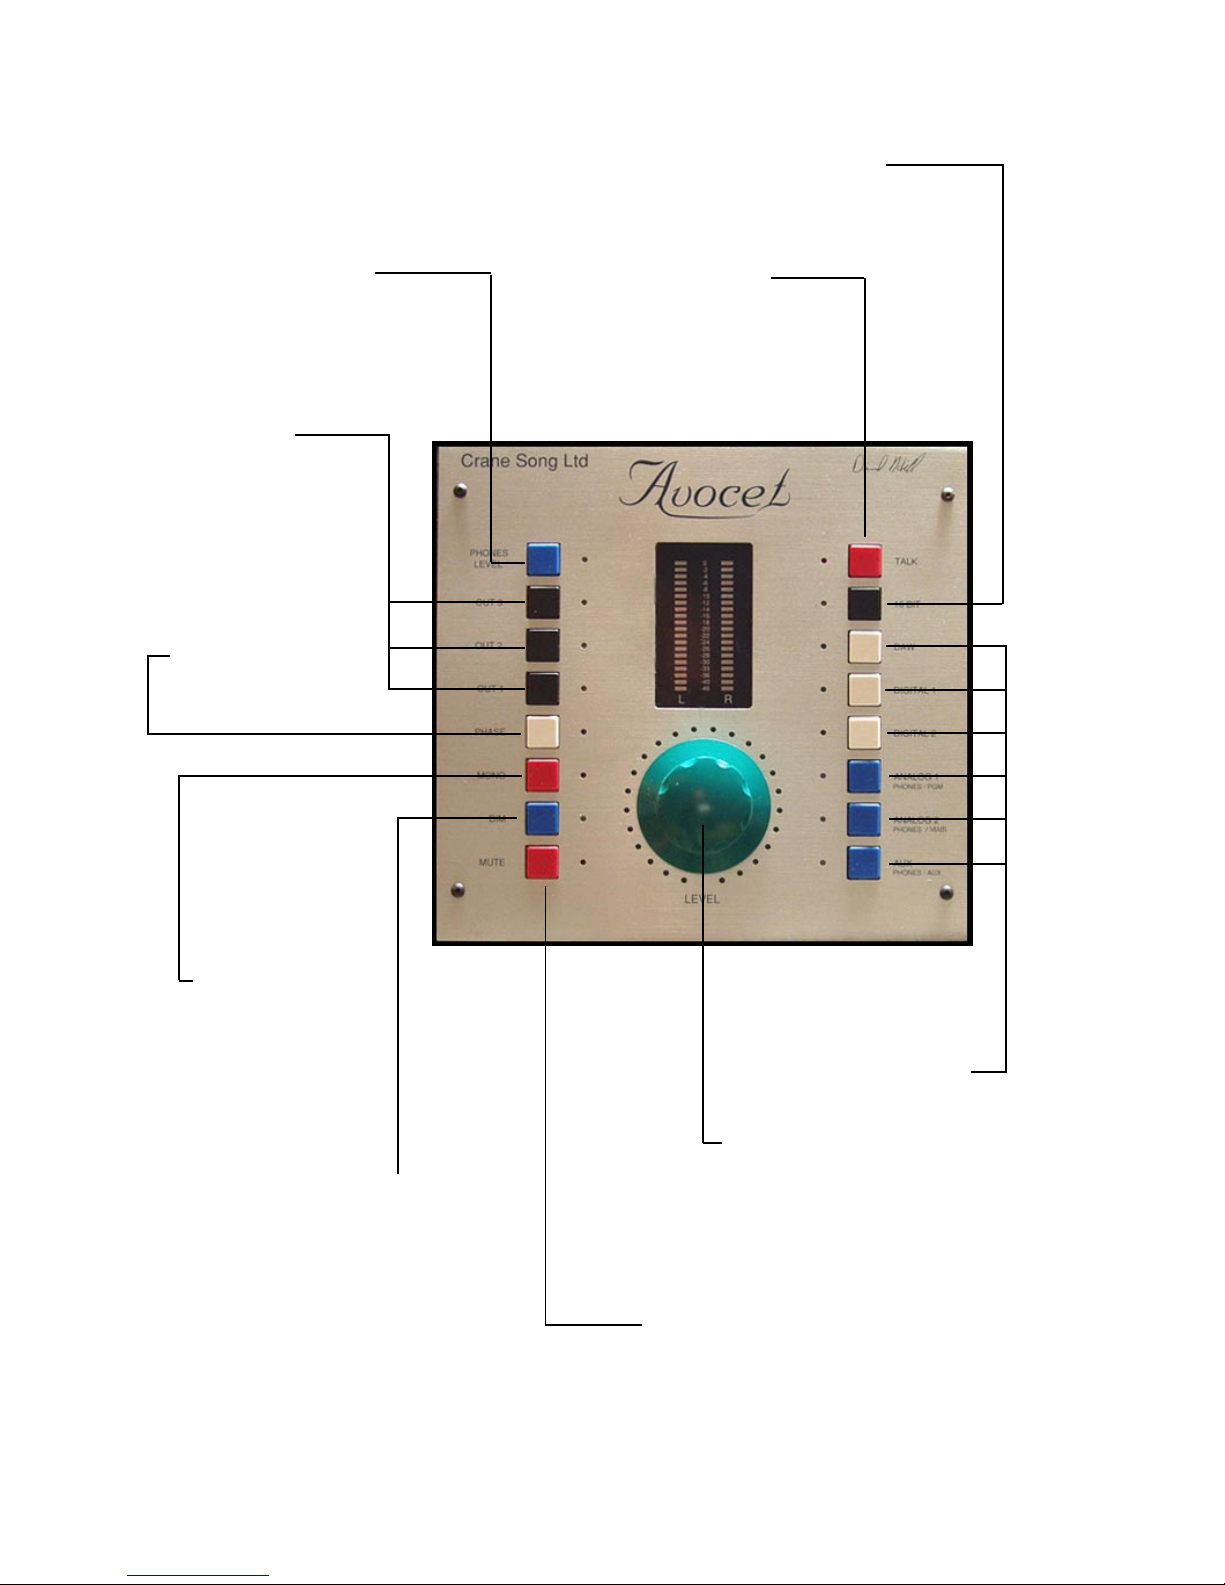
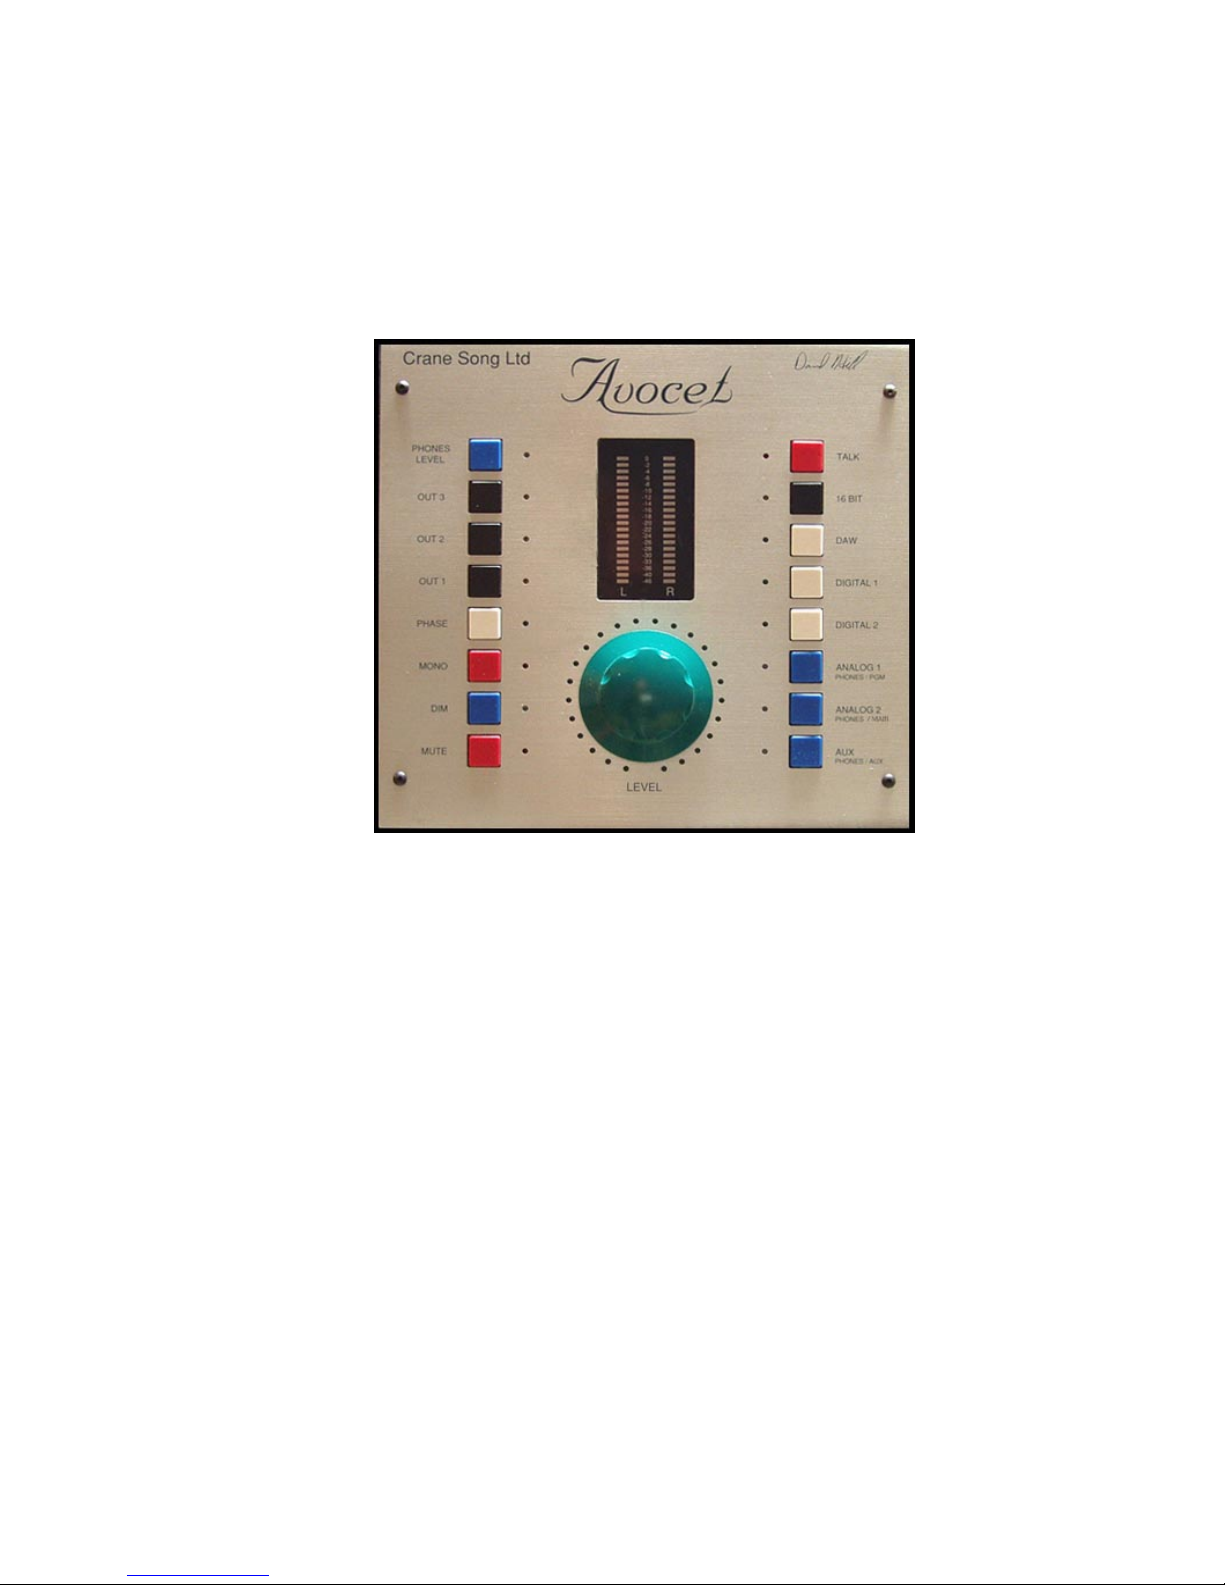
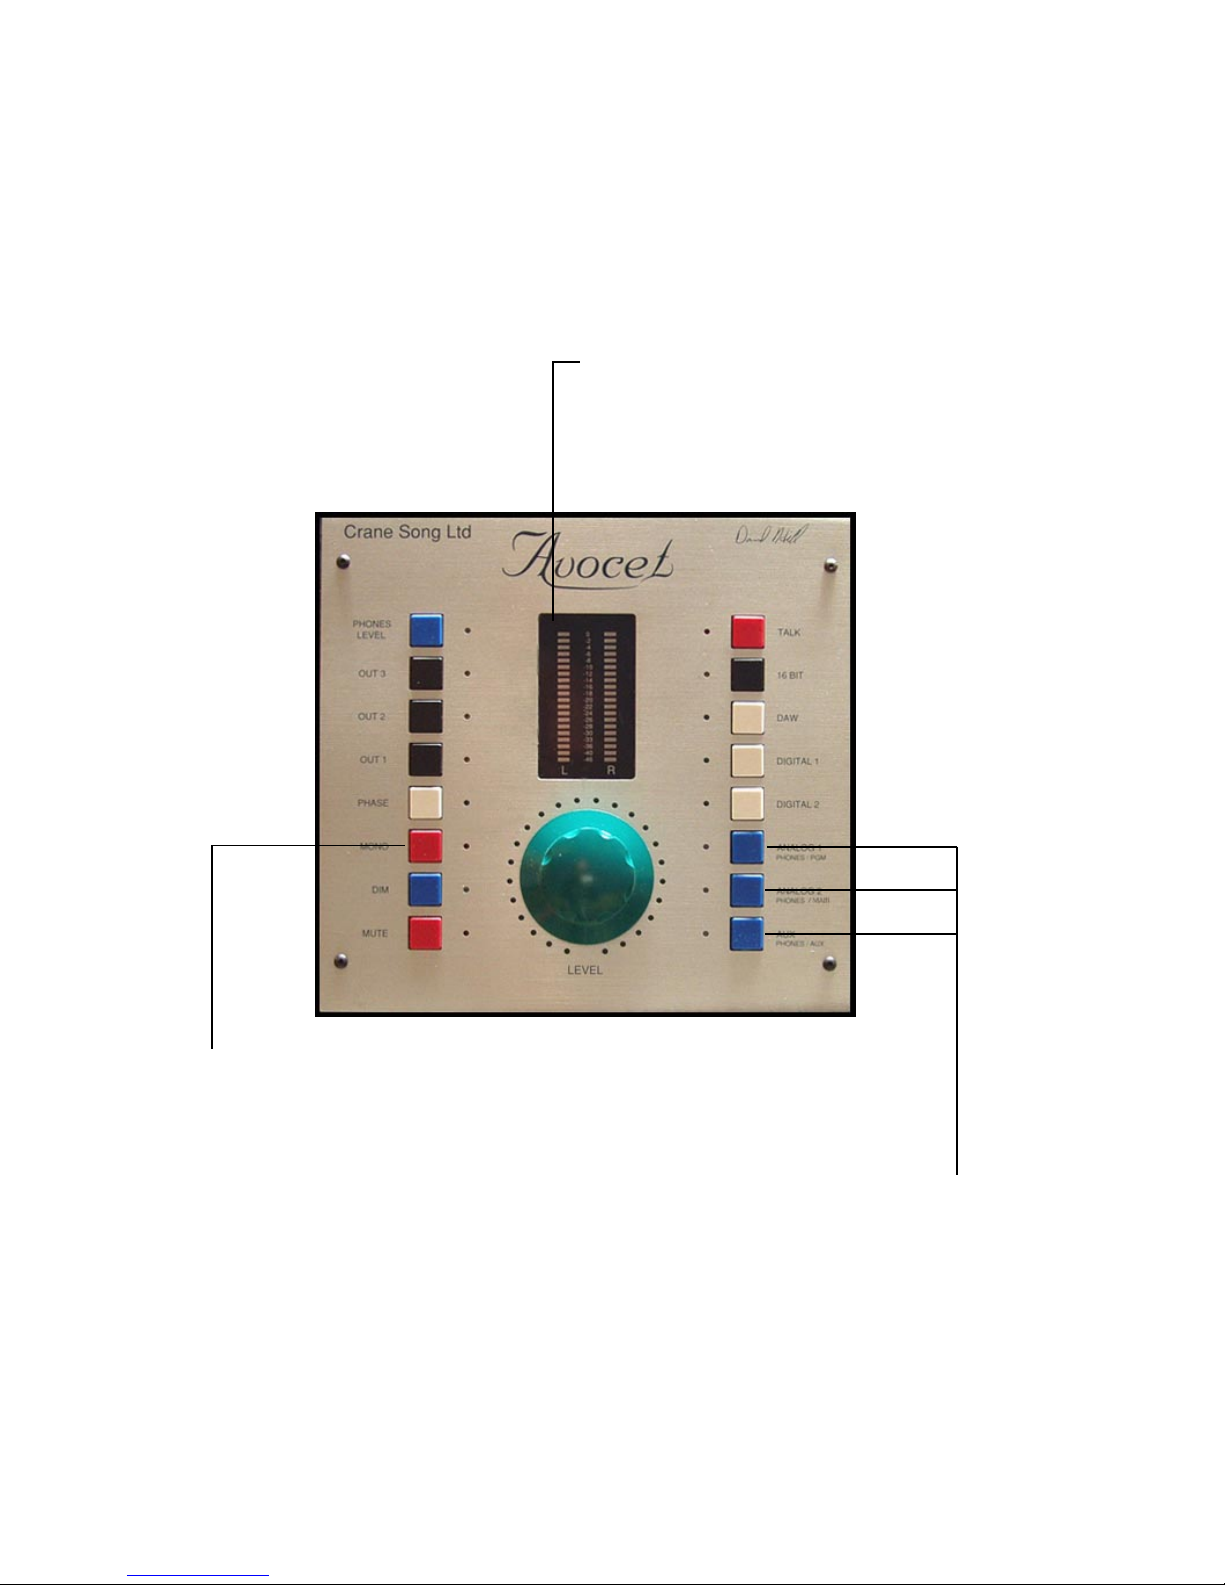
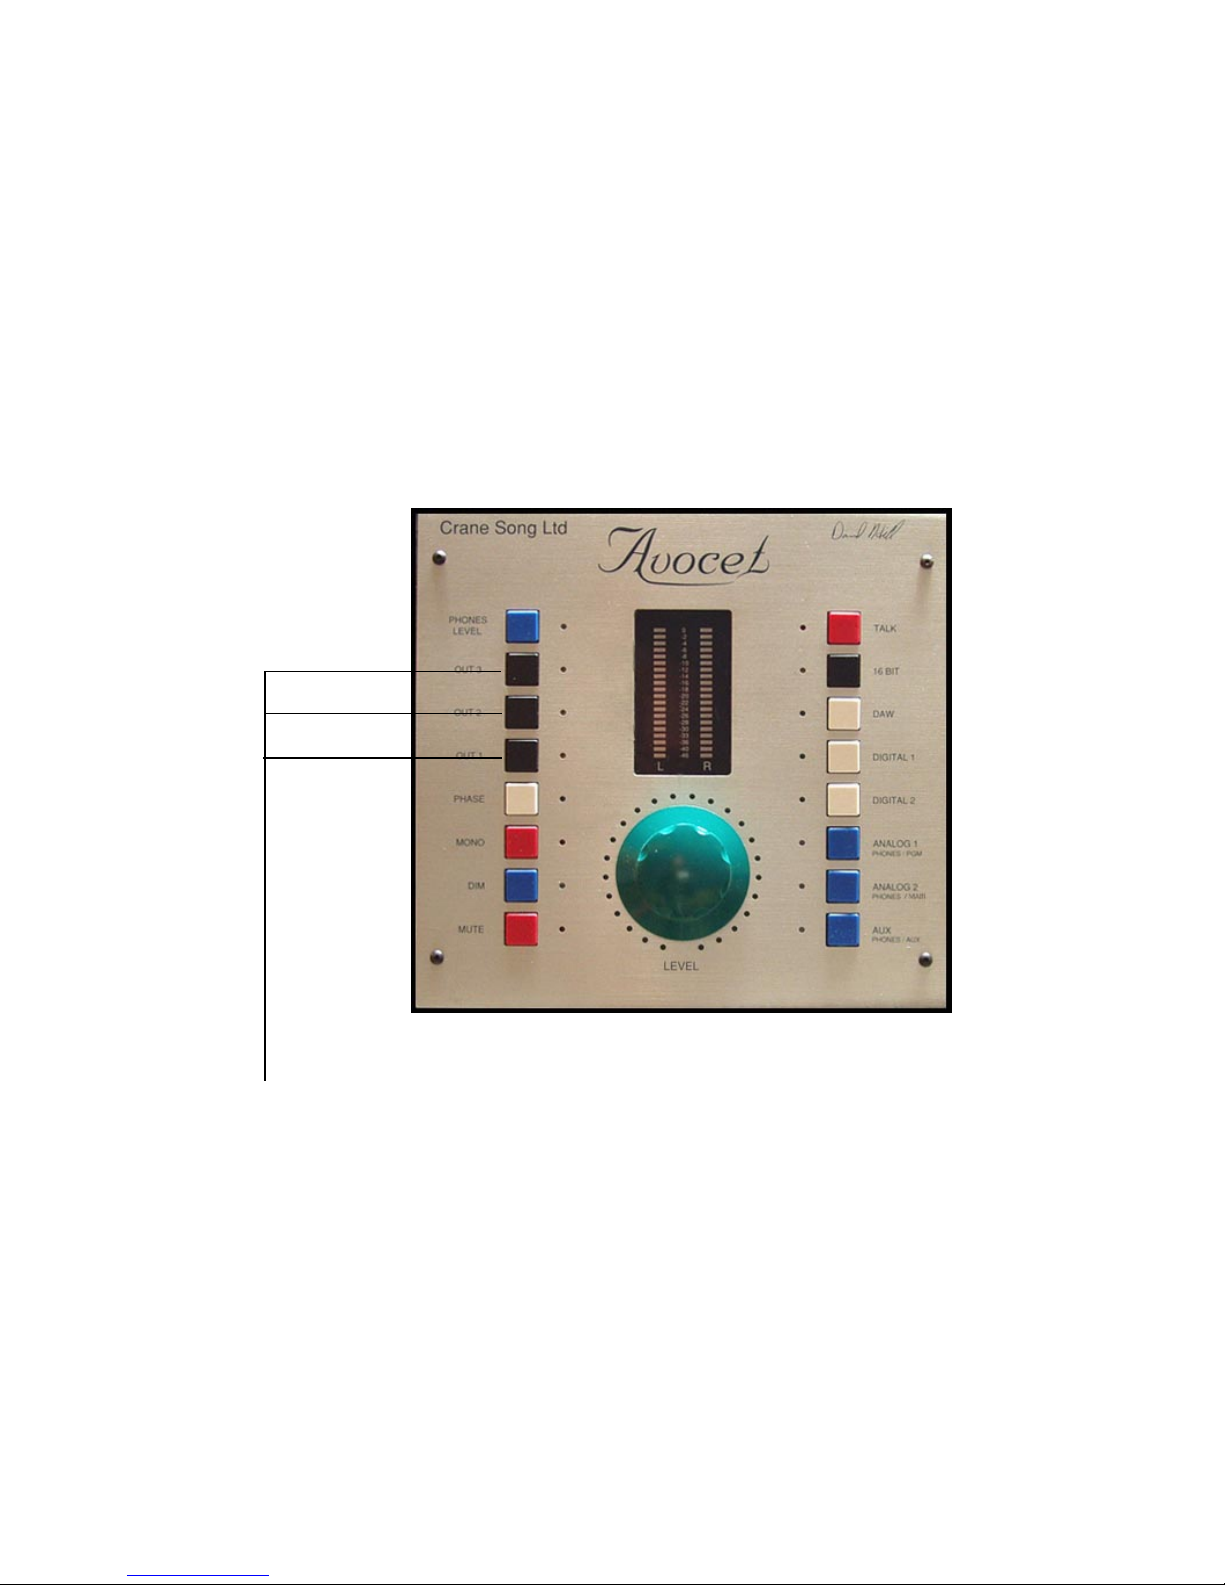
“Avocet” is designed to solve the problems of accurate monitoring and volume control
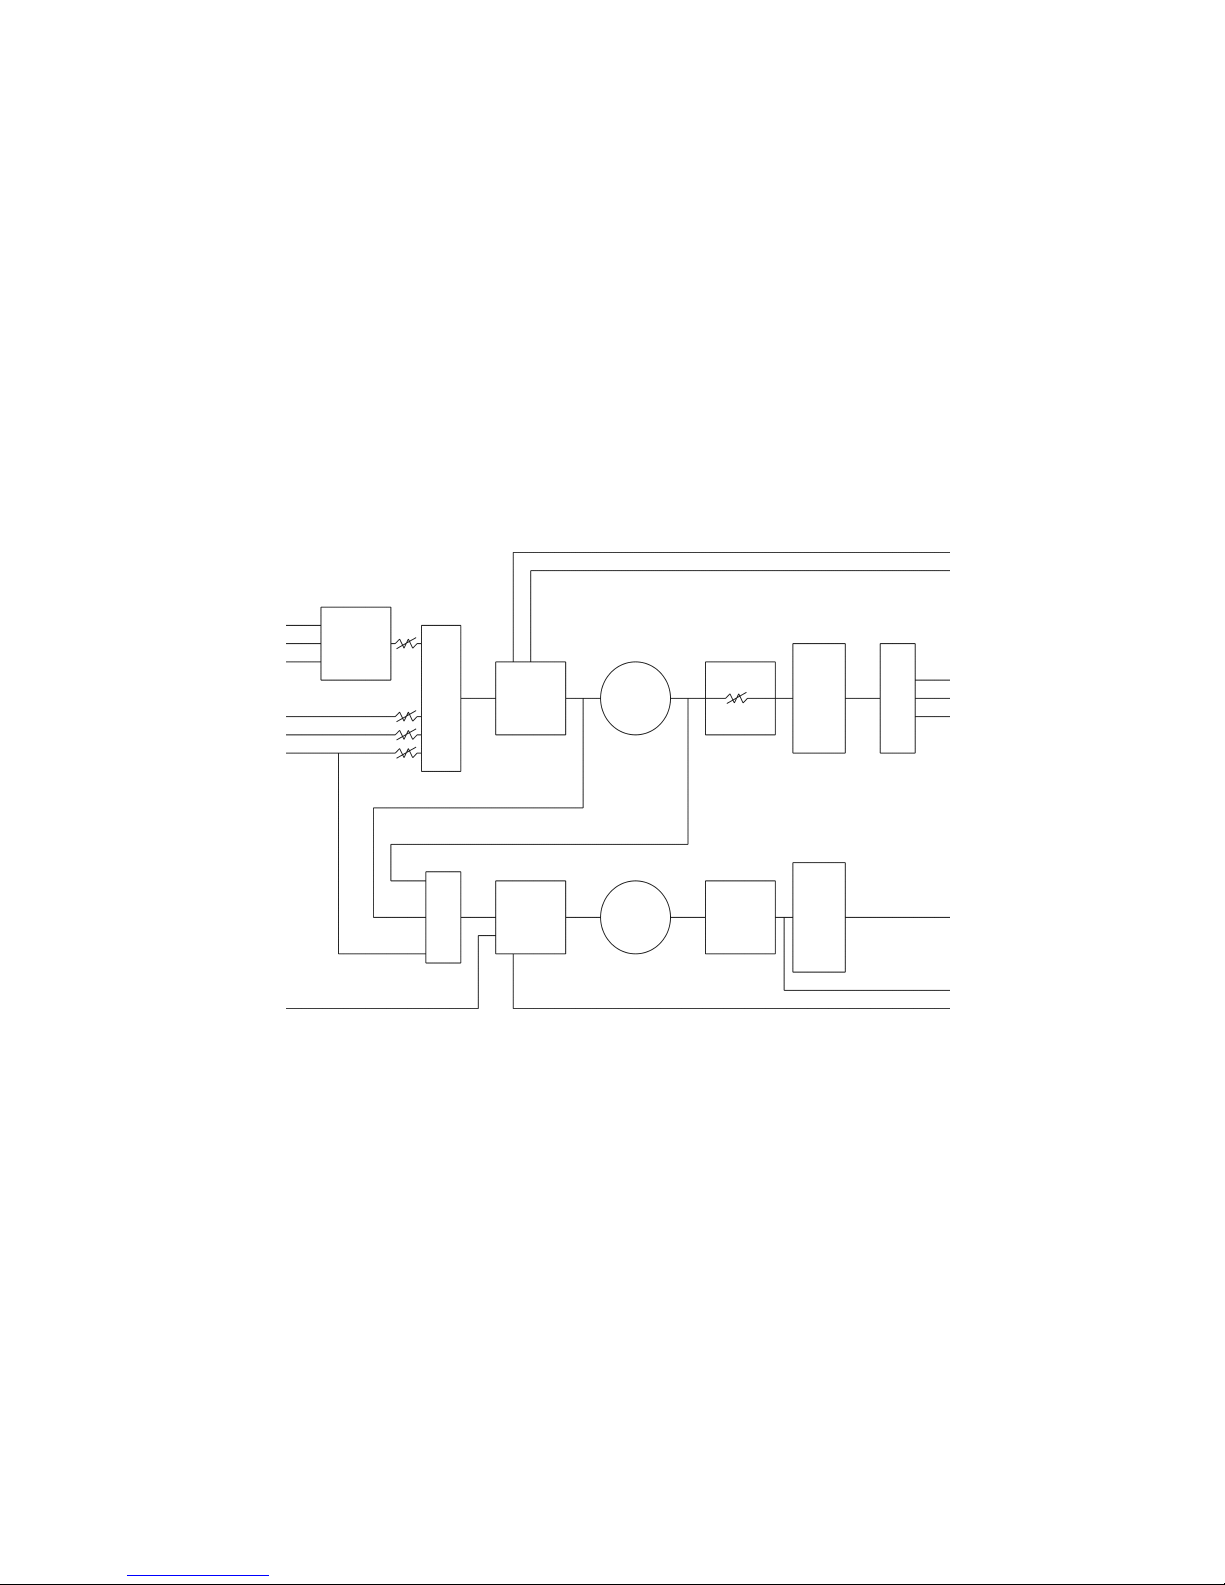
as required by workstation users, studios and mastering rooms alike. Avocet is a stereo
controller with three digital inputs, three analog inputs and a headphone system. All
digital signals are up-sampled and jitter reduced to ensure highest accuracy during D/A
conversion. Options are available to change the D/A mode, all though the default mode
has been chosen as more accurate.
Avocet’s many features including; dim, mute, phase, mono, and 16 bit truncation func-
tions, plus a speaker select switch that sends line level balanced audio to one of three
outputs. The six input sources have on the fly gain trim capability.
An accessory connector has extra functions for the technically minded. They are;
buffered stereo output, mono output, talk back mic output, headphone bus output, and
several input control functions such as; talk back enable, mute and and input selection
control that could be used for a prelisten or solo command.
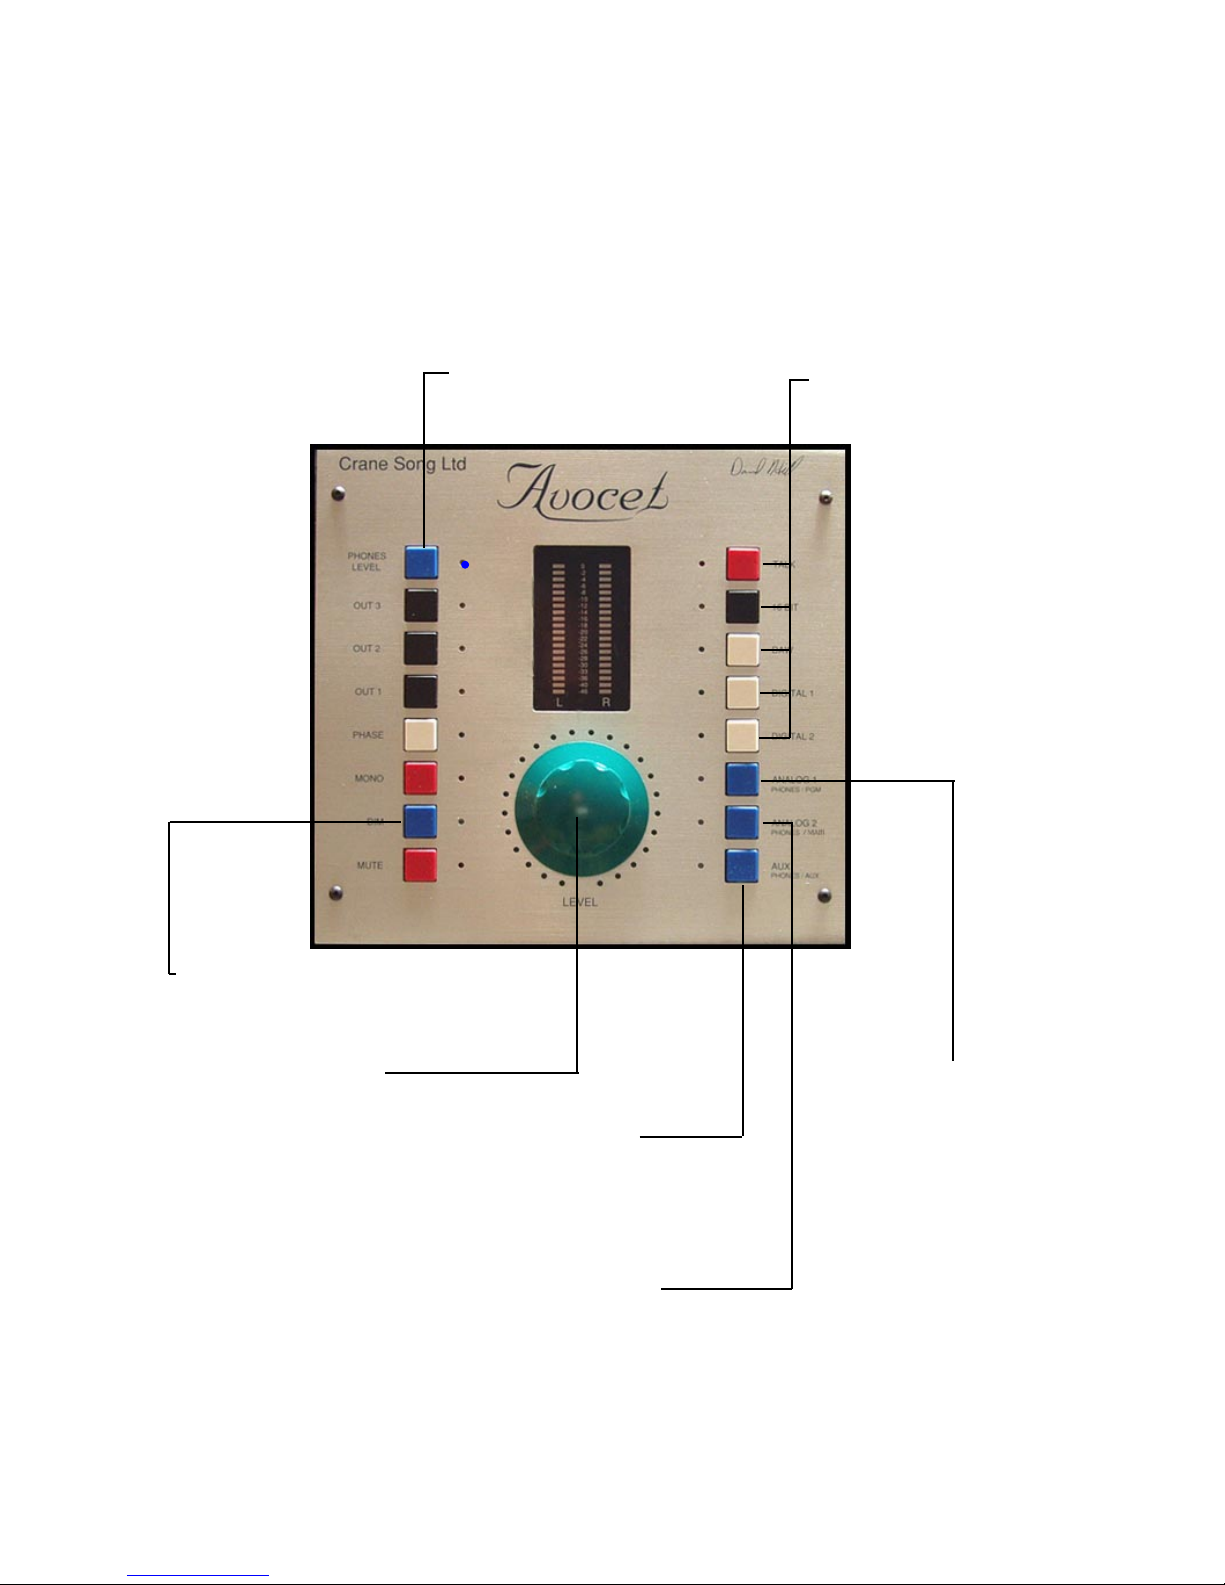
The internal headphone amplifier can be fed from the program source or an external
input. Provisions for a talk back function are inculded.
The three headphone sources are;
• The analog AUX input
• Main, meaning the audio source selected by the input button
• Program, meaning the audio source selected by the input button.
However the level control, mono and phase buttons also apply to the program
source.
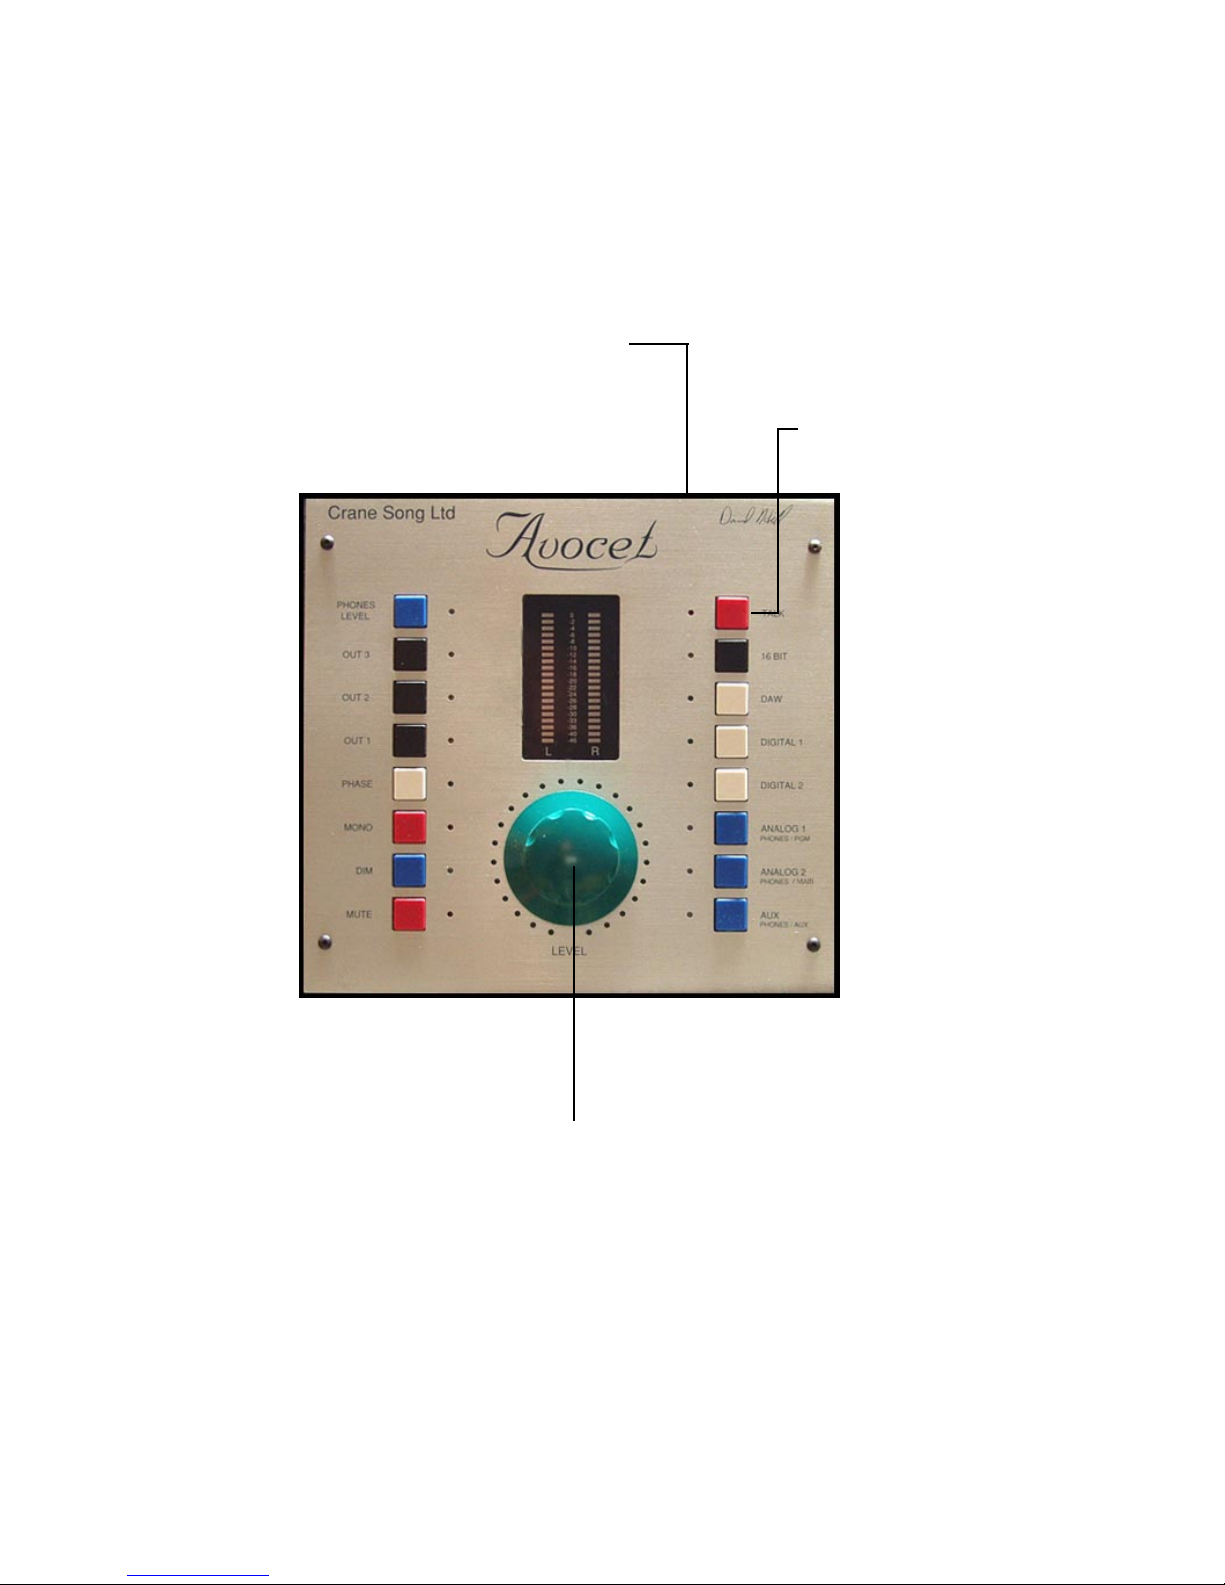
All three phone sources have individual gain settings controled by the green knob.
The talkback mic (not supplied and there is no phantom power) is hooked into the xlr connector on
the remote. There is a mic level trim pot next to the xlr connector. The talk back mic
signal is mixed into the headphone amplifier along with the selected headphone source.
By sending a cue mix to the Aux input you can use the headphone system for doing
overdubs in the studio and have communation to the artist. At the same time the main
audio path can operate independently of the headphone system
SURROUND
An upgrade path has been planned in Avocet to get to surround. This is being worked
on, with no finish date at this time. The audio box will work as two of the audio chan-
nels and the remote can drive multiple audio boxes. The remote will need different
programming for some different functions and thus different labling. If you have re-
quests of what you would like to see function wise send email to
subject “SURROUND” there will mostly not be a responce this is for information gath-
ering being surround is not very well defined. Some ideas will be used and some not.

FIRST TIME POWER UP
The first time that Avocet is powered up, it should be initialized. This is done by pushing
all three output select buttons at the same time. This sets up the remote for proper
operation. It also resets the user settings;
All gains, main and phones are set to zero
Output 1 is the selected output
DAW is the input selected
Phones are set to the Aux input
Take the time to look at the following pages that show how the buttons work. After that,
you are be good to go.
Almost all user selections and gains are remembered by Avocet and restored on power
up. The headphone button and the talk button positions are not remembered
Tha talkback mic gain is adjusted with a small trim pot that is next to the mic’s xlr con-
nector.
AUDIO PATH
The main audio path is discrete class A electronics with a stepped atteunator for gain
control. All switching and gain control functions in the main audio path is done with
relays. Yes they make accoustic clicks when operating.
The headphone audio path is done with high qualitity intergated circuits. The D/A
convertor used the latest technology intergated circuits.
POWERED MONITORS, POWER AMPS WITH NO GAIN CONTROL
Most powered monitors do not have a level control that is meaningfull. This resultes in
the need to trim Avocet’s output gain. In order to do this and not add any amplifier
stages a output pad is supplied. This pad is to be placed at the input of the power amp.
Not at Avocet’s connector. The pad has a range of 10 to 30 db of loss. It is preset to 20
db

Input selection
Holding the Talk back
button down sends the talk
mic into the headphone
output
Truncates the digital input to 16 bits. For
checking what 16 bits sounds like
Input level when
Phones or Dim modes are
not selected
Mute kills the main output.
On power up Avocet is
muted
Monos the
stereo source
Dims the main audio path.
The dim level is set by
turning the level while dim
mode is active. Selection
of phones is over ridden by
selecting dim.
Changes the
phase of one
channel
Enables Headphone
control mode
Selects which
speaker output

If one presses the input select button a second time it will enable the gain trim mode.
This will allow changing the input level on the selected input relative to all other inputs.
Gain trim has a plus or minus 10 db range. By pressing the input button a third time, the
gain will return to normal operation while remembering the gain trim.
In normal operation all input gains will track. At the end of the stepped attunator range
the offset gains could reach a limit where they will not change. As an example if you
trim an input up by 10 db and then move the main gain to max that input will be max
+10 which is not possible. Bringing the main gain back down the 10db be offset will still
exsit. The same thing will happen on the bottom end of the control range
In normal operation one should set the power amp gain, so that your normal listening
level is with the gain knob at 1 o’clock. There is a supplied adjustable pad for powered
monitors and power amps that have no gain control.
Input Gain Trim

Headphone Mode
Headphone Selected Buttons Disabled in
phones mode
Dim Button over rides
Headphone mode
Headphone Level
Selects direct AUX analog
input for the Headphone
output
The headphone source is
selected by the main input
buttons. It’s level does not
change with the main
system level
The headphone source
is selected by the main
input buttons. It’s level
changes with the main
system level

Talkback Mode
Talk mic is on when
this button is pushed
The monitor level can be set when the
talkback button is pushed. The monitors
can be dimmed to off or a level that is below
feedback. This will allow communation in
both directions while keeping the talk button
held down.
Talkback mic gain trim
on back panel

There are trim pots on the back of the main
unit for the analog gain trim. These have a
range of 8 db
Functions that can change
An internal jumper in the main unit allows the
selection of one or both speakers when mono
operation is selected
The meter can display input level. Which is
how Avocet is shipped. Or it can also display
output level. There is an internal jumper in the
main unit for this selection.

By pressing all three output selection buttons
at the same time Avocet will reset all of it’s
internal settings. This is the same as rebooting
the remote.
All gains, main and phones are set to zero
Output 1 is the selected output
DAW is the input selected
Phones are set to the Aux input
Clearing the internal settings

This is a signal flow reference for Avocet. The main audio part is discrete class A
amplifiers. Air flow arount the unit is recommended
D/A WITH
16 BIT
FUNCTION
INPUT
SELECT MONO
PHASE
FUNCTION
STEPPED
ATTENUATOR OUTPUT
AMP
BUFFER
AMP
WITH TRIM
OUTPUT
SELECT
PHONES
INPUT
SELECT
SUMMING,
TALK
FUNCTION
STEPPED
ATTENUATOR PHONES
OUTPUT
AMP
BUFFER
AMP
ACC. MONO OUTPUT
ACC. MAIN OUTPUT
OUTPUT 1
OUTPUT 2
OUTPUT 3
ACC. PHONES BUS
ACC. TALK MIC
OUTPUT
HEADPHONE JACK
DAW INPUT
DIGITAL 1 INPUT
DIGITAL 2 INPUT
ANALOG 1 INPUT
ANALOG 2 INPUT
AUX INPUT
TALK MIC INPUT

Do not change jumpers or adjust the trim pots unless you are sure of what you are
doing
JUMPER OFF = UPSAMPLE TO 192K
JUMPER ON = UPSAMPLE TO 96K
DEFAULT IS OFF
JUMPER OFF = FAST FILTER
JUMPER ON = SLOW FILTER
DEFAULT IS ON
JUMPER OFF = NO UPSAMPLE
JUMPER ON = UPSAMPLE
DEFAULT IS ON

Do not change jumpers or adjust the trim pots unless you are sure of what you are
doing
JUMPER ON THESE 2 METER = INPUT
DEFAULT
JUMPER ON THESE 2 METER = OUTPUT
JUMPER ON MONO = 2 SPEAKERS, OFF MONO = 1 SPEAKER DEFAULT IS ON
JUMPER ON SOLO = ANA1 INPUT
JUMPER OFF SOLO = DAW INPUT

Power entry
and fuse location
Analog input
Gain Trims
Select which type of
digi input for the DAW
input
Digital inputs
Analog inputs Analog Outputs
Analog Outputs
Second headphone output
Remote connector
Power Switch

XLR OUTPUT PAD
This is an adjustable pad for use with amplifiers or powered monitors that have
no gain control. The pad has a range of 10 to 30 db of loss. It is preset to 20 db
INPUT
OUTPUT
PAD LOSS ADJUST
7.53 inches
8 inches
depth not counting the knob is 1.62 inches

ACCESSORY CONNECTOR
1 Right Channel out
2 gnd
3 gnd
4 talk mic output - When talk button is pushed
5 Right phones out
6 Left phones out
7 gnd
8 data I/O do not connect
9 Left Channel out
10 mono out
11 talk command in - enable by tieing to gnd
12 mute+
13 mute-
14 solo+
15 solo-
To use the external talk control tie the talk input line to gnd to enable talk back.
To use the extrenal mute or solo inputs 5 to 15 volts needs to be applied to the control
input lines. Polarity must be followed. The solo control disables all input level controls
but the one that is selected by the jumper on the main board.

This manual suits for next models
1
Table of contents
Other Crane Song Recording Equipment manuals