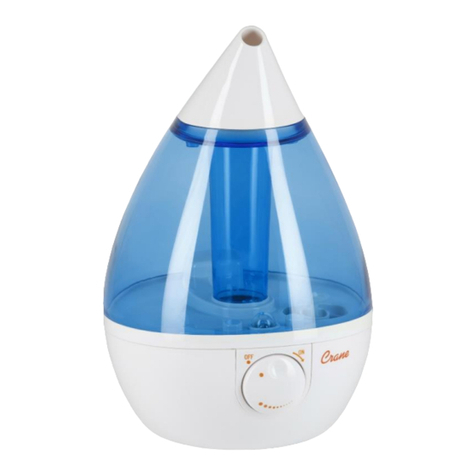
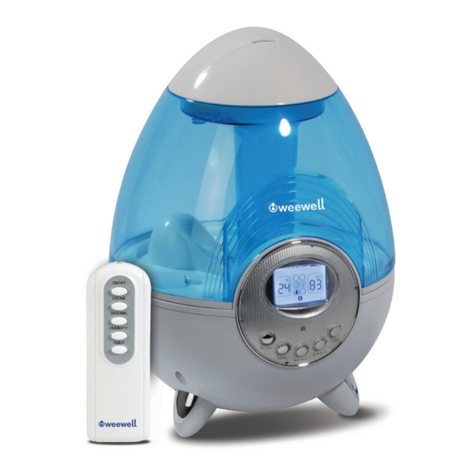
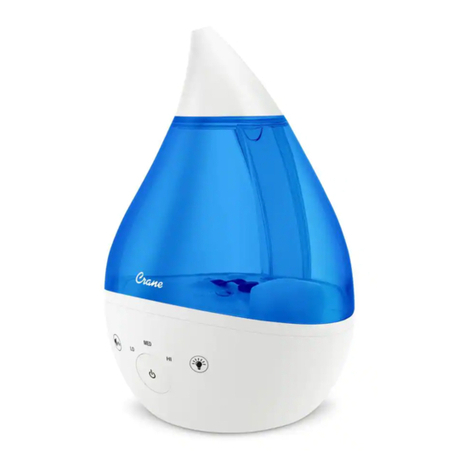
Crane EE-4109 User manual

Humidifiers
1 GALLON/ 3.78 LITER
ULTRASONIC HUMIDIFIER
MODEL# EE-4109
PLEASE READ AND SAVE ALL INSTRUCTIONS TO ENSURE THE SAFE AND
EFFECTIVE USE OF THIS APPLIANCE.

1
TABLE OF CONTENTS
Table of Contents P.1
Important Safety Instructions P. 2
General Safety Instructions P.3
List of Main Parts P.4
Tech. Specifications, Contents of Packaging
P.5
Operation and Use P.5-8
Maintenance P.8-10
Trouble Shooting P.10
Service Center Information P.11
Guarantee P.11

2
IMPORTANT SAFETY INSTRUCTIONS
INTRODUCTION
Thank you for purchasing our TALASSIO Ultrasonic Humidifier. Each unit has been
manufactured to ensure safety and reliability. Before using the humidifier for the first
time, please read the instructions carefully, and keep them for further reference.
WARNING! READ AND SAVE THESE INSTRUCTIONS. Failure to follow all
the instructions listed below may result in electric shock, fire and/or serious personal
injury.
1. Do not carry water tank by handle when it is filled with water. It is
advisable to carry filled water tank with two hands.
2. DO NOT operate outdoors; this humidifier is intended for indoor use only.
3. Always have water in the water tank when operating the unit.
4. Use only clean, cool tap water to fill the tank (filtered or distilled water is
recommended to avoid white dust if tap water is too hard). DO NOT use hot water.
5. Be sure that the filling cap of the tank is firmly tightened. Always have the mist
direction nozzle and the mist chamber in place while the unit is operating. Place the
mist direction nozzle so it aims away from children, walls, furniture, and electrical
appliances.
6. Use only a 110-120VAC outlet. ALWAYS plug and unplug unit with dry hands.
7. Never operate the unit with a damaged cord or plug.
8. Always place the unit on a smooth, flat, level surface, and away from direct
sunlight. Keep the cord away from heated surfaces and areas where it could be
walked on or tripped over. Unplug the unit when not in use and whenever you
clean or move the unit.
9. Do not add medication of any type into the nozzle, base or water tank. Do not
cover any openings on the unit or insert objects into any openings.
10.The unit should not be left unattended in a closed room as the air could become
saturated and leave condensation on walls or furniture. Leave room door partly
open.
11.When cleaning the inside of the unit keep water away from the air outlet / fan vent
(see FIG.3). The exterior may be wiped with a damp cloth, except the electrical
controls, only when the unit is off and unplugged. Humidifier requires regular
cleaning. Refer to cleaning instructions.
12.Do not tilt or tip the unit or attempt to empty or fill it while it is in operation.
13.Do not use a detergent to clean any parts of the unit that contain water. Always
use a few drops of vinegar with water to clean humidifier. Detergent film dissolved
in the water supply can interfere with the output of the unit.
SAVE THESE INSTRUCTIONS!
3
GENERAL SAFETY INSTRUCTIONS
WARNING! Read and understand all instructions. Failure to follow all instructions
listed below may result in electric shock, fire or serious personal injury. The warnings,
cautions, and instruction discussed in this instruction manual cannot cover all possible
conditions and situations that may occur. It must be understood by the operator that
common sense and caution are a factor which cannot be built into this product, but must
be supplied by the operator.
THIS HUMIDIFIER IS NOT A TOY!
Do not let your child play with this appliance. Serious injury and
electrocution might be possible. This appliance has to be operated by an adult only.
Children should be supervised to ensure that they do not play with the humidifier.
SAVE ALL INSTRUCTIONS!
ELECTRIC POWER
If electric circuit is overloaded with other appliances, your appliances may not operate
properly. The appliances should be operated on a separate electrical circuit from other
operating appliances.
SAFETY WARNING
Although your appliance is easy to operate, for your safety, the below warnings must be
followed:
1. Do not place the appliance near a heat source.
2. Never leave the appliance unattended while connected to the electrical outlet.
3. To avoid any accidents, never cover mist vent when the appliance is in operation.
4. Use the appliance on a stable surface away from water.
5. Do not unplug from the wall socket by pulling on the supply cord.
6. The appliance must be unplugged:
A. Before either filling or emptying
B. Before any cleaning or maintenance
C. After use
D. If it appears to be faulty
THIS PRODUCT IS INTENDED FOR HOUSEHOLD USE ONLY.

LIS
T
PA
R
Fig.
1.
O
C
2.
C
3. P
4.
N
Fig.
5.
V
6.
W
Fig.
3
7.
N
8.
V
9. F
10.
V
11.
W
Fig.
4
12.
W
13.
W
14.
V
Fig.
5
15.
W
16.
V
T
OF MA
I
R
TS DES
C
1 (Central
O
n/Off Swit
c
C
ontrol Kno
b
C
entral Bod
y
ower Light/
N
ight Light
S
2
(Top of
W
V
apor Outlet
W
ater Tank
H
3
(Water
B
N
ebulizer
V
aporization
a
n Vent
V
alve Opene
W
ater Level
4
(Bottom
W
ater Tank
V
W
ater Tank
C
V
apor Outlet
5
(Water
T
W
ater Tank
L
V
apor Outpu
I
N PART
S
C
RIPTIO
N
Body)
c
h
/
Regulato
r
b
y
with wate
r
Refill Ligh
t
S
witch
W
ater Tan
k
Channel
H
andle
B
asin)
Chamber
r
Sensor
of Water
T
V
alve
C
ap
channel
T
ank Lid)
L
id
t Slots
S
N
r
r
basin
t
k
)
T
ank)
4
5
11 7
1
1
2
F
i
5
F
i
8 9
F
i
2 13
F
i
5
F
i
4 1
Fi
g. 1
Fi
g. 2
10
Fi
g. 3
14
Fi
g. 4
16
Fi
g. 5
3
6

5
TECHNICAL SPECIFICATIONS:
Rating Voltage 230V
Frequency 50Hz
Power 45W
Water Tank Capacity Approx. 1.0 Gallon / 3.78
Liter
Output Per 24 Hours Approx. 2.1 Gallon / 8
Liter
Run Time Per Tank Min. 11 Hours
Noise < 36.5 (dB) A
CONTENTS OF PACKAGING
A. Instruction Manual
B. Central Humidifier Body
C. Water Tank
D. Water Tank Lid with Vapor Output Slots
OPERATION AND USE
BEFORE EACH USE
CHECK HUMIDIFIER PLACEMENT - Place the Humidifier on an elevated non-metallic
waterproof surface for best performance. This is to help disperse the mist in the air,
and prevent it from being knocked or tipped over.
CHECK WATER LEVEL SENSOR - Make sure that the water level sensor is secured
properly. Refer to “cleaning and maintaining water level sensor” on page 9 for
instructions on how to assemble water level sensor.
CHECK FAN VENT - This fan vent is located on the bottom of the humidifier. The
purpose of the Fan Vent is to blow the cool mist through the vapor outlet slots. It is
important that this part is kept clean and free of obstructions. We recommend checking
the fan vent before using this item (i.e. lint, paper)
Do not place Humidifier on top of a towel, or a carpeted surface. The air vent on
the bottom may become blocked, and overheat the humidifier.
CAUTION:
DO NOT operate the humidifier without water in the water tank.
DO NOT plug in the cord with wet hands; electric shock could happen

AS
S
1. L
2. T
a
(
S
3. F
t
h
(
S
N
i
s
DO
DO
wate
DO
Fig.2
4.
R
t
a
(
S
5. T
p
P
w
6. P
u
(
s
l
o
7. T
t
h
o
S
EMBLY
ift the wate
urn over th
e
t
the botto
m
S
ee Fig. 6
)
ill water ta
n
h
e rim.
S
ee Fig. 7
)
N
ote: To av
o
s
recomme
n
NOT
use
h
NOT
add
a
r
NOT
pour
on page 4
)
R
eplace the
w
a
nk with th
e
S
ee Fig. 8
)
urn the tan
lace it on t
h
lace the wa
w
ater tank.
lug the po
w
nit. The On
/
s
ee figure
o
cated at th
he Power Li
h
at enough
penings at
w
r tank off t
h
e
water tan
m
of the ta
n
)
n
k with cold
)
o
id possible
n
ded to use
h
ot water.
U
a
ny medica
t
water into
V
)
w
ater tank
c
e
threads o
n
)
k
over, hol
d
h
e central b
o
ter tank ca
p
(see Fig.
9
w
er cord int
o
/
Off switch
10). The N
e center of
ght will tur
n
water is in
t
w
ater tank
l
h
e central b
o
k and unsc
r
n
k by turnin
g
water; do
n
white dust
distilled wa
t
U
se cool ta
p
t
ion to othe
r
V
apor Outl
e
c
ap, alignin
n
the cap, a
d
ing it by th
o
dy, makin
g
p
with outp
u
9
)
o
a wall soc
k
is located a
ight Light
O
turning kn
o
n
on red. In
t
he water b
l
id.
6
o
dy.
r
ew the wat
e
g
it counter
n
ot fill all th
due to har
d
t
er.
p
water.
r
additives
t
e
t Channel (
g
the threa
d
nd turn it c
l
e top handl
e
g
sure it fit
s
u
t slots on t
k
et and tur
n
t the turnin
O
N/OFF butt
o
b.
a few seco
asin, and v
a
er tank cap
r
clockwise.
h
e way to
d
water it
t
o the
(
part 7,
d
s on the
l
ockwise.
e, and
s
perfectly.
t
op of the
n
on the
g knob
t
on is
nds it will s
a
por will st
a
witch to gr
e
a
rt emitting
Fig. 6
Fig. 7
Fig. 8
Fig. 9
e
en, indicat
i
through th
e
i
ng
e

8.
U
t
h
c
l
k
(
s
9.
W
o
h
s
t
b
t
a
T
b
IN
S
(S
O
A h
u
Mis
t
by
h
buil
Plac
e
NOT
reco
m
pack
a
Filte
r
purc
h
SE
T
AL
W
WA
T
Adju
s
vapo
roo
m
as th
air a
n
arou
n
.
If th
e
dow
n
outp
u
U
se the hum
h
e intensity
l
ockwise wil
nob counte
r
s
ee Fig. 1
0
W
hen the hu
utput will s
t
eating and
t
op the neb
asin. Turn
t
a
nk. Pleas
e
T
he (red)
l
i
b
e refilled.
S
ERTING
O
LD SEPA
u
midifie
r
t
Humidi
f
h
ard wat
e
d up in
y
e
humidifier
E: Do not l
e
m
mended ti
a
ging.
r
s are not i
n
h
ased sepa
r
T
THE CO
R
W
AYS PLAC
E
T
ERPROOF
s
t the vapo
r
r rises up a
m
air. Do no
t
e vapor ca
n
n
d accumul
a
n
d the hum
e
humidifier
n
by the for
e
u
t of the ot
h
idity outpu
t
of the vap
o
l increase t
h
r
clockwise
w
0
)
midifier ru
n
t
op. This is
damaging t
ulizer once
t
he humidifi
e
note tha
t
i
ght signal
HUMIDI
F
RATELY
n
r
filter is
f
ier. Filt
e
e
r and t
o
y
our hu
m
filter in hu
m
e
ave filter i
n
me. See Fil
t
n
cluded wit
h
r
ately.
R
RECT H
U
E
THE HU
M
SURFACE
F
r
control so
nd gets ab
s
t
turn on to
o
n
not be abs
o
a
tes on the
idifier.
is placed n
e
ign air str
e
h
er room c
o
t
regulator
c
o
r output. T
h
e moistur
e
w
ith reduce
n
s out of wa
a
safety fe
a
he nebulize
the water l
e
er off and
u
t
the Pow
e
indicates
t
F
IER FIL
T
n
ot inclu
an optio
n
e
rs are u
o
reduce
idifier.
m
idifier as
s
n
humidifier
t
er instructi
h
the humid
i
U
MIDIT
Y
M
IDIFIER
O
F
OR BEST
that the
s
orbed by t
h
o
high outp
u
o
rbed by th
e
surface
ear a fan o
r
e
am. Chang
e
o
nditioning
a
7
c
ontrol kno
b
urning the
k
e
output, tu
r
the moistu
r
ter the po
w
a
ture to pre
v
r. This safe
t
e
vel sinks b
e
u
nplug befo
r
e
r Light on
t
hat the h
u
T
ER
ded wit
h
n
al acce
s
sed to e
l
mold sp
o
s
hown in Fi
g
longer tha
n
ons on filte
i
fier and ca
n
Y
OUTPU
T
O
N AN ELE
V
PERFORM
A
h
e
u
t
e
r
air conditi
o
e
the locati
o
a
ppliances
b
to adjust
k
nob
r
ning the
r
e output.
w
er light will
v
ent the hu
t
y feature u
elow the re
q
r
e removin
g
the humi
d
u
midifier i
s
h
your h
u
s
sory for
l
iminate
w
o
res and
g
. 10A
n
r box
n
be
T
V
ATED NO
N
A
NCE.
correct
o
ning outle
t
o
n of the h
u
F
turn red, a
midifier fro
m
ses a wate
r
q
uired level
g
and refillin
d
ifier body
s
turned o
n
u
midifier
)
your Tal
w
hite d
u
bacteria
F
N
-METALL
I
t
the vapor
u
midifier or
F
ig. 10
nd the mis
t
m
possibly
o
r
level sens
o
in the wat
e
n
g the wate
r
will stay
o
n
and nee
d
)
assio Co
o
u
st cause
that ca
n
F
ig. 10 A
I
C
Wrong
may be for
c
reduce the
t
o
ver
o
r to
e
r
r
o
n.
d
s to
o
l
d
n
c
ed

8
A NOTE ABOUT HUMIDITY
It is best to keep the humidity level at about 30-50 percent of relative humidity.
The comfort level of humidity will vary from room to room and with changing room
conditions.
In cold weather, windows and even some walls may fog or develop frost from
excessive indoor humidity. If this occurs, reduce the mist intensity setting to avoid
damage from condensed water dripping on windowsills.
Too much humidity in the room may allow moisture to accumulate on surfaces where
bacteria and fungi can grow. Moisture that gathers may also damage furniture and
walls, especially wallpaper.
To eliminate excessive humidity, especially in small rooms, leave the room door open
and adjust the mist intensity control setting.
MAINTENANCE
CAUTION:
Always be sure that the appliance is unplugged and switched OFF
before cleaning or attempting to store the item. NEVER PLUG OR
UNPLUG UNIT WITH WET HANDS.
DO NOT leave water in water tank or water basin when unit is not
in use as it may result in the build up of mineral deposits and
bacteria that can inhibit the output efficiency of the humidifier.
PLEASE NOTE that if water remains in the water tank for more
than a day or two, bacterial growth is possible.
ALWAYS use fresh cool water when using unit.
NOTE: When removing water tank, water may accumulate under vapor lid and on the
bottom of the water tank. It is recommended to have a dry cloth ready to dry wet
surfaces.
DISINFECTING THE WATER TANK AND WATER BASIN
1. Fill water tank with 1 teaspoon of household vinegar in 1 gallon of water. Let
stand twenty minutes, shaking vigorously with two hands every few minutes,
drain and rinse with clean water until the vinegar smell is gone. Dry with a clean
cloth or paper towel.
2. Wipe the water basin with a soft cloth dampened in the vinegar and water
solution. Rinse the water basin with cool water to remove any vinegar smell. DO
NOT IMMERSE WATER BASIN IN WATER.
3. Wipe all exteriors surfaces of the base with a soft, dry cloth. Do not immerse the
base in water or use water to clean the base. An electric shock may result or the
humidifier may be damaged.
NOTE: It is recommended to clean humidifier with water and vinegar solution as
stated above after using the humidifier the fourth time.

GE
N
Befo
r
1.
A
2. T
3.
O
C
i
n
4. T
w
a
5.
W
t
a
6.
N
p
7. I
t
t
h
c
e
8.
C
Not
e
It is
Alwa
y
9. T
(
s
w
t
h
(
s
Plast
ST
O
Allo
w
locat
resul
from
beco
N
ERAL M
A
r
e any clea
n
A
lways unpl
u
he humidifi
e
O
nce unplug
C
aution: Th
n
to power s
o
here may
b
w
ater. Over
c
soft cloth
r
A. Dam
p
depo
s
B. Rub
d
C. Do n
o
D. Do n
o
W
hen cleani
n
a
p.
N
ever imme
r
p
age 4) or
a
t
is normal
h
e central
b
e
nter befor
e
C
lean the in
s
A. Fi
l
ta
h
a
B. Ri
e
: Water ac
important t
y
s use fres
h
o clean th
e
s
ee Fig.12
)
w
ith a soft d
h
e pin and
t
s
ee Fig.13
)
ic Cap
Fig.
1
O
RING Y
O
w
the appli
a
ion. Do no
t in possibl
e
metal obj
e
me attache
d
A
INTEN
A
n
ing operati
o
u
g the unit
b
e
r must be
g
ed the ext
e
ON/OFF s
o
urce.
b
e some li
m
c
ome this d
r
r
egularly, a
s
p
en a cloth
s
its disappe
a
d
own gently
o
t rub the n
e
o
t clean wit
h
n
g the wat
e
r
se the unit
a
ny other o
p
for water t
b
ody. If thi
s
e
using it a
g
s
ide of the
w
l
l the tank
nk comple
t
a
nds. Do no
nse thorou
g
cumulated
o remove t
h
h
clean wat
e
e
water lev
e
)
. Remove
amp cloth.
t
hen pressi
n
)
. Do not u
s
1
1
O
UR HU
M
a
nce to dr
y
t place any
e
damage
o
e
cts. Alway
s
d
.
A
NCE AN
D
o
n, switch
t
b
efore clea
n
drained an
d
erior of the
w
itch must
m
e deposit
s
r
awback by
s
follows:
with vine
g
a
r complet
e
with a dry
e
bulizer wit
h
chemical
p
e
r basin do
in water or
p
enings.
o
be in the
s
should ha
p
g
ain.
w
ater tank
a
with clean
t
ely with it
s
t hold by h
a
g
hly.
over long
p
h
e water in
e
r when filli
n
e
l sensor r
e
the water l
e
Replace th
e
n
g the plas
t
s
e excessiv
e
M
IDIFIER
y
complete
heavy ite
m
o
f the appli
a
s
check the
9
D
CLEAN
I
t
he humidifi
n
ing.
d
cleaned b
e
unit may b
e
be thoroug
h
s
in the n
e
cleaning t
h
ar and wi
p
e
ly.
cloth and r
e
h solid obje
p
roducts
not place
t
let water e
water basi
p
pen, take
a
t least onc
e
water addi
s
cap and
a
ndle while
p
eriods ma
y
the humidi
n
g the wat
e
e
move the
p
e
vel sensor
e
parts by f
i
t
ic cap on t
e
force.
Fig. 12
ly before
s
m
s on top o
f
a
nce. Store
plug befor
I
NG
er off and
u
e
fore storin
g
e
cleaned b
hly dry bef
o
e
bulizer, pa
h
e nebulize
r
p
e the neb
u
e
move rem
a
cts.
the nebuliz
e
nter the fa
n
n. Howeve
r
the humidi
f
e
a week, a
s
i
ng a few
d
shake by
h
shaking th
e
y
create ba
c
fier if the h
e
r basin.
p
lastic cap
and cap a
n
i
rst putting
he end of t
s
toring. St
o
f
appliance
the cord i
n
r
e use to a
s
u
nplug it.
g
.
y wiping wi
t
o
re unit is a
g
rticular in
r
with wate
r
u
lizer gentl
y
a
ins of hum
er directly
n
vent (see
r
water mu
s
f
ier to an a
u
s
follows:
d
rops of vi
n
h
olding the
e
tank.
c
teria and
m
umidifier is
on the pin
n
d clean by
the water l
e
he pin to s
e
F
i
o
re the ap
p
during sto
r
n
a clean, d
s
sure metal
t
h a dry clo
t
g
ain plugg
e
areas with
r
and vineg
a
y
, until the
idity.
under the
w
figure 3 o
s
t not get i
u
thorized s
e
n
egar. Clos
e
tank with
m
ildew (fun
not being
u
by pulling
wiping the
e
vel sensor
e
cure the s
e
i
g. 13
p
liance in
a
r
age as this
ry location
items hav
e
t
h.
e
d
hard
a
r on
lime
w
ater
n
nside
e
rvice
e
the
both
gus).
u
sed.
it up
parts
onto
e
nsor
a
dry
may
away
e
not

10
Save the box for off-season storage.
Make sure the tank, water basin and water tank cap are thoroughly dry before
storing.
If water is left in the unit during storage, it may evaporate completely and leave
deposits that can prevent the unit from operating properly.
Leave the water tank refill cap loose to prevent the water cap (see figure 4 on
page 4) and gasket from sticking together. This will prolong the life of the gasket.
TROUBLE SHOOTING
CAUTION: DO NOT attempt to repair the motor or nebulizer yourself. If the
humidifier continues to not operate please call our service center
Problem Solution
Humidifier is working than stops:
Ensure that water level sensor is
assembled properly.
Clean water level sensor
Call service center and request
replacement water level sensor
If humidifier does not work at all:
Ensure it is properly plugged into a
power outlet.
Check that the switch is in the ON
position.
If Power On indicator light does not
come on, bring to authorized service
station.
If there is a strange odor:
Clean the tank with water and vinegar
and rinse with clean water.
Leave the tank open for some time
without the cap, in a cool place.
The power light is green but there is no
mist being emitted: Check that there is water in the tank.
Check for possible lime deposits on the
water level sensor or the nebulizer (see
page 9).
Make sure that nothing blocks the
vapor output slots.
Check that the air vent on bottom of
humidifier is not blocked.
Empty the humidifier and rinse the
water basin with cool tap water and
allow to dry for 15 to 30 min.
White dust appears and settles outside the
humidifier: Area tap water may have too many
minerals, change to filtered or distilled
water.
Use Talassio filter cartridge to eliminate
minerals.

11
SERVICE CENTER / GUARANTEE
We grant 2 years guarantee on the product commencing on the date of purchase. Within
the
guarantee period we will eliminate, free of charge, any defects in the appliance resulting
from faults
in materials or workmanship, either by repairing or replacing the complete appliance as
we may
choose. This guarantee extends to every country where this appliance is supplied by
Talassio or its appointed distributor. This guarantee does not cover: damage due to
improper use, normal wear or use as well as defects that have a negligible effect on the
value or operation of the appliance. The guarantee becomes void if repairs are
undertaken by unauthorized persons and if original Talassio parts are not used.
To obtain service within the guarantee period, hand in or send the complete appliance
with your sales
receipt to
Key Electronics Ltd.
PO Box 406Halifax, West Yorkshire
HX3 8YN
UK
For UK customers: Phone +44 (0) 871 288 4903
For IR customers: Phone +353 (0) 12 475 437
www.keyelectronics.co.uk
ENVIRONMENTAL PROTECTION
If the appliance should no longer work at all, please make sure that it is disposed in an
environmentally friendly way, by handing it into a public collection point. Please do not
put it with your household waste.

Other manuals for EE-4109
2
Table of contents
Other Crane Humidifier manuals

Crane
Crane EE-5301 User manual

Crane
Crane EE-6905 User manual

Crane
Crane EE-7002 User manual

Crane
Crane EE-5301 User manual

Crane
Crane EE-6918 User manual

Crane
Crane EE-5951 User manual

Crane
Crane R-EE-6913 User manual

Crane
Crane EE-5949 User manual

Crane
Crane EE-5952 User manual

Crane
Crane EE-5949 User manual

Crane
Crane EE-3191 User manual

Crane
Crane EE-6917 User manual

Crane
Crane Germ Defense EE-8065 User manual

Crane
Crane EE-5303W User manual

Crane
Crane EE-5063 User manual

Crane
Crane TOP FILL EE-6913 User manual

Crane
Crane EE-8064 SH8201 User manual

Crane
Crane EE-5200W User manual

Crane
Crane EE-5301G User manual

Crane
Crane EE-5953AD User manual