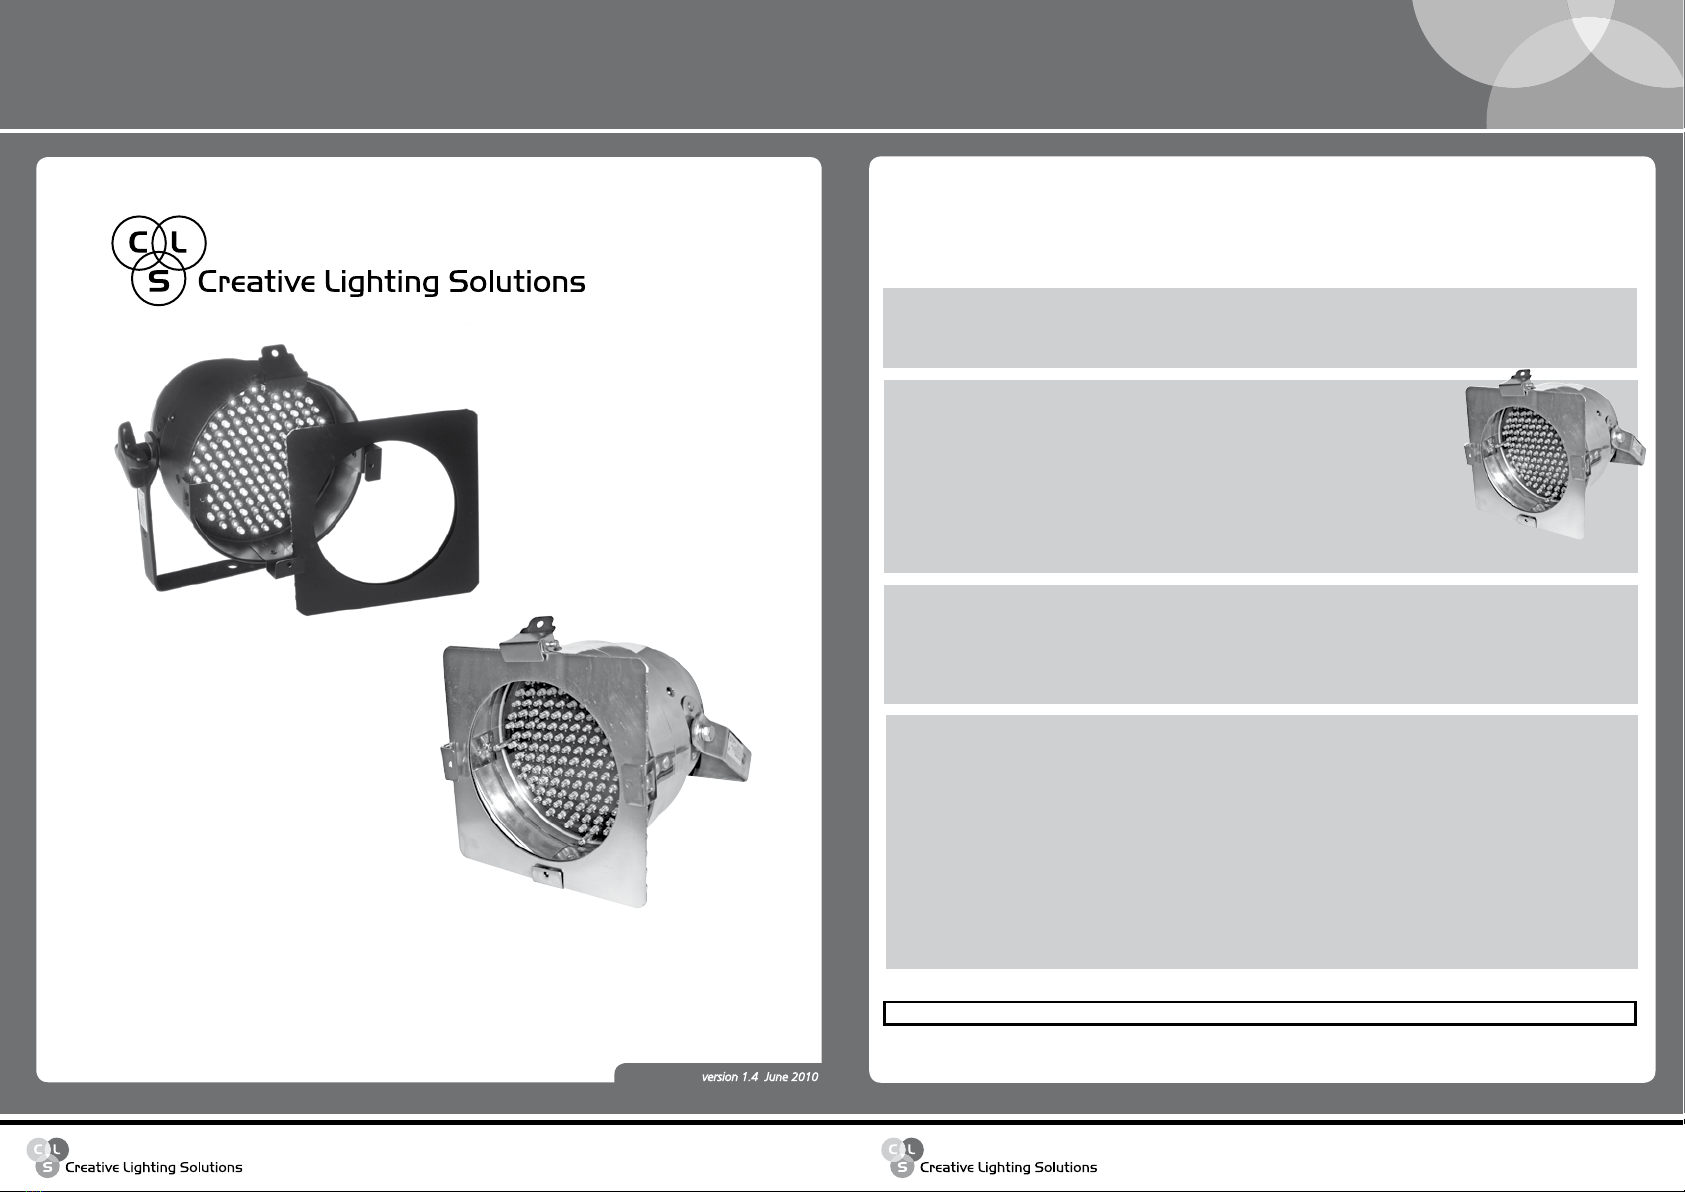
Creative Lighting Solutions CLS LED PAR56-V3 User manual
CLS Manuals
CLS Atmosphere LED-panel
CLS Manuals
CLS LED PAR56-V3 Black/Polish
www.cls-led.com
version 1.4 June 2010
www.cls-led.com
- 1 - - 2 -
CLS LED PAR56-V3 Black/Polish
Note: It is important to read this manual before you install this product.
1. INTRODUCTION
Thank you for selecting the CLS LED PAR56-V3 with 512 DMX-channels. The CLS LED PAR56-V3 is a univer-
sal DMX controlled luminairy that uses 151 5mm LEDs to create an even light-output. The CLS LED PAR56-
V3 works on an input voltage of 100 ~ 240 VAC.
The CLS LED PAR56-V3 features:
• 100 ~ 240 VAC input
• DMX input (3/5 channels)
• Auto-change mode
• Stand alone or DMX 512 controllable
• Dip switches
• Manual setting
• Indoor use only
Included items
The CLS LED PAR56-V3 is shipped in one package containing the following items:
• 1 CLS LED PAR56-V3
• 1 User manual
• 1 Filter frame
Optional accessories
• 707028 CLS Zense DMX controller + built in 4 amp RGB dimmer
• 707030 CLS ACX60 DMX controller for max. 60 channels
• 875580 CLS PAR RGB DMX controller
• 911200 CLS Extension cable black XLR male/female 80cm
• 911201 CLS Extension cable black XLR male/female 1.5mtr
• 911203 CLS Extension cable black XLR male/female 3mtr
• 911205 CLS Extension cable black XLR male/female 5mtr
• 911206 CLS Extension cable black XLR male/female 10mtr
• 911207 CLS Extension cable black XLR male/female 15mtr
• 911209 CLS Extension cable black XLR male/female 20mtr
Available RGB LED PAR56-V3
• CLS LED PAR56-V3 Black (item nr. 875550)
• CLS LED PAR56-V3 Polish (item nr. 875552)
CLS Manuals
CLS Atmosphere LED-panel
www.cls-led.com
CLS LED PAR56-V3 Black/Polish
- 3 - - 4 -
SAFETY INFORMATION
Warning! This product is for professional use only.
Read this manual before powering up or installing the CLS LED PAR56-V3. Follow the instructions
listed below and observe all warnings in this manual.
INSTALLATION
This section describes in general terms how to install the CLS LED PAR56-V3, and how to connect it to a DMX
data link.
Protection from electric shock
• Disconnect the power supply from AC power before installation, dismounting or maintenance of the unit.
• Make sure all connectors are connected properly.
• Use only a source of AC power that complies with local building and electrical codes.
• Do not expose the unit to rain or moisture.
• Refer all service to a qualified technician.
Protection from burns and fire
• Provide a clearance of at least 50 mm around the unit.
• Do not install the RGB LED PAR-V3 near to a heat source.
• Do not install the RGB LED PAR-V3 in a corrosive, flammable or explosive area.
• Do not modify the RGB LED PAR-V3, or install other than genuine parts.
• Do not operate the unit if the ambient temperature exceeds 50oC.
• Operate in a well-ventilated area
Protection from damage due to falls
• Verify that all covers and mounting hardware is securely fastened.
• Block access below the work area whenever installing or removing the unit.
Installing the CLS LED PAR56-V3
The CLS LED PAR56-V3 Black can be installed in different ways.
You can support it on a shelf, or mount it by using the mounting hole.
Data linking multiple CLS LED PAR56-V3
You need to create a data link if you want to control one or more CLS LED PAR56-V3 via a DMX
controller. The CLS LED PAR56-V3 can be data-linked by using the XLR 3 input and output connectors
at the back of the unit.
To set up a data link you have to take the following steps:
• Disconnect all the units from the AC supply.
• Connect the XLR 3 female connector of the first CLS LED PAR56-V3 to a DMX extension cable.
Connect the other end of the DMX cable to the XLR 3 male of the next CLS LED PAR56-V3. You can
use CLS DMX cables for this purpose.
• Continue connecting CLS LED PAR56-V3 in this 'daisy chain' way.
• A maximum of 32 units can be connected in this way.
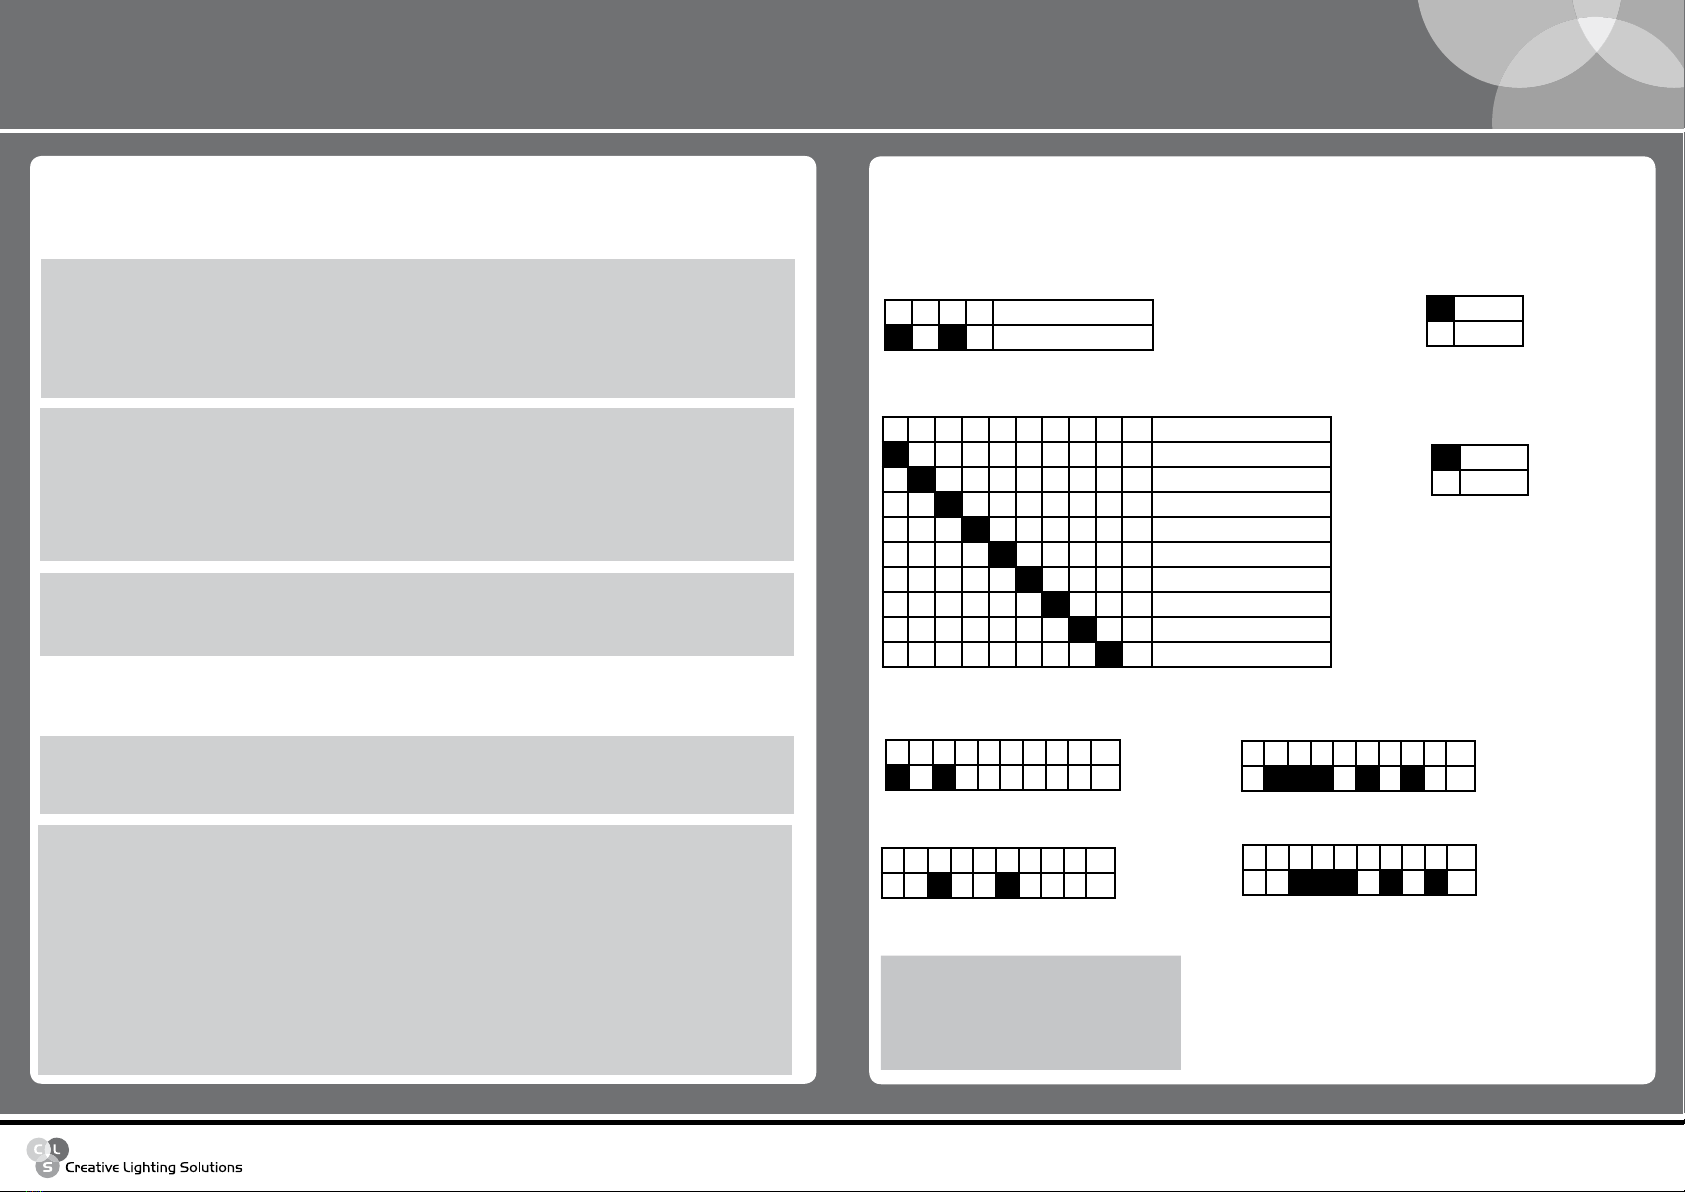
1 2 3 4 5 6 7 8 9 10 First DMX-channel
1
2
4
8
16
32
64
128
256
Channel Function
1 Red
2 Green
3 Blue
1 2 3 4 5 6 7 8 9 10
1 2 3 4 5 6 7 8 9 10
DMX address 36
1 2 3 4 5 6 7 8 9 10
DMX address 174
1 2 3 4 5 6 7 8 9 10
DMX address 348
1 2 3 4 Mode
DMX 3 channel operation
DMX OPERATION
3 channel DMX Operation
With 3 channel DMX operation you need 3 DMX channels to control the CLS LED PAR56-V3.
First set the function switches to DMX 3 channel operation:
Now you can give the CLS RGB LED PAR56 V3 a DMX adress with the selection switches:
= on
= off
= on
= off
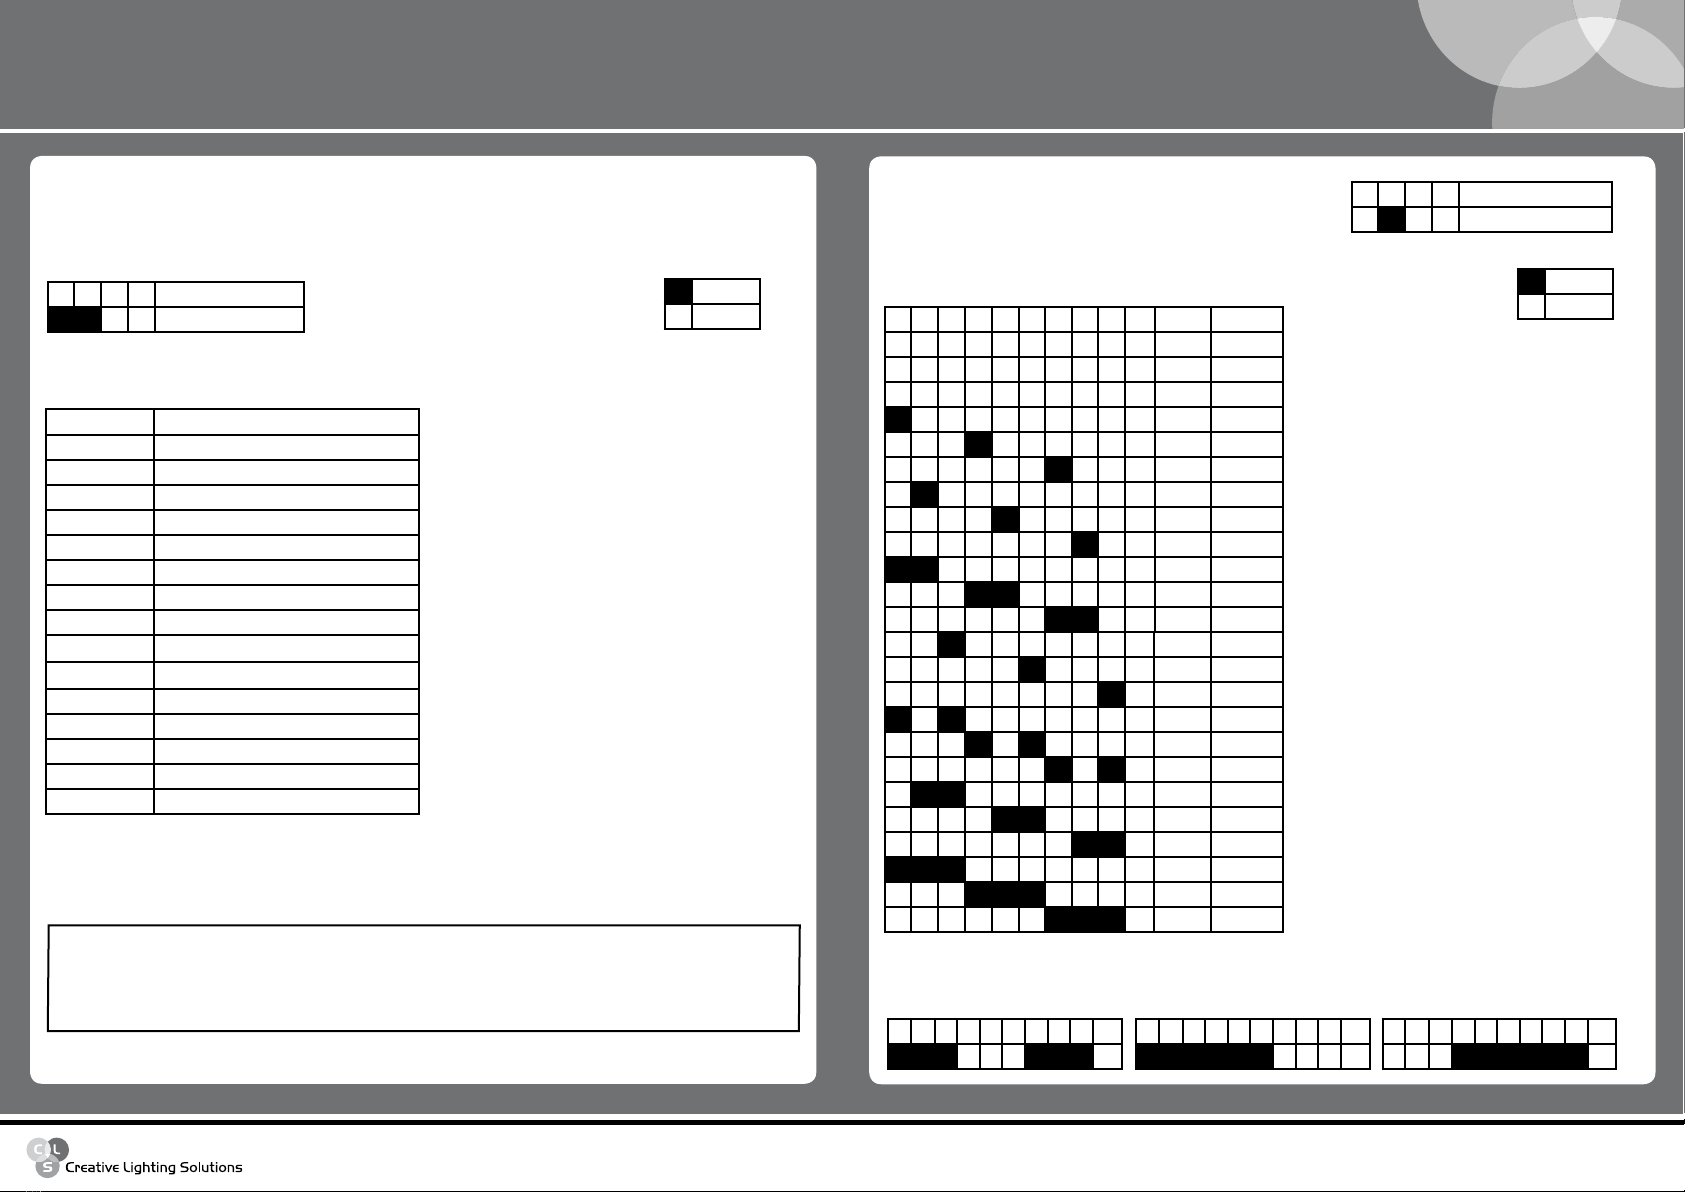
Example:
DMX address 5
The functions of the 3 channels are:
CLS Manuals
CLS Atmosphere LED-panel
www.cls-led.com
CLS LED PAR56-V3 Black/Polish
- 5 - - 6 -
1 2 3 4 5 6 7 8 9 10 Colour Brightness
RED 0%
GREEN 0%
BLUE 0%
RED 14%
GREEN 14%
BLUE 14%
RED 28%
GREEN 28%
BLUE 28%
RED 42%
GREEN 42%
BLUE 42%
RED 57%
GREEN 57%
BLUE 57%
RED 71%
GREEN 71%
BLUE 71%
RED 85%
GREEN 85%
BLUE 85%
RED 100%
GREEN 100%
BLUE 100%
1 2 3 4 5 6 7 8 9 10 1 2 3 4 5 6 7 8 9 10
Yellow
Example:
Magenta
1 2 3 4 5 6 7 8 9 10
Cyan
Now create a colour you wishes with the selection-switches:
STATIC COLOURS
You can set the CLS LED PAR56-V3 on a fixed colour.
First set the function switches to Static Colour Mode
= on
= off
1 2 3 4 Mode
Static colour mode
1 2 3 4 Mode
DMX 5 channel operation
Channel 1 value Function
0 - 63 RGB control, CH2 = red, CH3 = green, CH4 = blue
64 - 127 7 colour fade, CH5 = speed control
128 - 191 7 colour change, CH5 = speed control
192 - 255 3 colour change, CH5 = speed control
Channel 2 value
0 - 255 Red
Channel 3 value
0 - 255 Green
Channel 4 value
0 - 255 Blue
Channel 5 value
0 - 10 No speed
11 - 100 Fast to low speed
101 - 150 No speed
151 - 255 Speed control by unit, (potentiometer)
= on
= off
!
WARNING
ATTENTION!
BEfOrE sETTINg A sTANd-AlONE mOdE, fIrsT uNplug ThE
ExTErNAl dmx cABlE TO A dmx cONTrOllEr. YOu dON’T NEEd
A dmx cONTrOllEr fOr ThEsE mOdEs!
5 channel DMX operation
With 5 channel DMX operation you need 5 DMX channels to control the CLS LED PAR56-V3.
First set the function switches to DMX 5 channel operation:
Now you can give the CLS LED PAR56-V3 Black a DMX address with the selection switches.
See table on page 3.
STAND-ALONE OPERATION

CLS Manuals
CLS Atmosphere LED-panel
www.cls-led.com
CLS LED PAR56-V3 Black/Polish
- 7 - - 8 -
1 2 3 4 Mode
*Stand-alone master operation
1 2 3 4 Mode
Stand-alone slave operation
1 2 3 4 5 6 7 8 9 10 Function
Stepping colour changes
= on
= off
5.2 Colour changing
With this mode, the CLS LED PAR56-V3 will show you a stepping colour-changing program. You can set the
speed of this program by a potentiometer or by music.
5.3. Colour changing with 1 Master and maximum 3 Slaves
With this mode you can create a lightshow without a DMX controller. 1 CLS LED PAR56-V3 must set as
master and all other CLS LED PARs as slave units.
The selection-switches of the slaves must be “off”.
5.5 Stepping colour changes
For stepping colour changes with 1 master and maximum 3 slaves, set the selection-switches from the
master on the right position.
5.4 Fading colour changes
For fading colour changes with 1 master and maximum 3 slaves set the selection switches from the master
on the right position.
The selection-switches of the slaves must be “off”.
All slaves must be set with a DMX address with the selection switches. Every unit needs 5
channels, so the first slave must be set on address 6, the second on 11 and the third on 16.
Connect the master with a DMX cable to the first slave, connect the first slave with a DMX cable to the
second slave and connect the second slave with a DMX cable to the third slave.
Now you can choose how you want to change the colours. Fading or stepping.
And set all other CLS LED PAR56-V3 Black to slave operation:
* = dip switch on = Speed control by music
dip switch off = Speed control by potentiometer
1 2 3 4 Mode
*Stand-alone operation
* = dip switch on = Speed control by music
dip switch off = Speed control by potentiometer
1 2 3 4 5 6 7 8 9 10 Function
Fading colour changes
2007 CLS-LED BV. All rights reserved. Information subject to change without notice, CLS-LED BV and all affiliated companies disclaim liability for
injury, damage direct or indirect loss, consequential or economic loss or any other loss occasioned by the use of, inability to use or reliance on
the information contained in this manual. No part of this manual may be reproduced, in any form or by any means, without permission in writ-
ing from CLS-LED BV. Other legal information can be found in our General conditions to be found on the back of your CLS-LED BV invoice or on
our website www.cls-led.com/Conditions.pdf
TECHNICAL SPECIFICATIONS
Power supply: Voltage: 100 ~ 240 VAC
Power consumption: Max 18 VA
Primary fuse: 2,5A Fast
Secondary fuse: 100 mAF
Weight: 1,2 kg
Dimensions: 220 x 210 x 220 mm (hxwxd) (without bracket)
Dimensions filter frame: 198 x 198 mm (hxw)
Control in & output: XLR 3 pole male-female
Control cable: 120 ohm DMX cable
Control signal: DMX 512/1990
Working temperature: 0 to +50 oC
Housing: High temperature powder coated steel (item nr. 875550)
Polished steel (item nr. 875552)
Multiple connection
Possiblities on a fixture
Installation depth
In centimeters
Swivel
Fixture is horizontally rotatable,
indicated in degrees
Swivel
Fixture is vertically rotatable,
indicated in degrees
Mounting hole
In centimeters
Application area
Indoor or outdoor
Application area
Floor, wall or ceiling
Protection class
One, two or three
Cable length
Maximum cable attached
on the fixture in centimeters
Lifespan
Of the light source in hours
Driver
Inclusive or exclusive
Pressure
Maximum pressure on
the fixture per kg/cm2
Weight
In gram/kilogram
Curve
Minimal bending curve
in centimeters
LED pitch
Pitch between the
LEDs in millimeters
Cutting length
Indicated by the
cutting marks
DMX channels
DMX channels on
a product
Other Creative Lighting Solutions Dj Equipment manuals

Creative Lighting Solutions
Creative Lighting Solutions REVO Compact Basic User manual

Creative Lighting Solutions
Creative Lighting Solutions CLS Zense User manual

Creative Lighting Solutions
Creative Lighting Solutions CLS RGB LED Par Controller User manual

Creative Lighting Solutions
Creative Lighting Solutions REVO MODULAR User manual
Popular Dj Equipment manuals by other brands


American DJ
American DJ Flash Tube Buffer User instructions

American DJ
American DJ LED Messenger User instructions

PLUSLITE
PLUSLITE ECLISSE INDOOR PL200-I User instructions

Event Lighting
Event Lighting PS300IICW user manual

SCHLAPPI ENGINEERING
SCHLAPPI ENGINEERING BOUNDARY quick start guide

Novation
Novation Launchpad X user guide


