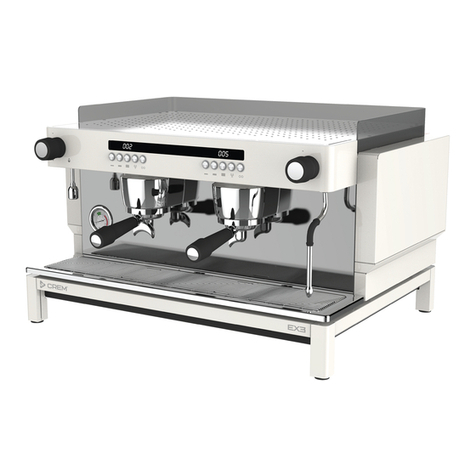
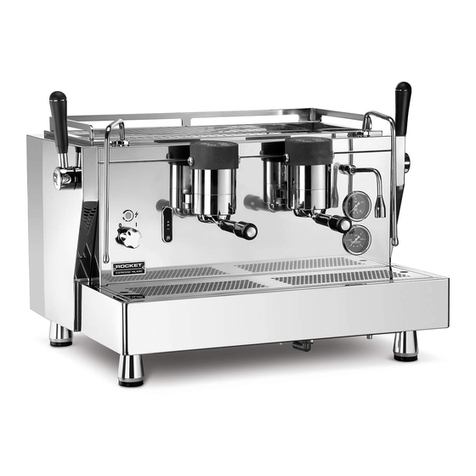
Crem EX3 1B User manual

Technical Manual
TM_EN
Part No.: 1964229_2
Crafted for every taste

2
CONTENTS
CONTENTS 2
MANUAL REVISIONS 4
NOTIFICATIONS 5
· Explanation of descriptions 5
ROUTINE MAINTENANCE SCHEDULE 6
· Service intervals 6
CHANGING THE GROUP GASKET 7
· All versions 7
BUTTONS AND CONTROLS 8
· Machine controls 8
SERVICE PROGRAMMING 9
· Stand-by [oFF] status 9
· Factory preset 9
· Service menu - Access 9
· Service menu - Settings summary chart 9
· toU – Boiler lling Time-out 10
· cLE – Automatic group cleaning cycles 10
· Prd – Enabling/Disabling dose Programming 10
· SEn – Level probe sensitivity 10
· PiF – Enabling/Disabling electronic Preinfusion 11
· tEA – Enabling/Disabling automatic hot water function 11
· Eco – Enabling/Disabling Eco mode function 11
· tEc – Eco mode boiler temperature 11
· SLA – Service liter alarm (Water lter maintenance) 12
· ScA – Service coee alarm (Maintenance) 12
· tU – Temperature units 12
· SkP – Ski - Skd – PID parameters kP, Ki & kd 12
· Sb – PID band zone 13
· SE – Display temperature oset 13
· AUt – Enabling/Disabling Auto On/O function 13

3
CONTENTS
ELECTRICAL DIAGRAMS 14
· PCB & LED lights connections - EX3 1B Control Versions 14
· PCB & LED lights connections - EX3 1B Display PID Versions 16
· Power diagram - EX3 MINI 1Gr & MINI 2Gr Control - 1Ph+N 220-240V 18
· Power diagram - EX3 MINI 1Gr & MINI 2Gr Display PID - 1Ph+N 220-240V 19
· Power diagram - EX3 2Gr Control - 1Ph+N 220-240V 20
· Power diagram - EX3 2Gr Display PID - 1Ph+N 220-240V 21
MACHINE ALERTS 22
· Alarms and warnings 22
TROUBLESHOOTING 23
· Machine faults 23
· Brewing faults 23
· Limescale faults 23

4
MANUAL REVISIONS
Rev. #: Date: TSB#: Change Description
01 Feb. 05, 2020 None First draft released for technical review.
Firmware rev 1.04
02 Apr. 03, 2020 None Include Mini models & update Electric diagrams

5
NOTIFICATIONS
· Explanation of descriptions
There are ve dierent levels of notication intensity within this
manual, as identied by the signal terms: DANGER, WARNING,
IMPORTANT, NOTE and PRO TIP. The level of risk and importance
of the notication is determined by the following denitions.
Always observe the warnings to ensure safety and prevent
potential injury and product damage.
Important:
Alerts against unsafe practices. Observe Important
notications to ensure food safety, prevent possible
minor personal injury, or damage to the machine.
WARNING:
Indicates a potentially hazardous situation which, if the
WARNING is ignored, could result in serious injury or
even death.
DANGER:
INDICATES AN IMMINENTLY HAZARDOUS SITUATION
WHICH, IF NOT AVOIDED, WILL LIKELY RESULT IN
SERIOUS INJURY AND EVEN DEATH.
Note:
Gives additional information which may be helpful
during the operation, routine maintenance, and
cleaning of the machine.
Pro Tip:
Gives helpful hints and suggestions from the
manufacturer that take the guesswork out of choosing
settings and care intervals.
i

6
ROUTINE MAINTENANCE SCHEDULE
· Service intervals
Main components Part No.
Months (Cycles)
6 (12500) 12 (25000) 18 (37500) 24 (50000)
Boiler
Non suction valve 65000210 Check Replace
Boiler lling solenoid
valve 60000202 Replace
Boiler upper raccord 30000200 Check Check
Boiler lower raccord 30000210 Check Check
Safety Valve 65000115 Check Check
Brewing group
Group solenoid valve 60000156 Replace
Shower 75000010 Replace Replace Replace Replace
Group head gasket 75000081
75000083 Replace Replace Replace Replace
Taps
Steam tap 15000342 (R)
15000338 (L) Clean Replace
Water tap 15000342 (R)
60000100N (A) Replace
Motor-pump
Pump head 60000030 Replace
Non return valve 60000010 Replace
Expansion valve 65000021 Replace
iNote:
(R) Manual rotary tap / (L) Manual lever tap / (A) Automatic tap solenoid
Important:
Always conduct the 6 month service intervals without delay to ensure excellent
performance of the machine and to ensure full warranty coverage.

7
· All versions
1. To remove the porta-lter, use
a straight-blade screwdriver to
release the shower by prying
down with medium force.
4. Remove the lter basket(A),
then place the new gasket
and shower(B) into the porta-
lter(C).
2. Remove the shower and
gasket.
5. Preheat the gasket to soften the rubber. A - heat the gasket
for 15 seconds using the water from the hot water outlet, or
B - place the gasket, shower, and porta-lter in hot water for 30
seconds.
3. Remove and discard the old
gasket. Insert the new gasket
(chamfer and EXPOBAR logo
facing up) into the shower.
15s
30s
99OC
> 65 OC
A
A
B B
C
WARNING!
The water from the water tap is very hot! Handle with care to prevent scalding or burns.
CHANGING THE GROUP GASKET

8
BUTTONS AND CONTROLS
· Machine controls
EX3 features a push button control block for each brewing group. Control functions are explained
below.
Versions with display (PID) are equipped with an individual 3 digit display on each group for
monitoring machine status, performing user programming and machine adjustments.
Hot Water Knob
K1
(One set per group)
Steam Knob
Pro Tip:
All group buttons are fully adjustable via the user programming. See the Dose
Programming section for more details.
000
Control PID
Pro Tip:
Versions with display will show the shot timer during the brewing process.
Button Selection description Programming menu function
K1 Short espresso (+)
K2 Medium espresso (-)
K3 Large espresso
K4 Group ush
K5 Continuous / Hot water Enter / Accept
K2 K3 K4 K5

9
· Stand-by [oFF] status
To put the machine on electronic Stand-by mode [oFF] from home screen, press K5 and then K3
at the same time. Message [oFF] is shown on the display.
On this mode, the heating element will remain disconnected.
To exit from the Stand-by mode, just press any button (K1 – K2 – K3 – K4) to come back to the
home screen.
· Service menu - Settings summary chart
SERVICE PROGRAMMING
Setting Description
[toU] Boiler lling time-out
[cLE] Cleaning program cycles
[Prd] Dose programming
[SEn] Level probe sensitivity
[PiF]* Preinfusion (electronic)
[tEA]* Automatic tea valve
[Eco]* Eco mode functions
[tEc] Eco mode boiler temperature
[SLA]* Service liter alarm (Filter maintenance)
Setting Description
[ScA]* Service coee alarm (maintenance)
[tU ] Temperature units
[SkP] ‘kP’ PID parameter
[Ski] ‘kI’ PID parameter
[Skd] ‘kD’ PID parameter
[Sb ] PID band parameter
[SE ] Display temperature oset
[AUt]* Auto On/O
* Disabled by default after PCB factory preset
· Factory preset
To restore the machine to factory default programming settings, follow the steps below:
1. Turn the machine o at the main power switch.
2. Press and hold K1+K3+K5 simultaneously while turning the main power switch back on. The
display will show [PrS] and all previously customized settings will be erased and replaced with
the factory settings.
3. Cycle the machine o and on once more at the main power switch to remove the message.
· Service menu - Access
To access the service programming settings, follow the steps below:
1. Put the machine on Stand-by mode [oFF] (see previous instructions).
2. When [oFF] is shown on the display, hold K5 for 15 seconds, until [toU] (1st menu setting) is
shown on the display.
3. Browse through the menu by pressing K1 & K2.
4. Access to each setting by pressing K5. The adjustable parameter will ash. Accept and save by
pressing K5 again.
5. To exit from the menu, browse to [ESc] (Escape) and press K5 to come back to [oFF] mode.

10
· toU – Boiler lling Time-out
To change the boiler lling time-out, follow the steps below:
1. Enter the service programming and browse through the menu (see previous instructions).
2. When [toU] is shown on the display, enter by pressing K5.
3. Select with K1 and K2 the boiler lling time-out in seconds.
4. Accept and save setting by pressing K5. You are back in the service programming menu.
SERVICE PROGRAMMING
· cLE – Automatic group cleaning cycles
To change the automatic group cleaning program cycles, follow the steps below:
1. Enter the service programming and browse through the menu (see previous instructions).
2. When [cLE] is shown on the display, enter by pressing K5.
3. Select with K1 and K2 the automatic group cleaning cycles.
4. Accept and save setting by pressing K5. You are back in the service programming menu.
· Prd – Enabling/Disabling dose Programming
To enable or disable the dose programming function, follow the steps below:
1. Enter the service programming and browse through the menu (see previous instructions).
2. When [Prd] is shown on the display, enter by pressing K5.
3. Use K1 and K2 to enable [on] or disable [oFF] the Dose programming function.
4. Accept and save setting by pressing K5. You are back in the service programming menu.
· SEn – Level probe sensitivity
To change the level probe sensitivity, follow the steps below:
1. Enter the service programming and browse through the menu (see previous instructions).
2. When [SEn] is shown on the display, enter by pressing K5.
3. Select with K1 and K2 the Level probe sensitivity between: [L] Low; [M] Medium; [h] High.
4. Accept and save setting by pressing K5. You are back in the service programming menu.

11
· tEA – Enabling/Disabling automatic hot water function
To enable or disable the automatic hot water functions, follow the steps below:
1. Enter the service programming and browse through the menu (see previous instructions).
2. When [tEA] is shown on the display, enter by pressing K5.
3. Select with K1 and K2 the hot water tap function: [oFF] Manual hot water tap; [on] Automatic
hot water tap; [St] Smart Tea function (specic model only).
4. Accept and save setting by pressing K5. You are back in the service programming menu.
SERVICE PROGRAMMING
· Eco – Enabling/Disabling Eco mode function
To enable or disable the Eco mode function, follow the steps below:
1. Enter the service programming and browse through the menu (see previous instructions).
2. When [Eco] is shown on the display, enter by pressing K5.
3. Use K1 and K2 to enable [on] or disable [oFF] the Eco mode function in the user menu.
4. Accept and save setting by pressing K5. You are back in the service programming menu.
· tEc – Eco mode boiler temperature
To change the Eco mode machine’s boiler temperature, follow the steps below:
1. Enter the service programming and browse through the menu (see previous instructions).
2. When [tEc] is shown on the display, enter by pressing K5.
3. Select with K1 and K2 the Eco mode boiler temperature.
4. Accept and save setting by pressing K5. You are back in the service programming menu.
· PiF – Enabling/Disabling electronic Preinfusion
To enable or disable the electronic preinfusion function, follow the steps below:
1. Enter the service programming and browse through the menu (see previous instructions).
2. When [PiF] is shown on the display, enter by pressing K5.
3. Use K1 and K2 to enable [on] or disable [oFF] the electronic preinfusion function.
4. Accept and save setting by pressing K5. You are back in the service programming menu.
iNote:
If enabled on service menu, electronic Preinfusion can be enabled [on] or disabled
[oFF] individually on each group [Pi1], [Pi2] or [Pi3] on the user menu.

12
· SLA – Service liter alarm (Water lter maintenance)
To change the Service liter alarm, follow the steps below:
1. Enter the service programming and browse through the menu (see previous instructions).
2. When [SLA] is shown on the display, enter by pressing K5.
3. Select with K1 and K2 the Service lter alarm value. The counter can be adjusted in steps of
10L = [001]: From [000] = 0L = Disabled, to [999] = 9990L.
4. Accept and save setting by pressing K5. You are back in the service programming menu.
SERVICE PROGRAMMING
· ScA – Service coee alarm (Maintenance)
To change Service coee alarm, follow the steps below:
1. Enter the service programming and browse through the menu (see previous instructions).
2. When [ScA] is shown on the display, enter by pressing K5.
3. Select with K1 and K2 the Service coee alarm value. The counter can be adjusted in steps of
1000coees = [001]: From [000] = 0coees = Disabled, to [999] = 999000coees.
4. Accept and save setting by pressing K5. You are back in the service programming menu.
· tU – Temperature units
To change the Temperature units, follow the steps below:
1. Enter the service programming and browse through the menu (see previous instructions).
2. When [tU] is shown on the display, enter by pressing K5.
3. Select with K1 and K2 the Temperature units between: [c] Celsius; [F] Fahrenheit.
4. Accept and save setting by pressing K5. You are back in the service programming menu.
· SkP – Ski - Skd – PID parameters kP, Ki & kd
To change the PID factors value, follow the steps below:
1. Enter the service programming and browse through the menu (see previous instructions).
2. When [SkP], [Ski] or [Skd] is shown on the display, enter by pressing K5.
3. Select with K1 and K2 the selected PID parameter value.
4. Accept and save setting by pressing K5. You are back in the service programming menu.

13
· Sb – PID band zone
To change the PID band zone, follow the steps below:
1. Enter the service programming and browse through the menu (see previous instructions).
2. When [Sb] is shown on the display, enter by pressing K5.
3. Select with K1 and K2 the PID working band value.
4. Accept and save setting by pressing K5. You are back in the service programming menu.
SERVICE PROGRAMMING
· SE – Display temperature oset
To change the home Display temperature oset, follow the steps below:
1. Enter the service programming and browse through the menu (see previous instructions).
2. When [SE] is shown on the display, enter by pressing K5.
3. Select with K1 and K2 the Display temperature oset.
4. Accept and save setting by pressing K5. You are back in the service programming menu.
· AUt – Enabling/Disabling Auto On/O function
To enable or disable the Auto On/O function, follow the steps below:
1. Enter the service programming and browse through the menu (see previous instructions).
2. When [AUt] is shown on the display, enter by pressing K5.
3. Use K1 and K2 to enable [on] or disable [oFF] the Auto On/O function.
If enabled [on], press K5 and the machine will ask for the close day [00X].
Weekdays: [001] Monday; [002] Tuesday; … ; [007] Sunday.
4. Accept and save setting by pressing K5. You are back in the service programming menu.
iNote:
The temperature shown on the display at home screen will be the boiler temperature
read by the temperature probe minus the [SE] value. E.g.: If Tboiler = 116ºC and
[SE] = 20, the value shown on the display will be Tboiler – [SE] = 116 – 20 = [ 96]
iNote:
The Auto On and O timers are adjusted on User menu when the function is enabled
in service menu.

14
ELECTRICAL DIAGRAMS
· PCB & LED lights connections - EX3 1B Control Versions
EX3 1B CONTROL
1Ph+N 220-240V

15
ELECTRICAL DIAGRAMS
EX3 1B CONTROL
1Ph+N 220-240V
· PCB & LED lights connections - EX3 1B Control Versions

16
ELECTRICAL DIAGRAMS
· PCB & LED lights connections - EX3 1B Display PID Versions
EX3 1B Display PID
1Ph+N 220-240V

17
ELECTRICAL DIAGRAMS
· PCB & LED lights connections - EX3 1B Display PID Versions
EX3 1B Display PID
1Ph+N 220-240V

18
ELECTRICAL DIAGRAMS
· Power diagram - EX3 MINI 1Gr & MINI 2Gr Control - 1Ph+N 220-240V

19
ELECTRICAL DIAGRAMS
· Power diagram - EX3 MINI 1Gr & MINI 2Gr Display PID - 1Ph+N 220-240V

20
ELECTRICAL DIAGRAMS
· Power diagram - EX3 2Gr Control - 1Ph+N 220-240V
This manual suits for next models
3
Table of contents
Other Crem Coffee Maker manuals
