manuals.online logo
Brands
  1. Home
  2. •
  3. Brands
  4. •
  5. Crestron
  6. •
  7. Amplifier
  8. •
  9. Crestron C2NI-AMP-4X100 User manual

Crestron C2NI-AMP-4X100 User manual

1
quickstart guide
C2N(I)-AMP-4X100
www.crestron.com
888.273.7876 201.767.3400
Specifications subject to
change without notice.
C2N(I)-AMP-4X100
For Regulatory Compliance information, refer to the latest version
of Doc. 7289.
QUICKSTART DOC. 7288A (2032394, Sheet 1 of 2) 11.11
4 Room Audio Processor Amplifier
1
Make the necessary connections as called out in the diagram below. Connect power last.
Hardware Hookup
NOTE: For double the power (into 8 ohm speakers only), SPEAKER
OUTPUTS 1 and 2 or SPEAKER OUTPUTS 3 and 4 can be bridged. For
example, the left speaker’s + and - terminals are connected to the two +
terminals of output #1 and the right speaker’s + and - terminals are connected
to the two + terminals of output #2. Refer to the diagram to the right.
To adjust volume when bridged, select ROOM 1 for SPEAKER OUTPUTS 1
and 2 or select ROOM 2 for SPEAKER OUTPUTS 3 and 4.
RM 1
RM 3
RM 2
RM 4
BRIDGE
8 OHMS ONLY +-
+-
L+-+-R
L+-+-R
To Cresnet® Devices
NET
From AC power line
PWR
Tie to ground
G
From Unbalanced Stereo Line Level Audio
Outputs from Source Devices
ANALOG SOURCES (IN)
To Additional Amplifiers
ANALOG SOURCES (OUT)
NOTE: The 24 Volt lines on the NET ports of the amplifier are
limited to 300 mA.
To Loudspeakers
SPEAKER OUTPUTS
NON-BRIDGE
L+-+-R
+ - + -
LEFT RIGHT
NOTE: The C2NI-AMP-4X100 (International
version) requires a power cord that is
harmonized to the country’s national and local
electrical codes. Each inner wire in the cord
should be at least 18 AWG (0.75 mm2) and rated
for at least 300V. The temperature rating of the
cord should be at least 60º C. The cord length
should be 1.5 - 2 meters.
To Cresnet® Devices
LOOP THRU
2Attach the Labels
Use the included labels and inserts to prepare your C2N(I)-AMP-4X100:
1. Locate the SOURCE and ROOM label inserts included with your unit (SOURCE insert has space for six labels, ROOM insert has room for four labels).
2. Apply the peel-and-stick labels in the appropriate positions on the inserts, being careful to match label positions to what is configured in the programming software. For neatest appearance, when applying a label,
cover the white guidelines on the insert. First and last labels will cover one line each; labels in between will cover lines on their left and right sides.
2
quickstart guide
C2N(I)-AMP-4X100
www.crestron.com
888.273.7876 201.767.3400
Specifications subject to
change without notice.
C2N(I)-AMP-4X100
For Regulatory Compliance information, refer to the latest version
of Doc. 7289.
QUICKSTART DOC. 7288A (2032394, Sheet 1 of 2) 11.11
4 Room Audio Processor Amplifier
3
Use Crestron Toolbox™ for communicating with the C2N(I)-AMP-4X100; refer to the
Crestron Toolbox help file for details.
There is a single method of communication: Indirect communication.
NOTE: Required for setting the Net ID and loading firmware.
Establish Communication
2
The NET port on the C2N(I)-AMP-4X100 connects to the control system via Cresnet:
1. Establish communication between the PC and the control system as described
in the latest version of the 2-Series Control Systems Reference Guide
(Doc. 6256) which is available from the Crestron® Web site
(www.crestron.com/manuals).
2. Use the Address Book in Crestron Toolbox to create an entry for the
C2N(I)-AMP-4X100 using the expected communication protocol (indirect).
Select the Cresnet ID of the C2N(I)-AMP-4X100 as listed in section below
and the address book entry of the control system that is connected to the
C2N(I)-AMP-4X100.
3. Display the C2N(I)-AMP-4X100’s “System Info” window (click the icon);
communications are confirmed when the device information is displayed.
Indirect Communication
Cresnet
or USB
Serial ,
LAN
PC Running
Crestron Toolbox Control System C2N(I)-AMP-4X100
4
4
The Net ID of the C2N(I)-AMP-4X100 has been factory set to 33. The Net IDs of
multiple C2N(I)-AMP-4X100 devices in the same system must be unique. The Net
ID may also be set from a personal computer (PC) via Crestron Toolbox (refer to
“Establish Communication” in section ).
Net ID
3
5
Turn the Amplifier On or Off
To turn the amplifier on, move the front panel switch to the ON position.
To turn the amplifier off, move the front panel switch to the OFF position.
Select a Source
To select a source for distribution, press the desired SOURCE button. If a room is connected to the selected source,
its LED will light.
NOTE: If a room is in the Volume Control mode, pressing a SOURCE button will exit the room’s Volume Control
mode.
Select a Room
Once a source is selected, press any ROOM button that is to receive the selected source. The room will be
connected to the selected source and its LED will light.
To remove a room from the selected source, press the ROOM button of a connected room. The LED will turn off.
NOTE: If a room is in the Volume Control mode, pressing a ROOM button will exit the Volume Control mode.
NOTE: If the outputs of the C2N(I)-AMP-4X100 are bridged, the ROOM 1 button will act in unison with the ROOM 2
button and the ROOM 3 button will act in unison with the ROOM 4 button. Similarly, the ROOM 1 LED will act in
unison with the ROOM 2 LED and the ROOM 3 LED will act in unison with the ROOM 4 LED.
Volume Control Mode
The volume level of a connected room can be controlled when the room is in the Volume Control mode. To switch to
the Volume Control mode:
1. Press and hold the ROOM button of the room to be controlled for two seconds.
• Press j or k to change the volume in 1 dB increments.
• Hold j or k for more than one second, to ramp the volume up or down in 1 dB/0.1 second
increments.
If the maximum volume or minimum volume is reached, all front panel LEDs will blink three times.
2. Press the ROOM button again to exit the Volume Control mode.
If j or k is not pressed for 10 seconds, the amplifier will automatically exit the Volume
Control mode.
Operation
3
quickstart guide
C2N(I)-AMP-4X100
www.crestron.com
888.273.7876 201.767.3400
Specifications subject to
change without notice.
C2N(I)-AMP-4X100
For Regulatory Compliance information, refer to the latest version
of Doc. 7289.
QUICKSTART DOC. 7288A (2032394, Sheet 2 of 2) 11.11
4 Room Audio Processor Amplifier
6Dimensions
2
13.64 in
(347 mm)
3.60 in
(92 mm)
16.89 in
(429 mm)
SPECIFICATION DETAILS
Audio
Controls
Volume Gain Range
Mute
Input Compensation
Bass Gain Range
Treble Gain Range
Frequency Response
S/N Ratio
THD + N
Stereo Separation
Power Requirements
Main Power
Available Network Power
Environmental
Temperature
Humidity
Dimensions
Height
Width
Depth
Weight
Volume, Balance, Bass, Treble, Loudness,
Mute, Mono, Input Compensation
-80dB to +20dB, 1 dB steps
-100dB (electronic)
±10dB
±12dB @ 100Hz, 2dB steps
±12dB @ 10kHz, 2 dB steps
20Hz to 20kHz ±1.0dB
103dB, 20Hz to 20kHz A-weighted
0.8%, 20Hz to 20kHz
>70dB
120 Volts AC, 60 Hz (C2N-AMP-4X100)
230 Volts AC, 50/60 Hz (C2NI-AMP-4X100)
5 Watts per each NET 1-4 connection (no
power on “Loop-Thru”); 24 Volts DC
41° to 122°F (5° to 50°C)
10% to 90% RH (non-condensing)
3.60 in (92 mm)
16.89 in (429 mm)
13.64 in (347 mm)
20.0 lb (9.0 kg)
7Specifications
Crestron, the Crestron logo, Cresnet, and Crestron Toolbox are either trademarks or registered trademarks of
Crestron Electronics, Inc. in the United States and/or other countries. Other trademarks, registered
trademarks and trade names may be used in this document to refer to either the entities claiming the marks
and names or their products. Crestron disclaims any proprietary interest in the marks and names of others.
©2011 Crestron Electronics, Inc.

This manual suits for next models

1

Other Crestron Amplifier manuals

Crestron DM-NAX-8ZSA User manual

Crestron

Crestron DM-NAX-8ZSA User manual

Crestron Adagio AMS-AIP User manual

Crestron

Crestron Adagio AMS-AIP User manual

Crestron HD-DA-2 Dimensional drawing

Crestron

Crestron HD-DA-2 Dimensional drawing

Crestron AMP-150-70 Dimensional drawing

Crestron

Crestron AMP-150-70 Dimensional drawing

Crestron DM-NAX-AMP-X300 User manual

Crestron

Crestron DM-NAX-AMP-X300 User manual

Crestron PROCISE PROAMPI-7X400 User manual

Crestron

Crestron PROCISE PROAMPI-7X400 User manual

Crestron MP-AMP40-70/100V How to use

Crestron

Crestron MP-AMP40-70/100V How to use

Crestron PROCISE PROAMPI-7X400 User manual

Crestron

Crestron PROCISE PROAMPI-7X400 User manual

Crestron AMP-2800 User manual

Crestron

Crestron AMP-2800 User manual

Crestron AMP-1200-100 Dimensional drawing

Crestron

Crestron AMP-1200-100 Dimensional drawing

Crestron High-Gain Line Amplifier SRD-AMP-1 User manual

Crestron

Crestron High-Gain Line Amplifier SRD-AMP-1 User manual

Crestron HD-DA-2-QUAD User manual

Crestron

Crestron HD-DA-2-QUAD User manual

Crestron CNAMPX-12X60 User manual

Crestron

Crestron CNAMPX-12X60 User manual

Crestron C2-AUDIO-6PAK User manual

Crestron

Crestron C2-AUDIO-6PAK User manual

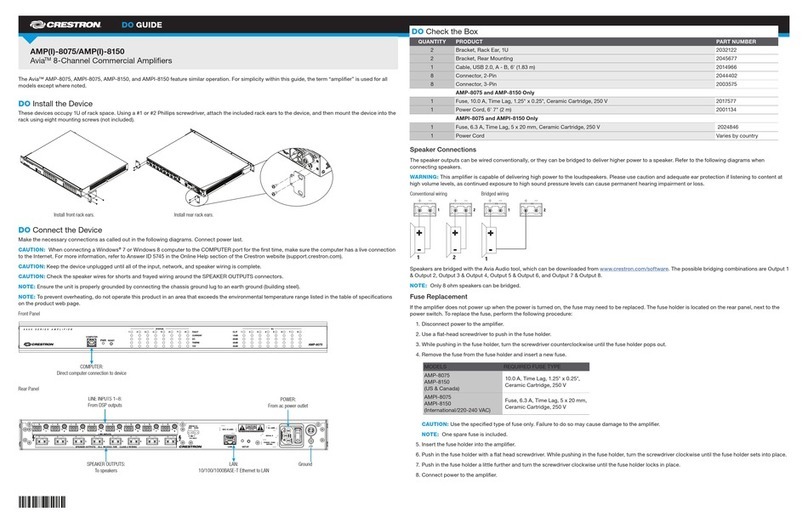
Crestron Avia AMP-8075 Dimensional drawing

Crestron

Crestron Avia AMP-8075 Dimensional drawing

Crestron C2N-IADS30X24 User manual

Crestron

Crestron C2N-IADS30X24 User manual

Crestron 4K DigitalMedia 3-Series Owner's manual

Crestron

Crestron 4K DigitalMedia 3-Series Owner's manual

Crestron X Series User manual

Crestron

Crestron X Series User manual

Crestron Adagio AADS User manual

Crestron

Crestron Adagio AADS User manual

Crestron AMP-8075 User manual

Crestron

Crestron AMP-8075 User manual

Crestron MP-AMP30 How to use

Crestron

Crestron MP-AMP30 How to use

Crestron X Series User manual

Crestron

Crestron X Series User manual

Crestron AMP-150-100 Dimensional drawing

Crestron

Crestron AMP-150-100 Dimensional drawing

Crestron AMP-2800 User manual

Crestron

Crestron AMP-2800 User manual

Popular Amplifier manuals by other brands

turck MK13-11AEx0-R Series quick start guide

turck

turck MK13-11AEx0-R Series quick start guide

Technics SU-A900 operating instructions

Technics

Technics SU-A900 operating instructions

Whadda WPI411 user manual

Whadda

Whadda WPI411 user manual

RDP Group S7AC Technical manual

RDP Group

RDP Group S7AC Technical manual

IED Globalcom DNA7874L installation instructions

IED Globalcom

IED Globalcom DNA7874L installation instructions

Onkyo TX-SV434 instruction manual

Onkyo

Onkyo TX-SV434 instruction manual

JL Audio M1700 owner's manual

JL Audio

JL Audio M1700 owner's manual

Musical Fidelity AMS100 manual

Musical Fidelity

Musical Fidelity AMS100 manual

Audison LRx 1.1k owner's manual

Audison

Audison LRx 1.1k owner's manual

Link electronics DigiFlex 1652 Specification sheet

Link electronics

Link electronics DigiFlex 1652 Specification sheet

Arcam FMJ C49 Handbook

Arcam

Arcam FMJ C49 Handbook

Kicker KX400.1 owner's manual

Kicker

Kicker KX400.1 owner's manual

Nuvo Essentia NV-E6DXS owner's manual

Nuvo

Nuvo Essentia NV-E6DXS owner's manual

CyberData 11097 Operation guide

CyberData

CyberData 11097 Operation guide

Pioneer QM-800 operating instructions

Pioneer

Pioneer QM-800 operating instructions

McIntosh MC352 owner's manual

McIntosh

McIntosh MC352 owner's manual

Marshall Amplification JCM 2000 DSL 100 manual

Marshall Amplification

Marshall Amplification JCM 2000 DSL 100 manual

Miboxer PA5 quick start guide

Miboxer

Miboxer PA5 quick start guide

manuals.online logo
manuals.online logoBrands
  • About & Mission
  • Contact us
  • Privacy Policy
  • Terms and Conditions

Copyright 2025 Manuals.Online. All Rights Reserved.