Crutchfield 000NAVIG User manual

Tools Needed: (depending upon vehicle)
000NAVIG
Revision 3/15/05
▲
*000NAVIG*
®
Copyright 2005 Crutchfield Corporation
Navigation Installation Guide
Flat Blade
Screwdriver
Phillips
Screwdriver Panel Tool
Pliers Drill &
Bit Set
Utility Knife
Wire Stripper/
Crimp Tool
Male
and Female Disconnects
Torx Driver Set
Socket &
Ratchet Set
Wire taps
IMPORTANT
Before starting, compare items on your invoice with items received. Carefully check through packaging material.
If any item is missing, please call: Crutchfield Customer Service at 1-800-955-9091
Although reasonable attempts are made to verify the accuracy of the information
contained in this guide, it is presented without warranties or guarantees of any
type due to the constantly changing nature of this type of information and running
changes in vehicle production. Any person or entity using this information does so
at his or its own risk. If you find that our instructions do not apply to your vehicle,
or if you have questions, do not continue with your installation. Contact our
toll-free technical support for assistance (Tech support number is on your invoice).
As with any car audio/video installation, your first
step is to disconnect the negative terminal of your
car battery to prevent short circuits. Check your Crutchfield
MasterSheet™ (available for most vehicles) or vehicle owner’s
manual for specific directions. In some vehicles, disconnecting
the battery may require you to re-enter a security code or have
the dealer reset the internal computer.
!

000NAVIG
2
®
Copyright 2005 Crutchfield Corporation
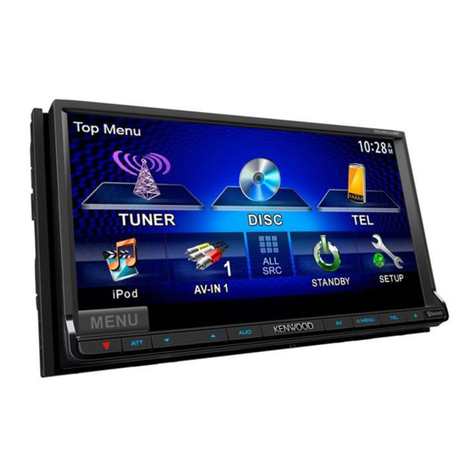
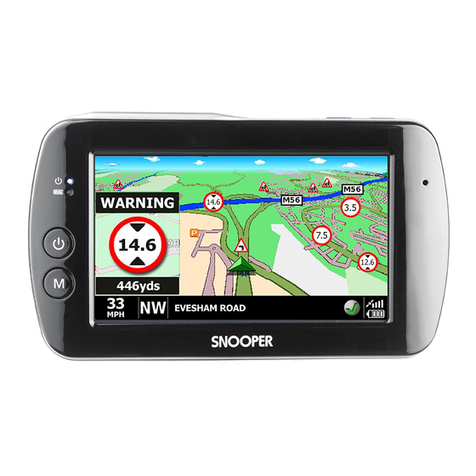
There are several different types of navigation systems available, including remote-
mount (or component) DVD-ROM systems, in-dash DVD receivers with built-in
monitors and navigation capability, and portable navigation pieces.
This installation guide focuses specifically on installing component navigation
systems. The main component in this case is a DVD-ROM drive that is installed in a
convenient spot, and to which certain wiring connections need to be made. For tips
on installing a receiver, visit our receiver installation guide and our receiver
installation video on crutchfieldadvisor.com, or refer to your Crutchfield
MasterSheet™ (available for most vehicles). Portables, meanwhile, don’t require
permanent installation methods, and are generally quite easy to use; you’ll just need
to follow a few simple instructions in the owner’s manual.
Please note, too, that all navigation systems require a GPS antenna. It can be placed
in the car, on the rear deck, for example. However, for optimum performance, it
should be mounted outside the vehicle. In this regard, it installs just like a satellite
radio antenna. Please see our satellite radio installation guide and our satellite radio
antenna installation video for further information.
To install a navigation system in your car, you’ll need to be able to do four things: find
and make a connection to the vehicle’s speed sensor, find and make a connection to
the reverse light, install the DVD-ROM drive, and make all the power and audio/video
connections. (If you’re not connecting the DVD-ROM drive to an in-dash receiver with
a monitor, you’ll need an external monitor. Front-seat external monitors usually come
with adjustable mounting brackets; their owner’s manuals feature mounting details.)
You must make a secure connection to your vehicle’s speed sensor to get the most accurate navigation possible.
Speed sensor wire location varies; it may be under the hood, as pictured above. Call the Tech Support phone number
on your Crutchfield invoice for assistance in locating the speed sensor in your specific vehicle.
Finding and connecting to the speed sensor
Your car’s speed sensor sends information from the transmission
to the speedometer. A navigation system (component or in-dash)
uses this information to calculate vehicle speed and distance
traveled, and to estimate time of arrival during a trip. To get this
information to the navigation system, you’ll have to find and make
a connection to your car’s speed sensor wire.
Where the wire is depends on the vehicle. Sometimes it can be
accessed from under the dash, sometimes from under the hood.
You’ll need to consult a comprehensive wiring diagram for your
vehicle in order to identify it correctly. Make sure you feel
comfortable with this. If not, you’ll probably want to have your
navigation system installed by a professional.
Once you find the vehicle speed sensor wire, connect the
navigation system’s speed sensor lead to it. The easiest way is
to attach a wire-tap to the car’s wire and connect the navigation
system’s lead with a male disconnect. For an even stronger
connection, you can strip away some of the jacket from the car’s
wire — be sure not to break the wire itself — then wrap the
exposed end of the navigation system’s lead around the exposed
wire and solder the two together. Wrap electrical tape around the
connection or use heat-shrink tubing for strength and insulation.
Types of Navigation Systems; Connecting to the Speed Sensor

If the speed sensor wire is under the dash, you can run
the lead to the DVD-ROM drive under the carpet on your
vehicle’s floor. If the wire is under the hood, you’ll have to
get the navigation system’s lead to it through the firewall.
Try to locate an existing hole on the firewall of your vehicle;
most cars will have a pre-drilled hole through which some
of the car’s wiring already runs. If you can’t find one, you’ll
have to find a good place to drill one — take care not to
drill through a gas line or electrical wiring. We recommend
that you drill your own hole only if necessary.
Once you’ve found or drilled a suitable hole, run the speed sensor lead
through the hole into the engine compartment, then connect it to the
speed sensor wire. (If you’ve drilled the hole, install a rubber grommet in
it to prevent damage to the lead.) Once you’ve made the connection, run
the lead to the DVD-ROM drive under the vehicle’s carpet.
Finding and connecting to the reverse light
The navigation system also needs to be connected to your vehicle’s
reverse light; it has to know when you’re going backwards for accurate
positioning and route calculation. The easiest way to do this is to connect
to the reverse light wire right at the tail light. As with the speed sensor,
you can consult your wiring diagram in order to find it. You can also check
each wire that goes into the taillight with a multimeter; connect the mul-
timeter to a wire, have someone put the car in reverse (while keeping the
brake engaged, of course), then see if you get a 12-volt reading. Repeat
this process with each wire until you’ve found the right one. (Note: if you
get a 12-volt reading, make sure it’s because you’ve found the reverse
wire, not the brake wire; you’ll know it’s the brake wire if you get a reading
as soon as the brake is pressed.)
As with the speed sensor, either wire-tap the reverse light wire or strip
and solder it. You can then run the connecting wire
from the tail lights to the DVD-ROM drive. Depending
on the vehicle you drive, this could involve removal
of trim panels, lifting of sections of carpet, and even
backseat removal (if you’re running the lead from
the trunk to the DVD-ROM drive in a passenger car).
The reverse wire can sometimes be found under
the dash or under the hood, but you’ll have to consult your wiring diagram
carefully in order to identify it correctly; tapping into it at the taillight tends
to be much easier.
000NAVIG
3
Using a wire tap and male disconnect
is the easiest way to make the wiring
connections you’ll need.
e wire tap clamps on the wire
you’re connecting to; the male
disconnect crimps onto the new
wire you’re connecting. e male disconnect
slides firmly onto the end
of the wire tap, making a
secure connection.
When running a wire from under the
hood into the cab through the vehicle’s
firewall, we recommend you find and use
a pre-existing opening, where other wires
come into the vehicle cab.
e easiest place to connect to your reverse light is in the
back of the vehicle. As pictured above, however, you may
choose to make a connection under the hood instead.
Connecting to the Speed Sensor (cont.); Connecting to the Reverse Light
Always be careful when
drilling or cutting in a
vehicle. Be aware of
things such as wiring,
windows, fuel lines and
safety devices. Check
drilling/cutting depth
and location to avoid
damage to vehicle
appearance.
CAUTION:
!
✔ Check reverse light wiring connection and test operation.
SAFETY CHECK
!

4
The wire routing and concealment depends upon your vehicle
and where the components of your system are placed. The
instructions below address, in general, what panels may need to
be removed and how they typically come off. Often, panels can
be pried up at edges. Screws and retaining clips might also be
present that will require removal (Figure 1). To prevent damage,
always use care when removing panels.
Door Scuff Plate removal
The plates are usually removed by prying up the edges to
release clips. Some vehicles will have screws present which will
need to be removed (Figure 2).
Seat Belt removal
A seat belt may be located on the panel that needs to be
removed. Most seat belt anchor covers pry off. The seat belt
anchor is secured with a large nut or bolt (Figure 3).
Pillar Trimpanel removal
Remove seat belt if present. Remove screw covers, screws
and plastic retaining clips, if present. Pry up edges of panel to
remove (Figures 4 & 5).
Kick panel removal
Look for screws and pry-out retaining clips to remove. Pry out
edges of panel to release and remove (Figure 6).
Routing wire behind dash
Route wire behind dash and secure with plastic wire ties. Be
sure that wire does not interfere with any moving parts to ensure
safe operation of vehicle.
Routing wire for components and power connections
Determine desired locations for each component. Use the most
direct route for wires. Remove panels necessary to route and
conceal wires. Test system before reinstalling panels.
Upper Pillar Trimpanel
Lower Pillar Trimpanel
Seat Belt Cover/Anchor
Door Scuff Plate
Kick panel
FIGURE 2
FIGURE 1
FIGURE 3
FIGURE 4
FIGURE 5
FIGURE 6
Screw w/ Cover Retaining Clips
The seat belt is
usually secured
with a large hex
head or Torx bolt.
000NAVIG
®
Copyright 2005 Crutchfield Corporation
Panel removal
✔ Make sure seats and seat belts are secured to
manufacturers specifications.
SAFETY CHECK
!

5
Installing the DVD-ROM drive
The DVD-ROM drive box installs like an external amplifier or satellite
radio tuner. First, find a good location for it. Under the passenger
seat is the most common location — don’t worry about accessing
the drive regularly; once you’ve inserted the map disc, you won’t
likely take it out.
The box also contains a gyroscope, which relays important direction
information about the turns you make to the system. The system
uses this information in conjunction with the information it receives
from the GPS satellites with which it’s in contact via the antenna. You
must mount the box horizontally; mounting the box at an angle will
throw the gyroscope off, and cause the system to deliver incorrect
in-route guidance.
The DVD-ROM drive box has four mounting feet or a mounting
bracket. Once you’ve found the spot in which you’d like to mount the box, mark the location of the
feet. Drill holes for the screws (which are usually included). Before drilling, check beneath the
mounting location to make sure you don’t puncture the fuel tank, fuel lines, transmission or brake
lines, etc.
Wiring the system
Connect the box to both a constant and a switched 12-volt power source. Using a multimeter can
help you with this task. You’ll also need to find a place to ground the DVD-ROM drive — using a seat
bolt usually works well.
Run the speed sensor and reverse light leads to the box. Once that’s done, all you have left are the
audio/video connections.
If you have an in-dash receiver with a monitor, you can run a video cable from the navigation system
to the receiver’s video input. If you're using an external monitor, run the video cable from the
navigation system to the monitor’s video input. Some video receivers and external monitors feature
special navigation inputs for same-brand navigation systems, which provide the best screen
resolution, frees up the monitor’s standard input for another video component, and sometimes
facilitates touch-screen operation of the navigation system. It also takes care of the required
audio connection.
Lastly, you’ll need to connect the navigation system to an audio source in order to take advantage of
its voice prompts. Some navigation systems come with a small external speaker (or will
accommodate an optional one); if this is the case, check your owner’s manual for speaker placement
tips. Otherwise, you can connect the audio from the navigation system to your external monitor or
in-dash receiver via a set of standard RCA patch cables.
To ensure neat cable runs that are out of sight, you might have to remove trim panels and pull up
some of your vehicle’s carpet. Though not difficult, this should be done carefully. Once the cables are
connected, and the box is mounted, you’re ready to navigate.
e best place for the navigation unit itself is on the floor. For the gyroscope
to work accurately, you must make sure the unit is mounted horizontally,
and aligned correctly with respect to the vehicle. (“Brain box” of the Pioneer
AVIC-N1 navigation receiver shown above.)
All wires, including power, audio, and video, must be run from the
navigation unit to the appropriate locations, usually under the
vehicle’s carpet.
Always be careful when
drilling or cutting in a
vehicle. Be aware of
things such as wiring,
windows, fuel lines and
safety devices. Check
drilling/cutting depth
and location to avoid
damage to vehicle
appearance.
CAUTION:
!
®
Copyright 2005 Crutchfield Corporation
Table of contents
