Crutchfield 000IPODIG User manual

Tools Needed: (depending upon vehicle)
000IPODIG
Revision 3/15/05
▲
*000IPODIG*
®
Copyright 2005 Crutchfield Corporation
iPod Installation Guide
Flat Blade
Screwdriver
Phillips
Screwdriver Panel Tool
Pliers Drill & Bit Set Utility Knife
Wire Stripper/
Crimp Tool Torx Driver Set
Socket &
Ratchet Set
IMPORTANT
Before starting, compare items on your invoice with items received. Carefully check through packaging material.
If any item is missing, please call: Crutchfield Customer Service at 1-800-955-9091
Although reasonable attempts are made to verify the accuracy of the information con-
tained in this guide, it is presented without warranties or guarantees of any type due to
the constantly changing nature of this type of information and running changes in vehicle
production. Any person or entity using this information does so at his or its own risk. If
you find that our instructions do not apply to your vehicle, or if you have questions, do not
continue with your installation. Contact our toll-free technical support for assistance (Tech
support phone number is on your invoice) (Tech support phone number is onyour invoice).
As with any car audio/video installation, your first
step is to disconnect the negative terminal of your
car battery to prevent short circuits. Check your Crutchfield
MasterSheet™ (available for most vehicles) or vehicle owner’s
manual for specific directions. In some vehicles, disconnecting
the battery may require you to re-enter a security code or have
the dealer reset the internal computer.
!
000IPODIG
Three Requirements For Using An
iPod In Your Car
2
®
Copyright 2005 Crutchfield Corporation
You need to take three things into account in order to listen to your iPod
safely in your car:
1. Signal Transfer
You need a way to transfer the audio signal from your iPod to your car
stereo and car speakers.
2. Power Supply
You’ll want to have a way to keep your iPod charged while using it in
your car.
3. Car Mount
You don’t want your iPod sliding around the floor of your vehicle — this
is a potential hazard should you have to stop quickly, and will likely
result in your iPod getting scratched. Depending on how you choose
to connect your iPod to your car stereo, you will either want to have a
secure mount that safely displays the iPod, or you will want to stow your
iPod away in a glove compartment or console.
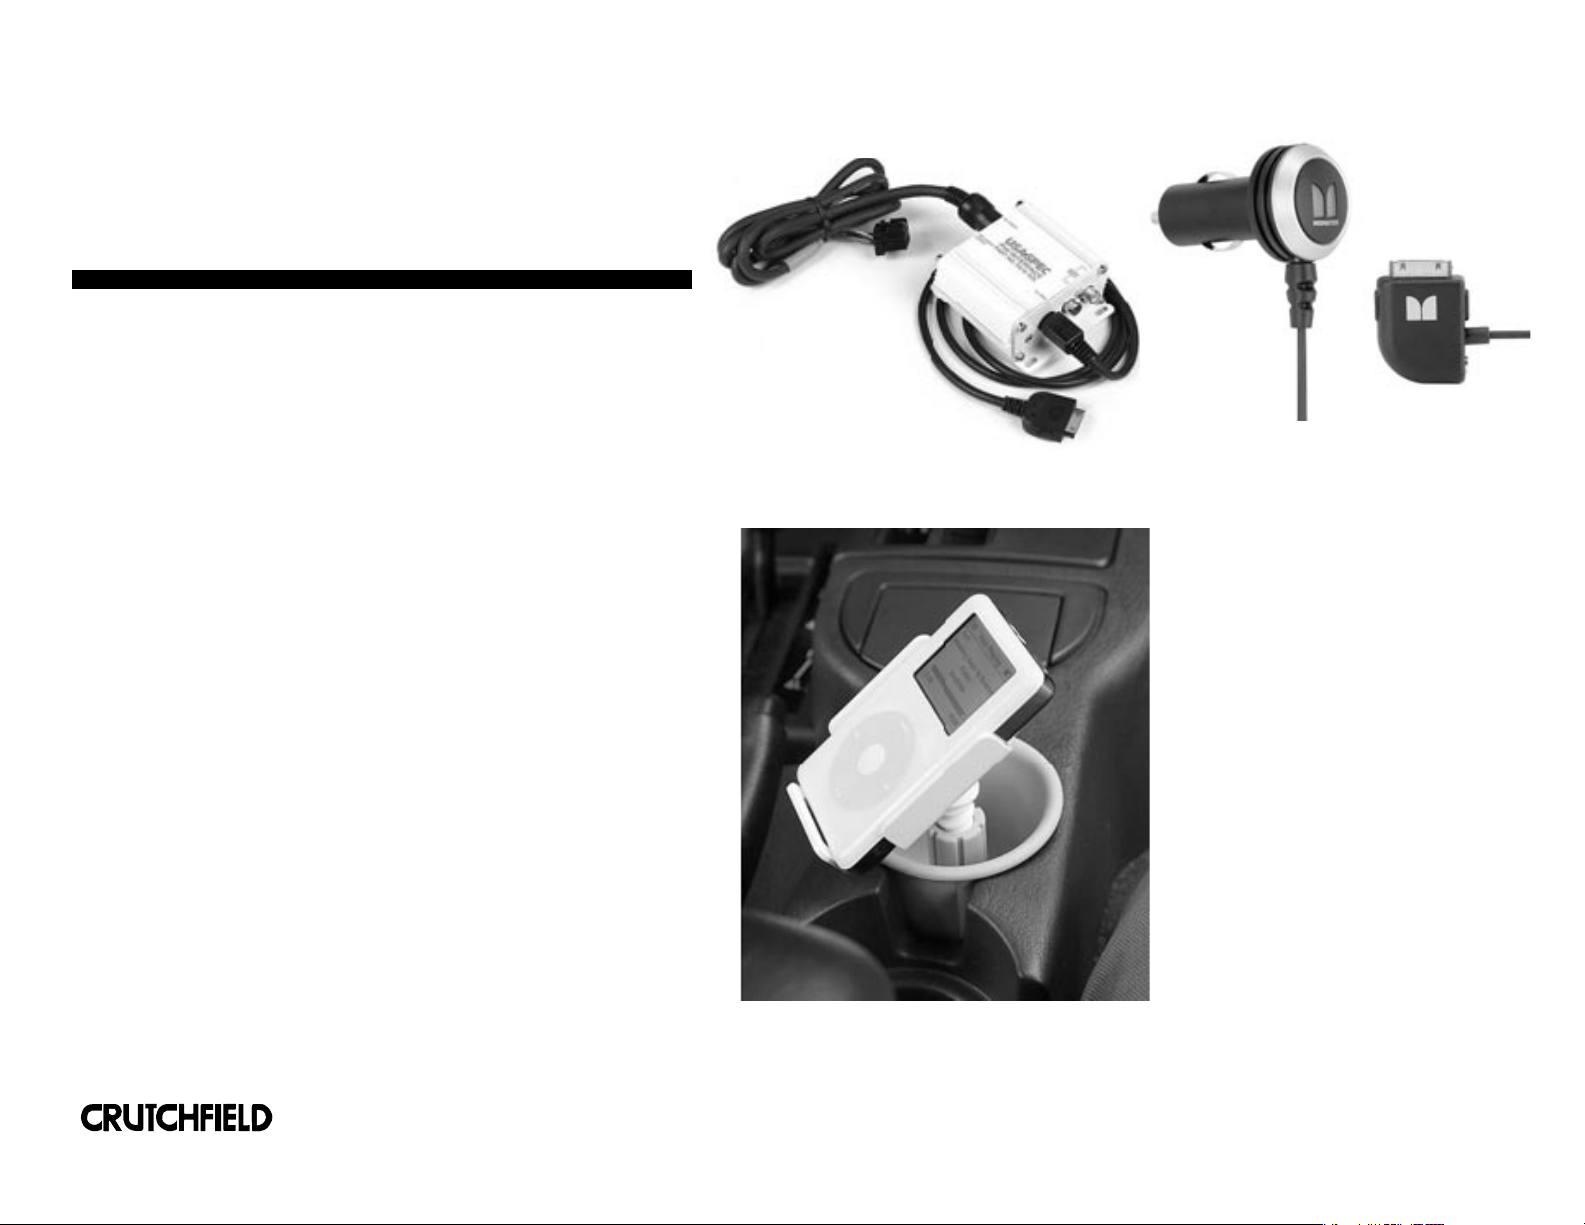
An iPod adapter for
a factory stereo.
An iPod cigarette lighter
power adapter.
An iPod cup-
holder car mount.

Signal Transfer: iPod Adapters
3
There are four different ways to connect your iPod to your car stereo. Each option presents a
different level of sound quality, degree of difficulty to install, and requirements for making the
audio connections.
iPod adapters
Adapters specifically designed for connecting an iPod to your car stereo will provide the best
possible sound quality. There are two types of special adapters for connecting your iPod to
your car stereo: factory stereo adapters and aftermarket stereo adapters. There are important
differences between these adapters. One is for connecting your iPod to the factory stereo and
the other is for connecting your iPod to a brand-name (or aftermarket) car stereo.
Factory stereo iPod adapters
To connect your iPod via a factory stereo iPod adapter, you will need to access the CD changer
port on your factory stereo. The CD changer port is usually located on the rear of the stereo
— follow the directions on your Crutchfield MasterSheet™ (available for most vehicles) or the
In-Dash Receiver Installation Guide to remove the factory stereo from the dash to
access the port. Some vehicles, however, are equipped with a pre-installed CD changer cable
in the trunk. In these vehicles, you will need to disconnect the changer (if installed) and plug
the adapter into the cable in the trunk (see photo).
Once you have connected the adapter to the factory stereo CD changer port, simply plug the
other end of the cable into the iPod's dock connector (most factory stereo iPod adapters work
only with iPods with a dock connector). Now that you have the iPod connected
to your stereo, find a good place to mount the adapter box (use self-tapping
screws, Velcro strips, or zip ties). Good locations include behind the dash,
under a seat, in the glove compartment, or in the center console.
Factory stereo iPod Adapters give you control of the iPod from your car stereo,
including your steering wheel stereo controls. Most of these adapters also
charge the iPod when connected, so you don’t have to worry about running
down the iPod's battery or having to use a cigarette lighter power adapter.
Aftermarket stereo iPod adapters
If you have replaced your factory car stereo with an aftermarket car stereo,
chances are that the same company that made your stereo has an adapter
that will allow you to connect and control your iPod from the stereo.
These adapters will install just like a factory stereo iPod adapter. You will have to remove the
stereo from the dash, connect a cable to your CD changer port, and connect another cable to
your iPod. Mount the compact hideaway box in a convenient location and secure it with self-
tapping screws, Velcro strips, or zip ties. Some of these aftermarket iPod adapters will offer a
“pass-through” connection, so you can keep your changer or other audio device connected to
your stereo in addition to your iPod. Like factory stereo iPod adapters, aftermarket adapters
will charge the iPod when connected.
A brand-name radio
iPod adapter connects
to your radio’s CD
changer port and
the iPod.
In some vehicles, the
factory CD changer
connections are made
in the trunk.
You will need to
remove the factory
radio to connect a
factory iPod adapter
to your car stereo.
000IPODIG
Always be careful
when drilling or
cutting in a vehicle.
Be aware of things
such as wiring,
windows, fuel lines
and safety devices.
Check drilling/cutting
depth and location
to avoid damage to
vehicle appearance.
CAUTION:
!

Auxiliary inputs are typically found only on brand-name car radios. There are
adapters, however, that can convert the CD changer port on the back of both
factory and brand-name radios into an auxiliary input (check your car stereo
manual or call a Sales Advisor to see if you need an adapter for your
stereo). Depending on your receiver, an auxiliary input may be a 1/8"
mini-jack (located on the back of the stereo, or sometimes, on the face), or
a pair of RCA connectors (located on the back of the unit).
To connect your iPod to an auxiliary input, run a cable from the headphones
jack on your iPod to your receiver (you will need a mini-jack-to-RCA adapter if
your stereo uses RCA inputs; otherwise, you can use a mini-jack-to-mini-jack
cable). If your input is located on the rear of your receiver, remove it from the
dash by using the instructions in your vehicle’s Crutchfield MasterSheet™
(available for most vehicles), or our In-Dash Receiver Installation Guide. It
may be convenient to connect an extension cable to the rear auxiliary inputs,
and to position the cable’s female inputs at a location that is easy to access
from the front seat. This allows you to plug in your iPod without removing
the receiver every time. Then, set the receiver to recognize the new auxiliary
connection (if necessary).
Using an auxiliary input to connect your iPod gives you the same high level of
sound quality as an iPod adapter. However, an auxiliary input will not provide
power to your iPod. If you plan to use your iPod in your car frequently, or for
a long trip, you’ll want to invest in a cigarette lighter power adapter — most
power adapters plug into your iPod’s dock connector.
000IPODIG
Auxiliary Inputs
4
®
Copyright 2005 Crutchfield Corporation
Using an auxiliary input to connect your iPod will give you sound quality that is
as good as that from an iPod adapter.

FM modulators
If your factory or aftermarket receiver doesn’t have changer controls, an
auxiliary input, or an available adapter, you can listen to your iPod via an
FM modulator (sometimes called an RF, or radio frequency, modulator). A
wireless FM modulator transmits the iPod's playback to your receiver over
a standard FM frequency which you can tune on your receiver. A wired FM
modulator offers slightly better performance, since it plugs into the antenna
input of the receiver.
Wired FM modulators
To install a wired FM modulator, first find a good mounting location. Keep in
mind that you will need to access your factory radio through its antenna
input; and you'll need to connect the iPod to the modulator. Common loca-
tions include under a seat, behind an interior panel, and in the cavity behind
the receiver.
FM modulators require a 12-volt connection to a switched (on/off) source.
Since you have to remove your radio to get to the antenna input, you’ll have
easy access to the power and ground wires in your factory radio harness.
If you don’t want to splice into your factory wires, you can make the power
connections at your fuse panel. Look for empty fuse holders and insert fuse
taps. You’ll also have a black ground wire that must be secured beneath a
nearby screw that makes contact with bare metal on the body of the vehicle.
Following the instructions on your Crutchfield MasterSheet™ (available
for most vehicles) or our In-Dash Receiver Installation Guide, remove your
receiver from the dash and unplug the antenna from the rear of the unit.
Plug the vehicle’s antenna cable into the antenna input on the FM modulator.
Next, run the output of the modulator to your receiver’s antenna input
(certain vehicles require antenna adapters — use the online Vehicle
Selector at crutchfield.com or call a Sales Advisor to inquire about your
specific vehicle). Tie up any slack in the cable so it won’t interfere with safe
vehicle operation.
Most wired FM modulators accept RCA inputs, so you’ll need a mini-jack-to-
RCA cable to connect your iPod. Once you have connected the iPod,
determine which of the available modulation frequencies is least likely to be
shared by a strong local radio signal and set it on the hideaway box before
you mount the unit (on some models you can change this setting on the fly).
000IPODIG
®
Copyright 2005 Crutchfield Corporation 5
You can tap power and ground for a wired FM
modulator from the car radio wiring harness.
A wired FM modulator connects between the
vehicle antenna and your radio.
Use a mini-jack-to-RCA cable to connect
your iPod to the FM modulator.
FM Modulators: Wired
Always be careful when
drilling or cutting in a
vehicle. Be aware of
things such as wiring,
windows, fuel lines and
safety devices. Check
drilling/cutting depth
and location to avoid
damage to vehicle
appearance.
CAUTION:
!
000IPODIG
6
Wireless FM modulators
Wireless FM modulators make it even easier to listen
to your iPod, allowing you to make connections
without removing your receiver or running extra wires.
The trade-off, however, is in sound quality. While
wireless modulators are convenient, they are
susceptible at times to outside interference and
static. Installation is easy — just connect the
modulator to your iPod and turn it on. Some iPod
accessories combine a wireless FM modulator, a
power adapter, and a mount for your iPod.
Cassette adapters
Wired cassette adapters are a convenient way to
connect your iPod to a cassette-based audio system. In
fact, it’s a great way to connect an iPod to a rented or
leased car, since you don’t need to remove the receiver
or disturb the installation in any way. A cassette
adapter, however, is a less than perfect solution
compared to a permanent installation because it
doesn’t provide power to the iPod, won’t sound as clear
as a direct-wired connection, and clutters your dash
with unsightly wires.
With that in mind, connecting a cassette adapter is a
relatively simple installation. The cassette unit loads
into your receiver and trails a cord with a 1/8” mini-
jack plug on the end. Just connect it to your iPod, plug
it into the adapter, power it up, and go. We suggest
investing in a cigarette lighter power adapter to keep
your iPod charged up while you’re on the road.
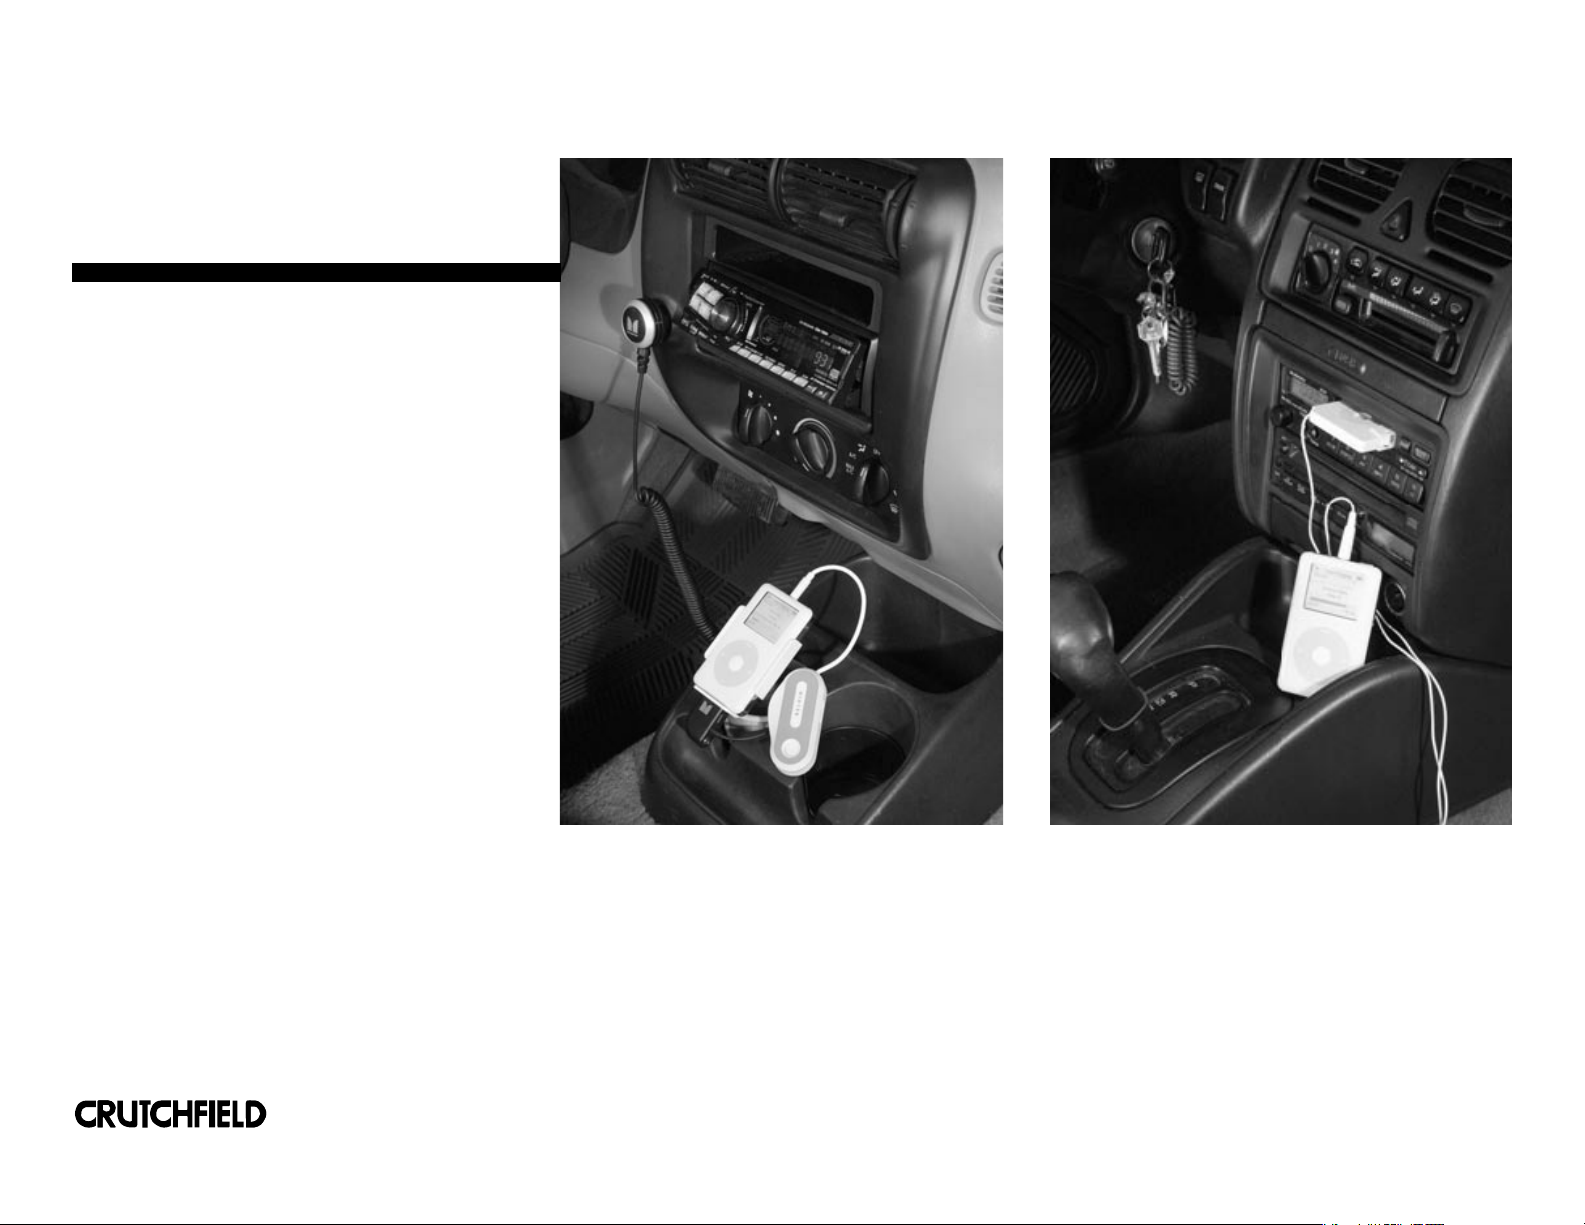
A wireless FM transmitter plugs into the iPod’s headphone
jack.
A cassette adapter remains a popular way to play an iPod
through a car stereo.
Wireless FM Modulators
& Cassette Adapters
®
Copyright 2005 Crutchfield Corporation

000IPODIG
7
®
Copyright 2005 Crutchfield Corporation
Power adapters
If you plan to use your iPod in your car everyday, or are just gearing up for a
long road trip, you’ll want to be sure to have an auxiliary power supply with
you. There are two types of power supply accessories for using your iPod in
the car. Each connects to your iPod via the dock connector.
1. Cigarette Lighter Power Adapters
Pros: A cigarette lighter power adapter provides a steady supply of
power to your iPod and charges the internal iPod batteries, so you don’t
have to worry about running out of juice while you’re on the road.
Cons: Unsightly wires hang over your dash.
2. Backup Battery Packs
Pros: Whether you have a rechargeable battery pack or one that
accepts AA batteries, these backups typically attach directly to your
iPod via suction cups or clips. You don’t have to worry about wires
draped across the dash.
Cons: These provide anywhere from 8 - 20 hours of battery life
(depending on the type of iPod you have), but once they are drained,
you’ll have to replace the batteries or charge them up again. Most iPod
car mounts are not designed to accommodate battery packs.
Car mounts
There are several different ways to securely mount your iPod in your car:
1. Cup-holder mounts
Simply place this mount in one cup holder and use the suction cup to
attach your iPod.
2. Flexible gooseneck arms
These may screw into the floor, fit in a cup holder, or attach to a
cigarette lighter power adapter. They offer the best viewing angle.
3. Vehicle-specific mounts
Custom mounts designed to clip to vents, screw onto the dash, or be
secured with Velcro.
If you do not have a good option for mounting your iPod in your car,
experiment with placing the iPod in various console pockets or your
glove compartment. The last thing you want is to place the iPod directly on a
seat or the floor, where it can move about freely.
A battery pack can keep your iPod
charged for a long road trip; most car
mounts, however, are not designed to
accept an iPod with a battery pack.
A cup-holder mount is a convenient way
to secure an iPod in a vehicle.
Power Adapters & Car Mounts

000IPODIG
8
®
Copyright 2005 Crutchfield Corporation
•CD changer ports may be located on remote factory tuner amp modules.
•If your vehicle already has an in-dash six disc CD changer separate from
the factory radio, the adapter slot is already in use. Owners must unplug
the unit from the slot; otherwise, loss of the in-dash unit will occur.
•GM and Chevrolet vehicles may have a facotry mini antenna plug. If using
an RF modulator, antenna adapters must be used.
Tech Tips
Table of contents
Other Crutchfield Car Video System manuals


Popular Car Video System manuals by other brands

Pioneer
Pioneer AVH-P6800DVD - DVD Changer With LCD Monitor installation manual

ZENEC
ZENEC E GO ZE-NC3152 Mounting instructions

Kenwood
Kenwood KVT-516 instruction manual

Saturn High-Tech
Saturn High-Tech Videovox ADV-100 Service manual

Pyle view
Pyle view PLVWR750T owner's manual

Pioneer
Pioneer AVX-P7300DVD Operation manual


