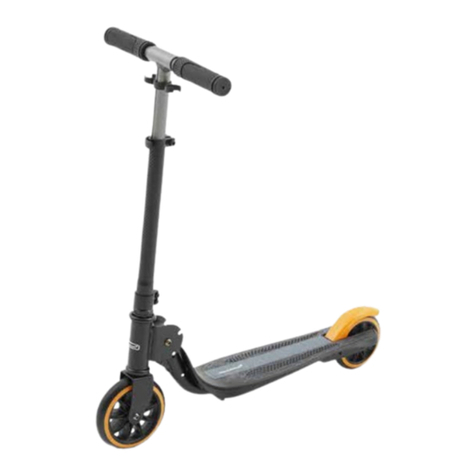
CRWSR E-Mobility SL E-mobility User manual

A MARITIME STATEMENT

Below we have summarized the essential topics regarding the assembly and the use of your e-scooter so that
you can use it without any further delay and enjoy it for a long time.
Please read these instructions carefully before you use the e-scooter the first time.
All country-specific regulations referring to the usage of an electric scooter have to be compulsorily complied with.
Please inform yourself attentively.
Our site www.CRWSR.com will provide you with further information and assistance.
We wish you to enjoy your new CRWSR e-scooter to the fullest!
2
for having chosen this electric scooter with its unique quality features!
Cgris

3
iESSENTIAL INFORMATION FIRST
1. CRWSR E-Mobility SL cannot take any responsibility for damages arising
from an inadequate maintenance, handling or use.
2. This having been said, the manufacturer’s design must in no case at all be
modified (add-on parts or tuning kits, for example).
3. Please keep in mind that you are a road user, at any time and at your risk and
peril. Driving without caution can be at the root of a loss of control, of bad falls,
of crashes and even of serious injuries. This is the reason why you should always
drive with circumspection and stay alert, especially when the weather conditions
are poor, if the road is wet or the traffic confusing.
4. Prior to any ride, make sure that your CRWSR is in a perfect functioning state
(battery, brakes, lights, tyre profile and air pressure, folding joint firmly locked, dirt).

iESSENTIAL INFORMATION FIRST
5. Take care that clothes or even parts of your body can never get entangled in the wheels.
6. You should always abide by the legal provisions specific to each country
(examples: driver’s minimum age, authorized top speed, etc.).
7. We recommend you to wear a helmet while driving.
8. NEVER should you be driving when affected by drugs or alcohol.
9. Always take care of other road users, first and foremost of pedestrians.
10. NEVER mount your CRWSR with a second person and never exceed the total
payload of 120 kg (264.6 lbs).
11. Prior to the maiden ride, charge your CRWSR to a hundred percent.
4

5
UNPACKING YOUR CRWSR
Once the unpacking is completed, check your CRWSR and first of all ensure that no
component is missing, and no damage occurred during the transport.
Remove all protection plastic sheets. We recommend you to keep and store the transport
protection packaging in case the e-scooter should be returned or dispatched.
CRWSR E- SCOOTER INSTRUCTION MANUAL
VALVE PUMP ADAPTER
QUICK CHARGER
3 MM ALLEN KEY
4 SOCKET HEAD SCREWS

6
ESSENTIAL COMPONENTS AND DISPLAY
SCREEN OF YOUR CRWSR
1. Front brake
2. Rear brake
3. Left blinker
4. Right blinker
5. Control unit
6. Display screen
7. Accelerator and blinker buttons
8. Headlight
9.a Snap hook
9.b Folding hook
10. Locking latch
11. Folding joint
12. a Front brake disk
12. b Rear brake disk
13. Wooden deck
14. Kickstand
15. Rear light/Brake light
12a
1
2
3
4
5
6
7
8
9a
9b
10
11
12b
13
14
15
6
6. Speedometer
Entering the code
Total mileage
Failure / Malfunction
Code blocking
Front/Rear lights
Cruise control
Battery charge level

7
ASSEMBLING YOUR CRWSR
Unlock the folding hook/buckle on the rear
mudguard and knock over the head tube upwards.
Push up the blocking latch flat to the tube until it
is engaged.
Completely insert the steering T-bar into
the head tube.
While using the Allen key, tighten the socket
head screws in the corresponding screw holes
(on both sides).

8
RECHARGING YOUR CRWSR
Please fully recharge your CRWSR before using it for the first time.
Lift the rubber cap covering and protecting the charging port placed underneath the wooden deck.
Your CRWSR is factory-equipped with a quick and efficient charger to be used in the whole world in addition
with a commonly available adapter. Insert the plug of the charger into the charging port of your CRWSR and
then connect the charger to a power socket. The LED is lighting up red during the charging process, then
switches to green as soon as your CRWSR is completely charged.
Pull the plug off the power socket and disconnect the charger from the port.
Be sure that the rubber protection cap is adequately positioned and snaps back into place on the charger
in order to prevent potential damages due to dust, dirt or moisture infiltration.
CAUTION! DO NOT charge the battery when the temperature climbs over 40° C (104° F) or plunges
under 0° C (0° F). If you will not be using your CRWSR for a long period of time, and before storing it,
please fully charge the battery to prevent a depth discharge.

9
STEERING FUNCTIONS OF YOUR CRWSR
BLINKERS COMMAND L/R
ACCELERATOR
BUTTON « + »
BUTTON « - »
ON/OFF POWER BUTTON

10
STEERING FUNCTIONS OF YOUR CRWSR
Power ON/OFF:
Hold down the ON/OFF power button for 3 seconds to switch
the CRWSR on or off.
Turning the lights on and off:
Hold down the the “+” button for 3 seconds to turn
the lights on or off.
Entering the code in order to unblock the start on the dashboard:
As the scooter leaves the factory, the code is set on “000”.
First power on the CRWSR and then press the “+” button to enter a “0”.
Should you have pressed too far, press “+” again and again until “0” shows up
on the dashboard again. Press “ON/OFF” to validate “0”. Repeat this
procedure for the two following “0” but after the third “0” press “ON/OFF”
twice in a row to validate the code. Your entry will be confirmed by a double
beep. The total mileage of the trip will be showing up in km (or “000” on delivery).
Your CRWSR is now ready to start.

11
STEERING FUNCTIONS OF YOUR CRWSR
Entering a customized code:
It is recommendable to modify the code after the initial use.
In order to enter you own code, simultaneously hold down both
buttons “ON/OFF” and “-” for 10 seconds. A blinking “0” will
then be shown.
Then, enter your first number on the “+” button and validate
with the “ON/OFF” button. Your entry is being confirmed by a
single beep. Repeat the same procedure when entering the
following two numbers, but after the last number finally press
twice “ON/OFF” to validate your individual three-digit code.
The changing of the code will be confirmed by a double beep.
At any rate, you should always memorize and/or take note of your new code.
Riding modes:
The CRWSR comes with three different riding modes:
E – Ecomomic; C – Comfort; F – Fast.
The maximum speed on these levels varies from country to country
(Examples: 15 km/h (9.3 mph), 20 km/h (12.4 mph), 25 km/h (15.5 mph))
The range is dependent on these riding modes. The slower the speed,
the longer the distance you will be able to ride.

12
STEERING FUNCTIONS OF YOUR CRWSR
Activating/Deactivating the cruise control mode:
Your CRWSR comes with a cruise control!
As soon as you are maintaining the accelerator in a constant
position for 8 seconds while driving, the cruise control will
automatically switch on, which will be signalised by a single
beep. You can now release the accelerator and keep on driving
at an unchanged speed. The cruise control will switch itself off
as soon as you pull on a brake or activate the accelerator again.
Activating/Deactivating the blinkers:
The blinker commands are located on the acceleration lever.
Before changing track, please push the appropriate symbol in order
to activate the blinker. After having turned left or right, press anew
on the same symbol in order to deactivate the blinker.

13
FOLDING AND UNFOLDING YOUR CRWSR
Folding your CRWSR:
Pull the locking latch forwards and tilt the steering front tube backwards. Push the locking
carabiner of the front tube inwards and hook it on the buckle located on the rear mudguard.
This being done, you now can easily grip the CRWSR by the front tube to lift and carry it.
Unfolding your CRWSR:
Disengage the carabiner from the buckle located on the rear mudguard and completely tilt
the front tube forwards. Then unfold the locking latch upwards until you can hear how it clicks.

14
TIPS AND TRICKS HOW TO USE YOUR CRWSR
Set one foot on the wooden deck and use the other foot to strongly push off your CRWSR.
At the same time, push down the accelerator so that the e-scooter can gain momentum.
Pull on the brake levers to slow down the CRWSR. We recommend you to always use both brakes –
and in any case the right/rear brake!
On bumpy roads:
Thanks to its large air-filled tyres, the CRWSR is just as well capable of comfortably managing an
uneven ground. However, please note that the mighty thrust of your CRWSR potentially could cause
the motorized wheel to spin or the rear to skid away out of control.
Should you occasionally be pushing the CRWSR alongside when it is powered on, do never ever
activate the accelerator.
When riding, do always take care of other users, potholes, obstacles, kerbs, etc.
As your CRWSR is a motorized vehicle, it is for safety reasons necessary to always see to the
cleanliness of brakes, tyres and wooden deck.
If your CRWSR is switched on but left idle for 5 minutes, it will automatically switch off itself
in order to save electric energy.

15
TIPS AND TRICKS HOW TO USE YOUR CRWSR
Conditions to be filled by the driver:
The driver should possess the physical, sensorial and mental aptitudes required to join in the road
traffic. In the case of underage drivers, judging their ability to use an e-scooter is solely incumbent
on their legal representatives.
Please do not ride on ice and snow, avoid irregular maintenance or repairing and stay away from
extreme off-track areas (for example professional competitions, trick riding or acrobatic stunts).
The brakes:
Using inadequately the brakes may provoke a loss of control or cause serious falls and injuries.
Before riding in the public space, please get familiar with braking and emergency stops. In case of
an emergency braking, try to shift your body weight as far as possible backwards and downwards.

16
MAINTENANCE AND REPAIR OF YOUR CRWSR
Brakes adjustment:
Should the brake levers be too hard, please use the 3 mm Allen key to loosen the screw on the
brake unit. Gently pull the brake cable line out of the eyelet until the gap between the braking
pads and the braking disk is widening. Tighten the socket head screw again and check the braking
power while pulling on the brakes and simultaneously pushing the CRWSR forward.
FRONT BRAKE REAR BRAKE

17
MAINTENANCE AND REPAIR OF YOUR CRWSR
Should the brake levers be too loose, proceed the other way round and push the brake cable line
through the eyelet. As a result, the gap between the pads and the braking disk will be narrowing.
In this case as well, tighten the socket head screw again and check the braking power, as afore mentioned.
Adjusting the steering tube:
Should the steering tube not be firmly locked, first check if the locking/unlocking latch is snapped into
place and adequately tightened (cf. folding joint of the CRWSR). Then look if there is some play and wobble
in the steering handle. In this case, please us the Allen key to better tighten the screws of the steering
tube and the locking latch.
Occasionally, the locking latch and the steering tube may get loosened because of vibrations, but this
is no sign of a quality defect.

18
MAINTENANCE AND REPAIR OF YOUR CRWSR
Tyres/Air pressure:
If you notice a loss of the tyre air pressure, connect the pump adapter to the tyre valve and inflate the tyre.
The recommended air pressure should be 2.5 bar.
Cleaning and maintenance:
By no means use alcohol, petrol or other corrosive chemical products. These could damage the high-quality
materials of your CRWSR and durably ruin its looks. Never use a high-pressure cleaner for cleaning.
The best way to clean the wooden deck is to use some soapy water and a soft cloth. Do not use varnish, do
not oil the stainless components as you risk slipping off the wooden deck.
Safekeeping/Storing:
When not using your CRWSR, the best thing to do is to store it in a dry and cool place. If it stands idle for an
extended period of time, fully charge the e-scooter before storing it. Do not let your CRWSR stand outdoors so
as to keep it safe from bad weather conditions. Do not expose your CRWSR to a constant heat (to direct and
prolonged sunshine, for example). This could have a negative impact on the battery efficiency.

19
INFORMATION ABOUT THE CRWSR BATTERY
Please use exclusively the quick charger delivered by the manufacturer with your CRWSR. Using non original
components entails the risk of damaging the electronics or the battery.
Be sure that the battery is not exposed to temperatures higher than +40° C (104° F) or lower than -20° C (-4° F).
Should it be necessary to replace the battery, please contact our Customer Service Team at the following
Internet address: www.CRWSR.com/support. Never replace the old battery yourself with a non-original model.
Please comply with the legal requirements in connection with the disposal of batteries. Improperly disposing
of accumulators and batteries is extremely detrimental to the environment.
TROUBLESHOOTING OF YOUR CRWSR
In case a problem arises that you are not able to solve yourself, or to solve completely, please contact our
Customer Service at the Internet address www.CRWSR.com/support.
Our aim is to continually keep our Instruction manual updated, and we are regularly publishing those updates
on our Internet site www.CRWSR.com/manual.
Warranty:
The warranty conditions, which may be consulted at the address www.CRWSR.com/guarantee,
apply specifically to every country.

20
ABOUT YOUR CRWSR - TECHNICAL SPECIFICATIONS
(LBH) 1140 mm x 470 mm x 1249 mm (44.9“ x 18.5“ x 49.2“)
17,6 kg (38.8 lbs)
Maximum payload 120 kg (264.6 lbs)
36V 10.4AH DC 42V 2.0A
Charge time: 3 h 30 (speed charging)
AC 100V-240V~50/60HZ 2.5A
Safe from splashes
20 - 35 km (12.4 – 21.7 mph),
depending on the country of use
Range: circa 35 km (21.7 miles)
Battery 350 W Maximum : 500 W
Tyre size 10“
Front and rear disk brake
Head and tail LED lights
Integrated LED Display

