Crystal Pond Professional PSK2 User manual

PSK2 - SKIMMER
INSTALLATION
ITEMS INCLUDED:
1) Leaf Basket
2) Brush Filter
3) Filter Mesh
4) 8” Door
5) 6” Door
6) 17 Screws
7) Skimmer
8) Bulkhead, Washer and Nut
9) Liner Sealant
10) Skimmer Cover
11) Washer – Inside Seal
12) Flange - Debris
084-121136
Rev. B
Page 1 of 6
SUGGESTED ITEMS, NOT INCLUDED:
Pump Tubing or Pipe
Shovel
Pump
Flat Rocks or Round Stones
Carpenter’s Level
Hex Driver
Awl or Punch
Utility Knife
PVC Fittings as needed (Elbows,
Checkvalves, ETC.)
OPTIONAL:
Rock Cover
1
2
3
4
5
6
7
8
9
10
12
11
Caulking Gun

OPTIONAL: Realistic looking Rock Lid
When assembly is complete place this
Lid on top of the Skimmer. To hide the
Lid and Skimmer make it blend in by
placing some of your landscape rocks
and stones on top.
Leaf Basket – catches
leaves and other large
debris. Easy to lift out
and clean.
Knock-Out Hole for over-flow.
You have the choice of whether
you want an over-flow or not. To
complete the opening, use a
hammer and/or screw driver to
knock it out. The Bulkhead and
Rubber Washer is to be placed
on the inside, the Nut is on the
outside. 1 ½” PVC Pipe may be
attached to the Bulkhead.
Liner Sealant
– Apply the
Sealant around
the screw holes
and connecting
the screw holes
(see example)
before installing
the Door and
Liner.
Door Inlet Choice:
1) 6” use when Pump flow
rates are below 3000 GPH.
2) 8” use when Pump flow
rates over 3000 GPH.
Brush Filter – Catches
the large debris. This
filter works best with
higher flow rate pumps
(more than 3000 GPH).
Mesh Filter Pad – catches small
debris. This filter works best for
lower flow rate pumps (less
than 3000 GPH).
To replace the brushes with the
mesh filter bend a brush slightly
and pull the tip out of its hole.
When all four are removed push
the mesh up under all 6 tabs of
the filter holder.
Connect your Pump with your
elbow and tubing or flex pipe
and Debris Flange. Route the
tubing out thru the front hole;
connect to an elbow and more
tubing until you reach the pond
or a waterfall.
Waterline Mark
When placing the Skimmer into the pond
the waterline is not to be any higher than
the Waterline Mark. Please see the
diagram below for further explanation.
Bulkhead
After applying Sealant to the back side
of the Door place the Liner over the
front surface of the Skimmer. Hold the
Door in place and poke the screw holes
in the Liner with the Awl. Attach the 17
screws.
With the Door Panel open, Use the
Utility Knife to cut the Liner the same
size as the Door opening.
Liner
Liner
Debris Flange: Install around your 2” Dia.
PVC Pump Discharge and then slide back
up against the Skimmer to prevent debris
from washing into the Skimmer.
Bulkhead
Inside Seal
To Pum
p
*OPTIONAL: For Bulkhead Installation
Since the Overflow Outlets are below the Pump Discharge
Outlet a watertight seal (via Bulkhead Fitting) is not required.
The Debris Flange is not needed with the Bulkhead. (The flat
washer that comes with the Bulkhead maybe discarded.)
*See upper left-hand corner for
Optional Bulkhead Installation.
Nut
2 of 6

Overflo
w
Partially bury the
Skimmer – please
read the following
“Helping Site
Planning Hints”
before placing the
Skimmer. HELPFUL SITE PLANNING HINTS
•Avoid placing rocks or plants directly in front of the Skimmer. Anything placed in front will interfere with the skimming action.
•Choose a high-leveled site that will not collect rainwater and will allow water drainage.
•Check to ensure there are no buried utilities before you start to dig.
•Waterfalls generally face the viewing area. Place the Skimmer so it faces the Waterfall and allow enough room on the sides
and back of the filter for ease of regular maintenance.
MAINTENANCE
Push the door all the way up to snap the door lock tab into place to
pump skimmer down for clean out.
When clean -- the water level before and after the brushes or filter
mesh would be close to the same.
When dirty -- the water level after the brushes or filter mesh would
be much lower.
Remove the Leaf Basket and dump the leaves and other debris
out. Pull the Filter Holder out and hose it down with the water hose.
Check your water level frequently. It is not necessary to clean the
Brushes or Filter Mesh when there is little water level difference.
Water Level = Clean
Water Level = Dirty
Note the water level
of this side view
example.
Skimmer
Waterfall Weir
Liner
Liner
Buried Flex PVC Pipe -
Connects the Waterfall
Weir to the Skimmer.
Rock on
Ledge
Flat Waterfall
Over-Flow Stone
Waterfall
Foam Sealant
Mesh Bag
with Lava
Rock
13”
Dig a hole for the Skimmer 13” down from the desired
Pond water level. Make sure that your desired water level
matches the Water Level Mark on the Door’s Mounting
Frame. Adjust by adding or removing soil. Backfill around
the entire unit by hand packing every 2 or 3 inches and
lightly moistening the backfill to aid in settling.
Waterline
Mark
Waterline Mark

LIMITED WARRANTY
Each Crystal Pond Professional Products are warranted to be free from defects in material and workmanship for the applicable
Warranty Period (herein so called) set forth below. The Warranty Period for each product commences on the date of purchase by
the original purchaser. The Warranty Periods are as follows:
Product Type or Name Warranty Period
Liner Material:
35 mil PVC…………………………………..20 Years
40 mil EPDM………………………...………20 Years
20 mil PVC…………………………………..15 Years
Waterfall Weir & Skimmer……………………………..5 Years
All Other Crystal Pond Products…………..………….90 days
APPLICATION: The warranty covers only properly installed and maintained Crystal Pond products and is limited to application at
normal temperature, 32ºF to 86ºF, (0ºC to 30ºC) pumping fluids with a specific gravity up to 1.1 and with a pH range of 5 to 9 (fresh
water). Other liquid applications and extreme temperature uses must be approved in advance by Beckett. The warranty does not
apply to or cover damages or defects caused by external causes, including, but not limited to, improper or faulty installation or
unauthorized modification, lightning, electrical surges, abuse, misuse or abnormal use or misapplication, including use in a manner
inconsistent with the product’s intended function. The purchaser is responsible for determining the suitability of the product for its
intended use. If products are damaged in transit, a claim should be filed with the carrier.
REMEDY: If there has been a failure to conform to the warranty, Beckett will, at Beckett’s option, repair, replace or issue a refund
for the particular nonconforming product or part. Repair, replacement or refund, at Beckett’s option, is the exclusive remedy in the
event of a failure to conform to the warranty. Warranty claims must be made within 3 months after expiration of the applicable
Warranty Period.
ADMINISTRATION: Warranty claims must be made by returning the nonconforming Beckett product, freight prepaid, along with
proof of purchase, to: Beckett Corporation, Customer Service Dept., 3321 E. Princess Ann Rd., Norfolk, Va. 23502, telephone
(866) 466-4319. Telephone authorization from Beckett is required prior to returning nonconforming products or parts. All products
or parts returned will be inspected to determine cause of failure before warranty is approved.
INSTALLATION, REMOVAL AND/OR SHIPPING CHARGES: The warranty does not cover any costs associated with the
installation, removal or shipping of products subject to warranty claims.
DISCLAIMER AND LIMITATION: THE EXPRESS WARRANTY AND REMEDIES SET FORTH ABOVE ARE EXCLUSIVE AND IN
LIEU OF ALL OTHER WARRANTIES AND REMEDIES, WHETHER ORAL OR WRITTEN, EXPRESS OR IMPLIED. TO THE
FULL EXTENT PERMITTED BY LAW, BECKETT EXPRESSLY DISCLAIMS ANY AND ALL IMPLIED WARRANTIES,
INCLUDING, WITHOUT LIMITATION, THE IMPLIED WARRANTIES OF MERCHANTABILITY AND FITNESS FOR A
PARTICULAR PURPOSE. IF IMPLIED WARRANTIES CANNOT BE DISCLAIMED, ALL SUCH IMPLIED WARRANTIES ARE
LIMITED TO THE DURATION OF THE APPLICABLE EXPRESS WARRANTY.
BECKETT DOES NOT ACCEPT LIABILITY BEYOND THE REMEDIES EXPRESSLY SET FORTH IN THIS WARRANTY. IN NO
EVENT SHALL BECKETT BE LIABLE OR RESPONSIBLE FOR INCIDENTAL OR CONSEQUENTIAL DAMAGES. BECKETT’S
AGGREGATE LIABILITY UNDER THIS WARRANTY OR WITH RESPECT TO ANY PRODUCT COVERED HEREBY, UNDER
ANY LEGAL THEORY, SHALL NOT EXCEED THE PURCHASE PRICE PAID FOR THE NONCONFORMING PRODUCT. THE
LIMITATIONS CONTAINED IN THIS PARAGRAPH SHALL NOT APPLY TO INJURY TO THE PERSON.
Some States do not allow the exclusion or limitation of incidental or consequential damages or exclusions or limitations on the
duration of an implied warranty, so the above limitations or exclusions may not apply to you. This warranty gives you specific legal
rights and you may also have other rights that vary from State to State.
FOR YOUR RECORDS:
Date of Purchase __________________________________
Model Number __________________________________
Name of Dealer __________________________________
PLEASE KEEP RECEIPT IN CASE OF WARRANTY SERVICE.
BECKETT CORPORATION
3321 E. Princess Ann Rd.
Norfolk, Va. 23502
www.888beckett.com
Toll Free: 1-866-466-4319
© 2007 BECKETT CORPORATION All Rights Reserved
Popular Swimming Pool Filter manuals by other brands
Pahlen
Pahlen MiniMaster manual
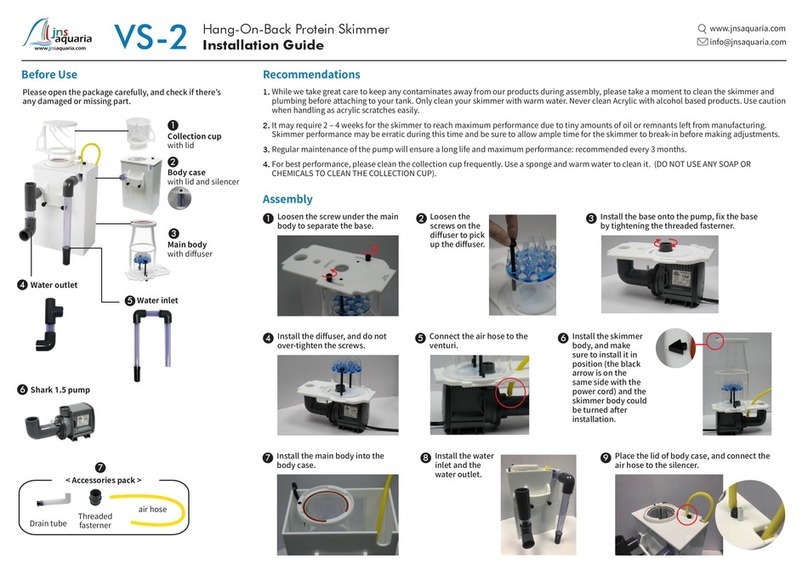
JNS Aquaria
JNS Aquaria VS-2 installation guide

Hydrover
Hydrover Oxymatic user guide

Clear Comfort
Clear Comfort CCW300 quick guide
Procopi
Procopi Aquareva MTi-400 Installation and operating instructions

Lectranator Systems
Lectranator Systems Soft Touch Pool Pilot ST840C Installation and operation manual
Messner
Messner Skimmer 200 operating instructions

Steinbach
Steinbach 040590 instruction manual
CMP
CMP POWERclean ULTRA Installation & operation

Pentair Pool Products
Pentair Pool Products D.E. Cartridge Style Filter Installation and user guide
Hayward Pool Products
Hayward Pool Products Dream Line S170TSCPE owner's manual
Astral Pool
Astral Pool Elite Connect 34 instruction manual

