Select a Suitable Place to Set
To Start
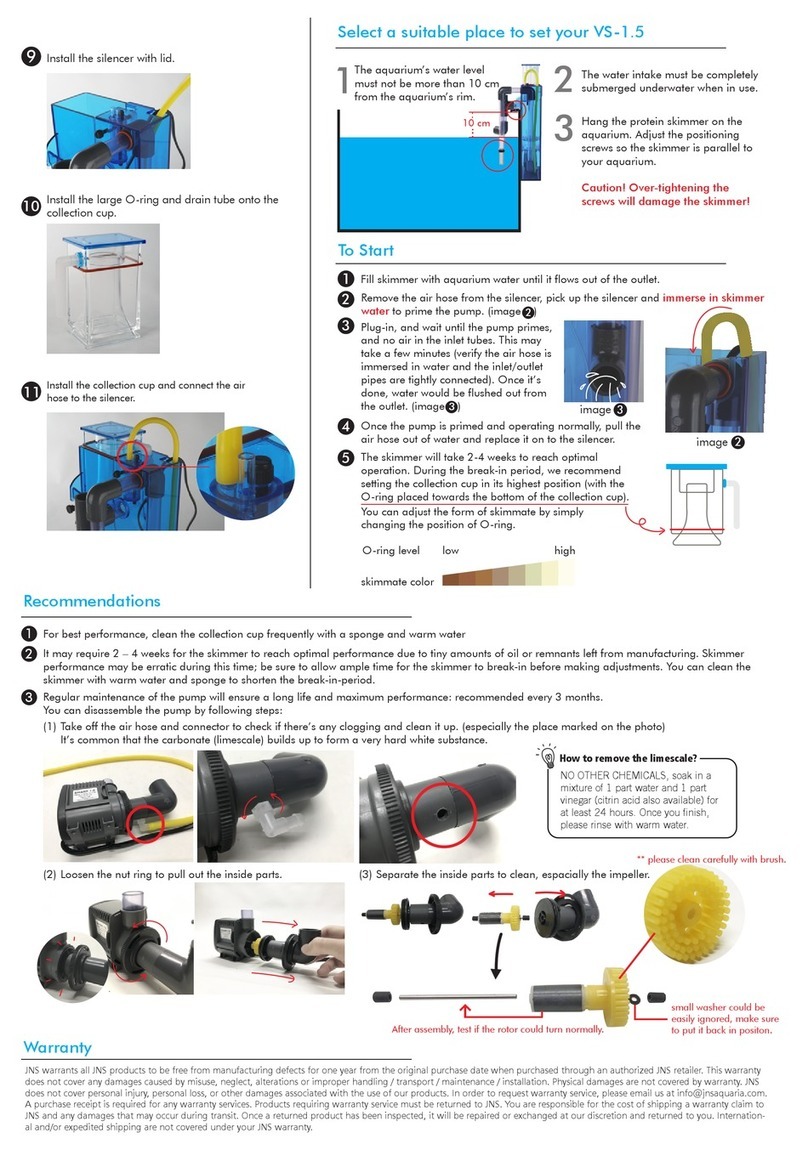
The aquarium’s water level must not be more than 10 cm from the aquarium’s rim.
The water intake must be completely submerged underwater when in use.
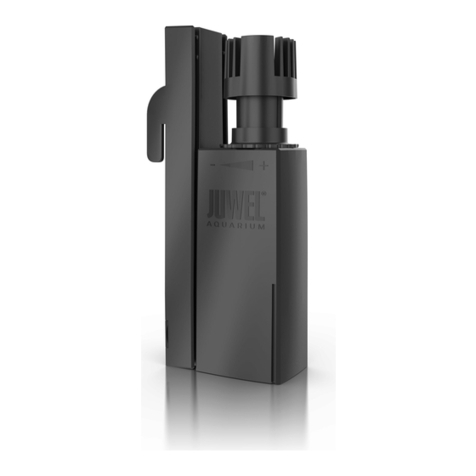
Hang the protein skimmer on the aquarium. Adjust the positioning screws so the skimmer is parallel to
your aquarium.
Caution! Over-tightening the screws will damage the skimmer!
1.
2.
3.
1
2
3
4
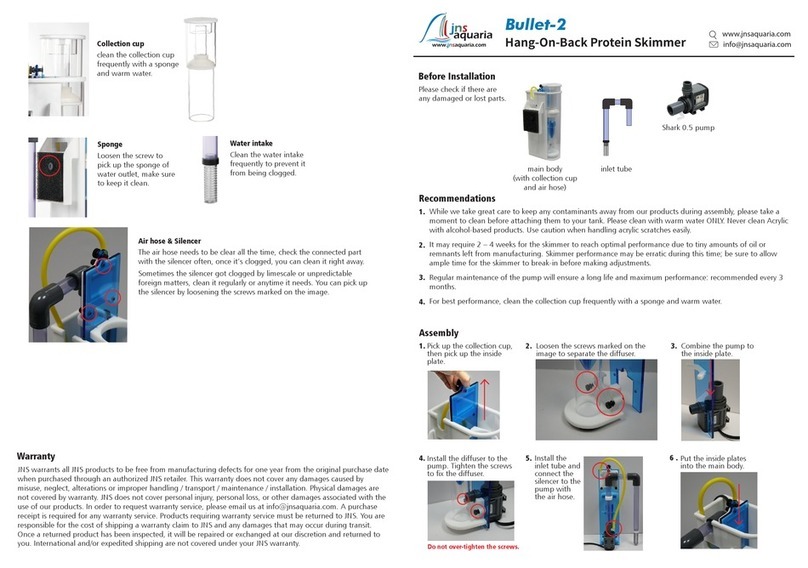
10 Connect the drain tube to the drain port under the
collection cup, and install the collection cup.
Fill the skimmer with aquarium water until it flows out from the outlet.
1Turning the nut ring to
separate the venturi 23
Remove the air hose from the silencer, pick up the silencer and immerse in skimmer water
to prime the pump.
Plug-in, and wait until the pump primes, and no air in
the inlet tubes. This may take a few minutes (verify
the air hose is immersed in water and the inlet/outlet
pipes are tightly connected). Once it’s done, water
would be flushed out from the outlet.
Once the pump is primed and operating normally, pull
the air hose out of water and replace it on to the
silencer.
5Adjust the water level by turning the main body.
Turning to O(open), causing the water level within the chamber to drop.
Generally, lower water level will lead to drier skimmate that is dark in color.
Turning to C(close), causing the water level within the chamber to rise.
Generally, higher water level will lead to wetter skimmate that is light in color.
As a starting point, it is recommended
to adjust the water level within the
skimmer body to where the
collection cup meets the neck.
open close
highlow
water outlet
water level
skimmate
color
O
Cclose
Open
Maintenance
Regular maintenance of the pump will ensure a long life and maximum performance. You can clean
the pump and its components by soaking in a general citric acid solution (citric acid:water=1:1) once
every 3 months.
Pump
Pull out the pre-chamber Pull out the rotor
the bearings should be in
position
bearing *2
rotor
The venturi should be cleaned
monthly and flushed weekly, due to
the air to water interface calcium
carbonate (limescale) builds up to
form a very hard white substance.
Remove the limescale by soaking in a general
citric acid solution (citric acid:water=1:1)
Venturi
The collection cup should be cleaned frequently with a sponge and warm water.
(DO NOT USE ANY SOAP OR CHEMICALS)
Collection cup
For daily maintenance, pull out the plug of the drain tube to let out the skimmate.
Warranty
JNS warrants all JNS products to be free from manufacturing defects for one year from the original purchase date when
purchased through an authorized JNS retailer. This warranty does not cover any damages caused by misuse, neglect, alterations
or improper handling / transport / maintenance / installation. Physical damages are not covered by warranty. JNS does not
cover personal injury, personal loss, or other damages associated with the use of our products. In order to request warranty
service, please email us at inf
[email protected]. A purchase r
eceipt is r
equired for any warr
anty ser
vices. Produc
ts requiring
warranty service must be returned to JNS. You are responsible for the cost of shipping a warranty claim to JNS and any damages
that may occur during transit. Once a returned product has been inspected, it will be repaired or exchanged at our discretion
and returned to you. International and/or expedited shipping are not covered under your JNS warranty.

