manuals.online logo
Brands
  1. Home
  2. •
  3. Brands
  4. •
  5. Cuisinart
  6. •
  7. Grill
  8. •
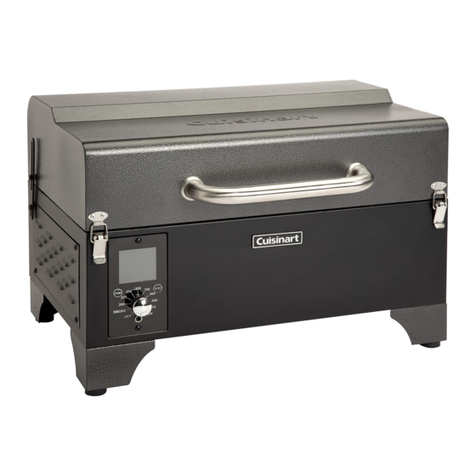
  9. Cuisinart SMK2036AS User manual

Cuisinart SMK2036AS User manual

Oakmont
Pellet Grill and Smoker
Model SMK2036AS
ASSEMBLY INSTRUCTIONS
1
ASSEMBLY INSTRUCTIONS:
READ ALL SAFETY WARNINGS & ASSEMBLY INSTRUCTIONS CAREFULLY
BEFORE ASSEMBLING OR OPERATING YOUR GRILL.
WE RECOMMEND TWO PEOPLE WORK TOGETHER WHEN ASSEMBLING THIS UNIT.
The following tools are required to assemble this Cuisinart Oakmont 3-in-1 Pellet Grill:
• Phillips Screwdriver
• Pliers or Wrench
PARTS LIST:
1 Side Table
1 Chimney
1 Hood Handle
1 Warming Rack
1 Rear Cart Brace
2 Right Table Brackets
2 Left Table Brackets
1 Grease Channel
1 Grill Body
1 Thermocouple Assembly
2 Side Cart Braces
1 Left Front Leg
1 Right Front Leg
1 Left Rear Leg
1 Right Rear Leg
1 Temperature Gauge Bezel
1 Temperature Gauge
4 Cooking Grates
1
2
3
4
5
6
7
8
11
9
10
12
1 Heat Plate Bracket
1 Hopper Lid
4 Casters
1 Heat Plate
1 Ash Clean-out Plate
1 Ash Clean-out Handle
1 Side Handle
1 Cart Base
1 Front Table
1 Pellet Hopper Assembly
1 Cord Wrap
1 Cart Front Panel
1 Grease Cup Bracket
2 Ash Cup Brackets
1 Heat Baffle
1 Grease Cup
1 Ash Cup
1 Control Knob
15
16
17
18
19
20
21
22
31
29
30
32
13
14
33
34
Note: Most hardware is pre-attached to the grill. You may need to loosen some screws
partially while others may need to be removed in order to assemble parts. The screws that
you remove will be re-used so don’t misplace this hardware.
Extra screws are included in a small bag with the owners manual.
25
23
24
26
27
28
35
36
2
31
30
29
32
25
27
9
23
22
19
16
20
17
14
13
12
18
10
21
6
1
11
7
33
24
28
26
15
4
3
5
34
8
2
35
36
3
• Attach side cart braces
11 to front legs 12 and 13
using 4 screws removed
from Step 1.
12
NOTE: Before tightening keyhole
screws, make sure panels are aligned.
• Loosen 4 screws.
• Attach front legs 12 and
13 front panel 30 using
keyholes.
• Tighten 4 screws.
• Remove 8 screws.
Step 2
12
13
11
13
Step 1
30
11
Remove
Remove
4
Step 3
• Attach cart base 26 to
front legs 12 and 13 using
4 screws removed from
Step 1.
Step 4
12
26
13
• Remove 12 screws.
• Attach rear cart brace
5to rear legs(14 and
15 ) using 4 screws just
removed.
5
15
14
Remove
5
• Attach cart base 26 to
rear legs (14 and 15 )
using 4 screws removed
from Step 4.
• Tighten all screws.
• Attach side cart braces
11 to rear legs (14 and
15 ) using 4 screws
removed from Step 4.
Step 6
11
14
11
15
14
26
15
Step 5
6
Step 7
Step 8
• Attach temperature
gauge 17 and bezel 16 to
hood using pre-attached
washer and wing nut.
16
17
• Lock casters 21 .
• Attach casters 21 to legs.
CASTERS
locked
unlocked
21
7
• Loosen 2 rear screws and
remove 2 front screws on
both sides of grill body
9.
• Set grill body 9on cart.
Make sure rear screws
drop into cart brackets.
• Install front screws
through front brackets.
• Tighten 4 screws.
Step 10
9
Step 9
• Remove 4 screws from
grease cup bracket 31 .
• Attach grease cup
bracket 31 to bottom of
rebox using 4 screws
just removed.
31
Loosen
Remove
• Remove 4 screws from
ash cup brackets 32 .
• Attach ash cup brackets
32 to bottom of rebox
using 4 screws just
removed.
Step 11
Step 12
32
• Install ash cup 35 and
grease cup 34 .
35 34
8
Step 14
• Remove 2 screws.
• Attach grease channel
8.
• Tighten 2 screws.
Step 13
9
• Attach control knob 36
to the controller located
on the pellet hopper
assembly 28.
36
28
8
Step 15
Step 16
• Install pellet hopper
assembly 28 into grill
body.
• Attach pellet hopper
assembly 28 to grill body
using 4 screws. (These
screws are in the bag
with the owner’s manual.)
• Tighten 4 screws.
Note: When assembling
the pellet hopper to the
grill, the light wires should
be fed through the back
side of the pellet hopper
to ensure there is enough
wire to connect during
Step 29b.
10
28
• Remove 2 screws from
ash clean-out plate 23
and set aside for later
use.
• Slide ash clean-out plate
23 into bottom of auger
housing.
23
23
Light Wires
11
Step 18
• Remove 3 screws.
• Attach heat plate bracket
19 using 3 screws just
removed.
Step 17
19
• Insert ash clean-out
handle 24 through back
of grill body.
• Attach ash clean-out
handle 24 to ash clean-
out panel 23 using 2
screws removed from
Step 16.
24
12
• Remove 2 screws.
• Attach thermocouple
assembly 10 using 2
screws just removed.
Note: Make sure to feed
the thermocouple wire
on the back side of the
auger box to ensure there
is enough wire to connect
during Step 29b.
Step 20
• Remove 1 screw from
heat baffle 33 .
• Insert the heat baffle
pin into auger box and
tighten screw to hold in
place.
Step 19
33
10
Thermocouple
Wire
13
• Remove 8 screws.
• Attach hopper lid 20 to
pellet hopper body using
8 screws just removed.
Step 22
• Attach side handle 25
using 2 pre-attached
screws from side handle.
Step 21
25
20
14
• Remove 5 screws.
• Attach chimney
2using
5 screws just removed.
Step 24
• Remove 2 screws.
• Attach cord wrap 29
using 2 screws just
removed.
Step 23
29
2
15
• Remove 4 shoulder bolts
from left and right table
brackets 7and 6.
• Attach left and right table
brackets 7and 6to
side table 1and front
table 27 using shoulder
bolts just removed.
Step 26
Step 25
• Install hood handle 3
using screws and bezels
pre-installed on handle.
7
3
7
6
6
1
27
16
• Remove 4 screws from
grill body.
• Attach side table 1to
grill body using 4 screws
just removed.
Step 27
• Remove 4 screws from
grill body.
• Attach front table 27
using 4 screws just
removed.
Step 28
27
1
17
• Connect the thermocouple
connector and the two
10 watt light connectors.
These wires can only be
connected one way.
Note: All connectors must
be connected in order
for the grill to function
properly.
Step 29b
• Remove 1 screw from the
bottom of pellet hopper
panel.
Step 29a
• Close pellet hopper
bottom panel and secure
with screw.
Step 29c
Thermocouple
Connector
10 watt Light
Connectors
18
• Place 4 cooking grates 18
inside cooking chamber.
Step 31
• Place heat plate 22
inside cooking chamber
on brackets.
Note: The heat plate
should set in the grease
channel and the heat
plate bracket. Once
installed the heat plate
will slope down to the left
to ensure grease ows
into the grease cup.
Step 30
18
22
19
• Place the warming rack
4on supports inside
cooking chamber.
Step 33
4

Other manuals for SMK2036AS

1

Other Cuisinart Grill manuals

Cuisinart Gourmet INFRARED 800 User manual

Cuisinart

Cuisinart Gourmet INFRARED 800 User manual

Cuisinart G41806 User manual

Cuisinart

Cuisinart G41806 User manual

Cuisinart Gourmet 600B User manual

Cuisinart

Cuisinart Gourmet 600B User manual

Cuisinart CGG-200 User manual

Cuisinart

Cuisinart CGG-200 User manual
Cuisinart Searin CGG-059 User manual

Cuisinart

Cuisinart Searin CGG-059 User manual

Cuisinart Griddler Deluxe GR-150 User manual

Cuisinart

Cuisinart Griddler Deluxe GR-150 User manual

Cuisinart WM-SW2C Service manual

Cuisinart

Cuisinart WM-SW2C Service manual

Cuisinart GR3E User manual

Cuisinart

Cuisinart GR3E User manual

Cuisinart CLERMONT Instruction Manual

Cuisinart

Cuisinart CLERMONT Instruction Manual

Cuisinart Griddler GC-17NC User manual

Cuisinart

Cuisinart Griddler GC-17NC User manual

Cuisinart GAS0356AS User manual

Cuisinart

Cuisinart GAS0356AS User manual

Cuisinart CCG-100 User manual

Cuisinart

Cuisinart CCG-100 User manual

Cuisinart C782IRS-R User manual

Cuisinart

Cuisinart C782IRS-R User manual

Cuisinart CGWM-093 Deluxe User manual

Cuisinart

Cuisinart CGWM-093 Deluxe User manual

Cuisinart Compact Grill Centro GC-15 Installation and operation manual
Cuisinart

Cuisinart Compact Grill Centro GC-15 Installation and operation manual

Cuisinart GEW 509 IB-3A3 Installation and operation manual

Cuisinart

Cuisinart GEW 509 IB-3A3 Installation and operation manual

Cuisinart WM-SW2 Service manual

Cuisinart

Cuisinart WM-SW2 Service manual
Cuisinart PORTABLE LP GAS GRILL CGG-180T User manual

Cuisinart

Cuisinart PORTABLE LP GAS GRILL CGG-180T User manual

Cuisinart GR4NE User manual

Cuisinart

Cuisinart GR4NE User manual

Cuisinart GR2298905-CU-00 Quick reference guide

Cuisinart

Cuisinart GR2298905-CU-00 Quick reference guide

Cuisinart Q33 User manual

Cuisinart

Cuisinart Q33 User manual

Cuisinart CPG-700 User manual

Cuisinart

Cuisinart CPG-700 User manual

Cuisinart GAS0256AF User manual

Cuisinart

Cuisinart GAS0256AF User manual

Cuisinart Venture CGG-750 User manual

Cuisinart

Cuisinart Venture CGG-750 User manual

Popular Grill manuals by other brands

Lynx All-Sear series Use and care guide

Lynx

Lynx All-Sear series Use and care guide

George Foreman GR0143SQ Use and care book

George Foreman

George Foreman GR0143SQ Use and care book

Fri-Jado TDR-M user manual

Fri-Jado

Fri-Jado TDR-M user manual

Hamilton Beach Indoor Grill Use & care guide

Hamilton Beach

Hamilton Beach Indoor Grill Use & care guide

Rommelsbacher Funtasia FG 2204/SE instruction manual

Rommelsbacher

Rommelsbacher Funtasia FG 2204/SE instruction manual

Garland MWE3W Installation and operation manual

Garland

Garland MWE3W Installation and operation manual

Dansons Group PIT BOSS PRO Series Assembly and operation

Dansons Group

Dansons Group PIT BOSS PRO Series Assembly and operation

Livoo KAMADO DOC283 instruction manual

Livoo

Livoo KAMADO DOC283 instruction manual

KitchenAid 720-0819GH Installation Instructions and Use & Care Guide

KitchenAid

KitchenAid 720-0819GH Installation Instructions and Use & Care Guide

Napoleon R425-1 manual

Napoleon

Napoleon R425-1 manual

DCS BGB36-BQAR Brochure & specs

DCS

DCS BGB36-BQAR Brochure & specs

NutriChief PYLE PKGRST32 user manual

NutriChief

NutriChief PYLE PKGRST32 user manual

Miele CS1312BG Operating and installation instructions

Miele

Miele CS1312BG Operating and installation instructions

Toastmaster A710 Owner's operating and installation manual

Toastmaster

Toastmaster A710 Owner's operating and installation manual

Broil King 6695003 Operator's manual

Broil King

Broil King 6695003 Operator's manual

Progrill PROLUXE CS157A Operation manual

Progrill

Progrill PROLUXE CS157A Operation manual

OMC BROIL-MATE 1165-54 Assembly manual & parts list

OMC

OMC BROIL-MATE 1165-54 Assembly manual & parts list

Magma A10-007 owner's manual

Magma

Magma A10-007 owner's manual

manuals.online logo
manuals.online logoBrands
  • About & Mission
  • Contact us
  • Privacy Policy
  • Terms and Conditions

Copyright 2025 Manuals.Online. All Rights Reserved.