Cupra BORN 2022 User manual

CUPRA BORN Inglés (08.22)
CUPRA BORN
OWNER’S MANUAL
Inglés 10E012720AC (08.22)
10E012720AC

SEAT S.A. is permanently concerned about continuous development of its types and models. For this reason we ask you to understand,
that at any given time, changes regarding shape, equipment and technique may take place on the car delivered. For this reason no
right at all may derive based on the data, drawings and descriptions in this current handbook.
All texts, illustrations and standards in this handbook are based on the status of information at the time of printing. Except for error or
omission, the information included in the current handbook is valid as of the date of closing print.
Re-printing, copying or translating, whether total or partial is not allowed unless SEAT allows it in written form.
SEAT reserves all rights in accordance with the “Copyright” Act.
All rights on changes are reserved.
❀
This paper has been manufactured using bleached non-chlorine cellulose.
© SEAT S.A. - Reprint: 15.08.22
Vehicle identication data
Model:
Vehicle Registration:
Vehicle identification
number:
Date of vehicle registration
or vehicle delivery:
SEAT Official Service/CUPRA authorised service:
Service advisor:
Telephone:
Conrmation of receipt of
documentation and vehicle keys
The following items were delivered
with the vehicle: YES NO
On-board documentation
First key
Second key
Correct working order of all keys was
checked
Location:
Date:
Signature of owner:

Thank you for your
condence
With your new CUPRA, you will be able to enjoy
a vehicle with state-of-the-art technology and
top quality features.
We recommend reading this Instruction Man-
ual carefully to learn more about your vehicle
so you can enjoy all its benets in your daily
driving.
Information about handling is complemented
with instructions regarding the operation and
maintenance of the vehicle in order to ensure
its safety and maintain its value. Moreover, we
want to give you valuable advice and tips to
drive your vehicle eiciently and respecting
the environment.
We wish you safe and enjoyable motoring.
WARNING
Read and always observe safety informa-
tion concerning the passenger's front airbag
›››page57, Fitting and using child
seats.

2
Table of Contents
Table of Contents
About this instruction manual . . . . . . . 4
Quick start guide . . . . . . . . . . . . . . . . . . . . 6
Ignition . . . . . . . . . . . . . . . . . . . . . . . . . . . . . . . . . . . . 6
Infotainment . . . . . . . . . . . . . . . . . . . . . . . . . . . . . . . 8
Connectivity . . . . . . . . . . . . . . . . . . . . . . . . . . . . . . . 9
Electrical charging . . . . . . . . . . . . . . . . . . . . . . . . . . 11
Other topics of interest . . . . . . . . . . . . . . . . . . . . . 12
General views of the vehicle . . . . . . . . . 13
Front exterior view . . . . . . . . . . . . . . . . . . . . . . . . . 13
Rear exterior view . . . . . . . . . . . . . . . . . . . . . . . . . . 14
Interior view . . . . . . . . . . . . . . . . . . . . . . . . . . . . . . . . 15
Overview (left hand drive) . . . . . . . . . . . . . . . . . . 16
Overview (right hand drive) . . . . . . . . . . . . . . . . . 17
Driver information . . . . . . . . . . . . . . . . . . 18
Control lamps . . . . . . . . . . . . . . . . . . . . . . . . . . . . . . 18
Instrument panel . . . . . . . . . . . . . . . . . . . . . . . . . . . 20
Infotainment system operation and displays . 31
Safety . . . . . . . . . . . . . . . . . . . . . . . . . . . . . . . 38
Safe driving . . . . . . . . . . . . . . . . . . . . . . . . . . . . . . . . . 38
Correct sitting position of vehicle occupants 39
Seat belts . . . . . . . . . . . . . . . . . . . . . . . . . . . . . . . . . . 41
PreCrash system . . . . . . . . . . . . . . . . . . . . . . . . . . . . 47
Airbag system . . . . . . . . . . . . . . . . . . . . . . . . . . . . . . 48
Transporting children safely . . . . . . . . . . . . . . . . . 56
In case of emergency . . . . . . . . . . . . . . . . . . . . . . . 65
High-voltage battery . . . . . . . . . . . . . . . . 69
Safety instructions . . . . . . . . . . . . . . . . . . . . . . . . . . 69
Conservation of the high-voltage battery . . . . 71
Charging the high-voltage battery . . . . . . . . . . 72
Charging settings . . . . . . . . . . . . . . . . . . . . . . . . . . . 79
Charging with a home energy management
system . . . . . . . . . . . . . . . . . . . . . . . . . . . . . . . . . . . . . 83
Charging cable . . . . . . . . . . . . . . . . . . . . . . . . . . . . . 84
Opening and closing . . . . . . . . . . . . . . . . 89
Set of vehicle keys . . . . . . . . . . . . . . . . . . . . . . . . . . 89
Keyless Access system . . . . . . . . . . . . . . . . . . . . . . 91
Central locking . . . . . . . . . . . . . . . . . . . . . . . . . . . . . 93
Anti-theft alarm . . . . . . . . . . . . . . . . . . . . . . . . . . . . 97
Doors . . . . . . . . . . . . . . . . . . . . . . . . . . . . . . . . . . . . . . 98
Rear lid . . . . . . . . . . . . . . . . . . . . . . . . . . . . . . . . . . . . . 100
Window controls . . . . . . . . . . . . . . . . . . . . . . . . . . . 102
Steering wheel . . . . . . . . . . . . . . . . . . . . . . 105
Multifunction steering wheel . . . . . . . . . . . . . . . . 105
Seats and head restraints . . . . . . . . . . . 107
Front seats . . . . . . . . . . . . . . . . . . . . . . . . . . . . . . . . . 107
Rear seats . . . . . . . . . . . . . . . . . . . . . . . . . . . . . . . . . . 108
Headrest . . . . . . . . . . . . . . . . . . . . . . . . . . . . . . . . . . . 109
Seat functions . . . . . . . . . . . . . . . . . . . . . . . . . . . . . . 111
Lights . . . . . . . . . . . . . . . . . . . . . . . . . . . . . . . 113
Vehicle lighting . . . . . . . . . . . . . . . . . . . . . . . . . . . . . 113
Interior lights . . . . . . . . . . . . . . . . . . . . . . . . . . . . . . . 118
Visibility . . . . . . . . . . . . . . . . . . . . . . . . . . . . . 121
Windscreen wiper and rear window wiper sys-
tems . . . . . . . . . . . . . . . . . . . . . . . . . . . . . . . . . . . . . . . 121
Mirrors . . . . . . . . . . . . . . . . . . . . . . . . . . . . . . . . . . . . . 123
Sun protection . . . . . . . . . . . . . . . . . . . . . . . . . . . . . 126
Air conditioning . . . . . . . . . . . . . . . . . . . . . 128
Heating, ventilation and cooling . . . . . . . . . . . . 128
Stationary air conditioning . . . . . . . . . . . . . . . . . . 136
Driving . . . . . . . . . . . . . . . . . . . . . . . . . . . . . . 138
Driving indications . . . . . . . . . . . . . . . . . . . . . . . . . . 138
Connecting and disconnecting the drive sys-
tem . . . . . . . . . . . . . . . . . . . . . . . . . . . . . . . . . . . . . . . . 143
Gear selection . . . . . . . . . . . . . . . . . . . . . . . . . . . . . 146
Steering . . . . . . . . . . . . . . . . . . . . . . . . . . . . . . . . . . . . 148
Drive Proles . . . . . . . . . . . . . . . . . . . . . . . . . . . . . . . 149
Braking system . . . . . . . . . . . . . . . . . . . . . . . . . . . . . 151
Brake assist systems . . . . . . . . . . . . . . . . . . . . . . . . 153
Assistant systems . . . . . . . . . . . . . . . . . . . 156
General notes . . . . . . . . . . . . . . . . . . . . . . . . . . . . . . 156
Drive assist sensors and cameras . . . . . . . . . . . . 156
Speed limiter . . . . . . . . . . . . . . . . . . . . . . . . . . . . . . . 159
Speed limiter with proactive speed adjust-
ment . . . . . . . . . . . . . . . . . . . . . . . . . . . . . . . . . . . . . . . 161
ACC - Adaptive Cruise Control . . . . . . . . . . . . . . 163
Predictive speed adjustment . . . . . . . . . . . . . . . . 168
emergency brake assistance system (Front
Assist) . . . . . . . . . . . . . . . . . . . . . . . . . . . . . . . . . . . . . . 170
Lane Assist system . . . . . . . . . . . . . . . . . . . . . . . . . . 174
Driving Assist (Travel Assist) . . . . . . . . . . . . . . . . . 176
Emergency Assist . . . . . . . . . . . . . . . . . . . . . . . . . . . 181
Lane departure warning (Side Assist) . . . . . . . . 182
Parking and manoeuvring . . . . . . . . . . . 186
Park the vehicle . . . . . . . . . . . . . . . . . . . . . . . . . . . . 186
Electronic parking brake . . . . . . . . . . . . . . . . . . . . 187
General information on parking systems . . . . . 189
Parking aid Plus . . . . . . . . . . . . . . . . . . . . . . . . . . . . . 191
Automatic parking system . . . . . . . . . . . . . . . . . . 194
Automatic Parking System Plus with memory
function . . . . . . . . . . . . . . . . . . . . . . . . . . . . . . . . . . . . 199
Reverse Assist (Rear View Camera) . . . . . . . . . . 204
Peripheral view system (Top View Camera) . . 206
Rear cross traic alert (RCTA) . . . . . . . . . . . . . . . 209
Door opening warning (Exit Assist) . . . . . . . . . . 210
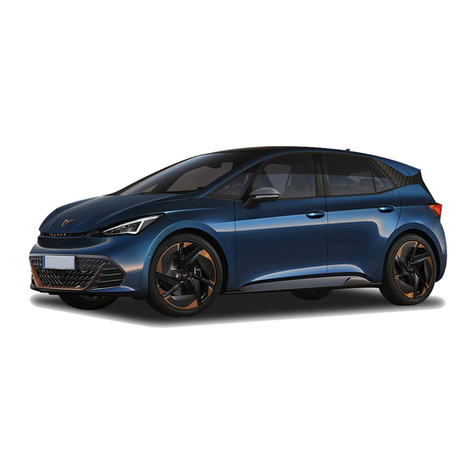
Table of Contents
3
Practical equipment . . . . . . . . . . . . . . . . 212
Storage compartment . . . . . . . . . . . . . . . . . . . . . . 212
Power sockets . . . . . . . . . . . . . . . . . . . . . . . . . . . . . . 213
Data transmissions . . . . . . . . . . . . . . . . . . 215
Cybersecurity . . . . . . . . . . . . . . . . . . . . . . . . . . . . . . 215
Car2X communication . . . . . . . . . . . . . . . . . . . . . . 216
CUPRA CONNECT . . . . . . . . . . . . . . . . . . . . . . . . . . 219
Privacy mode . . . . . . . . . . . . . . . . . . . . . . . . . . . . . . . 223
User administration . . . . . . . . . . . . . . . . . . . . . . . . . 224
WLAN access point . . . . . . . . . . . . . . . . . . . . . . . . . 224
Full Link . . . . . . . . . . . . . . . . . . . . . . . . . . . . . . . . . . . . 226
Wired and wireless connections . . . . . . . . . . . . 230
Infotainment system . . . . . . . . . . . . . . . . 231
First steps . . . . . . . . . . . . . . . . . . . . . . . . . . . . . . . . . . 231
Overview and controls . . . . . . . . . . . . . . . . . . . . . . 234
General instructions for use . . . . . . . . . . . . . . . . . 235
Voice control . . . . . . . . . . . . . . . . . . . . . . . . . . . . . . . 240
Radio mode . . . . . . . . . . . . . . . . . . . . . . . . . . . . . . . . 243
Media Mode . . . . . . . . . . . . . . . . . . . . . . . . . . . . . . . . 247
Navigation . . . . . . . . . . . . . . . . . . . . . . . . . . . . . . . . . 250
Telephone interface . . . . . . . . . . . . . . . . . . . . . . . . 258
Storing objects . . . . . . . . . . . . . . . . . . . . . . 264
Positioning the luggage and cargo . . . . . . . . . . 264
Luggage compartment . . . . . . . . . . . . . . . . . . . . . 265
Luggage compartment equipment . . . . . . . . . . 267
Roof carrier . . . . . . . . . . . . . . . . . . . . . . . . . . . . . . . . 268
Trailer mode . . . . . . . . . . . . . . . . . . . . . . . . . . . . . . . 269
Miscellaneous situations . . . . . . . . . . . . 270
Vehicle tool kit . . . . . . . . . . . . . . . . . . . . . . . . . . . . . 270
Changing the windscreen wiper blades . . . . . . 270
Jump start . . . . . . . . . . . . . . . . . . . . . . . . . . . . . . . . . 272
Towing the vehicle . . . . . . . . . . . . . . . . . . . . . . . . . . 274
Fuses . . . . . . . . . . . . . . . . . . . . . . . . . . . . . . . . . . . . . . 277
Changing bulbs . . . . . . . . . . . . . . . . . . . . . . . . . . . . . 282
Checking and relling levels . . . . . . . . 283
Front compartment . . . . . . . . . . . . . . . . . . . . . . . . 283
Fluids and consumables . . . . . . . . . . . . . . . . . . . . 286
Cooling system . . . . . . . . . . . . . . . . . . . . . . . . . . . . . 287
Brake uid . . . . . . . . . . . . . . . . . . . . . . . . . . . . . . . . . . 290
Windscreen washer reservoir . . . . . . . . . . . . . . . 291
12-volt battery . . . . . . . . . . . . . . . . . . . . . . . . . . . . . . 292
Wheels and tyres . . . . . . . . . . . . . . . . . . . . 297
Important information about wheels and
tyres . . . . . . . . . . . . . . . . . . . . . . . . . . . . . . . . . . . . . . . 297
Changing a wheel . . . . . . . . . . . . . . . . . . . . . . . . . . 303
Tyre pressure monitor system . . . . . . . . . . . . . . . 307
Tyre repair . . . . . . . . . . . . . . . . . . . . . . . . . . . . . . . . . . 309
Maintenance . . . . . . . . . . . . . . . . . . . . . . . . 312
Service . . . . . . . . . . . . . . . . . . . . . . . . . . . . . . . . . . . . . 312
Additional service oers . . . . . . . . . . . . . . . . . . . . 313
Vehicle upkeep and cleaning . . . . . . . . . . . . . . . . 314
Accessories, spare parts and repair work . . . . 320
Information for the user . . . . . . . . . . . . 323
Warranty . . . . . . . . . . . . . . . . . . . . . . . . . . . . . . . . . . . 323
Information stored by the control units . . . . . . 323
Vehicle antennas . . . . . . . . . . . . . . . . . . . . . . . . . . . 326
Materials and recycling information . . . . . . . . . 327
Radioelectrical equipment . . . . . . . . . . . . . . . . . . 328
Technical data . . . . . . . . . . . . . . . . . . . . . . 332
Indications about the technical data . . . . . . . . 332
Index . . . . . . . . . . . . . . . . . . . . . . . . . . . . . . . . 337

4
About this instruction manual
About this instruction
manual
This instruction manual is valid for all var-
iants and versions of your CUPRA model. It
describes all equipment and models without
specifying whether they are optional equip-
ment or model variants. As a result, equipment
not tted to your vehicle or only available in
certain countries may be described. Find out
about your vehicle's equipment in the docu-
mentation supplied with it and please contact
your CUPRA Specialised Service or SEAT Oi-
cial SEAT Service if you require more detailed
information.
All information provided in instruction manual
corresponds to the information available at the
time of going to press. As the vehicle is under
continuous development, it may have dieren-
ces to the data included in this manual. For this
reason, no claims can be made in the event
of mismatching data, illustrations and descrip-
tions.
Ensure that the on-board documentation is
kept in the vehicle at all times if you sell it or
lend it to third parties. In addition, CUPRA rec-
ommends resetting the infotainment system to
factory settings to delete all personal data.
Some details on the drawings may be dierent
to your vehicle and they should be interpreted
as a standard representation.
The direction indicators (left, right, forwards,
backwards) in this manual refer to the direction
of travel of the vehicle unless otherwise stated.
This instruction manual has been written for
left-hand drive vehicles. In right-hand drive
vehicles, the arrangement of the controls dif-
fers partly from that shown in the illustrations
or described in the texts.
Technical modications to the vehicle or
safety-critical issues that have arisen since the
time of going to press will be included in a sup-
plement to the on-board documentation.
Trademarks are marked with ®. The ab-
sence of this symbol does not guarantee
that the term is not a trademark.
You can access the information in this manual
using:
● Thematic table of contents that follows the
manual’s general chapter structure.
●Visual table of contents that uses graphics to
indicate the pages containing “essential” infor-
mation, which is detailed in the corresponding
chapters.
●Alphabetical index with many terms and syn-
onyms to help you nd information.
WARNING
Texts after this symbol contain information
about safety and warn you about possible ac-
cident or injury risks.
NOTICE
Texts after this symbol indicate possible
damage to the vehicle.
For the sake of the environment
Texts after this symbol contain information
on environmental protection.
Note
Texts after this symbol contain additional in-
formation.

About this instruction manual
5
1) Depending on the version.
Digital instruction manual
The digital version of the manual can be found
on the oicial CUPRA website:
Fig.1 CUPRA
website
●scan the QR code.
●OR enter the following address in the naviga-
tor website:
https://www.cupraoicial.com/owners/your-
cupra/cupra-cars-manuals.html
and select your vehicle.
Digital Manual in the Infotainment System1)
When a factory settings reset is performed, the
Digital Manual is uninstalled from the infotain-
ment system.
Proceed as follows to reinstall the Digital Man-
ual:
●Press the notications icon located on the
top bar of the infotainment system. A pop-up
window will then appear.
●Press to begin the installation process.
If in any doubts, please contact your SEAT Oi-
cial SEAT Service or specialised workshop.
Note
It is only possible to update the Digital
Manual when the vehicle is in Online
›››page223 mode. In Oline mode the
content may not be up to date.

6
Quick start guide
1.
2.
3.
1.
2.
Quick start guide
Ignition
Automatic connection of the drive
system
Automatic driver detection
Fig.2 Digital Cockpit Display
Enter the vehicle.
The Digital Cockpit displays ›››Fig.2.
Comfort Ready: Air conditioning and info-
tainment available.
Fig.3 Digital Cockpit Display
Press the brake pedal.
The Digital Cockpit displays ›››Fig.3.
Park: Vehicle on and stopped in a parked
status.
Fig.4 Digital Cockpit Display
Select D or R on the gear selector
The Digital Cockpit displays ›››Fig.4.
Ready: Vehicle ready to drive.
Note
NEW FEATURE WITH CUPRA! Possible to
switch on the vehicle’s ignition without
pressing the button.
Automatic disconnection
Fig.5 Digital Cockpit Display
Brake to step (if Autohold is inactive, press
P on the selector).
The Digital Cockpit displays ›››Fig.5.
Ready: Vehicle ready to drive.
Fig.6 Digital Cockpit Display
Leave the vehicle (no need to press the
button).
The Digital Cockpit displays ›››Fig.6.
The vehicle is switched o by automatic
driver detection

Quick start guide
7
Ignition
3.
1.
2.
Fig.7 Digital Cockpit Display
Activate door locking.
The Digital Cockpit displays ›››Fig.7.
Note
NEW FEATURE WITH CUPRA! Possible to
switch o the vehicle’s ignition without
pressing the button.
Recognise whether the drive sys-
tem is on or o
Fig.8 Digital Cockpit Display
When the drive system is switched on, the
Digital Cockpit displays the speedometer /
speed display ›››Fig.8
Fig.9 Digital Cockpit Display
When the drive system is inactive, the Dig-
ital Cockpit displays the CUPRA Born im-
age ›››Fig.9

8
Quick start guide
Infotainment
Access route to the digital manual
Fig.10 Infotainment: Main menu in tile mode
1. With the Main Menu in “tile” mode,
press: Help > Vehicle wallet.
Note
As with most state-of-the-art computer and
electronic equipment, in certain cases the
system may need to be restarted to make
sure that it operates correctly (e.g. display
not congured correctly when viewing the
digital manual). To do this, if appropriate,
press and hold the On/O button of the info-
tainment system for approx. 15 seconds until
the CUPRA logo appears on the display.

Quick start guide
9
Connectivity
1) Not available on all markets.
1
Connectivity
CUPRA CONNECT1)
Registration process
Use the My CUPRA App to register.
Don’t have the My CUPRA App yet? Download
it by scanning the QR code:
Fig.11 iOS
Fig.12 Android
To make registration easier, watch the follow-
ing video for a step-by-step explanation of the
registration process:
Fig.13 Download the
“How to register” video
here.
Fig.14 CUPRA ID
Create a CUPRA ID, log in and complete
your prole

10
Quick start guide
2
2.1
2.2
2.3
3
Fig.15 Enter the vehicle identication
number
Link the vehicle to your CUPRA ID
Enter the vehicle identication number,
accept the legal terms and conditions. Or-
der service packs.
Fig.16 Scan the QR code or enter the
CUPRA ID credentials
Scan the QR code generated by the Info-
tainment system.
Go to MyCUPRA App and select your pre-
ferred Authorized Service (depending on
the version).
Fig.17 Complete as primary user
Registration complete

Quick start guide
11
Electrical charging
Electrical charging
Charging the high-voltage battery
Fig.18 Charging process indicator LED
1. Make sure that the cable is connected cor-
rectly (the cable must be locked by the ve-
hicle). Start the process by following the
instructions of the charging point.
2. Check the charging status using the indica-
tor light on the charging cover. For more
information, see the sticker next to the
charging socket itself or the "Charging the
high-voltage battery" chapter of the user
manual.
3. The connector remains locked during the
charging process.
4. At the end of the charging process, remove
the cable and store it in the vehicle if nec-
essary.
LED indications
White LED ›››Fig.18
● Flashing: Preparing the charging process.
●Fixed: Not charging
Green LED ›››Fig.18
● Flashing: The battery is charging.
●Fixed: Process completed without problems,
full charge.
● Sparkling: If programmed charging has been
activated, the charging process has not yet
started.
LED alternately ashing green and red
›››Fig.18
●Emergency charging at reduced power due
to a failure to recognize the charging connec-
tor.
Red LED ›››Fig.18
● Fixed: Fault in the charging system. If it re-
mains on after several attempts, seek specialist
assistance.
NOTICE
To end the charging process manually, press
the open button on the central locking re-
mote control or press Stop charging in
the infotainment system's e-Manager menu.
You can now disconnect the cable. For more
information see chapter ›››page72,
Charging the high-voltage battery.
Tips for maximising the vehicle's
range
Pre-air condition the vehicle interior when
charging to maximise range. This means that
the energy needed to initially air condition the
vehicle will not be taken from the battery.
Whenever possible, use the heated seats
instead of the heating system. The heated
seats consume much less energy than the
heating and avoid unnecessary loss of range.
The the vehicle's range prediction is based
on the usual use of the car. It does not con-
sider gradients or the outside temperature.
Constant and eicient driving is recommended
for optimal predictions.

12
Quick start guide
Other topics of interest
How to pair a mobile phone
To pair a mobile phone, see section
›››page259, Pair, connect and manage in
the Phone Interface chapter.
Multifunction steering wheel buttons
Functions, usage logic. See chapters
›››page105, Functions and ›››page156,
Assistant systems.
Head-up-Display (HUD)
Windscreen Display with augmented reality
(AR), see chapter ›››page23, Head-up-
Display (HUD).
Cubic Portal
Access the Cubic portal to purchase data
for your vehicle. Create your account, add
your vehicle identication number (VIN) and
choose from a range of data plans.
Cubic website:
https://cupra.cubictelecom.com
Note
If necessary, to release the parking brake so
that the vehicle can be pushed:
●Press the brake pedal and select the N po-
sition on the gear selector. Next, conrm
“Activate rolling” in the Infotainment System.
●Or, open the vehicle settings:
Vehicle > Assistants > Park as-
sist > Brakes and activate the function.

General views of the vehicle
13
Front exterior view
General views of the vehicle
Front exterior view
Driving assistance sensors ›››page156
1Front multifunction camera
2“Top View Camera” front camera
3Front radar
4Park distance control sensors
5Park assist sensor
6“Top View Camera” side cameras
ALevels control
Brake uid ›››page290
Battery ›››page292
BFront compartment
Unlocking lever ›››page286
Open/close ›››page286
CTowing the vehicle
Towing ›››page274
Towline anchorage ›››page277

14
General views of the vehicle
Rear exterior view
Driving assistance sensors ›››page156
1Rear view camera
2Park distance control sensors
3Rear radars
4Park assist sensor
ARear lid
Opening from outside ›››page101
Emergency opening ›››page101
BCharging socket
Charging process display ›››page76
Emergency unlocking ›››page78
COpening and closing
Doors ›››page98
Central locking ›››page94
Emergency lock ›››page99
DAction in the event of a puncture
Anti-puncture kit ›››page309
Wheel change ›››page303

General views of the vehicle
15
Interior view
Interior view
1Armrest ›››page111
2Isox anchors ›››page59
3Seat belts ›››page42
4Sunshade blind ›››page127
5Interior mirror ›››page124
6Armrest with emergency starter housing
›››page146
7Connectivity Box / Wireless Charger
›››page262
8Seat adjustment ›››page107
9Start button ›››page143
10 Front passenger airbag ›››page51
11 Glove compartment ›››page212
12 Disconnecting the front passenger front
airbag ›››page52

16
General views of the vehicle
Overview (left hand drive)
1Door handle
2Central locking ›››page93
Exterior mirror adjustment ›››page125
Electric windows ›››page102
3Control for lighting and demisting windows
›››page113
4Turn signal and main beam lever
›››page115
5Multifunction steering wheel control pan-
els ›››page105
6Digital Cockpit ›››page21
Control lamps ›››page18
7Wipers and rear window wiper
›››page121
8Gear selector ›››page146
Electronic parking brake ›››page187
9Infotainment system ›››page31,
›››page231
10 Open bonnet lever ›››page286
11 Fuses ›››page277
12 Steering wheel adjustment ›››page106
13 Steering wheel with horn and driver front
airbag ›››page51
14 Hazard warning lights ›››page65

General views of the vehicle
17
Overview (right hand drive)
1Infotainment system ›››page31,
›››page231
2Turn signal and main beam lever
›››page115
3Multifunction steering wheel control pan-
els ›››page105
4Digital Cockpit ›››page21
Control lamps ›››page18
5Wipers and rear window wiper
›››page121
6Gear selector ›››page146
Electronic parking brake ›››page187
7Control for lighting and demisting windows
›››page113
8Central locking ›››page93
Exterior mirror adjustment ›››page125
Electric windows ›››page102
9Door handle
10 Open bonnet lever ›››page286
11 Fuses ›››page277
12 Hazard warning lights ›››page65
13 Steering wheel adjustment ›››page106
14 Steering wheel with horn and driver front
airbag ›››page51

18
Driver information
Driver information
Control lamps
Control and warning lamps
The warning and control lights can be lit indi-
vidually or in combination and serve as a warn-
ing, to indicate the presence of an anomaly or
to warn of the activation of certain functions.
Some turn on when the ignition is switched
on and have to be switched o after a certain
period of time.
The control lamps that light up on the light
control are explained in chapter ›››page113,
Lights.
WARNING
If the warning lamps and messages are ig-
nored, faults may occur in the vehicle, it may
stall in traic, or accidents and serious inju-
ries may occur.
●Never ignore the warning lamps or text
messages.
●Stop the vehicle safely as soon as possible.
Sym-
bol
Meaning
Stop driving!
Central warning lamp ›››page25
Sym-
bol
Meaning
Fasten your seat belt ›››page42
Deep discharge of the high-voltage
battery ›››page77
Electronic parking brake on
›››page187
Stop driving!
Fault in the brake system
›››page152
Stop driving
Brake uid level low ›››page290
Stop driving!
The electromechanical brake servo
is not working ›››page155
Take control of the vehicle and be
ready to brake! ›››page163
Stop driving!
Fault in the motor coolant system
›››page290
Stop driving!
Steering anomaly ›››page149
Sym-
bol
Meaning
Stop driving!
Fault in the high voltage system
›››page77, ›››page148,
›››page276
Stop driving!
12volt battery ›››page295
High-voltage battery empty -Driv-
ing not possible ›››page142,
›››page143
Health risk! Open the windows!
CO2 concentration too high
›››page135
Collision warning ›››page171
Take control of the steering imme-
diately ›››page180
Central warning lamp ›››page25
Airbag or belt tensioner system
deactivated by a diagnostic tester
›››page50
Fault in the airbag system or the
seat belt tensioners ›››page50
Range calculation failure
›››page77
Table of contents
Other Cupra Automobile manuals

Cupra
Cupra FORMENTOR User manual

Cupra
Cupra FORMENTOR User manual

Cupra
Cupra ATECA 2022 User manual

Cupra
Cupra LEON 5D User manual

Cupra
Cupra ATECA User manual

Cupra
Cupra Ateca 2018 User manual

Cupra
Cupra BORN User manual

Cupra
Cupra Ateca 2020 User manual

Cupra
Cupra BORN User manual

Cupra
Cupra BORN User manual