MODE: SLOW COOK
The SLOW COOK mode cooks food at a lower temperature for a longer period of time, resulting in tender, moist, and
flavorful stews, braised meats, and slow-roasted meats. Slow cooking is ideal for tough, large, often inexpensive cuts of
meat, as the long cooking time will break down the meat’s tough connective tissues. In most cases, you should position
the OVEN RACK in the lowest rack position.
Place the OVEN RACK in the lowest rack position.
Set MODE to SLOW COOK.
Set TEMP to desired cooking temperature.
Set TIME to desired cooking time. Please note that the countdown timer can only be set to a maximum of 3 hours, at
which time the heating elements will turn off and the END indicator will be shown on the DISPLAY. The TIME can be reset
for any additional cooking time needed.
Press the START/CANCEL button to begin preheating the oven.
Once the oven is preheated and the READY indicator is shown on the DISPLAY, add food to the oven and press the START/
CANCEL button to start the countdown timer.
You can cancel the cooking process at any time by pressing the POWER button or the START/CANCEL button until the END
indicator is shown on the DISPLAY.
NOTE: The OVEN TRAY should always be removed from oven when slow cooking as it will interfere with the flow of
hot air from the bottom elements
X.
1.
2.
3.
4.
5.
6.
7.
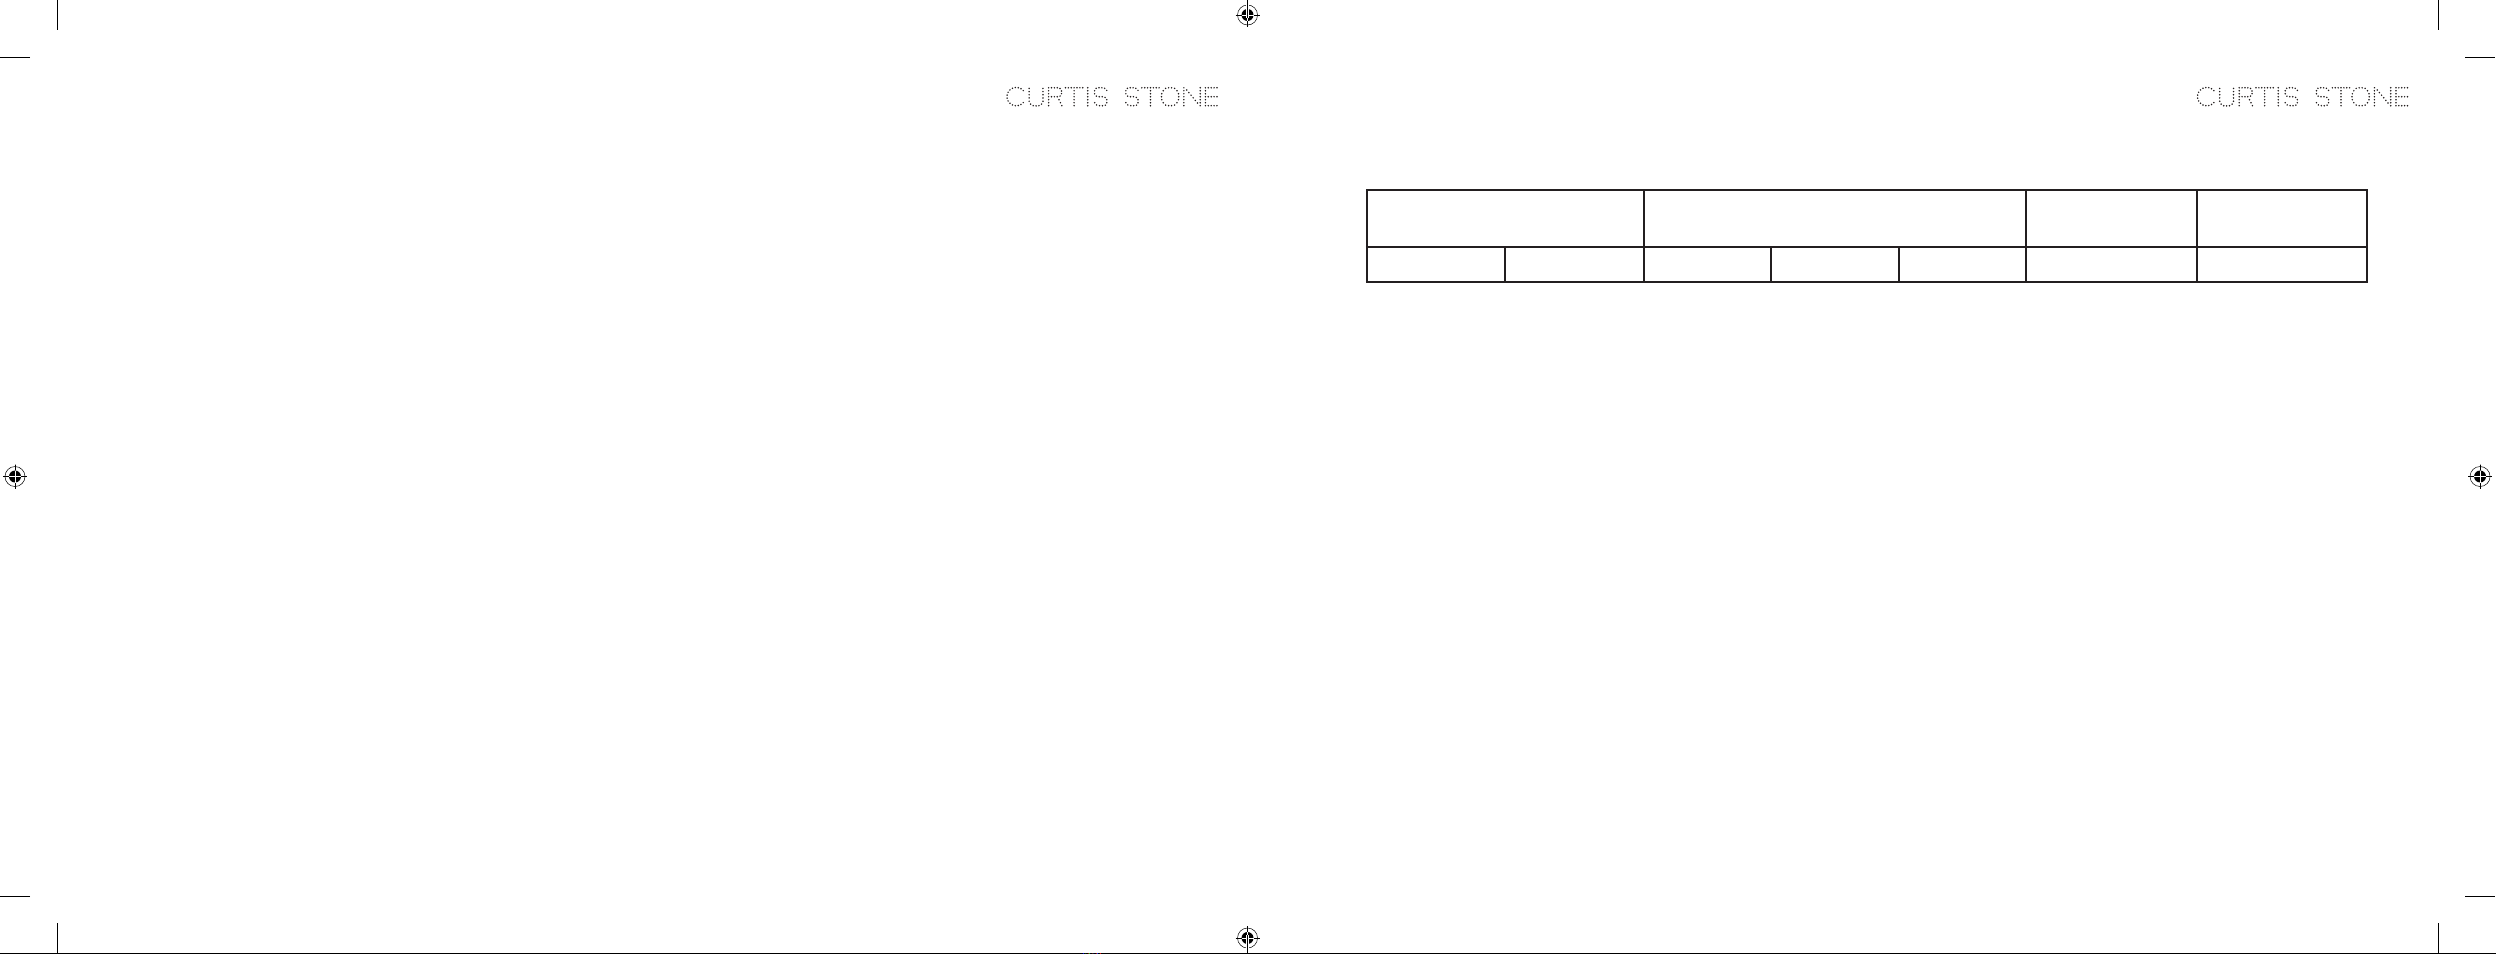
TEMPERATURE RANGE HEATING ELEMENTS
Convection FanFrom To Top Infrared Bottom Preheat
150°F 250°F OFF OFF ON ON OFF
MODE: ROAST
The ROAST mode is ideal for cooking a variety of meats and vegetables. The high roasting temperature browns and crisps
the outside of the food, while keeping the inside moist and flavorful. In most cases, you should position the OVEN RACK in
the lowest rack position. However this is only a guide.
Place the OVEN RACK in desired rack position. Place the MULTIPURPOSE RACK into the OVEN TRAY. Place meat fat side up
on the MULTIPURPOSE RACK (unless otherwise directed). This will allow air to circulate under the meat while roasting.
Set MODE to ROAST.
Set TEMP to desired cooking temperature.
Set TIME to desired cooking time.
Press the START/CANCEL button to begin preheating the oven.
Once the oven is preheated and the READY Indicator is shown on the DISPLAY, add OVEN TRAY to the oven and press the
START/CANCEL button to start the countdown timer.
You can cancel the cooking process at any time by pressing the POWER button or the START/CANCEL button until the END
indicator is shown on the DISPLAY.
TIPS:
If pan drippings begin to smoke while roasting, pour them off into a heatproof container and continue roasting.
When using roasting pans, baking pans, or baking sheets instead of the MULTIPURPOSE RACK and OVEN TRAY, place the
OVEN RACK in the lowest rack position before setting MODE, and set your cooking vessel on the OVEN RACK when ready
to cook.
When roasting vegetables, place them directly on the OVEN TRAY. If desired, preheat the OVEN TRAY to allow for better
browning.
XI.
1.
2.
3.
4.
5.
6.
7.
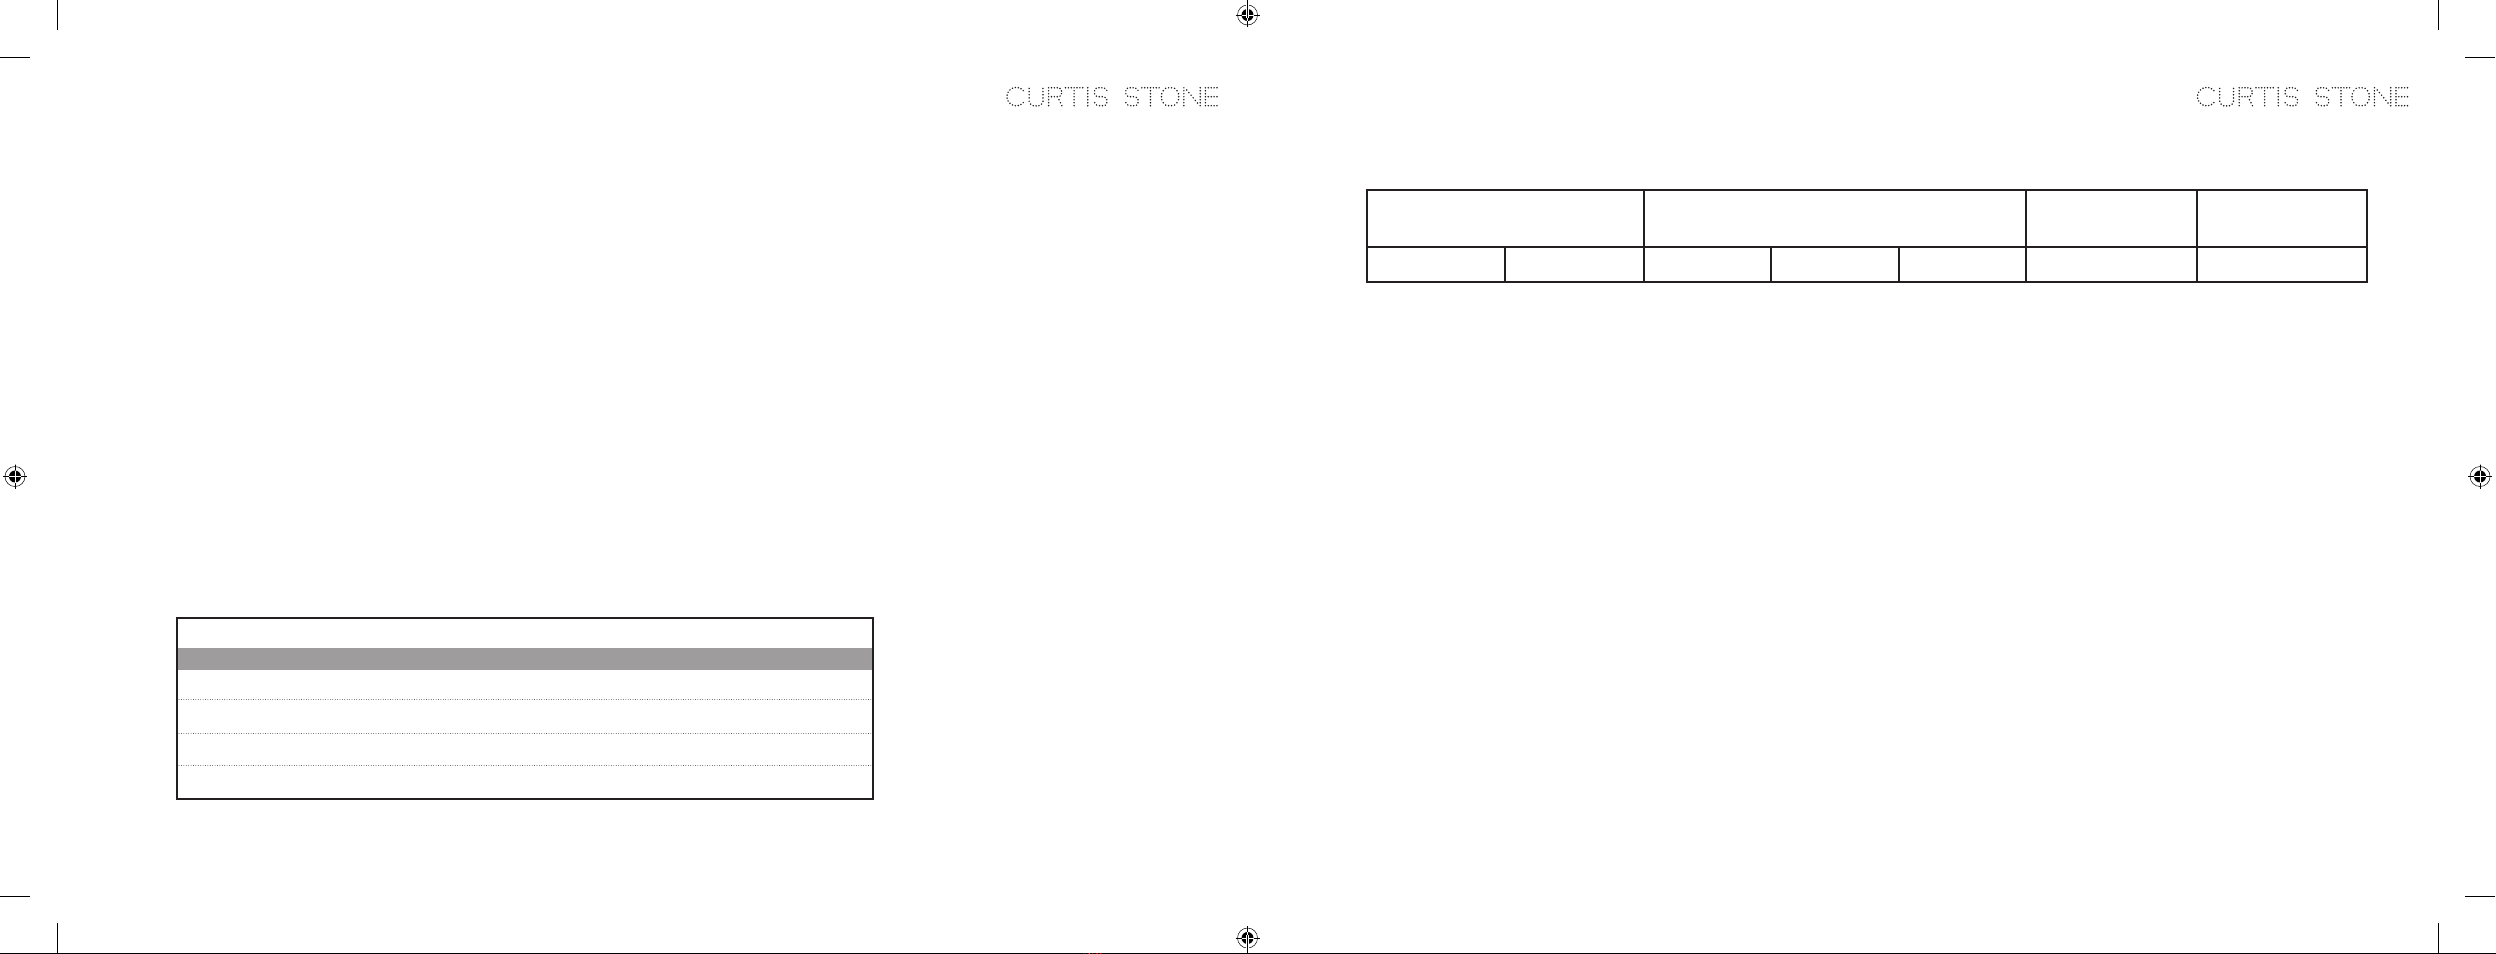
TEMPERATURE RANGE HEATING ELEMENTS
Convection FanFrom To Top Infrared Bottom Preheat
300°F 450°F ON OFF ON ON OFF
TOP AND BOTTOM ELEMENTS ARE ON IN PREHEAT MODE ONLY
13 14