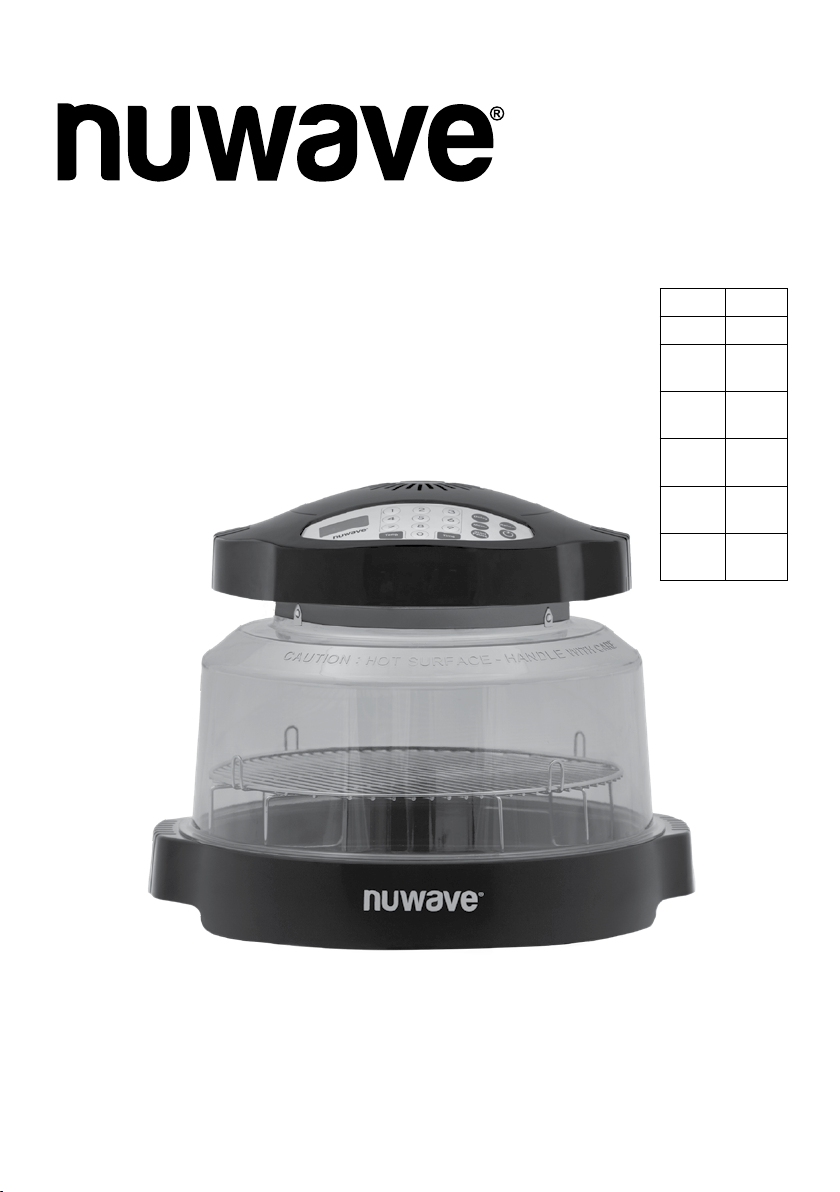
NuWave PRO PLUS 2 User manual

Questions or Comments?
For Amazon Purchases: support@nuwavenow.com
For All Other Purchases: help@nuwavenow.com
Owner’s Manual
Rev. 1
PRO PLUS 2
INFRARED OVEN™Model Color
20638 Black
20639 Cool
Gray
20640 Deep
Blue
20641 Cozy
Blue
20642 Mint
Green
20643 Wild
Olive

2| nuwavenow.com
THANK YOU!
Register Today!
Protecting your investment is easy and rewarding. Simply
scan the QR code or visit nuwavenow.com/register to
register. When you register, simply opt in for an additional
year of warranty. Don’t worry. There is no catch. We are
extending it absolutely FREE to show our appreciation!
nuwavenow.com/register
support@nuwavenow.com help@nuwavenow.com
For Amazon Purchases For All Other Purchases
Scan to Register
Congratulations on your NuWave® purchase. We know there are many options
available and sincerely appreciate the trust you have placed in us.
For the last 30 years, we have committed to introducing products that promote
healthy living at affordable prices. By combining the highest quality designs with
cutting edge technology, we have always strived to blend feature, function, and
innovation into every product we make. We hope you will agree.
We would love to hear from you. Please feel free to reach out with any feedback
or comments that could improve your experience. We would also enjoy hearing
about your successes.
The best way to reach us is by email:
For Amazon Purchases: support@nuwavenow.com
For All Other Purchases: help@nuwavenow.com
Connect with Us!
#nuwavenow
Visit nuwavenow.com to see other
great products and accessories.

nuwavenow.com | 3
CONTENTS
Meet your NuWave® Pro Plus 2 Infrared OvenTM and its unique combination
of conduction, convection and infrared heat that delivers healthier, tastier results
made faster and more efciently than traditional cooking appliances!
Para la versión en español de este manual, visita www.nuwavenow.com
Recipe Book QR Code ................................................................................ 3
Safeguards & Information........................................................................... 4-5
Electrical Information..................................................................................... 5
Parts & Accessories.................................................................................... 6
Ordering Parts ............................................................................................... 6
Assembly Guide .......................................................................................... 7-9
Before First Use............................................................................................. 7
Reversible Rack ............................................................................................ 8
Dome Holder ................................................................................................. 9
Quick Start ................................................................................................... 10-12
Control Panel................................................................................................. 10
Operating Buttons.......................................................................................... 10-12
Care & Maintenance .................................................................................... 13
Protective Grating Removal........................................................................... 13
Troubleshooting Guide ............................................................................... 14
Notes............................................................................................................. 15
Limited Warranty ......................................................................................... 16-18
RoHS Compliant .......................................................................................... 19
RECIPE BOOK QR Code
Visit www.nuwavenow.com/pro-plus-2-recipe-book
or scan the QR code to access over 90 recipes written
by our team of chefs specically for your NuWave®
Pro Plus 2 Infrared OvenT
M
.

4| nuwavenow.com
HOUSEHOLD USE ONLY • READ ALL INSTRUCTIONS BEFORE USE
When using electrical products, especially when children are present, basic safety
precautions should always be followed, including the following:
WARNING: When using the Pro Plus 2, basic safety precautions should
always be followed:
1. Read all instructions, safeguards, and warnings before using the appliance.
2. Do not place appliance where it can fall or be pulled into water or other
liquids.
3. Do not reach for an appliance that has fallen into water. Unplug immediately!
4. Do not immerse cord, plug, or power head in water or other liquids.
WARNING:To reduce the risk of burns, electrocution, fire or injury:
1. This appliance should not be used by children. Close supervision is
necessary when this product is used near children.
2. Use this appliance for its intended purpose as described in this brochure.
Do not use any other accessories or attachments not recommended by the
manufacturer. They may result in re, electrical shock, or personal injury.
3. Never operate this appliance if it has a damaged cord or plug; not
working properly; has been dropped or damaged; or dropped into water.
Call Customer Service:
For Amazon Purchases: support@nuwavenow.com
For All Other Purchases: help@nuwavenow.com
4. Keep the cord away from heated surfaces.
5. Unplug from outlet when not in use and before cleaning. Allow to cool before
putting on or taking off parts.
6. Always unplug power cord by pulling on the plug. Do not unplug by pulling on
cord.
7. Never force the plug into an outlet.
8. Do not use outdoors.
9. Do not use or operate where aerosol (spray) products are being used or
where oxygen is being administered.
10. Do not let cord hang over edge of table or counter, or touch hot surfaces.
11. Do not place on or near a hot gas or electric burner or in a heated oven.
12. Extreme caution must be used when moving an appliance containing hot oil
or other hot liquids.
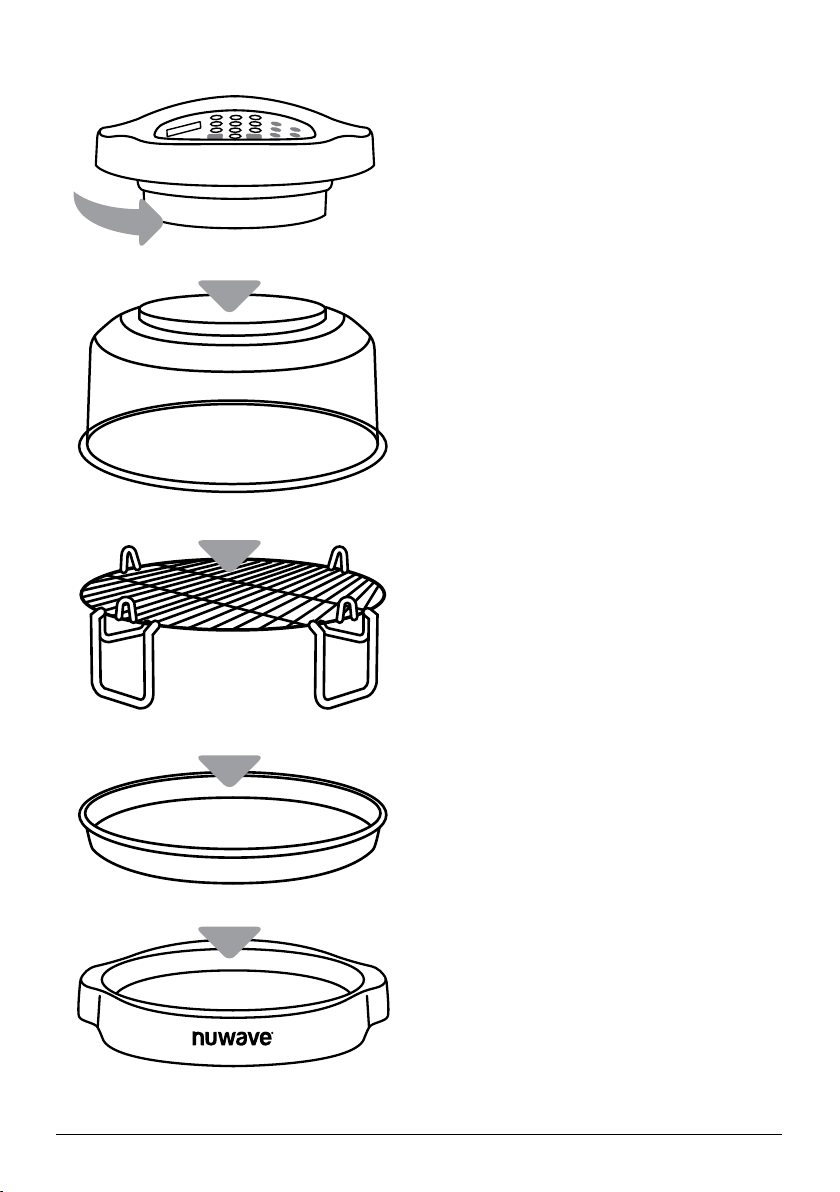
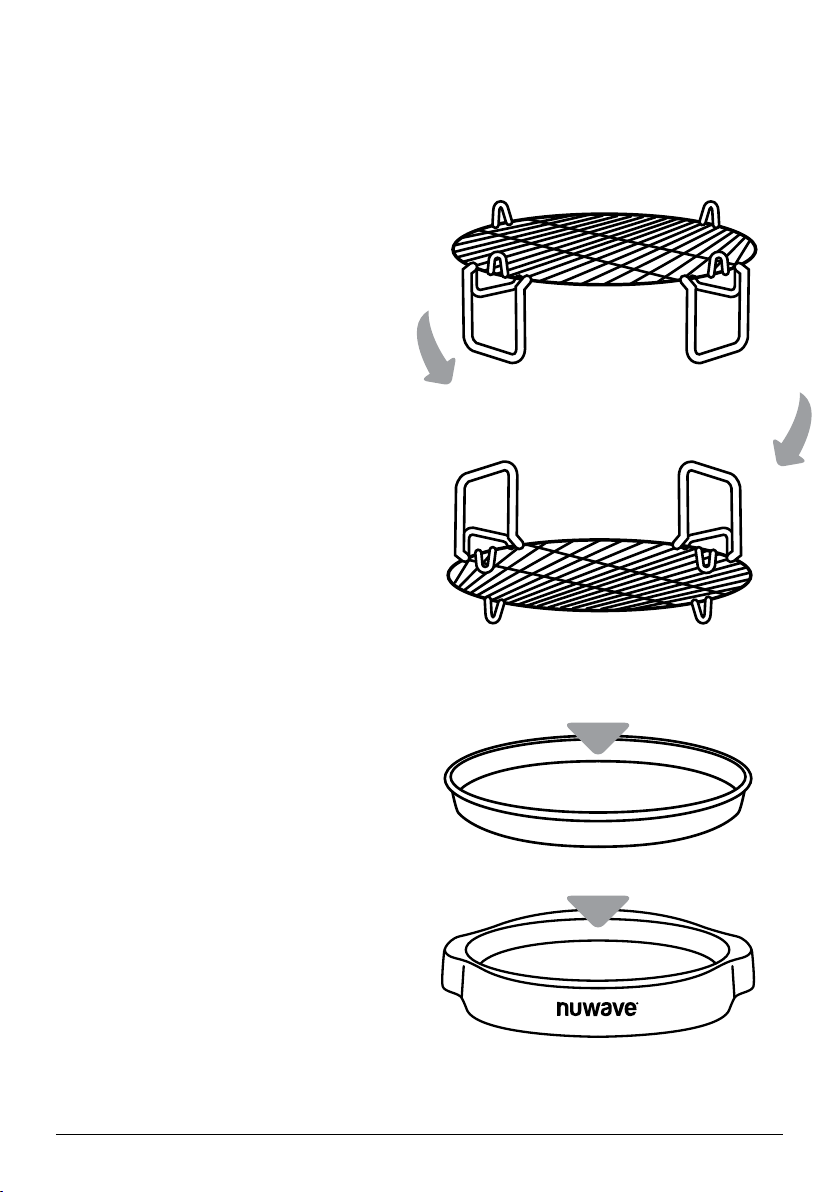
13. Use extreme caution when removing hot Liner Pan or Cooking Rack.
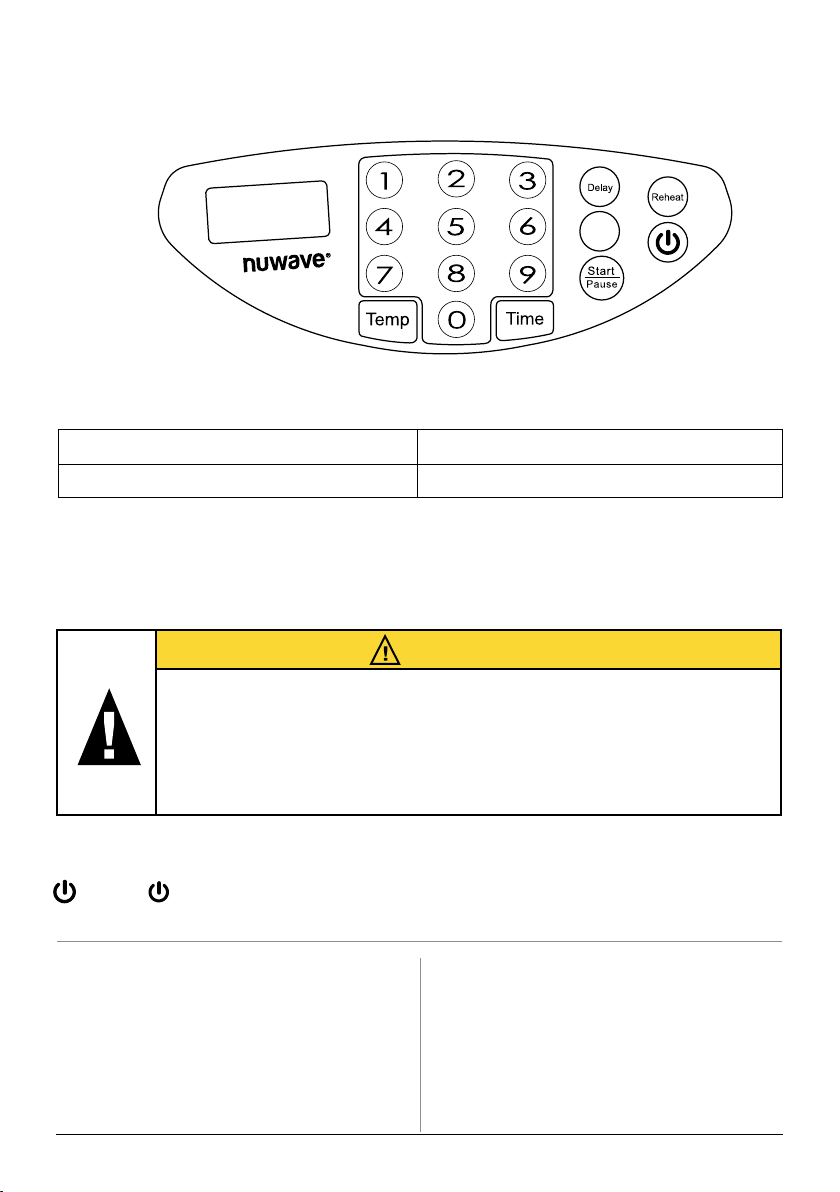
14. To disconnect, press the Pause/Clear Button twice before unplugging.
15. Do not use this appliance for anything other than it is intended.
16. Check all electrical wiring. Beware of damaged cord or plug.
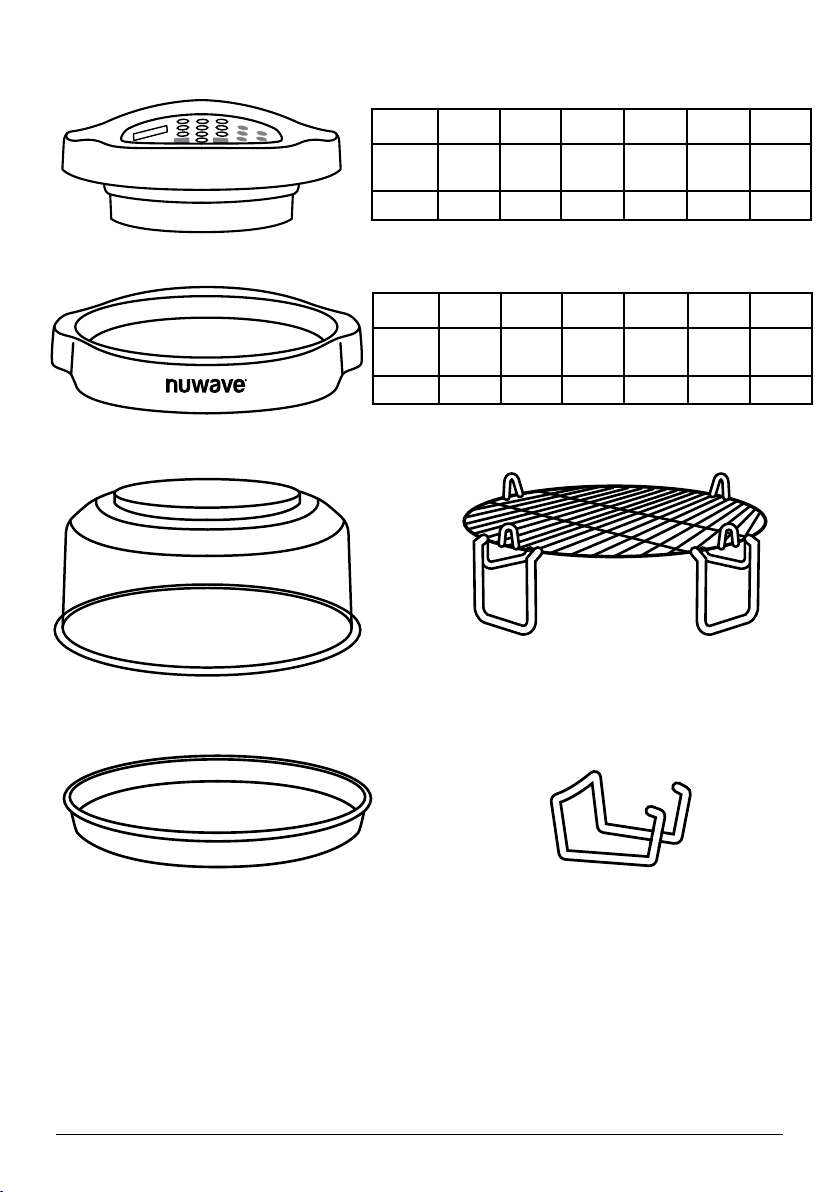
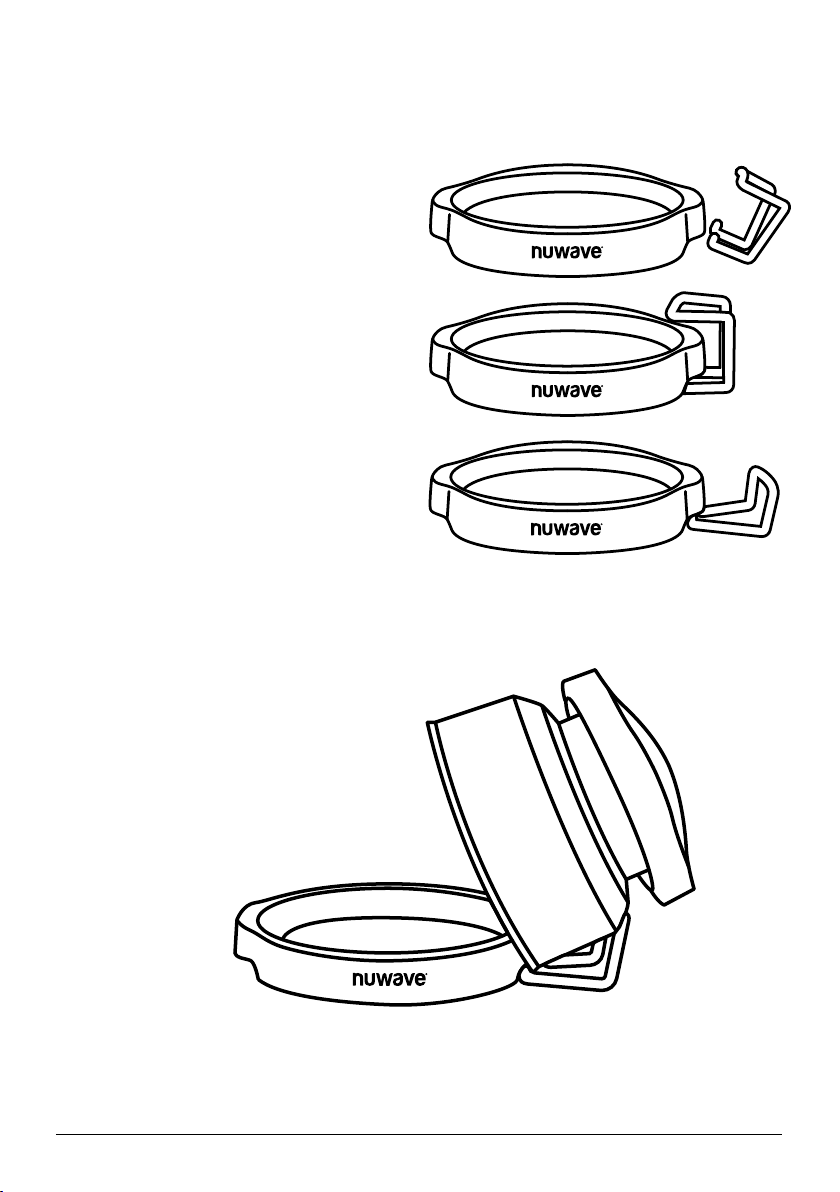
17. Do not line Pro Plus 2 accessories or base tray with foil or parchment paper.
This could cause the unit to overheat or catch re.
SAFEGUARDS & INFORMATION
ALWAYS KEEP THIS MANUAL HANDY FOR FUTURE REFERENCE.

nuwavenow.com | 5
18. This appliance is for household use only; it is designed to process normal
household quantities. It is not suitable for continuous or commercial operation.
• Do not disassemble the product. There are no user serviceable parts.
• Do not leave the appliance unattended while in use.
• Use the handles when lifting the Dome from the Base.
• Do not touch hot surfaces. Use the handles provided or use oven mitts.
• Stop or pause cooking before removing the Dome to check or turn food.
The Dome and power head should be placed on the Dome holder.
• Always remove the Dome away from you so the escaping steam is
channeled away from your face.
• If the power cord is damaged, it should be replaced by a special cord or
assembly from the manufacturer or its service agent.
• Use caution when disposing of hot grease.
• Keep this manual handy for easy future reference.
Electrical Information:
The cord length of this appliance was selected to reduce Safety Hazards that may
occur with a long cord. Extension cords are available and may be used if care is
exercised in their use. If an extension cord is used: (1) the marked electrical rating
of the extension cord should be at least as great as the electrical rating of the
appliance, and (2) the longer cord should be arranged so that it does not drape over
the counter or table top where it could be accidentally pulled off the counter or table
or tripped over.
Certain models of the appliance may have a polarized plug (one blade is wider
than the other). This plug is intended to fit into a polarized outlet only one way.
if the plug does not fit fully into the outlet, reverse the plug. If it still does not fit
properly, contact a qualified electrician. Do not attempt to modify the plug in
any way.
Always wear oven mitts or use pot holders.
Allow Liner Pan and Cooking Rack to cool completely before cleaning.
SAFEGUARDS & INFORMATION
ALWAYS KEEP THIS MANUAL HANDY FOR FUTURE REFERENCE.
WARNING
Electric shock hazard. Use with adequate electrical system. Do not
use if cord or plug is damaged.
WARNING: All metal items in the oven, such as the Liner Pan and
Cooking Rack can get very hot during cooking. Please be careful
when removing these items from a hot oven. Use the handles on
the Power Head when lifting the Dome from the Base. The Dome
opening may expand slightly when hot. In rare instances, the power
head could detach itself from the Dome completely, thereby causing
hot air to escape from between the Dome and the power head.

6| nuwavenow.com
Power Head
Dome
Part #: 22069
Dome Holder
Part #: 22020
1-inch and 3-inch
Reversible Rack
Part #: 22070
Liner Pan
Part #: 26010
Base Tray
PARTS & ACCESSORIES
ORDERING PARTS
Need a new part or accessory? We have you covered! Simply visit nuwavenow.com or
contact Customer Service to order the part you need.
For Amazon Purchases: [email protected]
You can even order directly online. Just visit www.nuwavenow.com
Model 20638 20639 20640 20641 20642 20643
Color Black Cool
Gray
Deep
Blue
Cozy
Blue
Mint
Green
Wild
Olive
Part # PP1 PP2 PP3 PP4 PP5 PP6
Model 20638 20639 20640 20641 20642 20643
Color Black Cool
Gray
Deep
Blue
Cozy
Blue
Mint
Green
Wild
Olive
Part # PP7 PP8 PP9 PP10 PP11 PP12

nuwavenow.com | 7
BEFORE USING:
• Remove all packaging
materials, including any glue
and labels.
• Wash the Power Dome,
Liner Pan, and Base Tray in
warm soapy water or in the
dishwasher. Dry thoroughly.
IMPORTANT - Do not wash or
immerse Power Head in water
or cycle through dishwasher.
The outer surface may be
cleaned by wiping carefully
with a damp dishcloth or
sponge.
ASSEMBLY:
1. Place Base Tray on a rm,
stable surface, but never on a
stovetop.
2. Place Liner Pan inside Base
Tray. When doing so, make
sure the handles are in the
dropped down position. If
the handles are not fully
dropped, the Power Dome
may not t over the Base
properly.
3. Place Reversible Cooking
Rack on the Liner Pan.
4. Place the Power Dome over
the Cooking Rack, Liner Pan
and Base Tray.
5. Place Power Head on rim of
the Dome.
6. Lock it into place by rotating
the Power Head clockwise
until the locking lugs are
engaged.
Power Head
Power Dome
Reversible Rack
Base Tray
Liner Pan
ASSEMBLY GUIDE

8| nuwavenow.com
ASSEMBLY GUIDE
Base Tray
Liner Pan
3-inch Rack Configuration
Turn the Reversible Rack over to
switch between 3-inch and 1-inch
heights.
1-inch Rack Configuration
To increase or decrease the height at which you are cooking your food, select
and ip the Reversible Rack to the corrseponding 3-inch or 1-inch side.
1. Place the Liner Pan inside the
Base Tray.
2. Add the Reversible Rack to the
Liner Pan on the side needed for
your recipe.
3. Ensure the Liner Pan is placed
inside the Base Tray.
Note: Exercise caution when
handling the Reversible Rack
after cooking. Use oven mitts
or wait for the Cooking Rack to
cool before flipping.
REVERSIBLE RACK

nuwavenow.com | 9
ASSEMBLY GUIDE
Note: Do not leave Dome
in Dome Holder for an
extended period of time.
1. Make sure the Power Head is
tightly locked onto the Dome.
2. Place Dome Holder under
either side of Base handle.
3. Make sure both feet of the
Dome Holder are situated
inside the handle, and the
Dome Holder is resting
horizontally on a at surface.
4. Place the assembled Power
Head and Dome at a 45°
angle on the holder as shown
in the larger photo below.
DOME HOLDER
Setup Instructions

10 | nuwavenow.com
50°F ~ 320°F99:59 (99 hours and 59 minutes)
325°F ~ 350°F2:00 (2 hours)
The maximum selectable cooking time differs depending on the selected
cooking temperature.
CAUTION
Do not touch the Power Dome or any surface on the cooking area
during operation. The air inside the Powe Dome can reach 350°F
which makes the surface very hot and may cause burns. Do not open
the Power Dome or remove the Power Head while the NuWave Oven
is operating. Turn off the power before removal.
QUICK START
NuWave Pro Plus 2 Black Control Panel - Graphic
09-22-23-JD
Menu
Temp: Press Temp, then enter the
desired cooking temperature.
The default cooking temperature is
350°F. To change the temperature,
press Temp and select any temperature
between 50°F and 350°F with the
keypad.
Start/Pause: Press Start/Pause to
begin cooking. Press again to pause
the cooking.
Note: While paused, the programmed
cooking settings will be saved until you
resume cooking. These can be cleared
by turning off the unit.
: Press to turn the unit off and on. Turning the unit off will also cancel the
current cooking function.
CONTROL PANEL
OPERATING BUTTONS
• If the temperature entered is higher than the maximum temperature of 350°F
the unit will display 350F and run at 350°F.
• If the time entered is above the maximum time for the set temperature range,
the unit will display and run at the maxium time allowed according to chart above.

nuwavenow.com | 11
QUICK START
OPERATING BUTTONS
Hour: Min Hour: Min Hour: Min
01:30 00:20 00:05
Press 1 Press 2 Press 5
Press 3 Press 0
Press 0
Example:
°F/°C Conversion:
1. Press Temp, “350F” and “Temp”
will be shown on the display.
2. Press and hold Temp for 4
seconds to switch to Celsius. The
unit will beep twice and “177C” will
be shown on the display.
3. Repeat to switch back to
Fahrenheit.
Note: When switching temperature
modes, the Oven will always display
the default temperature of 350°F or
177°C.
Note: Your selected temperature mode
will remain in place even if the unit is
powered off.
Time: Press Time, then enter the
desired cooking time in hours and
minutes.
This can be adjusted at any point.
When the time reaches 0, the Oven will
beep 3 times and “End” will be shown
on the display.
The default cooking time is 15 minutes.
Minutes/Seconds Conversion: If
you want to change the cooking time
to minutes and seconds, select your
desired time, then press and hold Time
for 4 seconds, until you hear 2 beeps.
Repeat to change back to hours and
minutes.
Note: Your selected time mode will
remain in place even if the unit is
powered off.
Menu: Press Menu, then make your
preset selection using the keypad.
Press Start/Pause to begin cooking.
There are 100 pre-programmed Menu
Presets. See Quick Start Guide and
Recipe Book for full list. Temperatures
and time can be adjusted after
selected.
Saving User Presets #101-150:
50 user presets can be saved. Create
your own saved recipe from scratch or
adjust one of the existing 100 Menu
Presets.
1. Set your desired cooking
temperature and time.
2. Press Menu twice. Will display 101.
3. Use the keypad to select the slot
number (#101-150) for your custom
recipe.
4. Press and hold Menu until “Save” is
shown on the display to save your
recipe.
Reheat: Press Reheat, the default
temperature and time are 350°F at 4
minutes, both of which can be adjusted
at anytime. Press Start/Pause to begin.
Delay: You can delay the start of your
programmed cooking function.
1. Set the cooking temperature and
time.
2. Press Delay, DLY will be shown
on the display. Enter the time you
want to delay cooking in hours and
minutes.
3. Press Start/Pause to begin the
delay process.
The delay time can be changed at any
time. Note: The temperature cannot
be changed while the delay function is
active.

12 | nuwavenow.com
QUICK START
OPERATING 2-KEY BUTTONS
Mute: Press and hold Delay and Reheat
untill you hear 2 beeps. Repeat to
unmute.
Mute turns off all beeping.
Lock: Press and hold Menu and Delay
until you hear 2 beeps. Repeat to
unlock.
Lock disables the control panel when in
use or not in use to prevent accidental
button presses.
2-KEY BUTTONS
GENERAL RULES
• User Presets (#101-150) can be stored before, during, and after the cooking.
• Place foods that require the longest cooking time on the 3-inch reversible
rack side, closest to the heating element (ex. potatoes, carrots), and place
soft vegetables on the lower 1-inch side (ex. mushrooms, tomatoes).
• When choosing the multi-level cooking option, use food combinations on the
reversible rack and liner pan underneath that take roughly the same amount
of time to prepare. Examples: pork or chicken and potato wedges; fish and
stewed tomatoes; or frozen beef with baked potatoes.
• If top layer foods finish cooking earlier, remove reversible rack with food
from above and continue cooking bottom foods in liner pan until done.
• To warm bread, place it on the 1-inch side of the reversible rack or Liner Pan
and cover. To bake bread, place bread on the 3-inch reversible rack side.
• Use shallow or oven-safe dishes for cooking. Metal, glass, silicone dishes
and pans, and all other oven-safe materials used in a conventional oven may be
utliized in the Nuwave®Pro Plus 2 Infrared OvenTM.
Cooking Instructions
Only lift Dome by the handles on the Power Head. Once the Power Head and
the Dome are assembled, the handles will allow you to lift both together when
removing or checking food. When removing Liner Pan after cooking, be extremely
careful and always use oven mitts.
For best results, follow the time, temperature, and Cooking Rack height
instructions provided in the cooking chart and recipe book.
No preheating of the unit is required.

nuwavenow.com | 13
Care and Maintenance
The Power Dome, Reversible Rack, Liner Pan, and Base Tray are all
dishwasher-safe, lower rack only. They can also be cleaned with warm soapy
water.
Always unlplug the Oven from the electrical outlet before cleaning. NEVER clean
the unit while it is plugged in.
Allow the Oven to cool completely before cleaning.
DO NOT wash the Power Head in the dishwasher or immerse in water.
DO NOT use any abrasive, harsh brushes to clean any of the Pro Plus 2 pieces.
CARE & MAINTENANCE
Unscrew here
Protective Grating Removal
To clean the protective grating on the underside of the Power Head, unscrew the
single corner screw and carefully push in then lift the grating to remove. Clean
the grating with warm soapy water and dry completely before reinserting into the
Power Head. Make sure you screw in the corner screw fully.
Protective Grating
Underside of Power Head
DO NOT touch or clean the fans.
DO NOT remove the heaters.
NEVER clean the unit while it is
plugged in. Allow the oven to cool
completely before cleaning.
DO NOT wash the Power Head
in the dishwasher or immerse in
water.
DO NOT use any abrasive, harsh
brushes to clean any of the Pro
Plus 2 pieces.

14 | nuwavenow.com
Error Message: Solution(s):
Err1 The unit circuit is short. Contact Custome Service.
Err2 The unit circuit is open. Contact Customer Service.
For further assistance, please contact NuWave’s Customer Service Department
For Amazon Purchases: support@nuwavenow.com
For All Other Purchases: help@nuwavenow.com
TROUBLESHOOTING GUIDE
See table below for when any error messages are displayed.
Error Messages
WARNING
Do not place the unit on or near a hot
gas burner, electric burner, or in a heated
oven or on a stovetop.
NOTICE
It is perfectly normal for your new unit
to produce a heated plastic smell when
used for the rst time. This will go away
after the rst few uses.

nuwavenow.com | 15
NOTES
NOTES

16 | nuwavenow.com
THE MANUFACTURER WARRANTS
NuWave, LLC warrants that the NuWave Pro Plus 2 Infrared OvenTM will be free from
manufacturer defects for 1 year from the date of purchase, under normal household
use, and when operated in accordance with the Manufacturer’s written instructions This
Limited Warranty covers for the Original Purchaser only. The Manufacturer will provide the
necessary parts and labor to repair the product at the NuWave LLC Service Department.
After the expiration of the warranty, the cost of the parts and labor will be the responsibility
of the owner.
THE WARRANTY DOES NOT COVER
The Limited Warranty is voided if repairs are made by an unauthorized dealer, or the
serial number data plate is removed or defaced. Normal deterioration of nish due to use
or exposure is not covered by this Warranty. This Limited Warranty does not cover failure,
damages or inadequate performance due to accident, acts of God (such as lightning),
uctuations in electric power, alterations, abuse, misuse, misapplications, corrosive-
type atmospheres, improper installation, failure to operate in accordance with the
Manufacturer’s written instructions, abnormal use, commercial or rental uses, or resold
units. NuWave LLC reserves the right to void the Limited Warranty, where allowable by
law, for products purchased from an unauthorized dealer.
TO OBTAIN SERVICE
The owner shall have the obligation and responsibility to pay for all services and parts not
covered by the warranty; prepay the freight to and from Service Department for any part
or system returned under this warranty; and carefully package the product using adequate
padding material to prevent damage in transit. The original container is ideal for this
purpose. Include in the package the owner’s name, address, daytime telephone number,
a detailed description of the problem, and RGA (Return Goods authorization number). To
obtain the RGA number, email us at:
For Amazon Purchases: support@nuwavenow.com
For All Other Purchases: help@nuwavenow.com
Provide the product model & serial number and proof of date of purchase (a copy of the
receipt) when making claims under this warranty.
MANUFACTURER’S OBLIGATION
The Manufacturer’s obligation under this Limited Warranty is limited, to the extent
allowable by law, to repairing or replacing any part covered by this Limited Warranty
which upon examination is found to be defective under normal use. The Limited
Warranty is applicable only within the continental United States and only to the original
purchaser of the manufacturer’s authorized channels of distribution.THE LIMITED
WARRANTY MAY NOT BE ALTERED, VARIED OR EXTENDED EXCEPT BY A
WRITTEN INSTRUMENT EXECUTED BY THE MANUFACTURER. THE REMEDY OF
REPAIR OR REPLACEMENT AS PROVIDED UNDER THIS LIMITED WARRANTY IS
EXCLUSIVE. IN NO EVENT SHALL THE MANUFACTURER BE LIABLE FOR ANY
CONSEQUENTIAL OR INCIDENTAL DAMAGES TO ANY PERSON, WHETHER OR
NOT OCCASIONED BY NEGLIGENCE OF THE MANUFACTURER, INCLUDING
WITHOUT LIMITATION, DAMAGES FOR LOSS OF USE, COSTS OF SUBSTITUTION,
LIMITED WARRANTY

nuwavenow.com | 17
PROPERTY DAMAGE, OR OTHER MONEY LOSS.
Some states do not allow the exclusion or limitation of incidental or consequential
damages, so the above limitation exclusions may not apply. This Limited Warranty gives
specic legal rights, and there may also be other rights which vary from state to state.
EXCEPT AS OTHERWISE EXPRESSLY PROVIDED ABOVE, THE MANUFACTURER
MAKES NO WARRANTIES EXPRESSED OR IMPLIED ARISING BY LAW OR
OTHERWISE, INCLUDING WITHOUT LIMITATION, THE IMPLIED WARRANTIES OF
MERCHANTABILITY AND FITNESS FOR A PARTICULAR PURPOSE TO ANY OTHER
PERSON. READ YOUR OWNER’S MANUAL. IF YOU STILL HAVE ANY QUESTIONS
ABOUT OPERATION OR WARRANTY OF THE PRODUCT, PLEASE CONTACT
NUWAVE LLC.
DISPUTE RESOLUTION PROCEDURE
For disputes relating to use of the website or use or purchase of a NuWave product
or service (collectively “Disputes”), you agree to rst contact NuWave LLC at legal@
nuwavenow.com. If we cannot resolve your dispute informally, any and all disputes shall
be submitted to nal and binding arbitration. You may start the arbitration process by
submitting in writing a demand to the American Arbitration Association (“AAA”) and sending
a copy to NuWave. NuWave will pay all ling costs. A single arbitrator of the AAA will
conduct the arbitration in a location convenient to you or by phone. The arbitrator’s award
will be binding and may be entered as a judgment in a court of competent jurisdiction.
The arbitration will be conducted in accordance with the provisions of AAA’s Commercial
Arbitration Rules and Mediation Procedures in effect at the time of submission of your
demand for arbitration. See https://www.adr.org/sites/default/les/CommercialRules_Web.
pdf. Except as may be required by law as determined by an arbitrator, no party or arbitrator
may disclose the existence, content, or results of any arbitration hereunder without prior
written consent of both parties.
A. WAIVER OF RIGHT TO SUE. By agreeing to arbitration, you understand that, to
the maximum extent permitted by law, you are agreeing to waive your right to le
suit in any court, to a court hearing, a judge trial, or a jury trial.
B. CLASS ACTION WAIVER. To the maximum extent permitted by law, you expressly
agree to refrain from bringing or joining any claims in any representative or class-
wide capacity, including but not limited to, bringing or joining any claims in any class
action or class-wide arbitration.
C. OPT OUT PROCEDURE. To request to opt out of arbitration you must contact
NuWave LLC at legal@nuwavenow.com, NuWave LLC, 560 Bunker Ct., Vernon
Hills, IL 60061, U.S.A. You will have thirty (30) days from the date of product
delivery to opt out of arbitration with respect to any dispute arising out of or relating
to use or purchase of any NuWave product. If more than 30 days have passed,
you are not eligible to opt out of arbitration and will have waived your right to sue or
participate in a class action with respect to the dispute arising out of your purchase
or use of a NuWave product. For any dispute arising out of your use of NuWave’s
website, you have thirty (30) days from the date you provided information to the
website to opt out of arbitration. If more than 30 days have passed, you are not
eligible to opt out of arbitration and you will have waived your right to sue and
participate in a class action with respect to the dispute arising out of your use of
NuWave’s website.
LIMITED WARRANTY

18 | nuwavenow.com
LIMITED WARRANTY
D. SOME MATTERS ARE NOT SUBJECT TO ARBITRATION. Notwithstanding the
foregoing, the following shall not be subject to arbitration and may be adjudicated
only in the state and federal courts of Illinois: (i) any dispute, controversy, or claim
relating to or contesting the validity of our intellectual property rights and proprietary
rights, including without limitation, patents, trademarks, service marks, copyrights,
or trade secrets; (ii) an action by a party for temporary, preliminary, or permanent
injunctive relief, whether prohibitive or mandatory, or other provisional relief; or (iii)
interactions with governmental and regulatory authorities. You expressly agree
to refrain from bringing or joining any claims in any representative or class-wide
capacity, including but not limited to, bringing or joining any claims in any class
action or any class-wide arbitration.

nuwavenow.com | 19
*RoHS stands for “The Restriction Of the use of certain Hazardous Substances in
electrical and electronic equipment”.
If you want to find out more about the RoHS Directive, please visit
www.rohsguide.com/rohs-faq.htm
At NuWave LLC, we have taken a great
amount of care in ensuring that our products
are safe and secure for every household. All
NuWave Ovens are built and manufactured
in strict compliance with RoHS* standards.
Although US manufacturers are not bound
by law to follow RoHS standards, NuWave
LLC has made a conscious decision to
voluntarily follow this directive to preserve
the safety of its consumers and the quality
of our environment.
RoHS Restricted Materials
Material & Toxicological Prole Maximum Concentration
Lead (Pb) 0.1% by weight
Mercury (Hg) 0.1% by weight
Cadmium (Cd) 0.01% by weight
Hexavalent Chromium (Cr-VI) 0.1% by weight
Polybrominated Biphenyls (PPB) 0.1% by weight
Polybrominated Diphenyl Ethers (PBDE) 0.1% by weight
LIMITED WARRANTY

Item No: BM20638
Rev.1-V5-JD
12-21-23
FOR HOUSEHOLD USE ONLY
120V, 60Hz, 1500 Watts
Para la versión en español de este manual,
visita www.nuwavenow.com.
For patent information please go to:
www.nuwavenow.com/legal/patent
Designed & Developed in USA
NuWave LLC
560 Bunker Ct.
Vernon Hills, IL 60061, U.S.A.
Email:
For Amazon Purchases: support@nuwavenow.com
For All Other Purchases: help@nuwavenow.com
Made in China
©2023 NuWave LLC • All Rights Reserved.
Rev. 1
PRO PLUS 2
INFRARED OVEN™
Model 20638 20639 20640 20641 20642 20643
Color Black Cool
Gray
Deep
Blue
Cozy
Blue
Mint
Green
Wild
Olive
RECIPE BOOK QR Code
Visit www.nuwavenow.com/pro-plus-2-recipe-book
This manual suits for next models
6
Table of contents
Other NuWave Convection Oven manuals