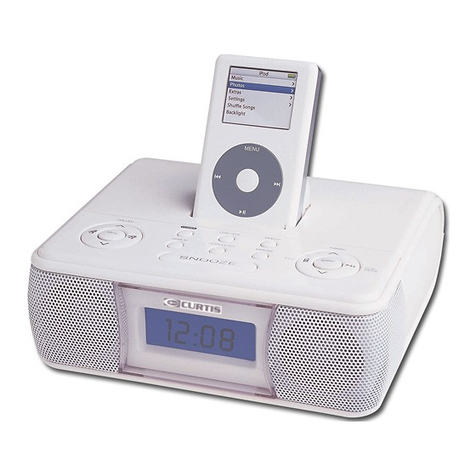
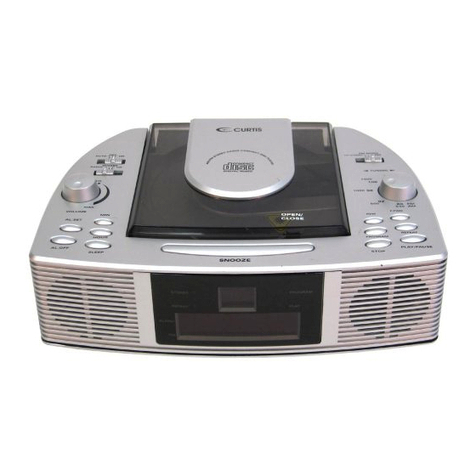
Curtis iMode IP1005BUK User manual

1
AM/FM ALARM CLOCK RADIO WITH iPOD CONNECTOR
BEFORE OPERATION THIS PRODUCT, READ, UNDERSTAND, AND FOLLOW
THESE INSTRUCTIONS.
Be sure to save this booklet for future reference.

2
The Lightning flash with arrowhead
symbol, with an equilateral triangle is
intended to alert the user of the
presence of uninsulated dangerous
voltage within the product’s enclosure
that may be of sufficient magnitude to
constitute a risk of electric shock to
persons.
CAUTION: TO REDUCE THE RISK
OF ELECTRIC SHOCK, DO NOT
REMOVE COVER (OR BACK). NO
USER SERVICEABLE PARTS
INSIDE. REFER SERVICING TO
QUALIFIED SERVICE PERSONNEL.
The exclamation point within an
equilateral triangle is intended to alert
the user of the presence of important
operating and maintenance (servicing)
instructions in the literature
accompanying the appliance.
CAUTION : TO PREVENT ELECTRIC SHOCK,
MATCHWIDEBLADEOFPLUG
TOWIDESLOT,FULLYINSERT.
WARNING : TO REDUCE THE RISK OF FIRE
ORELECTRICSHOCK,DONOT
EXPOSETHEAPPLIANCETORAIN
ORMOISTURE.
IMPORTANT SAFETY INSTRUCTIONS
1. Read instructions - All the safety and operating instructions should be read before the
appliance is operated.
2. Retain instructions - The safety and operating instructions should be retained for future
reference.
3. Head Warnings - All warnings and cautions on the appliance and in the operating instructions
should be adhered to.
4. Follow instructions - All operating and use instructions should be followed.
5. Water and Moisture-The appliance should not be used near water, e.g. near a bathtub,
washbowl, kitchen sink, laundry tub, in a wet basement, or near a swimming pool or the like.
6. Wall or Ceiling Mounting - The appliance should not be mounted to a wall or ceiling.
7. Heat - The appliance should be situated away from neat sources such as radiators, heat
registers, stoves, or other appliances (including amplifiers) that produce heat..
8. Power Sources - The product should be operated only with the type of power supply indicated
on the marking label. If you are not sure of the type of power supply to your home, consult your

3
product dealer or local power company. For products intended to operate from battery power,
or other sources, refer to the operation instructions.
9. Grounding Polarization - This product may be equipped with a polarized alternating current
line plug (a plug having one blade wider than the other). This plug will fit into the power outlet
only one way this is a safety feature. If you are unable to insert the plug fully into the outlet, try
reversing the plug. If the plug should still fail to fit, contact your electrician to replace your
obsolete outlet. Do not defeat the safety purpose of the polarized plug.
10. Power-Cord Protection - Power supply cords should be routed so that they are not likely to
be walked on or pinched by items placed upon or against them, paying particular attention to
cords at plugs, convenience receptacles, and the point where they exit from the appliance.
11. Cleaning - The appliance should be cleaned only as recommended by the manufacturer.
12. Nonuse periods - The power cord of the appliance should be unplugged from the outlet when
left when left unused for a long period of time.
13. Object and Liquid Entry - Care should be taken so that objects do not fall and liquids are not
spilled into the product case through product openings.
14. Damage Requiring Service - Unplug this product from the wall outlet and take it to qualified
service personnel under the following conditions.
a) When the power-supply cord or plug is damaged.
b) If liquid has been spilled into, or objects have fallen into the product.
c) If the product has been exposed to rain or water.
d) If the product does not operate when used according to the operating instructions.
Adjust only those controls that are covered by the operating instructions as an improper
adjustment of other controls may interfere with the product’s normal operation.
e) If the product has been dropped or damaged in any way.
f) When the product exhibits a distinct change in performance-this indicates a need for
service.
15. Servicing - The user should not attempt to service the product beyond that described in the
operating instruction. All servicing should be referred to qualified service personnel.
16. Power Lines - An outside antenna system should not be located in the vicinity of overhead
power lines, or other electric light or power circuits, or where it can fall into such power lines or
circuits. When installing an outside antenna system, extreme care should be taken to keep
from touching power lines or circuits as contact with them might be fatal.
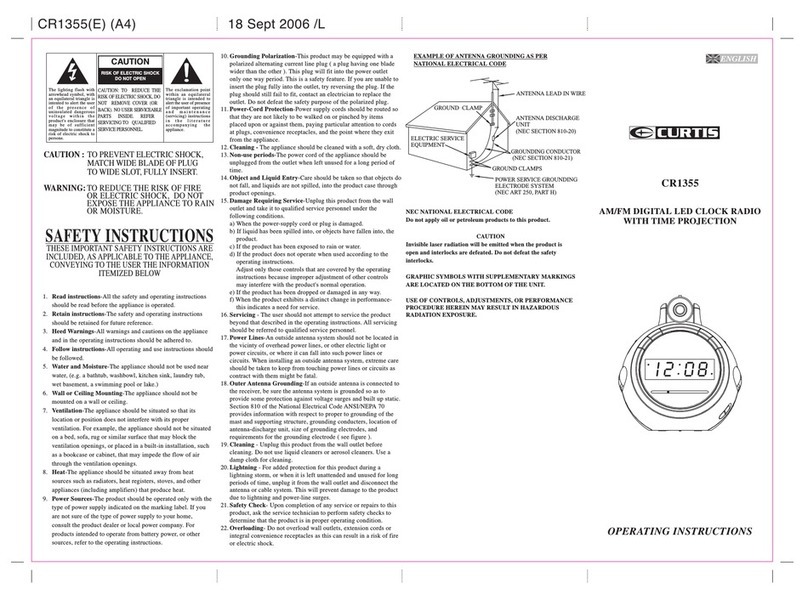
17. If an outside antenna is connected to the receiver, be sure the antenna system is grounded so
as to provide some protection against voltage surges and built up static. Section 810 of the
National Electrical Code ANSI/NEFA 70 provides information with respect to proper grounding
of the mast and supporting structure, grounding conductress, location of antenna-discharge
unit, size of grounding electrodes, and requirements for the grounding electrode (see figure).
18. Cleaning - Unplug this product from the wall outlet before cleaning. Do not use liquid cleaners
or aerosol cleaners. Use a damp cloth for cleaning.
19. Lightning - For added protection for this product during a lightning storm, or when it is left
unattended and unused for long periods of time, unplug it from the wall outlet and disconnect
the antenna or cable system. This will prevent damage to the product due to lightning and
power-line surges.
20. Safety Check - Upon completion of any service or repairs to this product, ask the service
technician to perform safety checks to determine that the product is in proper operation
condition.
4
21. Overloading - Do not overload wall outlets, extension cords, or integral convenience
receptacles as this can result in a risk of fir or electric shock.
22. The apparatus shall not be exposed to dripping or splashing and that no objects filled with
liquids, such as vases, shall be placed on apparatus.
23. “To be completely disconnect the power input, the mains plug of apparatus shall be
disconnected from the mains” as the disconnect devices is the mains plug of apparatus.
24. The mains plug of apparatus should not be obstructed OR should be easily accessed during
intended use.
25. Excessive sound pressure from earphones and headphones can cause hearing loss.
26. Battery shall not be exposed to excessive heat such as sunshine, fire or the like,
27. Minimum distances 5 cm around the apparatus for sufficient ventilations.
28. The ventilation should not be impeded by covering the ventilation openings with items such as
newspaper, table-clothes, curtains etc.
29. No naked flame sources such as lighted candles should be placed on the apparatus.
30. Attention should be drawn to the environmental aspects of battery disposal.
31. The use of apparatus in moderate climates.
SAVE THESE INSTRUCTIONS FOR FUTURE REFERENCE

5
CONDENSATION
If coldwater is poured into a glass, water droplets form on the outside of the glass. This is called
condensation. Condensation may also occur on internal operating parts of the laser pickup.
Condensation occurs:
-When the unit is brought from the outdoors into a warm room, or if it is in a cold room which is
heated quickly.
-In the summer, if the unit is moved suddenly from an air-conditioned room or car to a hot or
humid location.
CAUTION :
USE OF CONTROLS, ADJUSTMENTS, OR PERFORMANCE PROCEDURE HEREIN WAY
RESULT IN HAZARDOUS RADIATION EXPOSURE.
NOTE:
The rating plate is located at the bottom enclosure of the apparatus.

6
LOCATION OF CONTROLS
1. Battery Compartment
2. Aux Jack
3. Phone Jack
4. Play/Band Button
5. Function/AL. Select Button
6. Power/AL. Off Button
7. M- Button
8. M+ Button
9. Skip-/Tune- Button
10. Skip+/Tune+ Button
11. LCD Display
12. MEM/Clock Adjust(C-ADJ) Button
13. EQ Button
14. SLEEP/SNOOZE Button
15. VOL + Button
16. VOL – Button
17. iPod Docking Knob
18. Antenna
19. AC Socket

7
Remote Control
1. Function/AL. SEL Button
2. SKIP-/TUNE- Button
3. M- Button
4. Menu Button
5. MEM/REPEAT/C-ADJ Button
6. UP Button
7. EQ Button
8. SLEEP/SNOOZE Button
9. VOL- Button
10. Power/AL. OFF Button
11. Play/Band Button
12. Skip+/Tune+ Button
13. M+ Button
14. SELECT Button
15. MONO/SHUFFLE Button
16. DN Button
17. DISP Button
18. MUTE Button
19. VOL+ Button
20. Battery Compartment
Power Supply:
This unit can be powered by batteries or AC (electric) power. For battery-powered operation, remove the Battery
Compartment Cover and insert six C-size alkaline batteries (not included). Replace the cover. For AC power, connect the
AC power cord to the AC Socket and plug into a standard 230V (50Hz) AC electrical outlet.
BATTERY SAFETY PRECAUTIONS
ƽʳKeep batteries away from children and pets.
ƽʳInsert the battery observing the proper polarity (+/-). Failure to properly align the battery
polarity can cause personal injury and/or property damage.
ƽʳRemove spent or discharged batteries from the product. Remove the battery when the
product will not be used for extended periods of time to prevent damage due to rusted or
corroded batteries
ƽʳNever throw batteries into a fire, Do not expose batteries to fire or other heat sources
ƽʳBattery Disposal: Spent or discharged batteries must be properly disposed of and recycled

8
in compliance with all applicable laws. For detailed information, contact your local country
solid waste authority
ƽʳFollow the battery manufacturer’s safety, usage, and disposal instructions.
CAUTION
Danger of explosion if battery is incorrectly replaced.
Replace only with the same or equivalent type
SETTING THE CLOCK TIME
Connect the AC power cord to a wall outlet. Make sure the unit is in Standby Mode.
1. Press the MEM/C-ADJ Button, the Hour Time will blink in the LCD Display.
2. Press SKIP+/TUNE+ or SKIP-/TUNE- Button to adjust the HOUR Time.
3. After the desired hour time has reached, press MEM/C-ADJ Button and the MINUTE time
will blink.
4. Press SKIP+/TUNE+ or SKIP-/TUNE- Button to adjust the Minute Time.
5. After the desired minute time have reached; press MEM/C-ADJ Button three times to back
to normal mode.
TO SET ALARM FUNCTION
The iPod, radio or buzzer automatically sounds at the designated time every day.
1. Make sure the unit is in Standby Mode.
2. Press the MEM/C-ADJ Button three times; an alarm signal and the Hour Time will blink
in the LCD Display.
3. Press SKIP+/TUNE+ or SKIP-/TUNE- Button to adjust the HOUR Time.
4. After the desired hour time has reached, press MEM/C-ADJ Button and the MINUTE
time will blink.
5. Press SKIP+/TUNE+ or SKIP-/TUNE- Button to adjust the Minute Time.
6. After the desired minute time have reached; press MEM/C-ADJ button to back to
normal mode.
7. After setting the alarm time as your desired, remember to press FUNCTION/AL SEL
button to turn on the alarm function. (An alarm signal will show on LCD display)
TO WAKE UP TO BUZZER:
a. Press Power/AL. OFF Button to turn off the unit.
b. Press FUNCTION/AL SEL button to select the “Buzzer” source. (Buzz,Tuner and iPod will
alternative display in the LCD display )
c. The alarm buzzer will sound at the set alarm time.
Note: Press POWER/AL. OFF button to turn off the alarm when it sounds.
TO WAKE UP TO RADIO:
a. Press Power button to turn on the unit.
b. Press FUNCTION/AL. SEL Button to Radio Mode.

9
c. Press PLAY/BAND Button to select your desired band.
d. Press SKIP-/TUNE- or SKIP+/TUNE+ Button to your desired radio station.
e. Press VOL- or VOL+ Button to adjust the volume as desired.
f. Press POWER button to turn off the unit.
g. Press FUNCTION/AL. SEL button to select the “TUNER” source.
Note
: To deactivate the alarm (Radio sound) manually, press the POWER/AL. OFF BUTTON to turn
off.
WAKE UP TO iPod:
a. Press the POWER/AL. OFF BUTTON to switch power on.
b. Press the FUNCTION BUTTON to the iPod function.
c. Insert the iPod into the iPod docking.
d. Press VOL- or VOL+ Button to adjust the volume as desired.
e. Press the POWER/AL. OFF BUTTON to switch power off.
f. Press FUNCTION/AL. SEL button to select the “iPod” source.
g. The iPod will sound at the set alarm time.
To deactivate the alarm (iPod playing) manually, press POWER/AL.OFF Button.
SNOOZE FUNCTION
When you are awakened but wish to sleep a few minutes more, simply press the
“SLEEP/SNOOZE” button and it will shut off the alarm sound for approximately 9 minutes before
the alarm sounds again. “SNOOZE” signal will show on the LCD Display. This can be repeated
several times.
RADIO OPERATION
1. Press Power/AL. Off button to turn on the unit.
2. Press the FUNCTION/AL. SEL Button to “RADIO” mode.
3. Press the PLAY/BAND Button to the desired band (AM or FM).
4. How to tune the radio
i. Manual Tuning
Press the SKIP+/TUNE+ or SKIP-/TUNE- to search for desired frequency. Higher
frequency can be selected by pressing the “SKIP+/TUNE+” button while Lower
frequency can be selected by pressing the “SKIP-/TUNE-” button
ii. Automatic Tuning
i) Press and hold the SKIP+/TUNE+ BUTTON or SKIP-/TUNE- BUTTON until the
display frequency starts run.
ii) When a station of sufficient strength has been found Tuning will stop or you can stop
the automatic tuning by pressing SKIP+/TUNE+ or SKIP-/TUNE-BUTTON.
5. Press VOL-/VOL+ Button to your preferred Listening Level.
6. After listening, Press the POWER/AL. OFF BUTTON to turn off the unit.
Note: If the reception is strong enough. “ST” will display in the LCD Display indicate it is in FM STEREO mode. If
stereo signal is too weak, press MONO/SHUFFLE BUTTON to mono mode, “MONO” will display in the
LCD Display, the reception will be improved.

10
PRESENT TUNING
1. Select the AM/FM band and tune to your desired station according to the normal tuning
procedure.
2. Press the MEM/C-ADJ BUTTON,” P-01” will appear and flash in the LCD, Then use M+ or M-
BUTTON to change the number where the station will be stored. (NO.1 to NO.10)
3. Store the current frequency by pressing MEM/C-ADJ Button again when you get the desired
number.
4. Repeat the same procedure to set other desired frequencies into Memory No.1 to NO.10.
Remarks: A stored frequency can only be erased by storing another frequency in its place.
MEMORY RECALL
Recall the stored frequencies by pressing M+ or M- BUTTON select 1 to 10 stations as desired
NOTE: As stored frequencies can only be stored for long time with the power supplying. The station
you stored will be lost and can not be recalled in case that you cut off the AC power.
iPod Installation and Use
Installing the iPod into the Unit:
1. Rotate the Docking Knob corresponds to the model of iPod to be used, and place the iPod into
Dock.
2. Ensure that the iPod is firmly in place..
NOTE: For older iPods that do not have a Dock Connector, use a stereo audio cable (not
included) to connect the device to the Auxiliary Input Jack on the back of the unit (see the
"Using a Non-Docking iPod or Other Audio Device" subsection)
3. Press the FUNCTION/AL. SEL Button to “iPod” mode.
4. Press the PLAY/BAND Button to the Play the iPod.
5. Press VOL-/VOL+ Button to your preferred Listening Level.
6. Press SKIP-/TUNE- to listen to the previous tracks.
7. Press SKIP+/TUNE+ Button to the next tracks..
8. To stop the iPod play temporarily, press Play/Band button, to resume, press again.
9. To turn off the unit, press Power/AL. Off Button.
Charging the iPod in the Unit:
The unit will recharge the iPod while docked. Ensure the iPod is properly inserted.
NOTE: The unit wills not charge an iPod Shuffle or any other audio device.
REPEAT FUNCTIONS
- The REPEAT BUTTON can be used to repeat a single track and repeat all the tracks.
- To repeat a single track. Press the REPEAT BUTTON once. REPEAT SIGNAL will show on the
iPod Display.
- To repeat all of the tracks on a CD. Press the REPEAT BUTTON a second time. REPEAT ALL
will show on the LCD Display.
- To exit the REPEAT mode. Press the REPEAT BUTTON a third time.

11
SHUFFLE PLAY
In iPod mode, Press the MONO/SHUFFLE Button once, a random signal will appear on iPod
Display.
MUTE FUNCTION
When you press the MUTE BUTTON, the volume will turn off and the MUTE signal will show in the
LCD.. You will not hear any sound. When you press the MUTE BUTTON again, volume will turn on
again.
MENU Button
The menu of the iPod will display on the iPod by pressing the MENU Button in iPod mode. Press
UP/DN Button on the remote to choose the function of the iPod. Press SELECT Button to enter.
DISP Button
Time/ALARM TIME/Function (Radio, CD or iPod) will alternatively display on the LCD display when
pressing the DISP Button.
EQUALIZER
1. Press EQ button to select the EQ sound effects ( POP, ROCK, JAZZ or CLASSIC)
2. It will be shown on the unit display if chosen POP, ROCK, JAZZ or CLASSIC.
SLEEP FUNCTION
Sleep time step changes for each Sleep Button pressing:
90Æ80Æ70Æ60Æ50Æ40Æ30Æ20Æ10
Sleep icon will appear on the LCD display when sleep function is on.
When count-down time reaches to zero, the system will automatically turn OFF.
HEADPHONE JACK
This unit is equipped with a HEADPHONE JACK for private listening. Simply plug any 3.5 mm plug
type stereo headphone into the HEADPHONE JACK. With the headphone connected, the speaker
in the unit will be automatically disconnected.
AUX INPUT JACK
1. Power on the unit.
2. Connect the AUX connect wire from the out jack of your Personal Player such as portable MP3
player to the AUX input jack.
3. Slide the Function Selector to “AUX/iPod” position.
4. Play Start from your Personal Player.
Table of contents
Other Curtis Clock Radio manuals

Curtis
Curtis KCR2613 Operation manual

Curtis
Curtis CR1338 User manual

Curtis
Curtis IP200A User manual

Curtis
Curtis RCD313 User manual

Curtis
Curtis KCR2611UK User manual

Curtis
Curtis CR1355 User manual

Curtis
Curtis CR4947 User manual

Curtis
Curtis IP250 User manual

Curtis
Curtis KCR2609UK User manual

Curtis
Curtis CR-750 User manual

Curtis
Curtis cr1274 User manual

Curtis
Curtis CR4966 User manual

Curtis
Curtis KCR2613 User manual

Curtis
Curtis CR1320 User manual

Curtis
Curtis KCR2610 User manual

Curtis
Curtis CR1345 User manual

Curtis
Curtis CR1276 User manual

Curtis
Curtis KCR2607 User manual

Curtis
Curtis CR1252 User manual

Curtis
Curtis KCR2609 User manual