I. Basic Operation
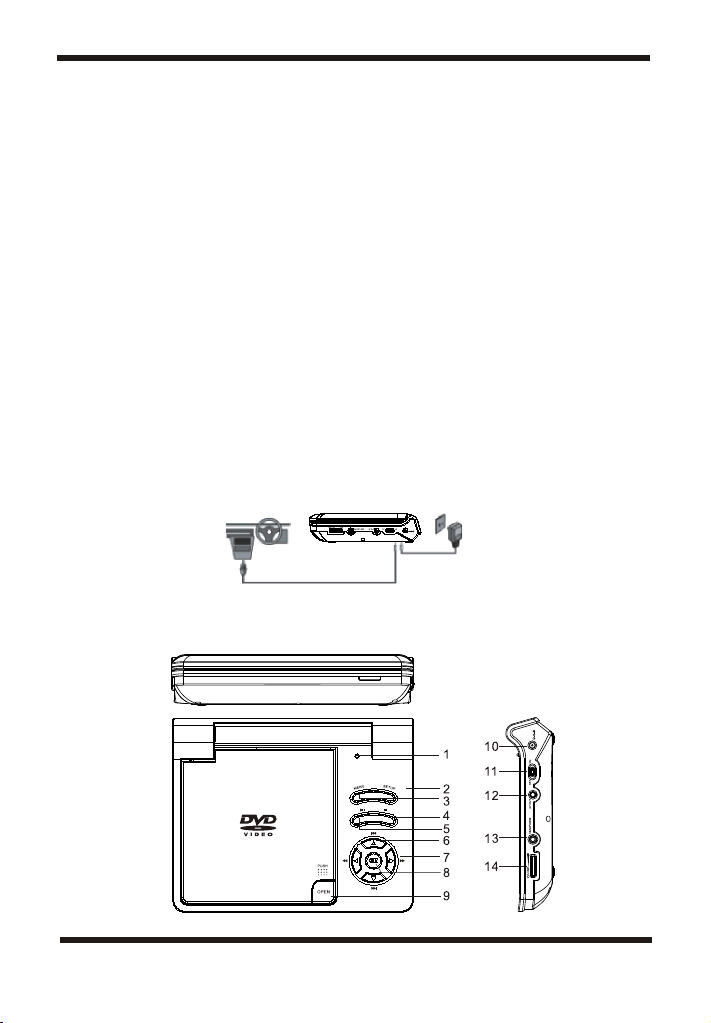
ON/OFF
OPEN
PLAY
PAUSE
STOP
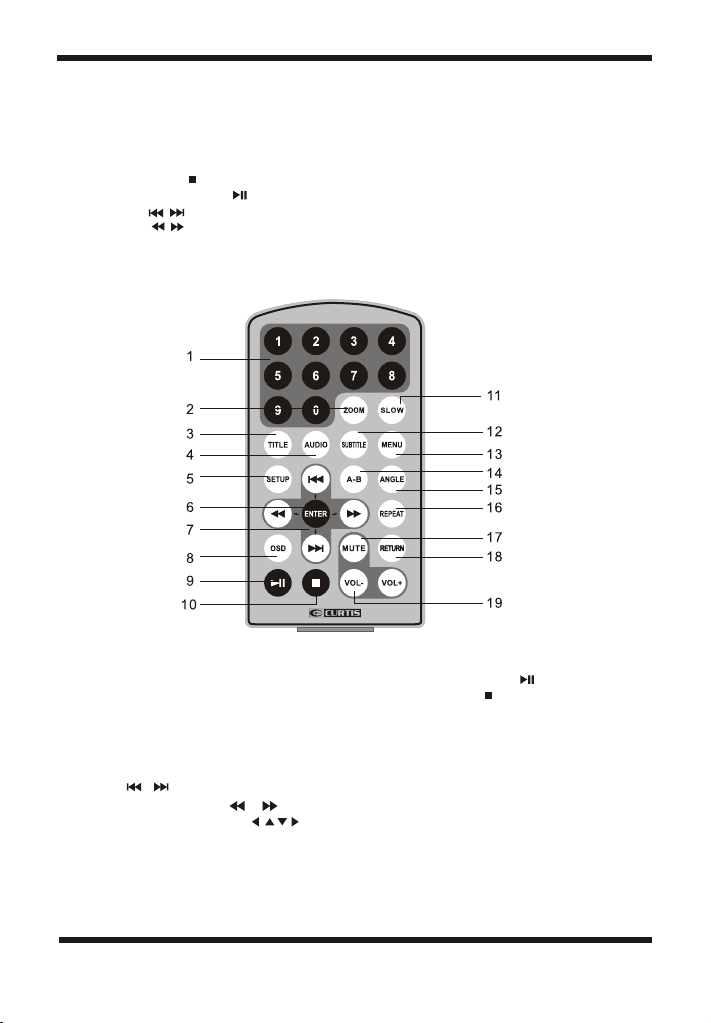
( ON the remote)
( ON the remote)
( ON the remote)
( ON the remote)
OK (ON theremote)
NUMBERS
MENU
REPEAT
A-B
ANGLE
SUBTITLE
AUDIO
ZOOM
SETUP
RETURN
TITLE
SLOW
Turn the uniton/off
Remove/load the disc
Start Play/Execute itemor setting
Still Picture
(1 time) Stopat the present playing point /
(2 times) Stopplaying
Go to thenext chapter, track or scene
during play back(alsoused for Menu
Navigation)
Go back tothe previous chapter, track or
scene during playback(alsoused for Menu
Navigation)
Scan forward at2, 4,8,16or 32times speed
(also used forMenu Navigation)
Scan backward at2, 4, 8, 16 or 32 times
speed (also usedfor Menu Navigation)
Execute item orconfirm setting
Select item orsetting
Display the main menuof the disc
Repeat playing title, chapter, or track
Repeat a specific portionfrom point Ato
point B of thedisc
Change the viewingangles on the scene
Select the subtitlelanguage and turn it
on/off
Select the audiolanguage
Enlarge an imageto 2, 3, or 4 times the
original size.
Display the setup menuto select and setitems,
and exit thesetup menu.
Toreturn to main menu when PBC on for
VCD;To returnto root menu duringDVD
playing and resumeplaying when in title
menu or rootmenu by pressing it again
Root title
Slow
Menu
A DVDis divided intotwo sections called titles and chapters. When you play a
DVD, a rootmenu of the disc will appear on the screen of your TVor
Monitor. Thecontents of the menu vary fromdisc to disc. Press MENU
during playback to displaythe menu. Some DVDsonly allow you toselect
disc playback optionsusing the DVD root menu.
ANGLE
During playback a disc, press 'ANGLE' to display the available angles for
discs containing multi-angles*, with the currentangle number (1) and the
total number of angles (2) displaying.Press 'ANGLE' toselect another
angle, then press again to exitand return tothe normal viewing angle. The
angle display will disappear automatically ifthe 'ANGLE' buttonis not
pressed again within 3seconds.
*NOTE: Not all discs contain this feature.
8