Curtis Klu LT8036-B User manual


8VHU0DQXDO
Key points喚
This manual includes security measures and correct operating methods. For personal safety, please make sure to read this
manual before using. Thank you!
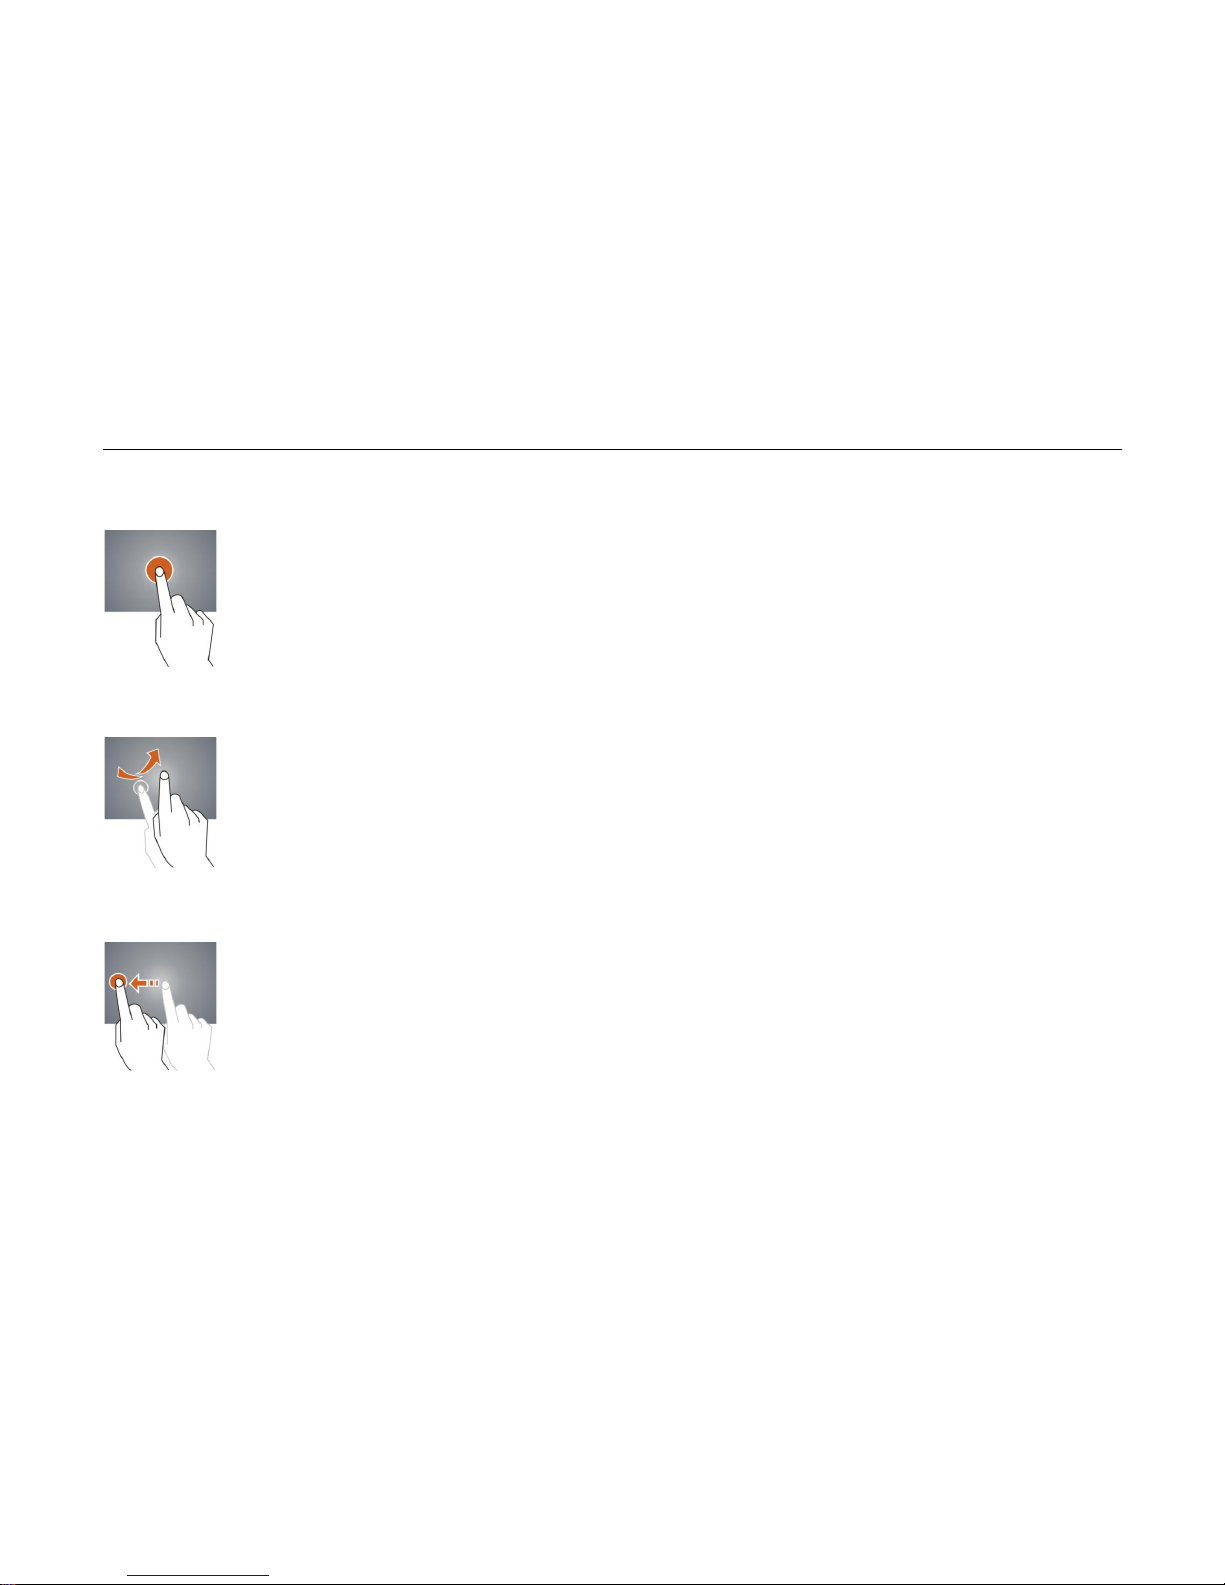
The machine adopts capacitive touch screen, you can just touch it by finger or click with capacitive pen for operation. (Never use
the sharp objects to click the screen, or the touch screen may be damaged).
Do not put the device at any high temperature, high humidity or dusty place.
Do not drop or crash the device to prevent the violent impacting between the display and the capacitive touch screen. Or the
customers have to take the consequence by themselves.
Please choose the suitable volume and never make the too loud volume .If you feel uncomfortable please turn down the volume
or stop to use the device soon.
Please charge if you meet those situations as below:
AǃLow battery on the battery icon. BǃThe system turns off automatically.
CǃThe keys do not work. Dǃ“ ”is battery charging.
ǏNoteǐ:Don’t use the different type charger or it may make the device burned. We assume no liability for the damage.
Please contact with our agent if you need the original adaptor.
In the charging processˈthe device may be warning up a little (not too hot), this is normal, and it won’t effect functions.
Do not disconnect the device while formatting, downloading or uploading, or it may make the error.
Our company won’t bear the duty for the loss of the memory erasing on account of the damage, repair or some other reason.
Please operate the device according to the user manual rightly and backup the important data in time.
Do not dismantle this device by yourself, and do not polish it with alcohol, dilution, or benzene.
Do not use this device where electronics is forbidden, such as on the airplane.
Do not use this device while walking and driving, avoiding traffic accident.
USB is for transferring data but NOT for charging.
Virus can damage this device. So please use proper computer antivirus and keep it updated.
For any support needed for this device please contact the company or the authorized distributor. Any unauthorized dismantling of
the device will make the warranty null and void.
We reserve the right to keep the change of the products, the specification and design is subject to change without notice!

240V 50/60Hz 0.5A
6. OTG Cable
USB Cable
8VHU0DQXDO
Packing List: 喚
Please check box for the following items
1. Device
2. User Manual
3. Product Warranty
4. Power Adaptor
5.
Other accessories can be purchased at local retailers
The accessories may not be compatible with other devices
Power Adaptor Specification:
INPUT:
AC 100-
OUTPUT: 5.0V 2.0A
Earphone
7.

Micro USB,Micro-5pin connector
8VHU0DQXDO
Device description
ķTouch screen˖You can click and drag in the touch screen.
ƾĸ Camera˖You can take photos and videos etc..
ĹVolume-˖Turn down the volume.
ĺVolume+˖Turn up the volume.
ĻBACK: Return to the previous page.
ļPOWER˖
Keep pressing button over 2 seconds for power on/ off, press
button once to turn on screen from sleep mode .
Ľ˖Earphone jack: 3.5mm standard earphone jack.
ľ˖
Ŀ˖DC jack: Connect the power cable to charge to the device.
ŀReset: Reset the device.
䢈Micro SD card˖SD card slot.
ǏTIPS ǐ˖1. When the battery is low, it will power off automatically.
2. Shutdown illegally, when you restart, device would scan and repair the disk. The screen will stay at the progress bar
for a long time .
Ǐ
Note
ǐ˖
The pictures in the user manual are just for your reference, about the “
ƾ
” item, please according to the real products.

8VHU0DQXDO
Setting up for the first time
Charging your device
˖
For first-time use, you need to charge the device for ten hours.
After that you can recharge the device as needed.
Connect the DC-in jack to your device and plug the AC adapter into any AC outlet.
ǏTIPSǐ:
1. This device adopts built-in polymer battery. Only the specified charger should be used.
2. It is normal for the device’s surface to become warm during charging or long
periods of use. All devices are factory tested before release.
3. If you do not use this set for a long time, please charge/release it once
one month to avoid deep discharge. The damage caused by battery over-consuming is not included in the warranty.
Battery Saving
To save battery running life, please see below key points. With below suggestions, battery can run longer time after fully charged
each time.
1. When device is not in use, press power button once to go to sleep mode.
2. Shut down the applications when not in use.
3. Turn off WLAN when not in use
4. Shut off application sync selection
5. Set a shorter time for display backlight
6. Reduce brightness of display

8VHU0DQXDO
Power On
Keep pressing power button over 2 seconds, device will start up opening screen, Android system is activating and enter the main
screen.
Sleep Mode
After devise is on, press power button once and it goes to sleep mode. The screen is now on standby and under low battery
consumption. To wake up device, press one more time power button.
Power off and Forced Shut down
When you are not using the device, keep pressing power button over 2 seconds, the
screen will display “shut down”, select “Yes”to power off unit completely.
If device is hanging, use a small pin to press Reset hole, it will forced shut down and the
device will power on again.
Operation of Touch Panel
Click -- Use finger or capacity panel pen to touch once, so as to select or activate function, or select menu or turn on applications.

8VHU0DQXDO
Tap and hold -- Tap over 2 seconds, it will turn on option list
Slide -- Slide up, down, left or right for fast scrolling browsing page and display screen
Drag –drag an icon and relocate the position

8VHU0DQXDO
Double Click –Double click to enlarge or shrink the display size of picture or under browsing webpage.
Shut --Use two fingers at same time on touch panel, to enlarge or to shrink the display scale.

8VHU0DQXDO
Home Screen
ķGoogle Search
ĸClick to turn on voice search, it will search according to voice input ( Make sure WIFI is on )
ĹList of last running applications
ĺBack to Home screen
ĻBack to previous screen
ļDisplay of icons and device status, click to turn on notification screen
ĽShortcut to application
ľEnter applications page

8VHU0DQXDO
Home screen with a set of 5 screens, slide left/ right to view individual screen
¾Change of Wallpaper
1. Tag home screen, it will pop-up wallpaper selection
2. Select preloaded wallpapers or picture as wallpaper
3. Click “setup”to confirm
¾Add shortcut on Home screen
1. Enter in application page, tag the icon of application
2. Locate the icon to designated position or locate it in another screen
¾Add Widget in Home Screen
1. Enter application page and slide to Widget page
2. Slide left / right to select widget
3. ag designated widget and locate it in home screen
Remark :˖Some widgets is linked to internet service, be careful it will occur data cost
Some widgets might only be used in certain countries or under assigned service providers
¾Relocate the shortcut on Home screen
1. Tag the application icon and move
2. Move icon to the designated position
¾Cancel shortcut on Home screen
1. Tag the application icon, recycle bin displays on upper screen
2. Drag icon to recycle bin
3. When icon changes to red, let go

8VHU0DQXDO
¾Notification screen
In home screen or under running application, select right side notification screen, check device status and set up below options˖
Icon Icon Description
WiFi signal Wifi connection, icon is full under strong signal
Battery Status of battery or if device is being charged
USB Connection To show if USB port is connected
Soft keyboard Turn on soft keyboard, for word typing
Screen shot Press power button with volume down simultaneously to take screen shot
Applications
Internet Browsing
Browse internet and bookmark the website
Remark ˖Web browser and bookmark might be different in different countries or different service providers

8VHU0DQXDO
¾Browsing webpage
1. Enter application page, select ”Browser”Icon
2. To brows certain webpage, select URL and input website address, and select “confirm”
3. See below browsing options˖
ķOpen new window
ĸShut down current webpage
ĹGo to Next or Previous webpage
ĺAccessing webpage, icon becomes “X”when webpage shows
ĻDetail message of webpage
ļEnter webpage address or related words
ĽBookmark current page
ľSearch message
ĿOpen bookmark and current visited webpage
ŀOption list of browser

8VHU0DQXDO
¾Browser setting
When browsing webpageˈclick upper right cornerĀ āˈadjust setting in the option menu
¾Current visited webpage
1. Enter application page, click ”Browser”
2. Select bookmark Æcurrent visited history
3. Select webpage
Email
Send and Receive email
¾Setting of email account
1. Enter application page and click ”Email”
2. Enter email address and password
3. Select next step ( for personal email account) or manual setting (for commercial email account)
4. Follow and input the requested setting
5. For setting more than one email account, select Æsetting Æadd email account, repeat steps 2-4.
After email account setting, message will be received in device. For more than one email account, switch email account for operation,
to receive and send out message.

8VHU0DQXDO
¾Sending outgoing message
1. Enter application page and select “Email”Æ
2. Type in Recipients ˗Manual input email addressˈuse “;”or “,”to separate more than one recipients
3. Type in Subject
4. Type in message in content
5. Select for attachments
6. Select and send out message
Remark ˖If user is offlineˈmessage cannot be sent out
¾Check email message
In email account, user can check downloaded message, go online to check new messages.

8VHU0DQXDO
Audio player
Click “Musicāin application page
Music will be categorized by artists, album, and play list. It will display all music insideĀSongsā. Click the song and it will play
automatically.

8VHU0DQXDO
¾Lyrics Sync
Lyrics Sync is available in audio player.
1. Copy the LRC file of song in Memoryˈthe lyric file must be same as song name.
e.g, “Rolling In The Deep.mp3”ˈthe lyric file must be ”Rolling In The Deep.lrc”
2. When playing songˈclick to turn on Lyrics Sync.
Video player
Click “Videoāin application page.
Video player will search for all supported video files in the device, click the designated video file to play.
Camera
The built-in front camera can take picture and video file.
¾Take picture
1. ClickĀCameraāin application page, device is default at picture taking, icon isĀā
2. To take pictureˈclick Ā ā
¾Video shooting
1. Select recording in video fileˈclickĀ ā
2. Click Ā āto record video file.
3. Click Ā āagain to stop recording

ā˖
SlideMe
SlideMe
8VHU0DQXDO
¾Camera Setting
In camera modeˈclickĀ ā for set upˈclickĀāto select set up options
File Explorer
Go to application page and clickĀExplorerāDŽ
¾Check file
InĀExplorerāˈuser can check and manage files in SD CardǃInternal Memory and USBDŽ
Connect USB port with OTG cableˈit shall detect USB device such as memory stick, clickĀExplorerāto check files
¾File operation
1. Go to application page and clickĀExplorerāDŽ
2. Select file or file path
3. Press file or folder over 2 secondsˈuser can operate it through options
4. Select Multiˈselect file or folderˈselect Editorˈperform function in option listˈit can manage files under option list.
Management of application files
¾Installation of applications
In Android systemˈall application files and game files are in APK formatDŽAPK files can be installed through TF card, internal memory
or download from and similar third party providers.
1. APK installation from device˖download APK file from computer, saved it in TF card or in device through OTG cable. Click the APK
file underĀApkInstallāin application pageˈcomplete installation. The application icon will be shown in application page.
2. Installation throughĀConnect device with WiFiˈClick “āiconˈselect APK file for installation.
SlideMe

8VHU0DQXDO
¾
Uninstall APK file
1. Go to application page and clickĀApkInstallerāDŽ
2. Select “Manage”
3. Click APK file to
uninstall.
Connecting to a PC:
• You can connect with PC by USB cable attached with the device.
You can transfer your personal data to the PC.
•Connect the PC and the device, it will change to the USB mode,
in this state, realize the files transfer function between the PC and
the device.
Connecting a USB device:
• USB devices are supported, such as a keyboard, mouse through the USB port.
• View media files on USB storage with installed photo, music or video applications.
ǏCautionǐ: Before removing this USB storage,
make sure your device is not accessing data from the USB storage.

8VHU0DQXDO
Inserting the Micro SD card:
You may install a Micro SD card to expand your device’s storage space.
1. This device supports Micro SD card up to 32GB capacity.
2. Insert the Micro SD card as shown.
ǏNoteǐ: Ensure that the Micro SD card is inserted all the way into the card slot.
ǏCautionǐ: Before removing this card, make sure your device is not accessing data on
the card.
Connecting to the Network:
Wi-Fi wireless setup:
Enter the setting interface, and turn on the Wi-Fi item.
The device will automatically search any accessible nearby wireless networks.

8VHU0DQXDO
Commonlyusedsettings
Press the setup icon to enter the setting.
Wi-Fi: Click ON or OFF to open or close Wi-Fi.
When open Wi-Fithe system will scan the wifi signal around automatically.
Meanwhile, users could add network manually as well.
More…:
1. VPN: The user can preset the 3G operators information.
2. Portable hotspot: You must connect the cable to network (by RJ45
connector) then you can enter the option to open or close the “Portable Wi-Fi
hotspot”, you can also take this device as a Wi-Fi Router.
3. Mobile networks:
Connect a USB 3G Dongle settingTo insert a USB 3G dongle, the device will
connect the Internet automatically. A 3G icon will be displayed on the screen.
(Please make sure the 3G SIM card is matching with the 3G dongle well)
澬Remark1澭After turning on “Portable Wi-Fi hotspot”Wi-Fi will close automatically.
澬Remark2澭When you use 3G to connect internetyou must shut off Wi-Fi first.
Table of contents
Languages:
Other Curtis Tablet manuals