Cushman MINUTE MISER User manual

ELECTRIC POWERED THREE WHEEL
SERVICE VEHICLE
ISSUED NOVEMBER 2003 REVISED FEBRUARY 2007
TECHNICIAN’S REPAIR
AND SERVICE MANUAL
600198-G01

SAFETY
(NOTES, CAUTIONS AND WARNINGS CONTINUED ON INSIDE OF BACK COVER)
NOTES, CAUTIONS AND WARNINGS
Throughout this guide NOTE, CAUTION and WARNING
will be used. ANOTE indicates a condition that should be
observed.
A CAUTION indicates a condition that
may result in damage to the vehicle.
A WARNING indicates a
hazardous condition that
could result in severe
injury or death.
Please observe these NOTES, CAUTIONS and WARN-
INGS; be aware that servicing a vehicle requires
mechanical skill and a regard for conditions that could be
hazardous. Improper service or repair may damage the
vehicle or render it unsafe. Battery posts, terminals
and related accessories
contain lead and lead
compounds. Wash hands after handling.
! !
! !
Read and understand all labels located on the vehicle. For any questions on any of the information, contact a represen-
tative for clarification.
Always replace any damaged or missing labels.
On steep hills it is possible for vehicles to coast at greater than normal speeds encountered on a flat surface. To pre-
vent loss of vehicle control and possible serious injury, speeds should be limited to no more than the maximum speed
on level ground (See GENERAL SPECIFICATIONS). Limit speed by applying the service brake.
If the vehicle is to be used in a commercial environment, signs similar to the ones illustrated should be used to warn of
situations that could result in an unsafe condition.
Be sure that this manual remains as part of the permanent service record should the vehicle be resold.
WASH HANDS
AFTER HANDLING!
Battery posts,
terminals and related
accessories contain
lead and lead compounds,
chemicals known
to cause cancer and
reproductive harm.
BATTERY WARNING
WASH HANDS
AFTER HANDLING!
WARNING: Battery posts, terminals and related
accessories contain lead and lead compounds,
chemicals known to cause cancer and reproductive harm.
BATTERIES
CONTAIN LEAD
AND RELATED PARTS

Page i
Owner’s Manual and Service Guide
TECHNICIAN’S REPAIR
AND SERVICE MANUAL
ELECTRIC POWERED
THREE WHEEL
SERVICE VEHICLE
VEHICLES
CUSHMAN MINUTE MISER™
E-Z-GO Division of Textron Inc., reserves the right to make design changes without obligation to make these changes on units previously sold and the informa-
tion contained in this manual is subject to change without notice.
E-Z-GO Division of Textron Inc., is not liable for errors in this manual or for incidental or consequential damages that result from the use of the material in this
manual.
CUSTOMER SERVICE DEPARTMENT IN USA PHONE: 1-800-241-5855 FAX: 1-800-448-8124
OUTSIDE USA PHONE: 001-706-798-4311, FAX: 001-706-771-4609
E-Z-GO DIVISION OF TEXTRON INC., 1451 MARVIN GRIFFIN ROAD, AUGUSTA, GEORGIA USA 30906-3852
STARTING MODEL YEAR : 2004

Page ii Owner’s Manual and Service Guide
To obtain a copy of the limited warranty applicable to the vehicle, call or write a local Distributor, an authorized
Branch or the Warranty Department with vehicle serial number and manufacturer code.
The use of non Original Equipment Manufacturer (OEM) parts may void the warranty.
Overfilling of batteries may void the warranty.
BATTERY PROLONGED STORAGE
All batteries will self discharge over time. The rate of self discharge varies depending on the
ambient temperature and the age and condition of the batteries.
A fully charged battery will not freeze in winter temperatures unless the temperature falls below -75° F (-60° C).
For winter storage, the batteries must be clean, fully charged and disconnected from any source of electrical
drain, such as the battery charger. Disconnect the battery charger cable from the vehicle batteries when not
charging.
As with all electric vehicles, the batteries must be checked and recharged as required or at a minimum of 30
day intervals.
Refer to the ‘Prolonged Storage’ section within the BATTERIES AND CHARGING section of this manual.
NOTES

Page iii
Repair and Service Manual
TABLE OF CONTENTS
TITLE PAGE
Safety........................................................................................................................... Inside Covers
General Information...........................................................................................................................ii
Safety Information............................................................................................................................ v
TITLE SECTION
General Information & Routine Maintenance...................................................................................A
Safety...............................................................................................................................................B
Body.................................................................................................................................................C
Wheels and Tires .............................................................................................................................D
Batteries & Charging........................................................................................................................E
Electronic Speed Control..................................................................................................................F
Motor............................................................................................................................................... G
Electrical System Battery and Charger ............................................................................................H
Brakes.............................................................................................................................................. J
Rear Axle..........................................................................................................................................K
Paint................................................................................................................................................. L
Lightning Protection and Grounding................................................................................................M
General Specifications .....................................................................................................................N
Steering and Suspension .................................................................................................................P

Page iv Repair and Service Manual
TABLE OF CONTENTS
Notes:

Owner’s Manual and Service Guide
SAFETY INFORMATION
Page v
This manual has been designed to assist the owner-operator in maintaining the vehicle in accordance with procedures
developed by the manufacturer. Adherence to these procedures and troubleshooting tips will ensure the best possible
service from the product. To reduce the chance of personal injury and/or property damage, the following instructions
must be carefully observed:
GENERAL
Many vehicles are used for a variety of tasks beyond the original intended use of the vehicle; therefore it is impossible
to anticipate and warn against every possible combination of circumstances that may occur. No warnings can take the
place of good common sense and prudent driving practices.
Good common sense and prudent driving practices do more to prevent accidents and injury than all of the warnings
and instructions combined. The manufacturer strongly suggests that the owner-operator read this entire manual paying
particular attention to the CAUTIONS and WARNINGS contained therein. It is further recommended that employees
and other operators be encouraged to do the same.
If you have any questions, contact your closest representative or write to the address on the back cover of this publica-
tion, Attention: Product Service Department.
The manufacturer reserves the right to make design changes without obligation to make these changes on units previ-
ously sold and the information contained in this manual is subject to change without notice.
The manufacturer is not liable for errors in this manual or for incidental or consequential damages that result from the
use of the material in this manual.
This vehicle conforms to the current applicable standard for safety and performance requirements.
These vehicles are designed and manufactured for off-road use. They do not conform to Federal Motor Vehicle Safety
Standards and are not equipped for operation on public streets. Some communities may permit these vehicles to be
operated on their streets on a limited basis and in accordance with local ordinances.
With electric powered vehicles, be sure that all electrical accessories are grounded directly to the battery (-) post.
Never use the chassis or body as a ground connection.
Refer to GENERAL SPECIFICATIONS for vehicle seating capacity.
Never modify the vehicle in any way that will alter the weight distribution of the vehicle, decrease its stability
or increase the speed beyond the factory specification. Such modifications can cause serious personal injury
or death. Modifications that increase the speed and/or weight of the vehicle will extend the stopping distance and may
reduce the stability of the vehicle. Do not make any such modifications or changes. The manufacturer prohibits and
disclaims responsibility for any such modifications or any other alteration which would adversely affect the safety of the
vehicle.
Vehicles that are capable of higher speeds must limit their speed to no more than the speed of other vehicles when
used in a golf course environment. Additionally, speed should be further moderated by the environmental conditions,
terrain and common sense.
GENERAL OPERATION
Always use the vehicle in a responsible manner and maintain the vehicle in safe operating condition.
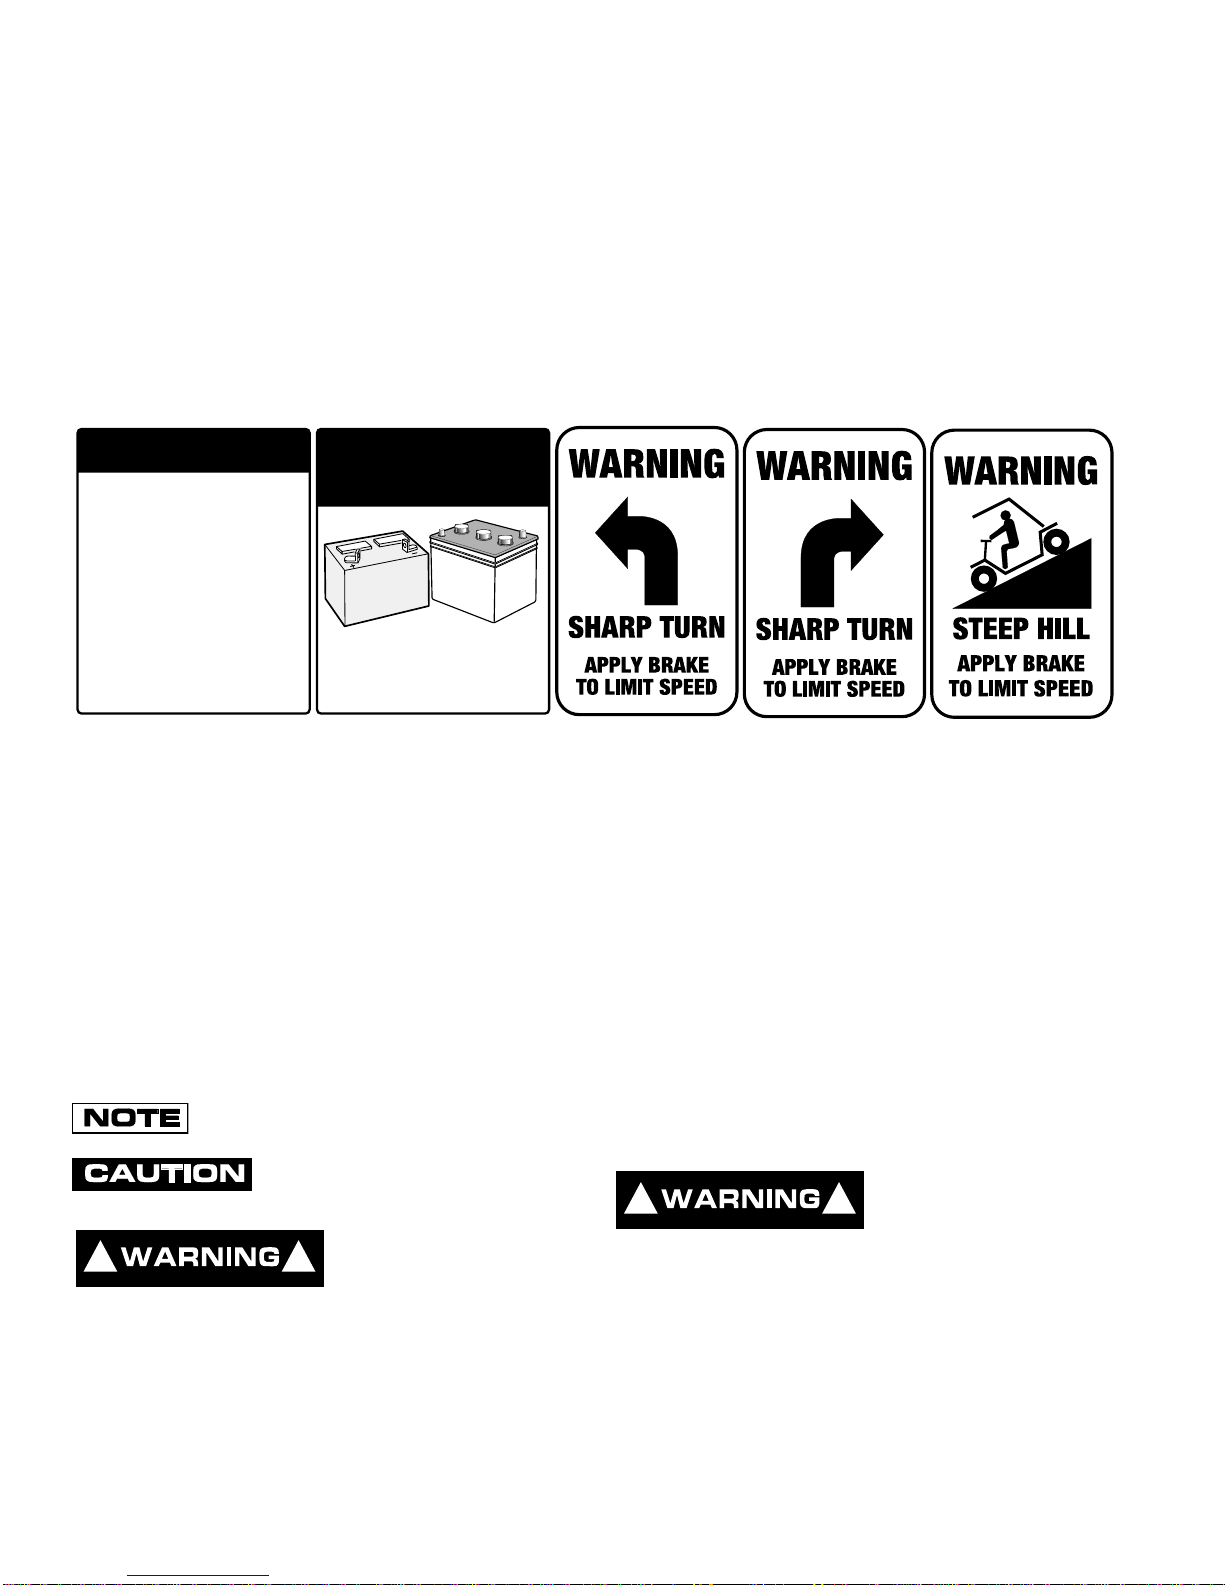
Always read and observe all warnings and operation instruction labels affixed to the vehicle.
Always follow all safety rules established in the area where the vehicle is being operated.

Owner’s Manual and Service Guide
SAFETY INFORMATION
Page vi
Always reduce speed to compensate for poor terrain or conditions.
Always apply service brake to control speed on steep grades.
Always maintain adequate distance between vehicles.
Always reduce speed in wet areas.
Always use extreme caution when approaching sharp or blind turns.
Always use extreme caution when driving over loose terrain.
Always use extreme caution in areas where pedestrians are present.
MAINTENANCE
Always maintain your vehicle in accordance with the manufacturer’s periodic service schedule.
Always ensure that mechanics performing repairs are trained and qualified to do so.
Always follow the manufacturer’s directions if you do any maintenance on your vehicle. Be sure to disable the vehicle
before performing any maintenance. Disabling includes removing the key from the key switch and removal of a battery
wire.
Always insulate any tools used within the battery area in order to prevent sparks or battery explosion caused by short-
ing the battery terminals or associated wiring. Remove the batteries or cover exposed terminals with an insulating
material.
Always check the polarity of each battery terminal and be sure to rewire the batteries correctly.
Always use specified replacement parts. Never use replacement parts of lesser quality.
Always use recommended tools.
Always determine that tools and procedures not specifically recommended by the manufacturer will not compromise
the safety of personnel nor jeopardize the safe operation of the vehicle.
Always support the vehicle using wheel chocks and safety stands. Never get under a vehicle that is supported by a
jack. Lift the vehicle in accordance with the manufacturer’s instructions.
Never attempt to maintain a vehicle in an area where exposed flame is present or persons are smoking.
Always be aware that a vehicle that is not performing as designed is a potential hazard and must not be operated.
The manufacturer cannot anticipate all situations, therefore people attempting to maintain or repair the vehicle must
have the skill and experience to recognize and protect themselves from potential situations that could result in severe
personal injury or death and damage to the vehicle. Use extreme caution and, if unsure as to the potential for injury,
refer the repair or maintenance to a qualified mechanic.
Always test drive the vehicle after any repairs or maintenance. All tests must be conducted in a safe area that is free of
both vehicular and pedestrian traffic.
Always replace damaged or missing warning, caution or information labels.
Always keep complete records of the maintenance history of the vehicle.

Owner’s Manual and Service Guide
SAFETY INFORMATION
Page vii
VENTILATION
Hydrogen gas is generated in the charging cycle of batteries and is explosive in concentrations as low as 4%. Because
hydrogen gas is lighter than air, it will collect in the ceiling of buildings necessitating proper ventilation. Five air
exchanges per hour is considered the minimum requirement.
Never charge a vehicle in an area that is subject to flame or spark. Pay particular attention to natural gas or propane
gas water heaters and furnaces.
Always use a dedicated circuit for each battery charger. Do not permit other appliances to be plugged into the recepta-
cle when the charger is in operation.
Chargers must be installed and operated in accordance with charger manufacturers recommendations or applicable
electrical code (whichever is higher).

Owner’s Manual and Service Guide
SAFETY INFORMATION
Page viii
Notes:

TABLE OF CONTENTS FOR SECTION ‘A’
SECTION TITLE PAGE NO.
Page A-i
Repair and Service Manual
A
GENERAL INFORMATION & ROUTINE MAINTENANCE
SERIAL NUMBER LABEL LOCATION ............................................................................................A - 1
SERVICING THE VEHICLE.............................................................................................................A - 1
ROUTINE MAINTENANCE..............................................................................................................A - 2
REAR AXLE.....................................................................................................................................A - 2
Checking the Lubricant Level................................................................................................A - 2
BRAKES...........................................................................................................................................A - 2
TIRES...............................................................................................................................................A - 3
LIGHT BULB REPLACEMENT ........................................................................................................A - 3
CARE AND CLEANING OF THE VEHICLE.....................................................................................A - 3
VEHICLE CARE PRODUCTS..........................................................................................................A - 4
HARDWARE ....................................................................................................................................A - 4
Controls.................................................................................................................................A - 5
Key Switch.............................................................................................................................A - 5
Direction Selector Switch.......................................................................................................A - 5
Power ON/Battery Condition Meter.......................................................................................A - 6
Headlight (Accessory) ...........................................................................................................A - 6
Service/Parking Brake Pedal.................................................................................................A - 6
Accelerator Pedal ..................................................................................................................A - 6
Horn and Handlebar..............................................................................................................A - 6
Handlebar Installation............................................................................................................A - 7
Seat Switch............................................................................................................................A - 7
Hour Meter (Accessory).........................................................................................................A - 7
ADDITIONAL FEATURES................................................................................................................A - 7
Battery Charger.....................................................................................................................A - 7
Fold Down Backrest ..............................................................................................................A - 7
Programmable Speed Controller...........................................................................................A - 8
EE UNITS.........................................................................................................................................A - 8
BEFORE ENTERING VEHICLE.......................................................................................................A - 8
OPERATING THE VEHICLE............................................................................................................A - 8
STARTING THE VEHICLE...............................................................................................................A - 9
COASTING.......................................................................................................................................A - 9
LIST OF ILLUSTRATIONS
Fig. 1 Model Number, Model Year and Serial Number ..................................................................A - 1
Fig. 2 Serial Numbers Under Seat .................................................................................................A - 1
Fig. 3 Initial Service Chart...............................................................................................................A - 1
Fig. 4 Lubrication Points..................................................................................................................A - 2
Fig. 5 Rear Axle Lubricant Check and Fill.......................................................................................A - 2
Fig. 6 Brake Bushing Lubrication ....................................................................................................A - 3
Fig. 7 Lubrication.............................................................................................................................A - 3
Fig. 8 Bolt Grades ...........................................................................................................................A - 4
Fig. 9 Controls On Dashboard.........................................................................................................A - 5
Fig. 10 Controls On Floorboard......................................................................................................A - 5
Fig. 11 Horn Switch........................................................................................................................A - 5
Fig. 12 Key Switch..........................................................................................................................A - 5

TABLE OF CONTENTS FOR SECTION ‘A’
SECTION TITLE PAGE NO.
Page A-ii
Repair and Service Manual
A
GENERAL INFORMATION & ROUTINE MAINTENANCE
Fig. 13 Direction Selector Switch ....................................................................................................A - 6
Fig. 14 Speed Control Pedal..........................................................................................................A - 6
Fig. 15 Seat Switch ........................................................................................................................A - 7
Fig. 16 Battery Charger..................................................................................................................A - 7
Fig. 17 Fold Down Backrest...........................................................................................................A - 7
Fig. 18 Torque Specifications..........................................................................................................A - 9
Fig. 19 Periodic Service Schedule ................................................................................................A - 10

A
Page A-1
Repair and Service Manual
Read all of Section B and this section before attempting any procedure. Pay particular attention to all Notes, Cautions and Warnings
SERIAL NUMBER LABEL LOCATION
The product model number, model year and serial num-
ber must appear on all correspondence concerning this
unit. These identification numbers appear on the label
attached to the left side of the kick panel (Ref Fig. 1 on
page A-1).
1. Model Number, Model Year and Serial Number.
The vehicle serial number is located under seat (Ref Fig.
2 on page A-1).
1. Serial Numbers Under Seat.
SERVICING THE VEHICLE
To prevent severe injury
or death resulting from
improper servicing tech-
niques, observe the following:
Do not attempt any type of servicing operations
before reading and understanding all notes, cau-
tions and warnings in this manual.
Any servicing requiring adjustments to be made
to the powertrain while the motor is running must
be made with both drive wheels raised.
Wear eye protection when working on
the vehicle. In particular, use care
when working around batteries, or
using solvents or compressed air.
To reduce the possibility of causing an electrical
arc, which could result in a battery explosion, turn
off all electrical loads from the batteries before
removing any heavy guage battery wires.
To prevent the possibility of motor disintegration,
never operate vehicle at full throttle for more than
4 - 5 seconds while vehicle is in a “no load” condi-
tion.
It is in the best interest of both vehicle owner and servic-
ing dealer to carefully follow the procedures recom-
mended in this manual. Adequate preventative
maintenance, applied at regular intervals, is the best
guarantee for keeping the vehicle both dependable and
economical.
Before a new vehicle is put into operation, it is recom-
mended that the items shown in the INITIAL SERVICE
CHART be inspected (Ref Fig. 3 on page A-1).
Vehicle batteries must be fully charged before initial use.
Fig. 1 Model Number, Model Year and Serial Number
Fig. 2 Serial Numbers Under Seat
1
1
Fig. 3 Initial Service Chart
! !
ITEM SERVICE OPERATION
Batteries Charge batteries
Seats Remove protective plastic covering
Brakes Check operation and adjust if necessary
Tires
Check air pressure (see SPECIFICATIONS)
GENERAL INFORMATION & ROUTINE MAINTENANCE

GENERAL INFORMATION & ROUTINE MAINTENANCE
Page A-2 Repair and Service Manual
Read all of Section B and this section before attempting any procedure. Pay particular attention to all Notes, Cautions and Warnings
In order to prevent damage to the bat-
tery charger transformer, blow water
from charger with compressed air. Allow sufficient time (1 - 2
hours) after washing the vehicle for the transformer to dry
before operating the charger.
PMC Controller should be covered during washing of the vehi-
cle.
ROUTINE MAINTENANCE
Some maintenance items must be serviced
more frequently on vehicles used under severe
driving conditions.
This vehicle will give years of satisfactory service provid-
ing it receives regular maintenance. Refer to the Periodic
Service Schedule for appropriate service intervals (Ref
Fig. 19 on page A-10). Refer to Lubrication Points for
appropriate lubrication locations (Ref Fig. 4 on page A-
2).
Do not use more than three (3) pumps
of grease in each grease fitting at any
one time. Excess grease may cause grease seals to fail or
grease migration into areas that could damage components.
Putting more than three pumps of grease in a grease fit-
ting could damage grease seals and cause premature
bearing failure.
REAR AXLE
The only maintenance to the rear axle for the first five
years is the periodic inspection of the lubricant level. The
rear axle is provided with a lubricant level check/fill plug
located on the bottom of the differential. Unless leakage
is evident, the lubricant need only be replaced after five
years.
Checking the Lubricant Level
With the vehicle on level ground, clean the area around
the check/fill plug and remove plug. The correct lubricant
level is just below the bottom of the threaded hole. If
lubricant is low, add as required. Add lubricant slowly
until lubricant starts to seep from the hole. Install the
check/fill plug. In the event that the lubricant is to be
replaced, the vehicle must be elevated and the oil pan
removed or the oil siphoned out through the check/fill
hole (Ref Fig. 5 on page A-2).
BRAKES
Service brakes in accordance with the Perodic Service
Schedule (Ref Fig. 19 on page A-10). Lubricate brake
bushes and linkage (Ref Fig. 6 on page A-3).
Fig. 4 Lubrication Points
Wheel bearings
and fork pivot
View from underside of vehicle
Rear axle
check and
fill
Fig. 5 Rear Axle Lubricant Check and Fill
Check/Fill Plug

GENERAL INFORMATION & ROUTINE MAINTENANCE
Page A-3
Repair and Service Manual
Read all of Section B and this section before attempting any procedure. Pay particular attention to all Notes, Cautions and Warnings
After the vehicle has been put into service, it is recom-
mended that the brakes be checked daily by performing
a brake test..
To prevent severe injury
or death resulting from
operating a vehicle with
improperly operating brake system, the braking sys-
tem must be properly maintained. All driving brake
tests must be done in a safe location with regard for
the safety of all personnel.
For information on conducting a brake test, refer to
BRAKES section.
TIRES
Tire condition should be inspected per the Periodic Ser-
vice Schedule (Ref Fig. 19 on page A-10). Inflation pres-
sure should be checked when the tires are cool. Be sure
to reinstall valve dust cap after checking or inflating. For
additional information, refer to WHEELS AND TIRES
section.
LIGHT BULB REPLACEMENT
To replace the headlight bulb, pivot the headlight forward
and remove the two Phillips head screws from back side
and separate light assembly. Place new bulb in place and
secure with screws previously removed.
To replace the taillight bulb, roll the rubber bezel from
around the edge of the taillight and remove lens. Replace
with new bulb.
Replacement headlight and taillight bulbs and 15 amp
fuses are available from a local distributor, an authorized
Branch or the Service Parts Department.
CARE AND CLEANING OF THE VEHICLE
When pressure washing vehicle, do not
use pressure in excess of 700 psi. To
prevent cosmetic damage, do not use any abrasive or reactive
solvents to clean plastic parts.
It is important that proper techniques and cleaning mate-
rials be used. Using excessive water pressure may
cause damage to seals, plastics, the electrical system,
body finish or back cushion material. Do not use pres-
sure in excess of 700 psi to wash vehicle.
Normal cleaning of vinyl backrests and plastic or rubber
trim requires the use of a mild soap solution applied with
a sponge or soft brush and wipe with a damp cloth.
Removal of oil, tar, asphalt, shoe polish, etc. will require
the use of a commercially available vinyl/rubber cleaner.
The painted surfaces of the vehicle provide attractive
appearance and durable protection. Frequent washing
with lukewarm or cold water is the best method of pre-
serving the painted surfaces.
Do not use hot water, strong soap or harsh chemical
detergents.
Fig. 6 Brake Bushing Lubrication
Fig. 7 Lubrication
5684
5685
! !

GENERAL INFORMATION & ROUTINE MAINTENANCE
Page A-4 Repair and Service Manual
Read all of Section B and this section before attempting any procedure. Pay particular attention to all Notes, Cautions and Warnings
Rubber parts should be cleaned with non-abrasive
household cleaner.
Occasional cleaning and waxing with non-abrasive prod-
ucts designed for ‘clear coat’ automotive finishes will
enhance the appearance and durability of the painted
surfaces.
Corrosive materials used for dust control can collect on
the underbody of the vehicle. These materials will accel-
erate corrosion of underbody parts. It is recommended
that the underbody be flushed occasionally with plain
water. Thoroughly clean any areas where mud or other
debris can collect. Sediment packed in closed areas
should be loosened to ease its removal, taking care not
to chip or otherwise damage paint.
VEHICLE CARE PRODUCTS
To help maintain the vehicle, there are several products,
available through a local Distributor, an authorized
Branch, or the Service Parts Department.
•Touch-up paint specially formulated to match vehi-
cle colors for use on metal bodies (P/N 28140-G**
and 28432-G**).
•Multi-purpose Battery Protectant formulated to
form a long-term, flexible, non-tacky, dry coating
that will not crack, peel or flake over a wide tem-
perature range (P/N 75500-G01).
•White Lithium Grease designed to provide lubrica-
tion protection in areas where staining or discolor-
ing is a problem, or in areas of extreme
temperature ranges (P/N 75502-G01).
•Penetrant/Lubricant, a 4-in-1 product that pene-
trates the most stubborn of frozen parts, lubricates
leaving a light lubricating film, prevents corrosion
by adhering to wet or dry surfaces and displaces
moisture, sealing against future moisture return
(P/N 75503-G01).
•Multi-purpose Cleaner and Degreaser that con-
tains natural, environmentally safe solvents (P/N
75504-G01).
•Multi-purpose Hand Cleaner is an industrial
strength cleaner containing no harsh solvents, yet
gently lifts grease off hands. May be used with or
without water (P/N 75505-G01).
•Battery Cleaner that promotes easy, non-violent
neutralization of battery acids and battery acid
crystals. The resulting sodium salts are water sol-
uble and easily washed away (P/N 75506-G01).
•Battery Maintenance Kit for complete battery
cleaning and watering, with battery maintenance
instructions (P/N 25587-G01).
•Biodegradable Cleaner that cleans the toughest
dirt and heavy soils by breaking down grease to
be easily wiped or rinsed away (P/N 75507-G01).
•Multi-purpose Value Pack sampler package
including 4 ounce (118 ml) aerosol cans of Battery
Protector, Penetrant/Lubricant, White Lithium
Grease, and Carburetor and Choke Cleaner (P/N
75508-G01).
HARDWARE
Periodically the vehicle should be inspected for loose
fasteners. Fasteners should be tightened in accordance
with the Torque Specifications table (Ref Fig. 18 on page
A-9) or specific torque values stated in procedures.
In general two grades of hardware are used in the vehi-
cle. Grade 5 hardware can be identified by the three
marks on the hexagonal head. Unmarked hardware is
Grade 2 (Ref Fig. 8 on page A-4).
Fig. 8 Bolt Grades
Grade 2 Grade 5

GENERAL INFORMATION & ROUTINE MAINTENANCE
Page A-5
Repair and Service Manual
Read all of Section B and this section before attempting any procedure. Pay particular attention to all Notes, Cautions and Warnings
Controls
(Ref Fig. 9 on page A-5) and (Ref Fig. 10 on page A-5)
Controls on the dash and the floorboard.
1. Key Switch
2. Direction Selector Switch
3. Power On/Battery Condition Meter
4. Headlight Switch
1. Service/Parking Brake Pedal
2. Accelerator Pedal
(Ref Fig. 11 on page A-5) shows the horn button and
handlebar.
1. Handlebar
2. Horn
Key Switch
The key switch, located in the vehicle dash, supplies or
interrupts power to the vehicle electrical system.
ON POSITION: Supplies power
OFF POSITION: Interrupts power (Ref Fig. 12 on page
A-5)
1. On Position
2. Off Position To prevent unexpected
vehicle movement or
unauthorized use,
always turn the key switch to the OFF position and
remove the key when the vehicle is not in use.
Direction Selector Switch
The direction selector switch, located on the dash panel,
controls the direction of vehicle movement. The panel is
marked with FORWARD, NEUTRAL and REVERSE
Fig. 9 Controls On Dashboard
Fig. 10 Controls On Floorboard
4
3
12
1
2
Fig. 11 Horn Switch
Fig. 12 Key Switch
1
2
2
1
! !

GENERAL INFORMATION & ROUTINE MAINTENANCE
Page A-6 Repair and Service Manual
Read all of Section B and this section before attempting any procedure. Pay particular attention to all Notes, Cautions and Warnings
positions. Push to the NEUTRAL position when leaving
the vehicle seat.
To prevent unexpected
vehicle movement when
you or other persons
next operate the vehicle, ALWAYS place the direction
selector switch in the NEUTRAL position when leav-
ing the vehicle seat.
Remove the key to prevent unauthorized use of the
vehicle.
Power ON/Battery Condition Meter
The power on/battery condition meter indicates whether
power is supplied to the unit and the state of battery
charge. The meter illuminates only when power is being
supplied.
The meter scale is a 10--bar LED (light emitting diode)
displaying the state of charge successively, bar by bar,
from full to empty.
•At 70% of discharge, a flashing light signals an
“energy reserve” alert.
•At 80% of discharge, a double flashing light sig-
nals as “empty” alarm. The batteries should be
fully charged before using the vehicle.
Headlight (Accessory)
The headlight can be pivoted on the mounting as
required. Push the headlight switch on the dash panel to
turn the headlight on or off.
Service/Parking Brake Pedal
The service and parking brakes are combined in the left
pedal on the floorboard. Depressing the pedal will slow
or stop the vehicle. Once the vehicle has stopped, the
parking brake can be engaged by pressing the front por-
tion of the pedal.
The floorboard catch should engage in the first notch of
the parking brake lock catch when the brake is properly
adjusted. (Ref Fig. 14 on page A-6).
To release the parking brake, depress the service/park-
ing brake pedal. ALWAYS apply the park-
ing brake when the vehi-
cle is to be left
unattended. The parking brake is NOT automatically
applied.
Accelerator Pedal
Depressing the accelerator pedal starts the motor;
releasing the pedal stops the motor.
Operation with the pedal fully depressed gives maximum
speed but is recommended only when the vehicle can be
operated safely. For slower speeds, depress the pedal as
required.
Reverse speed is half of forward speed.
To prevent loss of vehi-
cle control, NEVER
exceed safe operating
speed. ALWAYS adjust speed to conditions.
Horn and Handlebar
The horn button switch is attached to the handlebar on
the standard equipment vehicle.
A vehicle equipped with optional wheel type steering will
have the horn button located on the right side of the
steering console.
Depress the button to sound the horn. The horn will not
sound when the key is in off position.
Fig. 13 Direction Selector Switch
NEUTRAL
FORWARD
REVERSE
! !
Fig. 14 Speed Control Pedal
DEPRESS TO
RELEASE PARKING
BRAKE
DEPRESS TO ENGAGE
PARKING BRAKE CATCH
FLOORBOARD
FLOORBOARD CATCH
PARKING BRAKE
LOCK CATCH
FIRST NOTCH
FRONT OF VEHICLE
! !
! !

GENERAL INFORMATION & ROUTINE MAINTENANCE
Page A-7
Repair and Service Manual
Read all of Section B and this section before attempting any procedure. Pay particular attention to all Notes, Cautions and Warnings
Handlebar Installation
If the handlebar is factory installed,
make sure the retaining nut is tight.
Otherwise install the fork spindle key, handle, lockwasher and
nut. Tighten the nut to 50 ft. lbs. (68 Nm) torque.
Failure to install the fork
spindle key and to tight-
en the handlebar retain-
ing nut may allow the handlebar to come loose,
resulting in loss of vehicle steering control.
Seat Switch
The seat switch, located under the operator’s seat,
allows the vehicle to function only when the seat is in
position and the operator is properly seated. Should the
operator leave the seat during operation, the vehicle will
stop (Ref Fig. 15 on page A-7).
To prevent unexpected
vehicle movement, NEV-
ER operate the vehicle if
the seat switch is malfunctioning.
Hour Meter (Accessory)
The hour meter, located in the motor compartment,
behind the speed controller, records the number of hours
the vehicle has been operated.
ADDITIONAL FEATURES
Additional features include a built-in battery charger, a
fold down backrest and a programmable speed control-
ler.
Battery Charger
The standard vehicle is equipped with a built-in 24 volt,
25 amp DC, 120 volt AC, 60 Hz, fully automatic charger,
located under the driver’s seat. There is also a storage
area under the seat for the charger cord (Ref Fig. 16 on
page A-7).
Fold Down Backrest
The backrest is easily positioned to provide seating for a
passenger or, in a raised position, for cargo.
To lower the backrest, lift it upward and toward the front
of the vehicle. When the pins on either side have cleared
the slots, slowly lower the backrest into position. Reverse
the procedure when raising the backrest (Ref Fig. 17 on
page A-7).
Fig. 15 Seat Switch
! !
! !
Fig. 16 Battery Charger
Fig. 17 Fold Down Backrest
2
1
COMBINATION
BACKREST
AND SEAT
SLOT
PIN
Table of contents
Popular Outdoor Cart manuals by other brands

Lista
Lista L3627 user manual

Gator Frameworks
Gator Frameworks GFW-UTL-CART52AT Assembly instructions

Agri-Fab
Agri-Fab 45-01754 owner's manual

LINE LEADER
LINE LEADER SS-AVJ42-LKBC manual

SHARKS
SHARKS Garden cart 200 Instruction for operation and maintenance

Mooreco
Mooreco Platinum Series Assembly instructions