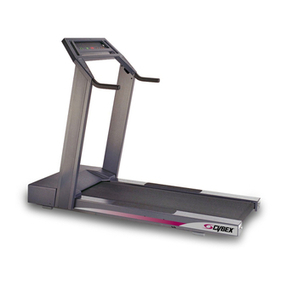
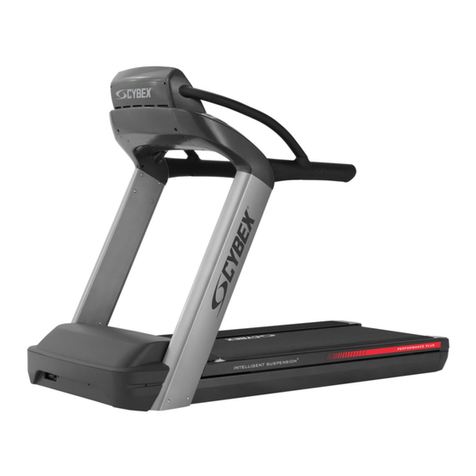
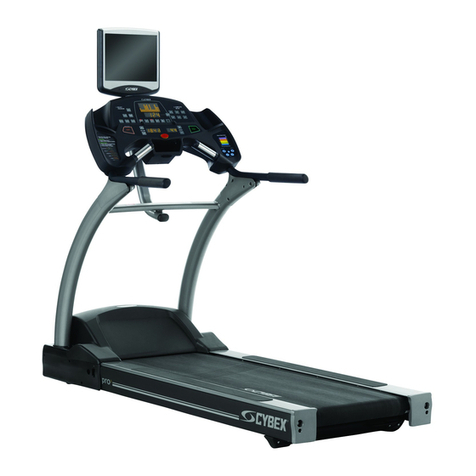
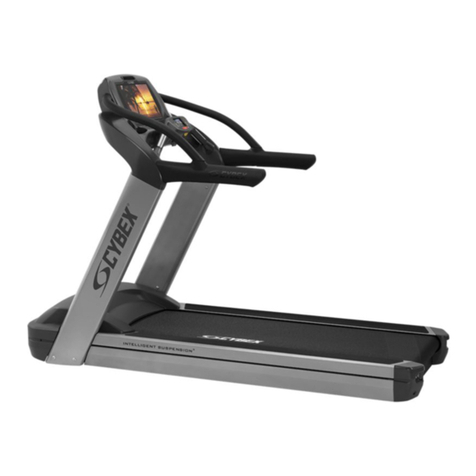
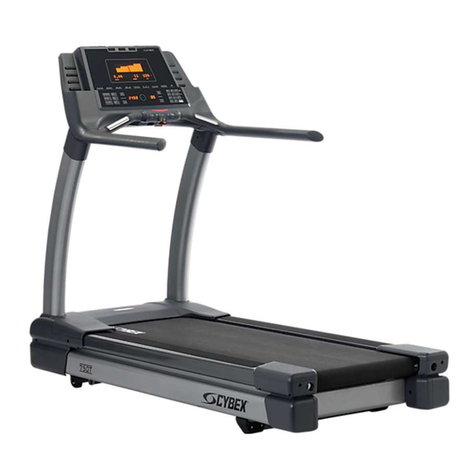
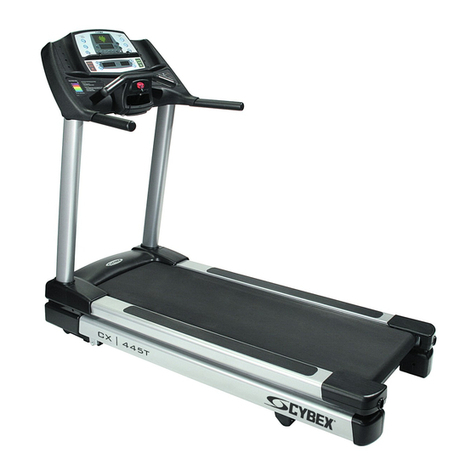
CYBEX 900T User manual

J
•
•
•
:e
•
•
•
•
•
•
•
•
•
•
•
•
•
•
•
:e
•
•
•
•
•
•
•
•
•
•
•
•
•
•
•
:e
•
•
•
~
@
Cybex 900T Treadmill Service Manual
Cardiovascular Systems
Cybex and the Cybex logo are registered trademarks
of
Cybex International, Inc. Bioflex and the Bioflex logo are registered
trademarks of Cybex International, Inc. Polar is aregistered trademark
of
Polar.
DISCLAIMER:
Cybex International, Inc.
makes
no
representations
or
warranties
regarding
the
contents
of
this
manual. We
reserve
the
right
to
revise
this
document
at
any
time
or
to
make
changes
to
the
product
described
within
it
without
notice
or
obligation
to
notify
any
person
of
such
revisions
or
changes.
©2001, Cybex International, Inc. All rights reserved. Printed
in
United States
of
America.
10 Trotter Drive Medway, MA
02053·
888-GO-CYBEX·
888-462-9239·
508-533-4300·
FAX
508-533-5183

~
•
•
•
e:
•
•
•
•
•
•
•
•
•
•
•
•
•
•
•
e:
•
•
•
•
•
•
•
•
•
•
•
•
•
•
•
e:
•
•
•
•

•
•
•
•
:e
•
•
•
•
•
•
•
•
•
•
•
•
•
•
•
:e
•
•
•
•
•
•
•
•
•
•
•
•
•
•
•
:e
•
•
•
".
Cybex
900T
Treadmill
Service
Manual
About
This Manual
For your convenience, all measurements and voltage requirements are listed in both English
and metric units. English values are listed first, followed by metric units in parentheses. For
example:
1"
(2.54 em).
The 900T Treadmill is anewer model that has replaced the former 685 model. This manual,
part number SM-16106, should be referred
to
for
685 service questions. An Owner's Manual
is shipped with each 900T Treadmill.
To
purchase acopy
of
any manual, order online at
www.eCybex.com, fax your order
to
508-533-5383 or contact Cybex Customer Service at
888-462-9239 or 508-533-4300.
To
contact Cybex with comments about this manual you may send email
to
FCC
Compliance
Information
!WARNING: Changes
or
modifications to this unit
not
expressly
approved
by
the party
responsible for compliance
could
void the user's authority to operate
the equipment.
This equipment has been tested and found
to
comply with the limits
for
aClass Adigital
device, pursuant
to
Part 15
of
the FCC Rules. Operation is subject
to
the following
two
conditions:
(1)
This device may not cause hannful interference, and
(2)
this device must
accept any interference received, including interference that may cause undesired operation.
Pagei

Pageii
Cybex 900T Treadmill
Service
Manual
-
•
•
•
•
e:
•
•
•
•
•
•
•
•
•
•
•
•
•
•
•
-:
•
•
•
•
•
•
•
•
•
•
•
•
•
•
•
e:
•
•
•
•

Cybex 900T Treadmill Service Manual
Table of Contents
•
•
•
•
:e
•
•
•
•
•
•
•
•
•
•
•
•
•
•
•
:e
•
•
•
•
•
•
•
•
•
•
•
•
•
•
•
:e
•
•
•
•
Front Pages
About
this Manual i
FCC Compliance Information i
Table
of
Contents .iii
1Safety
Important Voltage Information 1-1
Grounding Instructions 1-1
Important Safety Instructions 1-2
Caution Decals
1-4
2Technical Specifications
Specifications 2-1
Bioflex 2-2
3Preventive Maintenance
Regular Maintenance Activities 3-1
Cleaning Your Treadmill 3-1
Running Belt Maintenance
3-2
Other Preventive Maintenance
3-6
Service Schedule
3-7
Log Sheet
3-8
4Troubleshooting
Diagnostic Test
Mode
4-1
Diagnostic Menu 4-1
LED Functions
4-6
Motor
Current &Voltage
4-7
Speed Sensor Adjustment
4-9
Error Codes 4-10
Flow Charts 4-13
5Removal &Replacement
Running Belt &Deck 5-1
Drive Belt
5-4
Front Roller
5-4
Rear Roller
5-4
Drive
Motor
5-5
Drive
Motor
Cleaning
5-8
Motor
Brushes 5-12
Elevation
Motor
5-14
Limit Switch Assembly 5-17
PWM Module 5-18
Display Board
5-20
EPROM 5-21
Contact Heart Rate Board 5-22
CSAFE Board 5-24
Display Cable 5-25
Display Overlays 5-26
Handrail Assembly 5-28
6Diagrams
Parts List 6-1
Exploded View
6-3
900T Schematic
6-4
7Customer Service
Contacting Service 7-1
Serial
Number
7-1
Retum Material Authorization (RMA)
..
7-1
Damaged Parts 7-2
Page
iii

Cybex 900T Treadmill Service
Manual
•
•
•
•
-:
•
•
•
•
•
•
•
•
•
•
•
•
•
•
•
e:
•
•
•
•
•
•
•
•
•
•
•
•
•
•
•
e:
•
•
•
•

Cybex
900T
Treadmill
Service
Manual
IMPORTANT: Read all instructions
and
warnings before using the treadmill.
Important
Voltage
Infonnation
Page
1-1
Front Pages
About this Manual i
FCC Compliance Infoonation
..
i
Table
of
Contents
iii
1
Safety
~
Voltage Information 1-1
Grounding Instructions
.....
1-1
Important Safety Instructions
1-2
Caution Decals . . . . . . . .
..
1-4
2
Technical
Specificatiolls
~
2-1
Bioflex
2-2
3Preventive
Maintenance
Regular
MarnenMCe
Activities
3-1
Cleaning Your Treadmill. .
..
3-1
Running Belt Maintenance .3-2
Other Preventive
Maintenance
~
Service Schedule 3-7
Log
Sheet
3-8
4
TroubIeshooUlg
Diagnostic Test
Mode
4-1
Diagnostic
Menu
4-1
LED Functions
4-6
Motor
Current &Voltage
4-7
Speed
Sensor
Adjustment
..
4-9
Error
Codes
4-10
Flow Charts
4-13
5
Removal
&RepIac:ement
Running Belt &Deck 5-1
Drive
Belt 5-4
Front Roller 5-4
Rear
Roller 5-4
Drive
Motor
5-5
Drive
Motor
Cleaning
5-8
Motor
Brushes. .......
..
5-12
Elevation
Motor
5-14
Umit Switch Assembly 5-17
PWM
Module
5-18
Display Board
5-20
EPROM
5-21
Contact Heart
Rate
Board .
5-22
CSAFE
Board
5-24
Display Cable
5-25
Display Overlays
5-26
Handrail Assembly
5-28
6
Diagrams
Parts
Ust
6-1
Exploded
VIeW
6-3
900T Schematic 6-4
7Customer Service
Contacting Service
7-1
Serial Number
7-1
Return Material Autt1orization
(RMA)
7-1
Damaged
Parts.
. . . . . . .
..
7-2
This treadmill
is
for use on a
nominal 115
VAG
±15%, 60
/DANGER:
Improper
connection
of
the
equipment-grounding
conductor
can
result
in
a
risk
of
electric
shock.
Check
with
a
qualified
electrician
or
service
provider
if
you
are
in
doubt
as
to
whether
the
treadmill
is
properly
grounded.
Seek
a
qualified
electrician
to
perform
any
modifications
to
the
cord
or
plug.
Cybex
is
not
responsible
for
injuries
or
damages
as
a
result
of
cord
or
plug
modification.
208/220V
NEMA 6-15
Euro Plug
GEE
7/7
Grounding
Instructions
1-
Safety
Before you assemble your 900T, check
to
make sure that the treadmill has the
correct voltage requirements
for
your area, and that you have the correct
model. The power requirements
for
this treadmill are 220
VAG
±15%, 50 Hz/60
Hz and 15 amps grounded, dedicated circuit.
/WARNINGS:
Do
not
attempt
to
use
this
unit
with
a
voltage
adapter.
Do
not
attempt
to
use
this
unit
with
an
extension
cord.
This treadmill is intended
for
commercial use. This treadmill must be grounded.
If it should malfunction
or
break down, grounding provides apath of least
resistance for electric current
to
reduce the risk
of
electric shock. This
product
is equipped with acord having an equipment-grounding conductor
and agrounding plug. The plug must be plugged into an appropriate outlet
that
is properly installed and grounded in accordance with all local codes
and ordinances.
•
•
•
•
:e
•
•
•
•
•
•
•
•
•
•
•
•
•
•
•
:e
•
•
•
•
•
•
•
•
•
•
•
•
•
•
•
:e
•
•
•
•

Page
1-2
Cybex 900T Treadmill
service
Manual
Hz
and
20
amps
or
a
220
VAC
±15%,
50 Hz/60 Hz and
15
amps
grounded,
dedicated
circuit.
Make sure
that
the
treadmill is connected
to
an outlet having
the
same
configuration as
the
plug. Do
not
use a
ground
plug adapter
to
adapt
the
power
cord
to
a
non-grounded
outlet.
Important
Safety
Instructions
(Save These Instructions)
J
DANGER:
To
reduce
the
risk
of
electric
shock,
always
unplug
this
treadmill
from
the
electrical
outlet
immediately
after
using
it
and
before
cleaning
it.
JWARNING:
Serious
injury
could
occur
if
these
precautions
are
not
observed.
To
reduce
the
risk
of
bums,
fires,
electric
shock,
or
injury:
•
Obtain
amedical exam before beginning any exercise program.
•Keep children
away
from the treadmill. Teenagers
and
disabled
persons
must
be
supervised while using.
•
Stop
exercising if you feel faint, dizzy,
or
experience pain at any
time
while exercising
and
consult
your
physician.
•
Use
the
treadmill handrails
for
support
and
to
maintain balance.
.•
Use
caution when mounting and dismounting
the
treadmill.
•
Disconnect
all
power
before servicing
the
treadmill.
•Use a
dedicated
line when operating
the
treadmill.
•
Connect
the
treadmill
to
aproperly grounded
outlet
only.
•
Do
not
operate electrically powered treadmills in
damp
or
wet
locations.
•Keep
the
running belt clean and
dry
at all times.
•
Stop
and
place
the
treadmill at 0degrees incline (level)
after
each
use.
•
Do
not
leave
the
treadmill unattended when
plugged
in and running. After turning
off
the
treadmill,
don't
leave it until it
comes
to
a
complete
stop
and is level.
To
disconnect,
turn
all controls
to
the
STOP
or
OFF position, and
then
remove
the
plug from
the
outlet.
•
Inspect
the
treadmill
for
worn
or
loose
components
before each use.
Do
not
use until
worn
or
damaged
parts are replaced.
•Maintain and replace worn parts regularly. Refer
to
"Preventive Maintenance" Section
of
Owner's
Manual.
•
•
•
•
e:
•
•
•
•
•
•
•
•
•
•
•
•
•
•
•
e:
•
•
•
•
•
•
•
•
•
•
•
•
•
•
•
e:
•
•
•
•

•
•
•
•
:e
•
•
•
•
•
•
•
•
•
•
•
•
•
•
•
:e
•
•
•
•
•
•
•
•
•
•
•
•
•
•
•
:e
•
•
•
•
Cybex 900T Treadmill service Manual
•Do not operate the treadmill if
the
cord is damaged, if
the
treadmill is not
working properly,
or
if the treadmill has been
dropped
or
damaged. Seek
service from aqualified technician.
•Do
not
place
the
cord near heated surfaces
or
sharp edges.
•Do
not
use the treadmill outdoors.
•Do
not
operate
the
treadmill around
or
where aerosol (spray)
or
where
oxygen products are being used.
•Read
and
understand the Owner's Manual completely before using the
treadmill.
•Read and understand emergency
stop
procedures.
•Read and understand all warnings posted on the treadmill.
•Replace any warning label if damaged, worn
or
illegible.
•Do
not
wear
loose
or
dangling clothing while using
the
treadmill.
•Always wear proper footwear on
or
around exercise equipment.
•Keep all
body
parts, hair, towels, water bottles, and the like free and clear
of
moving parts.
•Set
up
and
operate the treadmill
on
asolid, level surface. Do
not
operate
in recessed areas or on plush carpet.
•Provide
the
following clearances: 39 inches
(1
m)
at
each side, 78 inches
(2
m)
at
the
back, and enough room
for
safe access and passage at the
front
of
the
treadmill. Be sure
your
treadmill is clear
of
walls, equipment,
and
other
hard surfaces.
•Do
not
attempt
repairs, electrical
or
mechanical. Seek trained repair
personnel when servicing. Contact
the
nearest authorized Cybex dealer
or
other
competent
repair service.
•Use
Cybex
factory parts when replacing parts
on
the
treadmill.
•Do
not
modify
the
treadmill in any way.
•Do
not
use attachments unless recommended
for
the
treadmill by Cybex.
•Report any malfunctions, damage
or
repairs
to
the
facility.
•Do
not
use the treadmill if you exceed 400 Ibs.
(181
kg). This is
the
rated
maximum
user weight.
Front
Pages
About this Manual i
FCC
Compliance Information
..
i
Table
of
Contents iii
1
Safety
ImportantVoltage Infoonation 1-1
Grounding Instructions
.....
1-1
Important Safety Instructions 1-2
Caution Decals . . . . . . . .
..
1-4
2Technical Specifications
Specifications . . . . . . . . .
..
2-1
Bioflex
2-2
3Preventive Maintenance
Regular Maintenance
Activities
3-1
Cleaning
Your
Treadmill. .
..
3-1
Running
Belt
Maintenance .3-2
Other
Preventive
Maintenance
3-6
Service Schedule
3-7
Log
Sheet
3-8
4Troubleshooting
Diagnostic Test
Mode
4-1
Diagnostic
Menu
4-1
LED Functions
4-6
Motor
Current &Voltage
4-7
Speed SensorAdjustment
..
4-9
Error
Codes
4-10
Flow
Charts
4-13
5Removal &
Replacement
Running Belt &Deck 5-1
Drive Belt 5-4
Front Roller 5-4
Rear Roller 5-4
Drive
Motor
5-5
Drive
Motor
Cleaning
5-8
Motor
Brushes
5-12
Elevation
Motor
5-14
Umit Switch Assembly
5-17
PWM
Module
5-18
Display Board
5-20
EPROM 5-21
Contact Heart Rate Board .
5-22
CSAFE Board
5-24
Display Cable
5-25
Display Overlays
5-26
Handrail Assembly
5-28
6
Diagrams
Parts
Ust
6-1
Exploded
VieW
6-3
900T
Schematic
6-4
7
Customer
5ervice
Contacting Service 7-1
Serial
Number
7-1
Retum
Material Authorization
(RMA)
7-1
Damaged Parts. .......
..
7-2
Page
1-3
Page
1-4
Cybex 900T Treadmill service Manual
Caution Decals
Caution decals indicate apotentially hazardous situation, which, if
not
avoided, may result
in
minor
or
moderate injury. The caution decals used on the 900T are shown below.
To
replace
any worn
or
damaged labels
do
one
of
the following: Visit eCybex.com
to
shop for parts
online, or download the parts order form and fax your order
to
508-533-5183.
To
speak with a
customer service representative, in most areas call 888-GO-CYBEX
or
888-462-9239.
Otherwise call 508-533-4300.
•
•
•
•
-:
•
•
•
•
•
•
•
•
•
•
•
•
•
•
•
-:
•
•
•
•
•
•
•
•
•
•
•
•
•
•
•
-:
•
•
•
•

Cybex 900T Treadmill Service Manual
CAUTION
Page 1-5
Front
Pages
About this Manual i
FCC
Compliance Information
..
i
Table
of
Contents
iii
2
Tecfv1icaI
Spec:ifications
Specifications . . . . . . . . .
..
2-1
Bioflex
2-2
1Safety
I~
Voltage
Information
1-1
Grounding Instructions
.....
1-1
Important Safety Instructions 1-2
Caution Decals ........
..
1-4
3Preventive Maintenalce
RegUar
Marnencrlc:e
Activities
3-1
Cleaning
Your
Treadmill. .
..
3-1
Running
Belt Maintenance .3-2
Other Preventive
Maintenance 3-6
Service Schedule 3-7
Log Sheet 3-8
4
TI"CIWIeehootin
Diagnostic
Test
Mode 4-1
Diagnostic
Menu
4-1
LED
FlI1CIions
4-6
Motor
CUI'1'ent
&Voltage 4-7
Speed
Sensor
Adjustment
..
4-9
Error
Codes 4-10
Flow Charts 4-13
5Removal &Replacement
Running
Belt &
Deck
5-1
Drive
Belt
...............5-4
Front
Roller 5-4
Rear
Roller
5-4
Drive
Motor 5-5
Drive
MotorCleaning 5-8
Motor Brushes. . . . . . . .
..
5-12
Elevation Motor 5-14
Limit Switch
Assembly
5-17
PWM Module 5-18
Display Board 5-20
EPROM
5-21
Contact Heart
Rate
Board .5-22
CSAFE
Board 5-24
Display Cable 5-25
Display 0vet1ays 5-26
Handrail Assembly 5-28
6Diagr.-ns
Parts Ust. .............
..
6-1
Exploded View 6-3
900T Schematic 6-4
7
Customer
Service
Contacting Service
7-1
Serial Number
7-1
Return
Material
Authorization
(RMA)
7-1
Damaged Parts 7-2
DO
NOT
USE
EXCESSIVE
FORCE
TO
TIGHTEN
BELT
CAUTION
DO NOT OPEN
REFER
TO
QUALIFIED
SERVICE
PERSONNEl.
SEE
INSTRUCTIONS
MANUAL.
HIGH VOLTAGE UNDER COVER
NO
USER SERVICEABLE PARTS INSIDE
•
•
•
•
:e
•
•
•
•
•
•
•
•
•
•
•
•
•
•
•
:e
•
•
•
•
•
•
•
•
•
•
•
•
•
•
•
:e
•
•
•
>.

Page
1-5
Cybex
900T Treadmill
service
Manual
•
•
•
•
e:
•
•
•
•
•
•
•
•
•
•
•
•
•
•
•
-=
•
•
•
•
•
•
•
•
•
•
•
•
•
•
•
e:
•
•
•
•

Cybex
900T
Treadmill
Service
Manual
I
......
E-------
82"
(208
cm)------
...
I
2-Technical Specifications
2Technical Specifications
Specifications ........... 2-1
Bioflex 2-2
Page
2-1
Front
Pages
About
this Manual i
FCC Compliance Information
..
i
Table
of
Contents iii
1
Safety
Important Voltage Information
1-1
Grounding Instructions
.....
1-1
Important Safety Instructions 1-2
Caution OecaIs . . . . . . . .
..
1-4
3Preventive
Maintenance
RegUar
Maintenance
Activities
3-1
Cleaning Your Treadmill
....
3-1
Running Belt Maintenance .3-2
Other Preventive
Maintenance
3~
Se!vice Schedule 3-7
LogShee1 3-8
4Troubleshooting
Diagnostic Test
Mode
4-1
Diagnostic Menu
4-1
LED Functions
4~
Motor
Current &Voltage 4-7
Speed
Sensor
Adjustment
..
4-9
Error
Codes
4-10
Row
Charts 4-13
5
Removal
&
Replacement
Running Belt &
Deck
5-1
Drive Belt 5-4
Front Roller 5-4
Rear Roller 5-4
Drive
Motor
5-5
Drive
Motor
Cleaning 5-8
Motor
Brushes 5-12
Elevation
Motor
5-14
Umit Switch Assembly 5-17
PWM
Module
5-18
Display Board 5-20
EPROM 5-21
Contact Heart
Rate
Board .5-22
CSAFE Board 5-24
Display Cable 5-25
Display Over1ays 5-26
Handrail Assembly 5-28
6
Diagrams
Parts Ust
6-1
Exploded
VieW
6-3
900T
Schematic 6-4
7
Customer
Service
Contacting Service
7-1
Serial Number 7-1
Retum Material Authorization
(RMA)
7-1
Damaged Parts .
..
. . . . 7-2
82" (208 cm)
33" (84 cm)
20" x60"
(51
cm
x152 cm)
350 Ibs. (159 kg)
0.5
to
12.4 mph (0.8
to
20 kph)
in
0.1
mph
or
0.1
kph increments
-5
to
+20%
grade
Minimum
of
9per program
Yes
Cardiovascular, Weight Loss, Speed Interval,
Hill Interval, Rolling Hills, Demonstration,
Up
to
10
Custom
Contact Heart Rate, Polar
CSAFE
10 gauge steel
Wax impregnated
wood
220 VAC
±10%,
50 Hz/60 Hz and 15 amps
grounded, dedicated circuit
3hp, DC. continuous duty
Press
the
stop
button
English, Spanish, German, French
400 Ibs. (180 kg)
Labor 1year; parts 2years except as follows:
structural frame, 10 years; deck and belt 1
year.
Length:
Width:
Running Area:
Weight
of
Product:
Speed Range:
Incline Range:
Levels
of
Difficulty:
Manual Mode:
Programs:
Standard Features:
Connectivity:
Chassis Construction:
Deck Material:
Power Requirement:
Motor:
Emergency Stop:
Languages:
Maximum User Weight:
Warranty:
Specifications
•
•
•
•
:e
•
•
•
•
•
•
•
•
•
•
•
•
•
•
•
:e
•
•
•
•
•
•
•
•
•
•
•
•
•
•
•
:e
•
•
•
~,

Page
2-2
Cybex 900T Treadmill Service Manual
Bioflex
The Bioflex system used on the 900T is optimized
for
lateral stability. This is accomplished
through
the use of a10 gauge steel frame and critically
damped
rear wheels. The heavy
gauge
of
the steel frame provides arigid structure
to
transfer
the
landing
shock
to
the
damped
wheels so that they can effectively absorb the impact.
•
•
•
•
-:
•
•
•
•
•
•
•
•
•
•
•
•
•
•
•
•
•
•
•
•
•
•
•
•
•
•
•
•
•
•
•
e:
•
•
•
•

•
•
•
•
:e
•
•
•
•
•
•
•
•
•
•
•
•
•
•
•
:e
•
•
•
•
•
•
•
•
•
•
•
•
•
•
•
:e
•
•
•
•
Cybex 900T Treadmill Service Manual
3-Preventive Maintenance
Regular Maintenance
Activities
Preventive maintenance activities
must
be performed
to
maintain normal
operation
of
your treadmill. Keeping alog sheet
of
all maintenance actions will
assist you
in
staying current with all preventive maintenance activities. See Log
Sheet in this chapter.
Cleaning Your Treadmill
When cleaning your treadmill spray amild cleaning agent, such as awater and
dishsoap solution, on aclean cloth first,
and
then wipe
the
treadmill with the
damp
cloth.
NOTE: Do
not
spray cleaning solution directly on the treadmill. Direct
spraying
could
cause damage to the electronics
and
may void the
warranty.
!WARNING: To
prevent
electrical
shock,
be
sure
that
power
is
shut
off
and
the
treadmill
is
unplugged
from
the
electrical
outlet
before
perfonning
any
cleaning
or
maintenance
procedures.
After
Each
Use
-
Wipe
up
any liquid spills immediately. After each workout,
use acloth
to
wipe
up
any remaining perspiration from
the
handrails and
painted surfaces.
Be careful not
to
spill
or
get excessive moisture between
the
edge
of
the
display panel and the console, as this
might
create an electrical hazard
or
cause failure
of
the electronics.
As
Needed
-Vacuum any dust
or
dirt
that
might
accumulate under
or
around
the
900T. Motors are especially susceptible
to
dust
and dirt, and restricted
airflow can prevent adequate cooling
that
could shorten
motor
life. Cleaning
this area should be
done
as often as indicated in
the
Service Schedule.
!WARNING:
Keep
wet
items
away
from
inside
parts
of
the
treadmill.
Electrical
shock
could
occur
even
if
the
treadmill
is
unplugged.
Avoid
touching
the
wire
connections
at
the
end
of
the
blue
capacitor
mounted
on
top
of
the
aluminum
box
next
to
the
drive
belt.
Front
Pages
About
this Manual i
FCC
Compliance
Information
..
i
Table
of
Contents iii
1
Safety
ImportantVoltage Infoonation
1-1
Grounding Instructions
.....
1-1
Important Safety Instructions 1-2
Caution
Decals
..
. .
..
.
...
1-4
2Tec:hnicaI Spec:ificatiol18
Specifications .........
..
2-1
Bioflex
2-2
3
Preventive
Maintenance
FlegU<r
Mairtenance
Activities
3-1
Cleaning
Your
Treadmill. .
..
3-1
Running
Belt
Maintenance .3-2
Other Preventive
Maintenance
3-6
Service Schedule
3-7
Log
Sheet
3-8
4
Troubleshooting
Diagnostic Test Mode 4-1
Diagnostic
Menu
4-1
LED Functions
4-6
Motor
CuTent &Voltage 4-7
Speed
Sensor Adjustment
..
4-9
Error
Codes
.4-10
Flow Charts 4-13
5Removal &
Replacement
Running Belt &Deck 5-1
Drive Belt 5-4
Front Roller 5-4
Rear Roller 5-4
Drive
Motor
5-5
Drive
Motor
Cleaning 5-8
Motor
Brushes. .......
..
5-12
Elevation
Motor
5-14
Umit
Switch
Assembly
5-17
PWM
Module
5-18
Display Board 5-20
EPROM 5-21
Contact Heart Rate Board .5-22
CSAFE Board 5-24
Display Cable
5-25
Display Overlays
5-26
Handrail
Assembly
5-28
6
Diagrams
Parts
Ust
6-1
Exploded
VieW
6-3
900T Schematic
6-4
7
Customer
Service
Contacting Service 7-1
Serial
Number
7-1
Return Material Authorization
(RMA)
7-1
Damaged
Parts 7-2
Page
3-1

Page
3-2
Cybex
900T Treadmill
Service
Manual
To
clean the
motor
components, you
must
remove the
two
Phillips head screws that hold the
motor
cover in place. Lift the cover, and
put
it and the screws aside. Use avacuum
attachment
or
hand vacuum
to
clean
the
exposed elevation assembly, drive motor, lower
electronics and the surrounding areas.
Also use a
dry
cloth
for
the areas that you can't reach with the vacuum cleaner. If the machine
has not been used
for
some time
or
is excessively dirty, use a
dry
cloth
to
wipe all exposed
areas. Replace the cover and screws when finished.
With
the
help
of
another person, lift
the
rear
of
the treadmill and roll it back from its present
position
so
as
to
vacuum
the
floor area underneath the unit. Wipe clean the underside
of
the
900T
to
prevent dirt and
dust
build-up. When finished, return the treadmill
to
its normal
position.
Contact
Heart
Rate
Grips
-Contaminants, such as hand lotions, oils or body powder, may
come
off
on the contact heart rate grips. These can reduce sensitivity and interfere with the
heart rate signal. It is recommended that the user have clean hands when using the contact
heart rate. Clean the grips using acloth dampened with acleaning solution containing alcohol.
The grips are the only part
of
the treadmill you should use acleaning solution containing alcohol.
In
addition, the nickel plating on the 900T may become tarnished and blackened with time.
This may reduce sensitivity and interfere with the heart rate signal. Use
an
emery cloth
to
remove
the
tarnish from
the
exposed nickel plating on
the
heart rate grips.
Running Belt
Maintenance
Belt
and
Deck
-Clean
the
belt and the
deck
surfaces
to
minimize the effect
of
friction
between
the
wood
deck
and the running belt. Clean the underside
of
the running belt and the
top
of
the running
deck
surface by wiping them with aclean dry towel. This should be done
often
to
prevent premature wear
of
the deck, running belt, and the drive
motor
system. See
the Service Schedule in this chapter
to
determine the minimum recommended cleaning.
The running belt may become loose and slip on the drive roller with each foot plant. The 900T
is equipped with visual indicators
of
belt tension. These are located at the rear
of
the treadmill
where the
two
3/4·
bolts protrude from the plastic end caps. See Figure 1. These are
designed
to
indicate if
the
running belt is at the proper tension
to
insure safe operation
of
the
unit. If
the
belt has become loose,
the
silver colored washer located under the bolt will move
out slightly from
the
protruding
tab
molded in the end cap. See the Service Schedule in this
chapter
to
determine the minimum recommended checking
of
the belt tension.
•
•
•
•
e:
•
•
•
•
•
•
•
•
•
•
•
•
•
•
•
~
•
•
•
•
•
•
•
•
•
•
•
•
•
•
•
•
e:
•
•
•
•

•
•
•
•
:e
•
•
•
•
•
•
•
•
•
•
•
•
•
•
•
:e
•
•
•
•
•
•
•
•
•
•
•
•
•
•
•
:-
•
•
•
•
--
--
Cybex 900T Treadmill Service
Manual
Top View
.Q,ooI!b-""---
Protruding Tabs
Bolts
Figure 1
Re-tensioning
and
Re-centering
the
Belt
-Follow
the
procedure below.
Tools
Required
•
3/4
10
wrench
1.
Re-tension
the
belt.
A.
Use a3/4" wrench
to
turn each
bolt
clockwise until the silver washers
are flush with the protruding
the
tab
on the end caps. See Figure 1.
B. Turn
the
power on and press
the
Manual
key. Press the
Up
Arrow
to
bring the speed
up
to
3.5-4
mph
(5.6-6.4 kph).
c.
Allow
the
treadmill
to
run for aminute
or
two. Observe the bolts and
silver washers. If they begin
to
protrude
or
retract turn the treadmill off
and adjust the bolts. Follow the next step
to
be sure the belt
is
centered.
NOTE:
Be
careful
not
to
over
tighten the belt.
Over
tightening the
belt
can
create excessive tension
on
the front
and
rear
rollers.
NOTE:
While
centering
the
belt
choose
one
bolt
to
adjust. Do
not
adjust
both
bolts.
2.
Re-center
the
belt.
A. With the treadmill running at 5
mph
(8
kph) observe the running belt. If
the
belt tracks off center
to
the
right or left the
deck
will become
exposed. Use a3/4" wrench
to
tighten the rear roller bolts. on the side
of
the treadmill toward which the belt
is
moving. For example: If the belt
moves
to
the right and the
deck
becomes exposed on the left, use a
wrench
to
tighten the bolt on the right side
of
the
frame, tighten about
1/2
of
aturn (clockwise) and wait
30
seconds. If
the
belt does not move
back
to
the center
of
the treadmill, make another adjustment
to
the
Front
Pages
About
this Manual i
FCC Compliance Information
..
i
Table
of
Contents iii
1
Safety
Important Voltage Information 1-1
Grounding Instructions
.....
1-1
ImportantSafety Instructions 1-2
Caution Decals . . . . . . . .
..
1-4
2
Technical
Specifications
Specifications 2-1
Bioflex
2-2
3
Preventive
Maintenance
RegtW
Maintenance
Activities 3-1
Cleaning Your Treadmill. .
..
3-1
Running Belt Maintenance .
3-2
Other
Preventive
Maintenance
3~
Service Schedule
3-7
Log Sheet
3-8
4Troubleshooting
Diagnostic
Test
Mode 4-1
Diagnostic Menu 4-1
LED Functions
4~
Motor
Current &Voltage
'"
4-7
Speed SensorAdjustment
..
4-9
Error Cocles
4-10
Row Charts
4-13
5Removal &
Replacement
Running Belt &Deck 5-1
Drive Belt ...............
5-4
Front Roller
5-4
Rear Roller
5-4
Drive
Motor
5-5
Drive
Motor
Cleaning 5-8
Motor
Brushes 5-12
Elevation
Motor
5-14
Limit
Switch
Assembly
5-17
PWM
Module
5-18
Display
Board
5-20
EPROM 5-21
Contact Heart
Rate
Board .
5-22
CSAFE Board
5-24
Display Cable
5-25
Display Overlays 5-26
Handrail Assembly
5-28
6
Diagrams
Parts List 6-1
Exploded
VieW
6-3
900T Schematic 6-4
7
Customer
Service
Contacting Service 7-1
Serial
Number
7-1
Return Material Authorization
(RMA)
7-1
Damaged Parts 7-2
Page 3-3

Page
3-4
Cybex 900T Treadmill Service
Manual
same
bolt.
Once
the
running belt has been adjusted
closer
to
the
center
of
the
treadmill
use
about
1/4
of
a
turn
until the belt has been stabilized.
B. After
the
belt has been centered,
check
the
belt tension again.
Make
sure
the
running
belt tension is
tight
enough so that
the
belt does
not
slip
or
hesitate when stepped on.
Walk on
the
treadmill at 3.5-4 mph (5.6-6.4 kph) and every 4th
to
5th
step
throw
your
weight into
your
step
to
feel if the belt is slipping. If
the
belt
does
slip, use awrench
to
equally tighten
both
rear roller adjustment bolts
1/2
of
a
turn
(clockwise). Adjust
the
belt
until
no
further slipping is felt. If the running belt continues
to
slip
the
drive belt could
be
loose.
NOTE: The springs may eventually compress slightly.
If
they compress the silver washers
may no
longer
be
flush with the protruding tab
on
the
end
caps when the
belt
is
properly tensioned.
The
washers will
be
positioned deeper into the
end
cap
and
not
be
as visible.
Checking
the
Belt
and
Deck
Surfaces
-The running belt
and
deck
should
be checked
periodically
for
any excessive wear.
In
an
effort
to
make sure
that
the
running belt operates
properly, visually
inspect
the
belt on aweekly basis
to
make sure
that
there are no tears
or
fraying in
the
belt material.
To
inspect
the
edges
of
the
belt, it is necessary
to
remove
the
motor
cover
and plastic side
rails. Follow these steps:
Tools
Required
•Phillips head
screwdriver
•Flat head
screwdriver
•
3/16·
Allen
wrench
•Dry towel
1.
Turn
the
power
off.
A. Turn
the
main
power
switch on the
front
panel
to
the
off
(0)
position.
B. Unplug
the
treadmill from
the
power
outlet.
2.
Remove
the
motor
cover
and
side
rails.
A. Remove
the
two
Phillips head screws
that
fasten
the
motor
cover
to
the
frame. Lift
the
cover
and set it aside. This will allow you
to
remove
the
side
rails. See Figure 2.
B. Using a
3/16"
Allen wrench, remove
the
two
button head
screws
on
the
sides
of
each
side
rail. See Figure 2.
C. Using aflat
head
screwdriver, remove
the
screw on
the
top
of
each side rail. See
Figure 2.
D. Grasp
the
top
edge
of
each side rail and pull up and
away
from
the
deck. This will
enable
you
to
see
the
deck
and edges
of
the
belt. It is
not
necessary
to
remove
the
side rails
completely
off
the
frame.
•
•
•
•
e:
•
•
•
•
•
•
•
•
•
•
•
•
•
•
•
e:
•
•
•
•
•
•
•
•
•
•
•
•
•
•
•
e:
•
•
•
•

4.
Clean
under
the
belt.
Front
Pages
About
this Manual i
FCC Compliance Information
..
i
Table
of
Contents iii
2Technical Specifications
Specifications . .
.. ..
...
..
2-1
Bioflex 2-2
Page 3-5
1
Safety
ImportantVoltage Information 1-1
Grounding Instructions
.....
1-1
Important Safety Instructions 1-2
Caution Decals
..
....
.
...
1-4
3
Preventive
Maintenance
RegUar
Maintenance
Activities
3-1
Cleaning Your Treadmill. .
..
3-1
Running Belt Maintenance .3-2
Other
Preventive
Maintenance 3~
Service Schedule 3-7
LogSheErt
3-8
4
Troubleshooting
Diagnostic Test Mode 4-1
Diagnostic Menu 4-1
LED Functions
4~
Motor
Current &Voltage
4-7
Speed SensorAdjustment
..
4-9
Error Codes
4-10
Flow Charts
4-13
5Removal &Replacement
Running Belt &
Deck
5-1
Drive Belt 5-4
Front Roller
5-4
Rear Roller 5-4
Drive
Motor
5-5
Drive
Motor
Cleaning 5-8
Motor
Brushes 5-12
Elevation
Motor
5-14
Umit
Switch Assembly 5-17
PWM
Module
5-18
Display Board
5-20
EPROM 5-21
Contact Heart Rate Board .5-22
CSAFE Board 5-24
Display Cable 5-25
Display Overlays
5-26
Handrail Assembly 5-28
6
Diagrams
Parts Ust 6-1
Exploded
VieW
........•.•
6-3
900T Schematic 6-4
7
Customer
Service
Contacting
Service
7-1
Serial Number 7-1
Retum Material Authorization
(RMA)
7-1
Damaged Parts
..
.
..
. . 7-2
Screws
~=======---3
Screws Each
Side
,
I
I
~'~,'I~~~
Side
Rails
Cybex
900T
Treadmill Service Manual
B. Run
your
hand under the belt on the
top
of
the
deck
surface. If you feel
excessive ridges
or
cracks,
or
if the
deck
feels grooved yet highly
polished, the
deck
should be flipped so that an unused surface faces
the
top.
If the
deck
is worn on both sides it should be replaced.
In
time,
a
worn
belt and
deck
can cause high current draw and ultimately,
motor
failure. For instructions on replacing the belt and deck, see Running
Belt
and
Deck in the Removal andReplacement chapter
of
the Service Manual.
C. Using a
3/16"
Allen wrench, attach the
two
button head screws on the
sides
of
each side rail. See Figure 2.
A. After completing the inspection and cleaning
of
the
deck
surface, snap
the
side rails back down into their original position.
B. Using aflat head screwdriver, attach the screw on the
top
of
each side
rail. See Figure 2.
A. Look at the edges
of
the belt while you roll it by hand. If the belt has
any rips
or
looks excessively worn the belt needs
to
be replaced.
End
Caps
A.
To
minimize
the
effect of friction between the
deck
and the running belt,
Cybex
recommends cleaning the underside
of
the running belt and the
top
of
the
running deck surface
by
wiping them with aclean,
dry
towel.
This cleaning should be done each time you check the belt and
deck
condition
to
prevent premature wear
of
the deck, running belt and the
drive
motor
system. See the Service Schedule in this chapter.
5.
Replace
the
side
rails
and
motor
cover.
Figure 2
3.
Check
the
belt
and
deck
condition.
•
•
•
•
:-
•
•
•
•
•
•
•
•
•
•
•
•
•
•
•
=-
•
•
•
•
•
•
•
•
•
•
•
•
•
•
•
:e
•
•
•
•

Page
3-6
Cybex 900T Treadmill Service
Manual
D. Lower the
motor
cover
in
place and tighten the
two
Phillips screws. See Figure
2.
Other
Preventive
Maintenance
Cybex recommends that
the
following maintenance activities be completed
by
aqualified
service technician. These activities should be perfonned at the recommended intervals listed
in the Service Schedule (located in this chapter):
Measure the
motor
brushes and replace worn motor brushes
Rotate, flip and replace the running deck.
Replace the running belt
Check the current
draw
Measure motor voltage at maximum speed, with no load
Refer
to
the 900T Service Manual
for
detailed procedures when completing the tasks listed
above. If you need
to
order amanual, call Cybex at 888-GO-CYBEX, 888-462-9239 or
in
some areas call 508-533-5183.
•
•
•
•
-:
•
•
•
•
•
•
•
•
•
•
•
•
•
•
•
~
•
•
•
•
•
•
•
•
•
•
•
•
•
•
•
•
-=
•
•
•
•
Table of contents
Other CYBEX Treadmill manuals

CYBEX
CYBEX 525T User manual

CYBEX
CYBEX CardioTouch 770T User manual

CYBEX
CYBEX 790T User manual

CYBEX
CYBEX LT-16602-4 Application guide

CYBEX
CYBEX 770T-CT User manual

CYBEX
CYBEX 750T User manual

CYBEX
CYBEX PRO3 User manual

CYBEX
CYBEX 625T User manual

CYBEX
CYBEX 700T Application guide

CYBEX
CYBEX 625T User manual