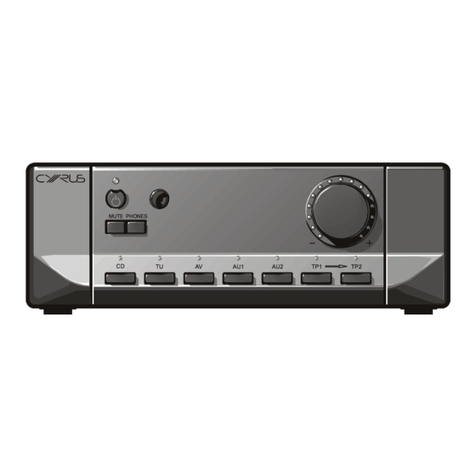
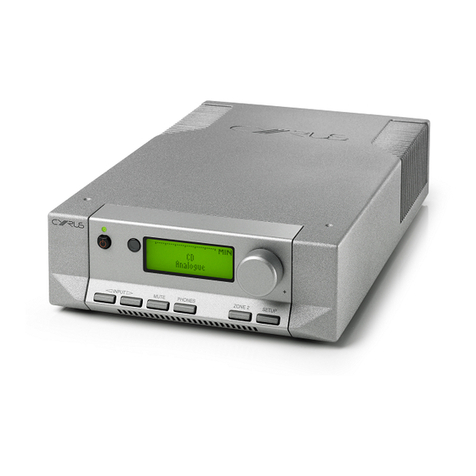
Cyrus CLASSIC AMP User manual

Firmware version V1.0
CLASSIC AMP USER GUIDE
BUILDING A BETTER MUSIC EXPERIENCE

Classic AMP User Instrucons
IMPORTANT! READ BEFORE OPERATING THIS EQUIPMENT!1
Power supply ......................................................................... 2
Speaker plugs......................................................................... 2
Servicing ................................................................................ 2
Product service centres ......................................................... 2
............................................................................. 3
WELCOME TO THE WORLD OF CYRUS.................................... 4
.................................................. 4
...................................................................... 4
INSTALLATION........................................................................... 5
Key to the rear panel drawing .......................................... 5
CONNECTIONS .......................................................................... 6
...................................... 6
.......................................................... 6
........................................... 6
...................................................... 7
............................... 8
........................ 8
......................................... 8
........................................................ 8
....................... 8
........... 8
MC-BUS System ..................................................................... 9
............................................... 9
........................................................... 9
How it works..................................................................... 9
....................................... 9
OPERATION ............................................................................. 10
....................................... 10
Mains power........................................................................ 10
Standby........................................................................... 10
Auto-standby .................................................................. 10
................................................................ 10
...................... 10
Volume and balance ............................................................ 11
Volume............................................................................ 11
.................................... 11
Balance ........................................................................... 11
Mute .................................................................................... 11
Listening to headphones ..................................................... 11
Tape/Disc playback and recording....................................... 11
Playback.......................................................................... 11
Recording........................................................................ 11
..................................... 11
REMOTE CONTROL OPERATION ............................................ 12
.......................................... 12
Remote control backlight................................................ 12
........................... 12
Sending commands to Cyrus components ..................... 12
Switching on Cyrus components..................................... 12
.................................................. 13
Cyrus CD player commands................................................. 14
Cyrus audio streamer commands........................................ 15
Cyrus Phono Signature commands...................................... 16
CONFIGURATION .................................................................... 17
Input names.................................................................... 18
Display mode .................................................................. 18
.................................................... 18
.................................................................... 19
FIRMWARE UPDATES.............................................................. 19
REMOTE CONTROL LEARNING .............................................. 20
.................................................. 20
Learning commands ....................................................... 20
Checking programmed commands...................................... 21
Problems with learning........................................................ 21
Sending TV or SAT commands ............................................. 21
TROUBLESHOOTING GUIDE................................................... 22
Error indicators ............................................................... 22
SPECIFICATIONS...................................................................... 23
Power Supply .................................................................. 23
....................................................... 23
Enclosure ........................................................................ 23
.................................................. 23
.............................................. 23
.............................................. 23
............................................... 23
WARRANTY.............................................................................. 23
WEEE........................................................................................ 23
CONTENTS

1
Classic AMP User Instrucons
WARNING:
remove any unit covers or panels. There are no user
serviceable parts in this product.
WARNING:
HEED WARNINGS: All warnings on the product and in the
READ ALL THE INSTRUCTIONS:
RETAIN INSTRUCTIONS:
FOLLOW INSTRUCTIONS:
CLEANING:
WATER AND MOISTURE: Do not use this product near water
shall be placed on the product.
HEAT:
VENTILATION: Slots and openings in the cabinet are
openings must not be blocked or covered. The openings
OBJECT OR LIQUID ENTRY:
into this product through openings as they may touch
dangerous voltage points or short-out parts that could
ACCESSORIES: Do not place this product on an unstable
OVERLOADING:
POWER CORD PROTECTION: Power supply cords should be
routed so that they are not likely to be walked on or pinched
NAKED FLAMES:
must be placed on this product.
LIGHTNING:
disconnect the antenna or cable system. This will prevent
damage to the product due to lightning and power-line
surges.
BATTERIES:
CAUTION! POLARISED CONNECTOR (CANADA and USA):
installed by a competent electrician.
ACCESS TO THE MAINS PLUG: The means to disconnect this
IMPORTANT! Read before operang this equipment!
CAUTION:
procedures in this manual.
ATTENTION:
inside this product. Unauthorised personnel
must not open this unit.
MOVING THE PRODUCT: A product and cart
cause the product and cart to overturn.
POWER SOURCES: This product should be
ATTACHMENTS:
2
Classic AMP User Instrucons
Power supply
this voltage is the same as your mains supply.
220-230V Products: Voltage Range 220V-240V
115V Products: Voltage Range 110V-120V
your local Cyrus distributor to have your product converted.
Speaker plugs
Servicing
personnel.
CONDITIONS REQUIRING SERVICE: Unplug this product
personnel when:
• When the power supply cord or plug is damaged.
•
product.
•
•
•
•
REPLACEMENT PARTS: When replacement parts are
SAFETY CHECK:
Product service centres
www.cyrusaudio.com.
the plugs.
Never terminate the cables with separate 4mm/banana
plugs.

3
Classic AMP User Instrucons
FCC Noce*
• Reorient or relocate the receiving antenna.
•
•
receiver is connected.
•
*115V products

4
Classic AMP User Instrucons
Welcome to the world of Cyrus
Preparaons for Installaon
• Power Cable
•
•
• Quick-start guide
Adjustable feet
•
• Raise the chassis slightly.
•
•
etc.

5
Classic AMP User Instrucons
R R
L
MADE IN ENGLAND
LEFT
SPEAKER
RIGHT
SPEAKER
DIG 4
DIG 3DIG 2
DIG 1
AN 4AN 3AN 2
PHONO MM
PRE OUT FIXED OUT
MC BUS
IN
OUT
GROUND
AN 1
L
HEADPHONES
UPGRADE
1@1#1%1&1* 1$1^
abcdef ghi1)
1(
1!
Installaon
1. Right speaker output
2.
3.
4.
5. Phono/MM input
6. Phono ground terminal
7. AN1 analogue input 1
Key to the rear panel drawing
8. AN2 analogue input 2
9. AN3 analogue input 3
10. AN4 analogue input 4
11.
12.
13. Upgrade port
14. DIG4 digital input 4
15. DIG3 digital input 3
16. DIG2 digital input 2
17. DIG1 digital input 1
18. Headphone socket
19. Power inlet

6
Classic AMP User Instrucons
Connecng analogue audio sources
• Connect a stereo audio interconnect cable between each
Ensure le and right channels are correctly connected.
Make a note of the input number used for each source as the
inputs can be re-named at the set-up stage.
stereo analogue audio sources. These include-
Analogue output from CD/Blu-ray Players
Analogue output from DAB or FM radio tuners
Analogue output from a TV
Analogue tape recorders
Surround decoders
Connecng a turntable
•
the red plug to the right socket.
•
Connecng digital audio sources
•
Make a note of the input number used for each source as the
inputs can be re-named at the set-up stage.
Digital audio output from a CD player
Digital audio output from a TV
Digital audio output from a games console
Digital radio
Blu-ray players
Digital satellite receivers
Digital tape/disc recorders
NOTE: The digital audio inputs are only compable with 2
channel PCM source material and will not reproduce mul-
channel surround sound.
Important – read before making any audio connecons

7
Classic AMP User Instrucons
Connecng loudspeakers
Your cables may also be marked for direconality with
arrows. In this case, the arrows should always point in the
direcon of signal ow towards the speakers.
Rib polarity indicator
Stripe polarity indicator
Direcon indicators
the plugs.
Never terminate the cables with separate 4mm/banana
plugs.
•
Observe polarity. The + and - speaker terminals of the
amplier must be connected to the corresponding + and -
terminals of the speakers. To idenfy polarity at each end
of the cable, most cables have polarity indicators. This is
usually a stripe or a rib on one conductor as shown in the
examples below. The polarity marking indicates the + cable.
•
into the speaker sockets on the back panel and into the
speaker.

8
Classic AMP User Instrucons
Using the xed output of your amplier
Connecng a tape recorder for recording
•
recorder.
You can now record the source you are playing on the tape/
disc recorder.
Connecng a second amplier
control.
•
speakers in another room.
You can now play the same music in both rooms and use the
volume controls on the two ampliers to control the volume
in each room separately.
Connecng headphones
The headphones socket is a standard 3.5mm stereo jack
Connecng a Cyrus surround sound decoder
•
For this system to funcon correctly both the amplier
and the Cyrus surround decoder must be included in an
MC-BUS connecon loop and the ‘Cyrus AV’ input name
must be set for the input used (see ‘MC-BUS’ secon and
‘Input names’ in the ‘Setup menu’ secon).
appropriate level.
Connecng a surround sound decoder (other
brand)
•
For this system to funcon correctly, the ‘AV Direct’ input
name must be set for the input used (see ‘Input names’
in the ‘Setup menu’ secon).
surround decoder.
level.

9
Classic AMP User Instrucons
MC-BUS System
Cyrus streamer
Cyrus ower mplifierpa
Cyrus CD player
Cyrus amplifier
MC-BUS out
MC-BUS out
MC-BUS out
MC-BUS out
MC-BUS in
MC-BUS in
MC-BUS in
MC-BUS in
An MC-BUS loop is
one unit to the MC-BUS
chain. Complete the loop
by returning the MC-
component to the MC-BUS
When a Cyrus Surround Processor is included in the MC-BUS
External power supply - PSX-R
range including the Classic AMP.
Connecng a PSX-R
•
•
How it works
noise and power supply ripple.
Connecng to the AC mains supply
• Connect the socket on the AC Power cable to the power
• Now connect the cable to a suitable AC power point.
mains supply is the mains plug. Ensure that the mains plug

10
Classic AMP User Instrucons
MUTE PHONES SETUP
INPUT
-27
CD
Sample rate 44.1kHz
bcde
f
g
h
i
a
1. Standby switch
2. Standby indicator
3. Remote eye
4. Display window
5. Level control and setup adjust
Operaon
6. Setup select
7. Headphones select
8. Mute select
9. Input select
Mains power
permanently.
power should be disconnected.
Standby
When switched on the standby indicator will be green,
when in standby the indicator will be red.
Auto-standby
may be disabled in the setup menu.
Selecng an input
•
• The input names will step through on the display.
Selecng the ‘Cyrus AV’ or ‘AV Direct’ inputs
will lock and the surround decoder input select and volume
To unlock the volume control and return to playing a stereo
Key to the front panel drawing

11
Classic AMP User Instrucons
Volume and balance
balance.
Volume
• Turn the level control to set the volume in 1dB steps.
The volume level is shown by a bargraph and numerically in
dB at the right side of the display.
Safe volume levels aer standby
Balance
•
balance.
Listening to headphones
• Connect your headphones.
•
The sound will mute in the speakers, and switch to the
headphones.
•
Note: Headphones can only be selected when headphones
are connected to the rear panel socket.
headphones can cause hearing loss.
Tape/Disc playback and recording
Playback
you connected your tape recorder.
Recording
The recording signal will always track the source that is
Playing through a second amplier
system.
The recording signal will always track the same source as the
main system is playing.
The balance may be adjusted in 1 dB steps by up to 4dB
control or pressing the volume up/down keys on the remote
control.
working correctly etc.
Mute
•
When muted the volume level display will show that the
sound is muted.
•
-27
Balance
The volume display will change
to show a graphic display of the
balance seng.

12
Classic AMP User Instrucons
Remote control operaon
Remote control introducon
The iR14 remote control will send commands to Cyrus
Signature.
The remote control can also be programmed with the
could also be other audio components such as a Cyrus tuner
or DVD player etc.
Remote control backlight
The remote control keypad includes a back-light. The back-
command is sent.
Fing baeries to the remote control
control.
123
45
79
6
8
0/10
SATTV
STORE
MENU
ENTER
SELECT
LIST
CH
SETUP
abc def
ghi jkl mno
pqrs tuv wxyz
GUIDE
INFO
TEXT
TV/AV
CONTROL
SOURCE
Switching on Cyrus components
123
45
79
6
8
0/10
SATTV
STORE
MENU
ENTER
SELECT
LIST
CH
SETUP
abc def
ghi jkl mno
pqrs tuv wxyz
GUIDE
INFO
TEXT
TV/AV
CONTROL
SOURCE
123
45
79
6
8
0/10
SATTV
STORE
MENU
ENTER
SELECT
LIST
CH
SETUP
abc def
ghi jkl mno
pqrs tuv wxyz
GUIDE
INFO
TEXT
TV/AV
CONTROL
SOURCE
Sending commands to Cyrus components
AAA
AAA
a
b
1. Press the catch on the
the cover.
2.
the retaining hook in the
compartment as shown.
3.
into the remaining space.
4.
same voltage and type.
• Press the CYRUS
key to set the
remote control to
Cyrus mode.
123
45
79
6
8
0/10
SATTV
STORE
MENU
ENTER
SELECT
LIST
CH
SETUP
abc def
ghi jkl mno
pqrs tuv wxyz
GUIDE
INFO
TEXT
TV/AV
CONTROL
SOURCE
• Press or to
switch on and
send commands
to a Cyrus
• Press the
key to switch
on a Cyrus CD
player and send
commands to a
Cyrus CD player
• Press the key
to switch on
a Cyrus Audio
streamer and
send commands
to a Cyrus Audio
streamer and

13
Classic AMP User Instrucons
Cyrus amplier commands
• Press the CYRUS key to set the remote control to Cyrus
mode.
1.
Standby.
2. Set the handset to send commands to Cyrus components.
3.
4.
CD player.
5.
6.
7.
8.
9.
10.
11.
12.
13.
14.
15.
16.
17.
18.
19.
20.
21.
22.
23.
24.
25.
26.
27.
28. Volume down.
29. Volume up.
30. Balance.
31.
32.
33.
34.
35.
36.
37. Step to the previous input.
38.
Audio streamer.
39.
123
45
79
6
8
0/10
SATTV
STORE
MENU
ENTER
SELECT
LIST
CH
SETUP
abc def
ghi jkl mno
pqrs tuv wxyz
GUIDE
INFO
TEXT
TV/AV
CONTROL
SOURCE
a
b
c
d
e
f
g
h
i
1)
1!
1@
1#
1$
1%
1^
1&
1*
1(
2)
2!
2@
2#
2$
2%
2&
2^
2*
2(
3)
3!
3@
3#
3$
3%
3^
3&
3*
3(

14
Classic AMP User Instrucons
Cyrus CD player commands
• Press the CYRUS key
• Press the key to set the remote control to CD mode.
The key will light red. You can now control both a Cyrus
commands are being sent in CD mode.
1.
Standby.
2.
3.
4.
CD player.
5.
6.
7. CD player repeat.
8.
9.
10.
11. CD player previous track.
12.
13.
14.
15.
16. CD player audio phase. Changes in phase are subtle and
signal is in normal or phase inverted mode.
17. CD player stop.
18.
19.
20.
21. CD player numeric keypad. Enter a one or two digit track
22.
23. CD player memory store.
24. CD player previous track.
25. CD player pause.
26. CD player search back.
27. CD player play/pause.
28.
29.
30.
31.
32. CD player search back.
33.
123
45
79
6
8
0/10
SATTV
STORE
MENU
ENTER
SELECT
LIST
CH
SETUP
abc def
ghi jkl mno
pqrs tuv wxyz
GUIDE
INFO
TEXT
TV/AV
CONTROL
SOURCE
a
b
c
d
e
f
g
h
i
1)
1!
1@
1#
1$
1%
1^
1&
1*
1(
2)
2!
2@
2#
2$
2%
2&
2^
2*
2(
3)
3!
3@
3#
3$
3%
3^
3&
3*
3(
34.
35.
36.
37.
38.
Audio streamer.
39.

15
Classic AMP User Instrucons
Cyrus audio streamer commands
• Press the CYRUS key
• Press the key to set the remote control to Audio
streamer mode.
The key will light red. You can now control both a Cyrus Audio
being sent in Audio streamer mode.
The Audio streamer mode commands available are listed
1.
Standby.
2.
3.
4. Select an input named CD and set the handset to send
5.
6.
7. Audio streamer repeat.
8.
9. Audio streamer cursor up.
10. Audio streamer cursor right.
11. Audio streamer cursor down.
12.
13.
14.
15.
16.
17. Audio streamer stop.
18.
19.
20.
21. Audio streamer alpha-numeric keypad.
22.
23.
24. Audio streamer previous track.
25. Audio streamer pause.
26.
27. Audio streamer play/pause.
28.
29.
30.
31. Audio streamer back.
32.
33. Audio streamer select.
34. Audio streamer home.
35.
36.
37.
123
45
79
6
8
0/10
SATTV
STORE
MENU
ENTER
SELECT
LIST
CH
SETUP
abc def
ghi jkl mno
pqrs tuv wxyz
GUIDE
INFO
TEXT
TV/AV
CONTROL
SOURCE
a
b
c
d
e
f
g
h
i
1)
1!
1@
1#
1$
1%
1^
1&
1*
1(
2)
2!
2@
2#
2$
2%
2&
2^
2*
2(
3)
3!
3@
3#
3$
3%
3^
3&
3*
3(
38.
Audio streamer.
39.

16
Classic AMP User Instrucons
Cyrus Phono Signature commands
Commands are sent to the Phono Signature via keys
ENTER/SELECT.
This page lists commands that will control the Phono
Signature.
• Press the CYRUS key to set the remote control to Cyrus
mode.
being sent in this mode.
123
45
79
6
8
0/10
SATTV
STORE
MENU
ENTER
SELECT
LIST
CH
SETUP
abc def
ghi jkl mno
pqrs tuv wxyz
GUIDE
INFO
TEXT
TV/AV
CONTROL
SOURCE
Standby
Select
Step right
Input select
MM/MC
Gain select
Resistance
Capacitance
Store

17
Classic AMP User Instrucons
Conguraon
to best match your system.
To enter the menu system
•
•
available on the display.
•
•
•
Name Input 1AN Choose a name for input 1 from the name listAN
Choose a name for input 2 from the name listAN
Choose a name for input 3 from the name listAN
Choose a name for input 4 from the name listAN
Choose a name for input
from the name list
PHONO
Choose a name for input from the name listDIG1
Choose a name for input from the name listDIG2
Choose a name for input from the name listDIG3
Choose a name for input from the name listDIG4
Set the sensitivity offset for input 1AN
Set the sensitivity offset for input 2AN
Set the sensitivity offset for input 3AN
Set the sensitivity offset for input 4AN
Set the sensitivity offset for input PHONO
Set the sensitivity offset for input DIG1
Set the sensitivity offset for input DIG2
Set the sensitivity offset for input DIG3
Set the sensitivity offset for input DIG4
Enable/Disable Auto-Standby
Name Input 2AN
Name Input 3AN
Name Input 4AN
Name Input PHONO
Name Input DIG1
Name Input DIG2
Name Input DIG3
Name Input DIG4
Offset AN1
Offset AN2
Offset AN3
Offset AN4
Offset PHONO
Offset DIG1
Offset DIG2
Offset DIG3
Offset DIG4
Auto-Standby
Setup
Display Mode Select large input, small input or large volume

18
Classic AMP User Instrucons
Input names
used once.
The name list is -
in which case the PHONO name can be re-assigned to
Each name may only be used once. When a name is assigned
surround decoders to an analogue input. This input name
Display mode
-27
CD
-27
-27dB
Offset
Input AN2
+4dB
show a three line display with the
display centre and the current
sample rate/lock status at the
selected.
a two line display with the volume
reading at the top and a larger
input legend below.
display large volume characters at
bargraph above.
-27
CD
Sample rate 44.1kHz
Input sensivity oset
enables the volume level to be
when playing low or high output
source components such as tape
decks or tuners.
Table of contents
Other Cyrus Amplifier manuals

Cyrus
Cyrus integrated 6 vs2 User manual

Cyrus
Cyrus X Power User manual

Cyrus
Cyrus ONE User manual

Cyrus
Cyrus 6vs User manual

Cyrus
Cyrus DAC XP Signature User manual

Cyrus
Cyrus Pre-XR User manual

Cyrus
Cyrus i9-XR User manual

Cyrus
Cyrus Straight Line User manual

Cyrus
Cyrus Mono X 300 Signature User manual

Cyrus
Cyrus CLASSIC POWER User manual