D.C. Athletics Start 2 Run User manual
Start 2 Run
MANUAL

1
WARNING
Read all instruction carefully before use this product. Retain this owner’s manual for the future’s
reference:
----When using this treadmill, keep attaching the safety pull pin rope to your clothes.
----When you are running, keep your hand swinging natural, stare frontward, never look adown at your feet.
----Add the speed step by step when running.
----When emergency happens, take away the “emergent stop button” immediately.
----Leave the treadmill after the running belt stop stably.
Caution: Read the assembly instruction carefully, follow the instruction when assemble.
ATTENTION
01- Before starting any exercise program, consult with your physician or health professional.
02- Check all the bolts locked.
03- Never put the treadmill in the wetness area, or it will cause troubles.
04- We take no responsibility for any troubles or hurts due to above reasons.
05- Dress sport clothes and shoes before running.
06- Do not do exercise in 40 minutes after meal.
07- To prevent hurts, please warm up before exercise.
08- Consult with doctor before exercise if you have high blood pressure.
09- The treadmill is only used for adults.
10- Provide the olds, children and handicapped with good care, guide and supervision.
11- Do not plug anything into any parts of this equipment, or it may damage.
12- Do not connect line to the middle of cable; do not lengthen cable or change the cable plug; do not put any heavy
thing on cable or put the cable near the heat source; forbid using socket with several holes, these may cause fire
or people may be hurt by the power.
13- Cut off the power when the equipment is not used. When the power is cut off, do not pull the power line to keep
the wire unbroken.
14. Maximum weight of user: 120KGS.
15. Pulse monitor data may not be accurate, can not be used for medicine. Over-exercise may cause injury, even
death. If you have a feeling of dizziness, sickness or other abnormal symptoms, please stop training and consult a
doctor immediately.

2
IMPORTANT SAFETY PRECAUSTION
1. Plug the power cord of the treadmill directly into a dedicated grounded circuit. This product must be grounded. If it
has breakdown, grounding provides a path of least resistance for electric current to reduce the risk of electric shock.
2. Position the treadmill on a clear, level surface. Do not place the treadmill on thick carpet as it may interfere with
proper ventilation. Do not place the treadmill near water or outdoors.
3. Position treadmill so that the wall plug is visible and accessible.
4. Never start the treadmill while you are standing on the walking belt. After turning the power on and adjusting the
speed control, there may be a pause before the walking belt begins to move, always stand on the foot rails on the
sides of the frame until the belt is moving.
5.Wear appropriate clothing when exercising on the treadmill. Do not wear long, loose fitting clothing that may be
caught in the treadmill.Always wear running or aerobic shoes with rubber soles.
6. Make sure the power supply is connected and the safety lock is effective before using the treadmill. Fit one side of
the safety lock on the treadmill and clip the other side on your clothes or belt, which will enable you to pull off the
safety lock promptly in an emergency.
7.Always unplug the power cord before remove the treadmill motor cover.
8.Make sure there is no less than 2*1m space behind the treadmill.
9. Keep small children away from the treadmill during operation.
10.Always hold the handrails when initially walking or running on the treadmill, until you are comfortable with the use
of the treadmill.
11. Always attach the safety pull pin rope to your clothing when using the treadmill. If the treadmill should suddenly
increase in speed due to an electronics failure or the speed being inadvertently increased, the treadmill will come to a
sudden stop when the pull pin is disengaged from the console.
12. In case of any abnormality during the use process, please remove the safety lock immediately, grasping the
handlebar and jumping onto the two edgings, then get off the treadmill after it stops.
13. When the treadmill is not being used, the power cord should be unplugged and the safety pull pin removed.
14. Put the safety key away where can not be reached by the children. Minors must be accompanied by the adults
when using the treadmill.
15. Before starting any exercise program, consult with your physician or health professional. He or she can help
establish the exercise frequency, intensity (target heart zone) and time appropriate for your particular age and
condition. If you have any pain or tightness in your chest, an irregular heartbeat, shortness of breath, feel faint or
have any discomfort while you exercise, STOP! Consult your physician before continuing.
16. If you observe any damage or wear on the mains plug or on any section of the mains lead then please have these
3
replaced immediately by a qualified electrician –do not attempt to change or repair these yourself.
17. If the supply cord is damaged, it must be replaced by the manufacturer, its service agent or similarly qualified
persons in order to avoid a hazard.
18. Put your feet on the side rail before using the treadmill, and always attach the safety pull pin rope to your clothing.
Hold the handle bar before the running belt moving well (feel the running speed by your single foot before using it).
To avoid loss balance, please slow down the speed to the lowest or take off the safety. And hold the handle bar to
jump to the side rail when emergency or the safety key is not attached.
19. Make sure the treadmill has stopped before folding. Please don’t operate it after folding the treadmill.
ASSEMBLY STEPS
UNFOLDING MACHINE
ASSEMBLY STEP ONE:
Open the package, take out all parts and place the main frame on the flat ground.
4
UNFOLDING MACHINE
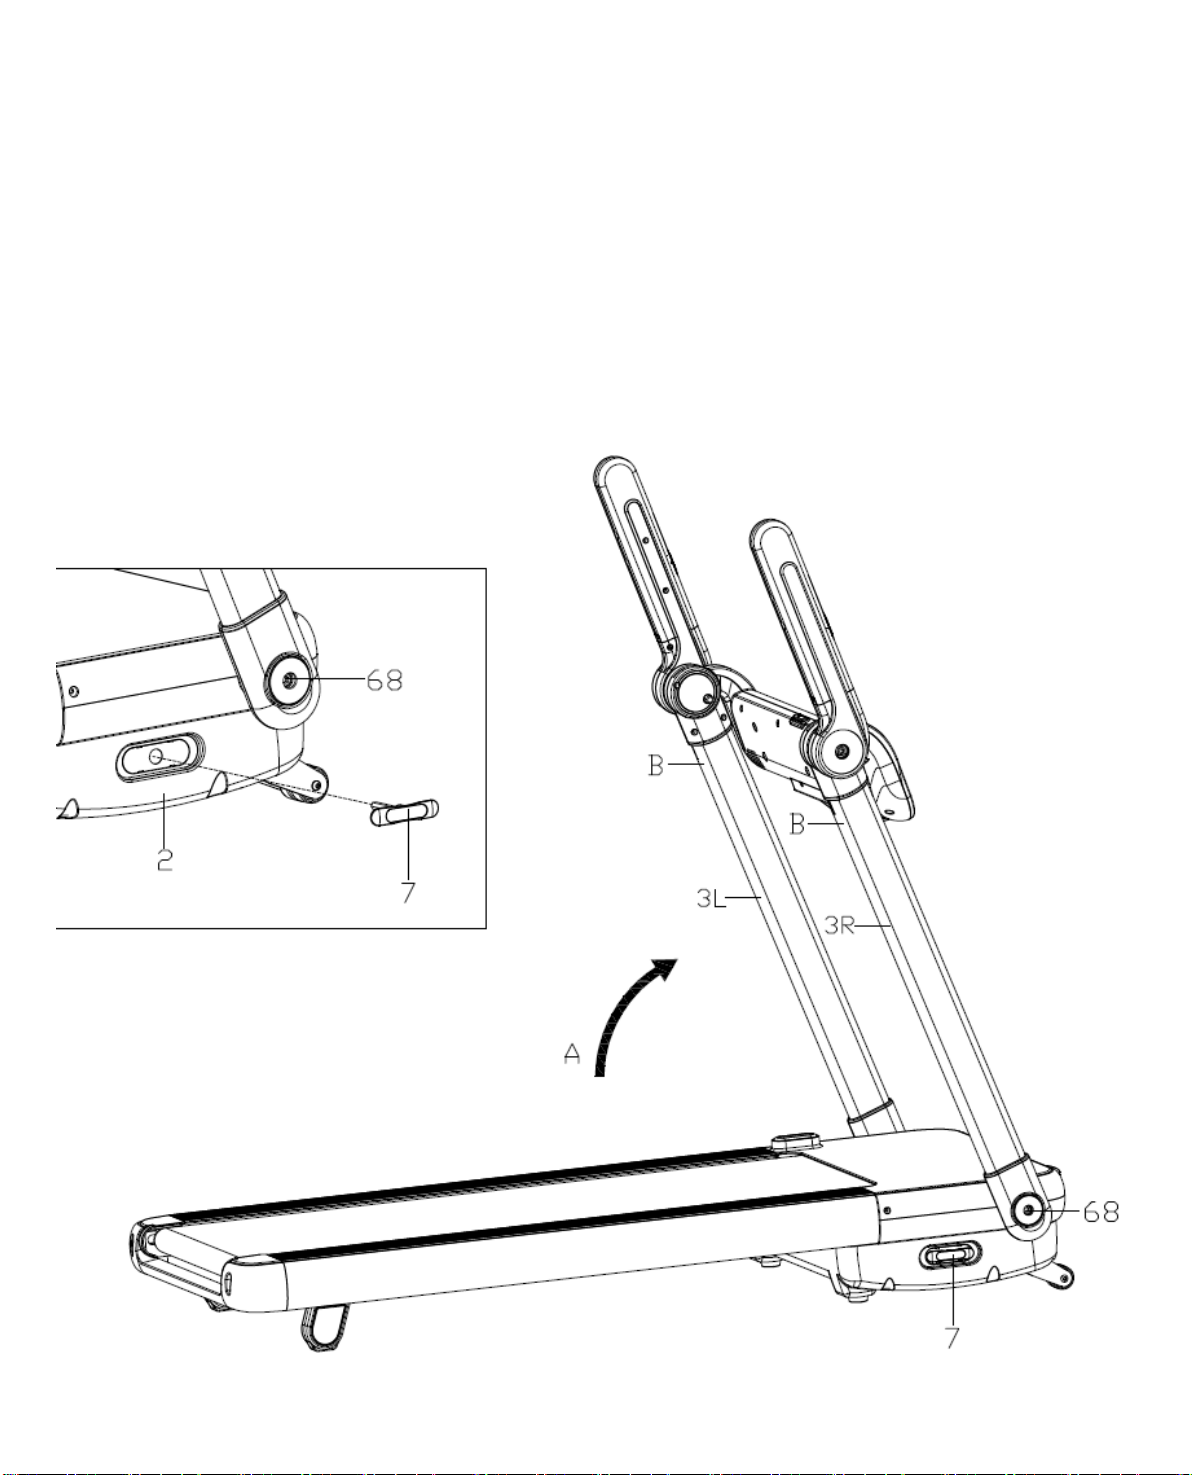
ASSEMBLY STEP TWO:
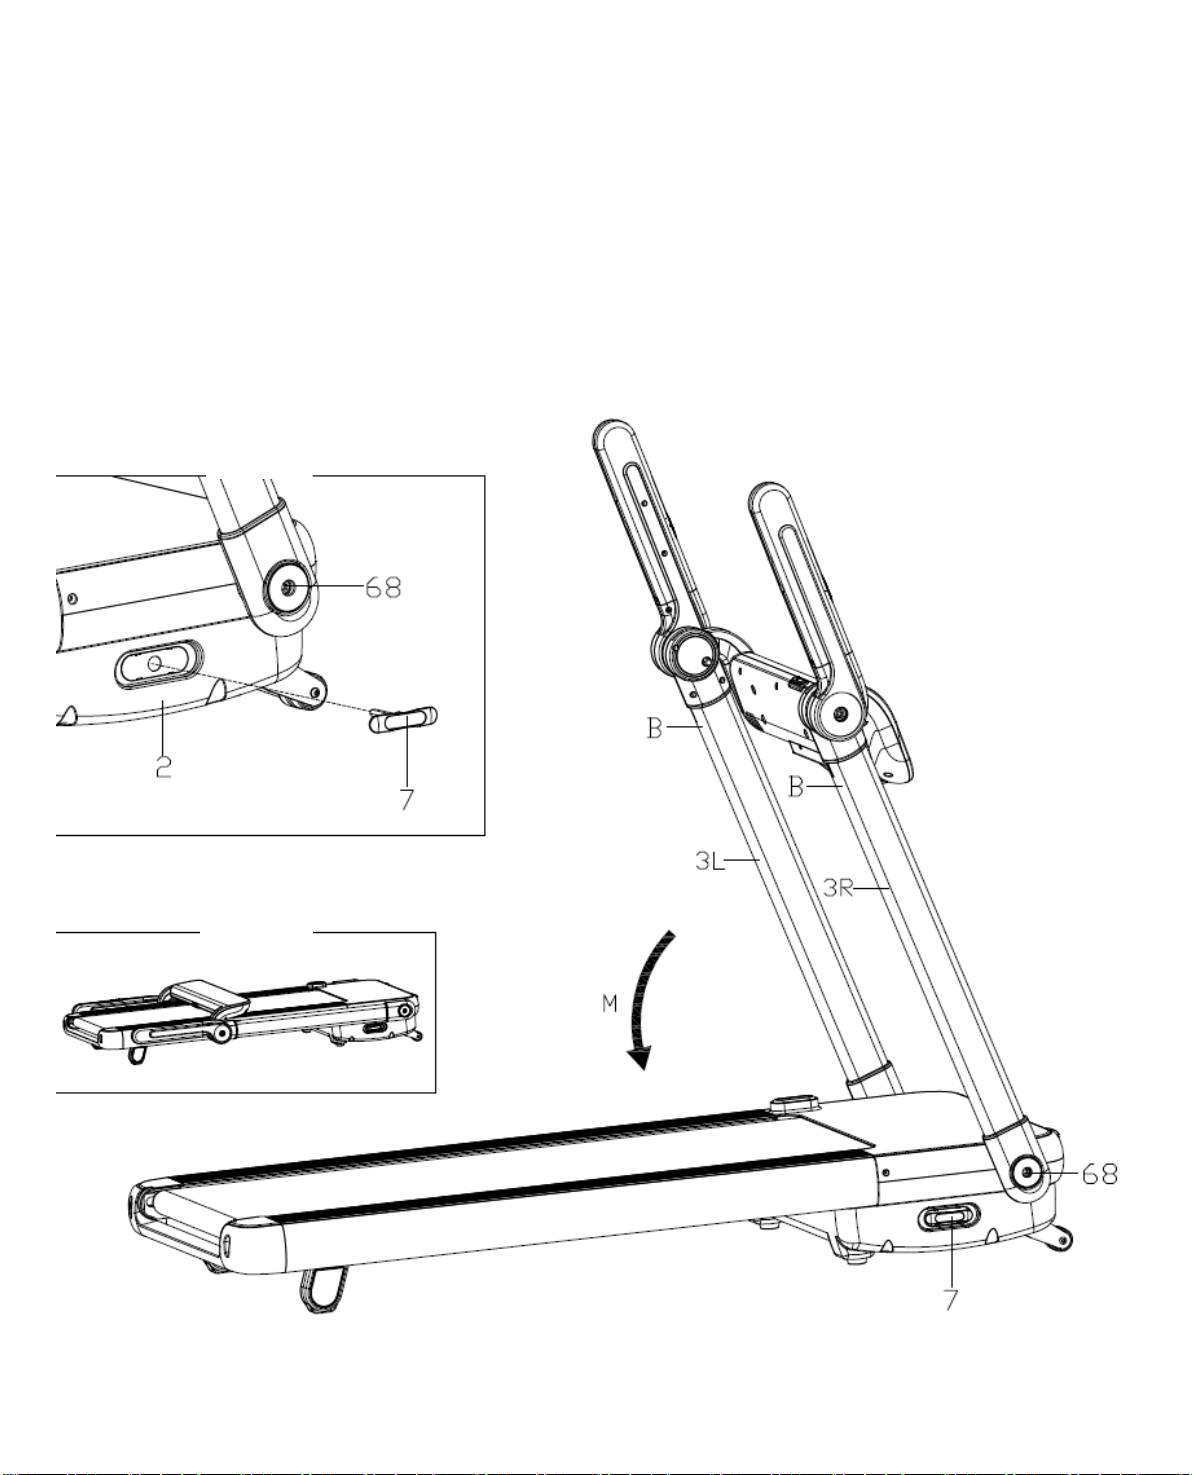
1. Take out T-Wrench (7) from main frame(2) (Figure 1 show). Then loose Hexagon socket head cap screws (68)
with T-Wrench (7) in counter-clockwise until it can't rotate any more.
2. Hold on the B with two hands and lift up the upright tubes (3L/R) in the direction of arrow A. Then lock Hexagon
socket head cap screws (68) in clockwise on both sides. Finally,put back T-Wrench (7) on main frame(2).
Note:
During the lifting and locking the upright tubes,hold the upright tubes with your hand in whole process, so
as not to fall down and hurt
1

5
UNFOLDING MACHINE
ASSEMBLY STEP THREE:
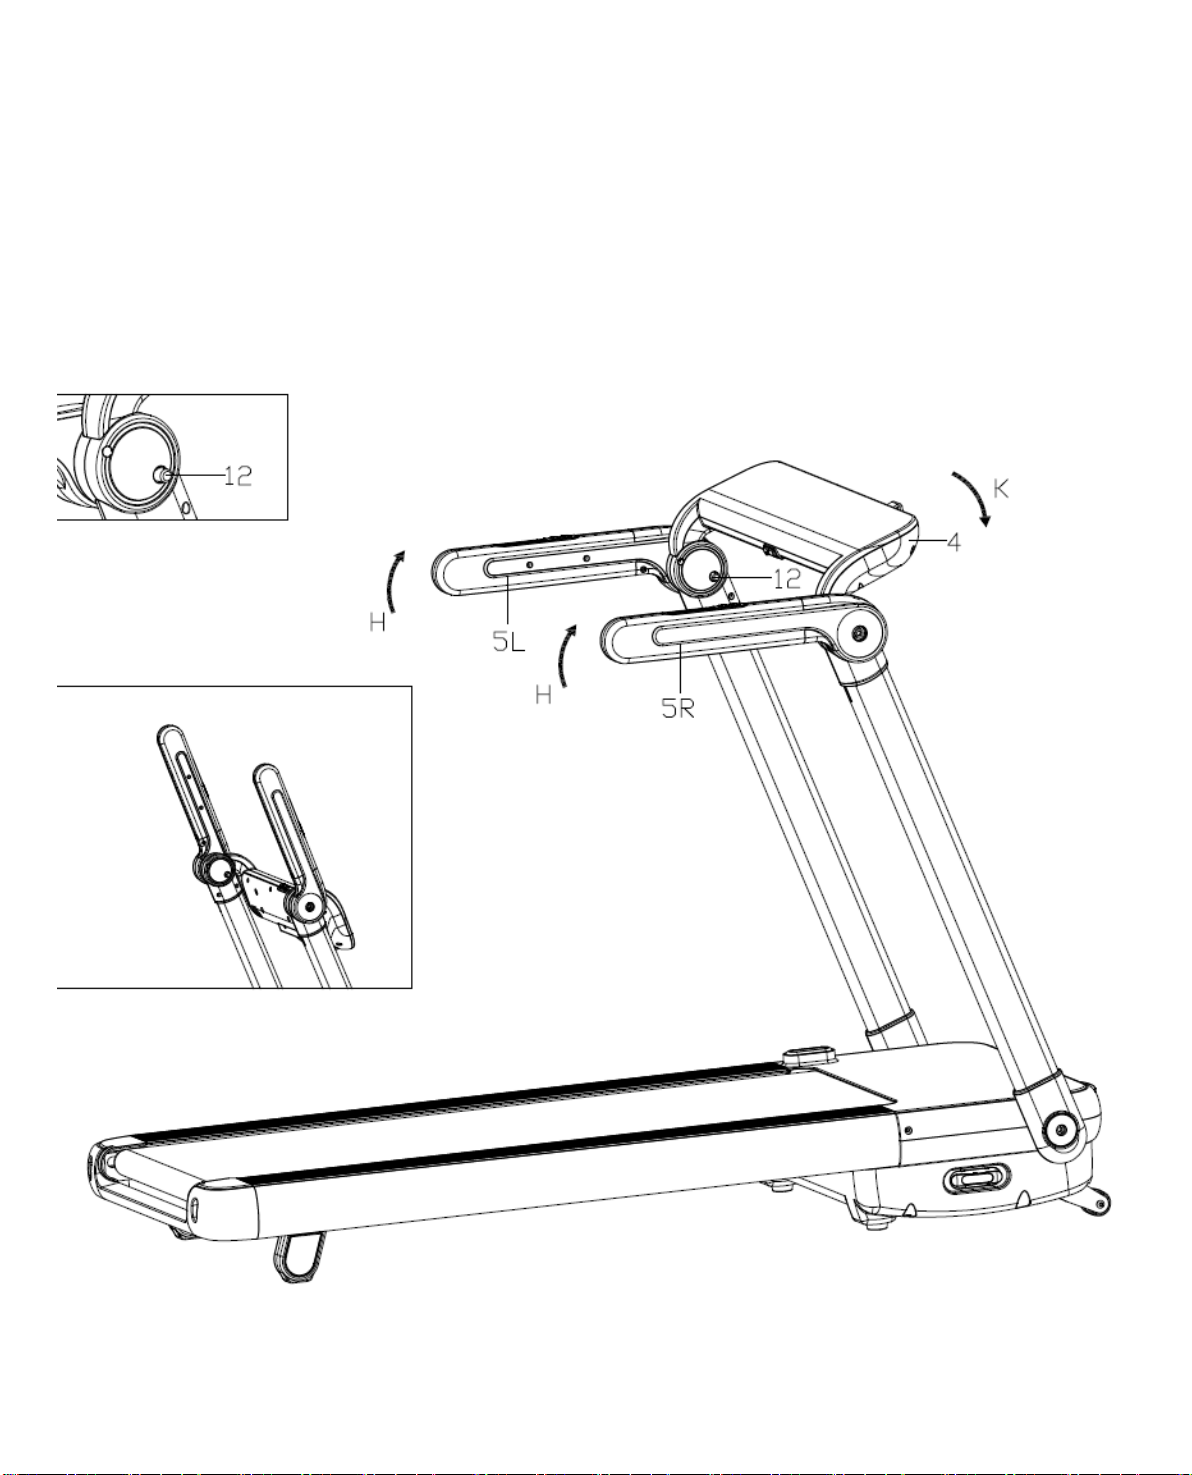
1. Turn down Handrail (5L/R) in the direction of arrow E until it can’t turn any further. (Figure 3 show)
2. Turn up Computer frame (4) in the direction of arrow D until Positioning pin (12) pop up automatically to fasten
Computer frame (4) . (Figure 2 show) If Positioning pin (12) not pop up automatically, you can turn Computer frame
(4) up and down until it pops up.
2
3
6
UNFOLDING MACHINE
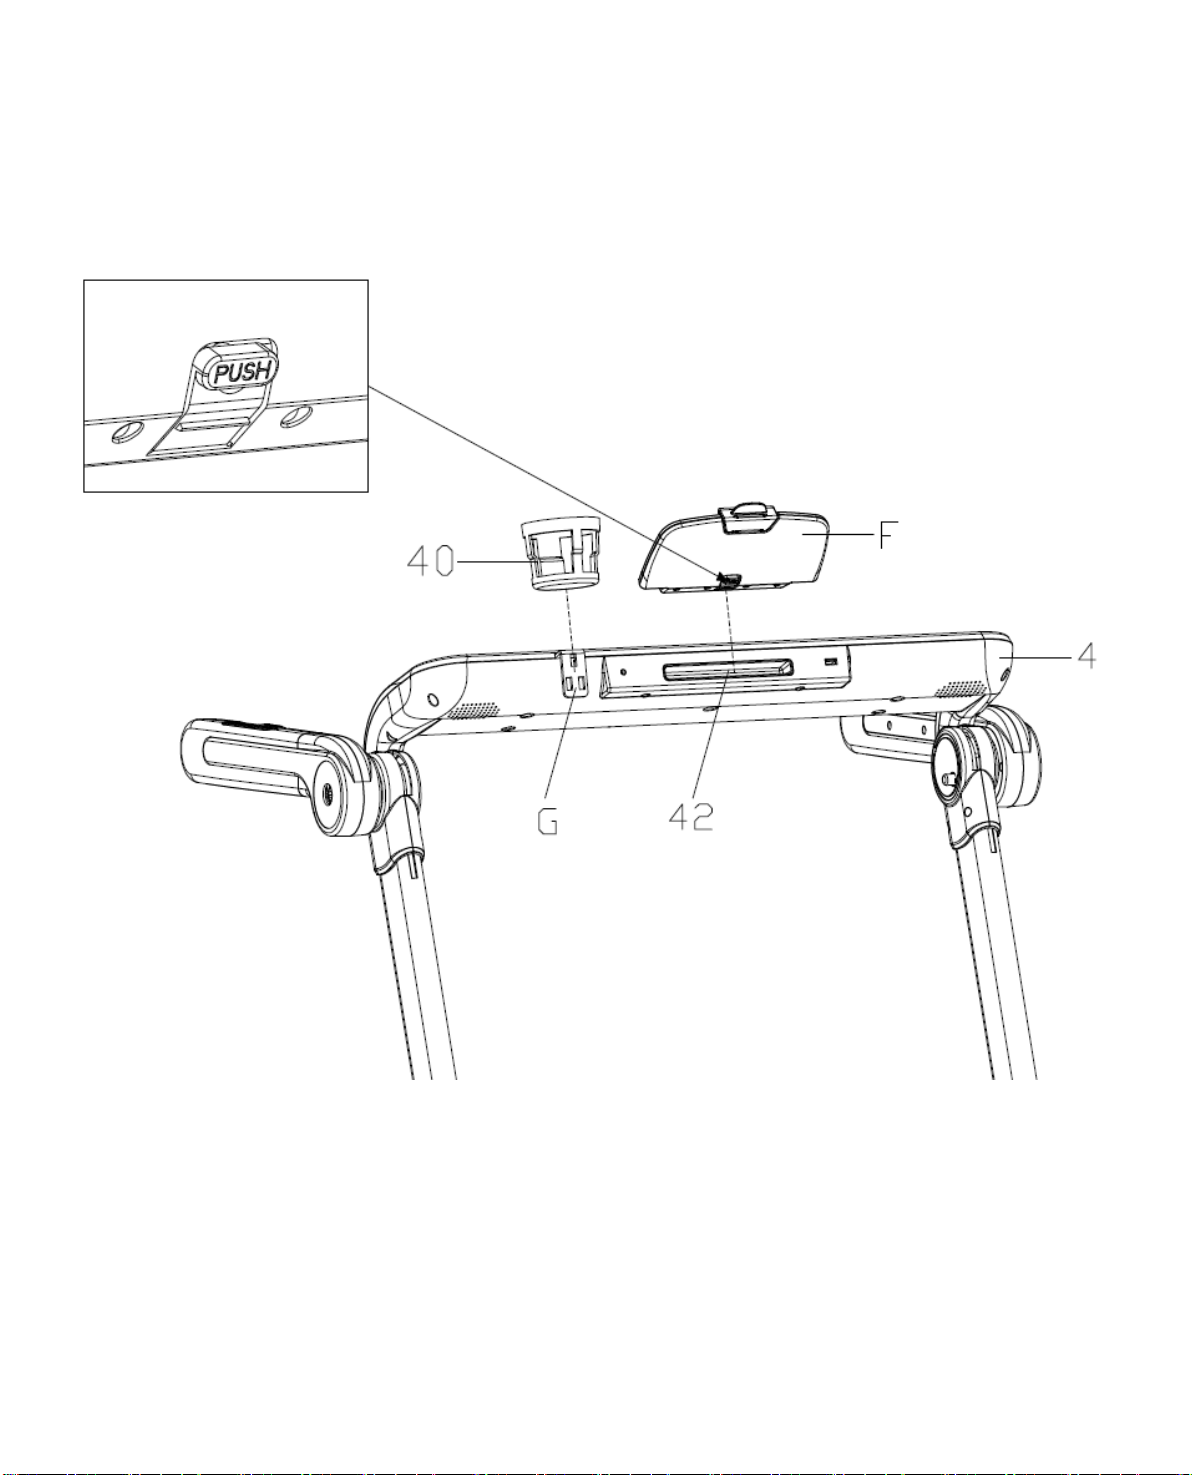
ASSEMBLY STEP FOUR:
1. Press the PUSH button on ipad holder (F), then insert ipad holder (F) to the ipad holder bracket(42).
2. Insert the water bottle holder (40)to the G of the Computer frame (4)

7
FOLDING MACHINE
ASSEMBLY STEP FIVE:
1. Press the PUSH button on ipad holder (F), then pull out ipad holder (F) from ipad holder bracket(44) and keep it
well.
2. Take off the water bottle holder(40) from the Computer frame (4)
8
FOLDING MACHINE
ASSEMBLY STEP SIX:
1. Press Positioning pin (12) and then turn Computer frame (4) in the direction of arrow G until it can’t turn any further.
(Figure 4 show)
2. Turn up Handrail (5L/R) in the direction of arrow H. (Figure 5 show)
4
5
9
FOLDING MACHINE
ASSEMBLY STEP SEVEN:
1. Take out T-Wrench (7) from main frame(2) (Figure 6 show). Then hold your hands on upright tubes and loose
Hexagon socket head cap screws (68) with T-Wrench (7) in counter-clockwise until it can't rotate any further.
2. Hold on the B with two hands and fold the upright tubes (3L/R) in the direction of arrow M (Figure 7 show). Then
lock Hexagon socket head cap screws (68) in clockwise on both sides. Finally,put back T-Wrench (7) on main
frame(2).
6
7
10
FOLDING MACHINE
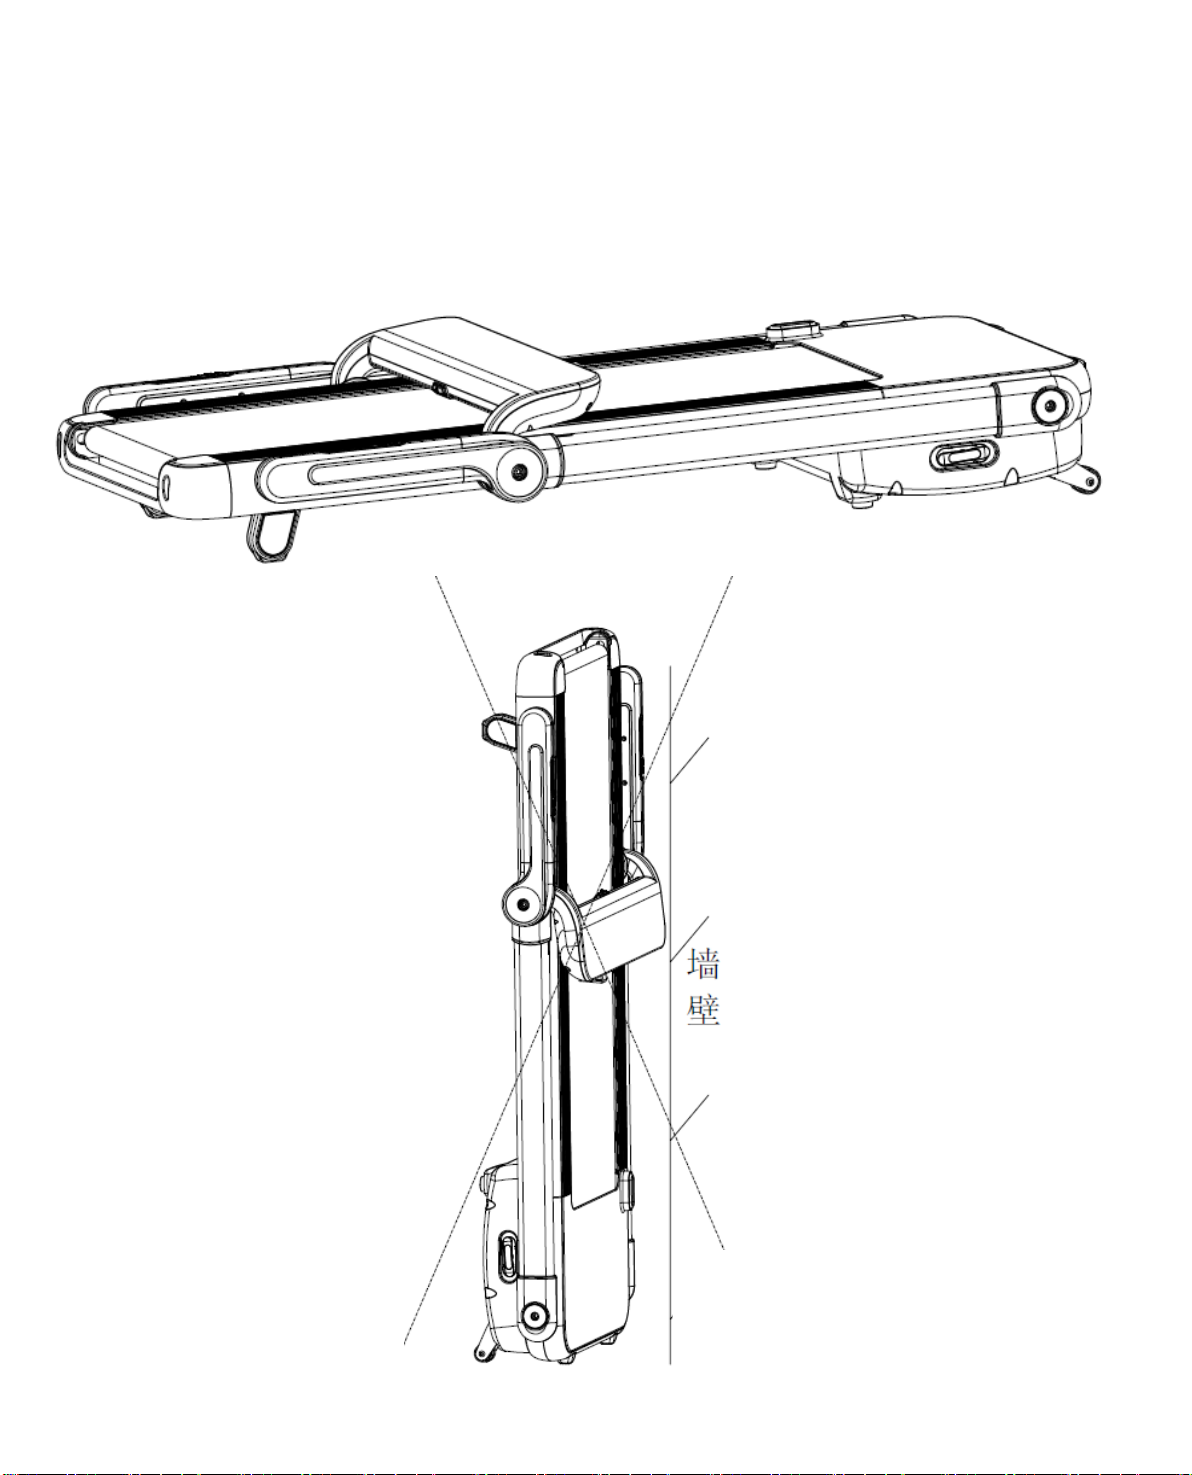
ASSEMBLY STEP EIGHT:
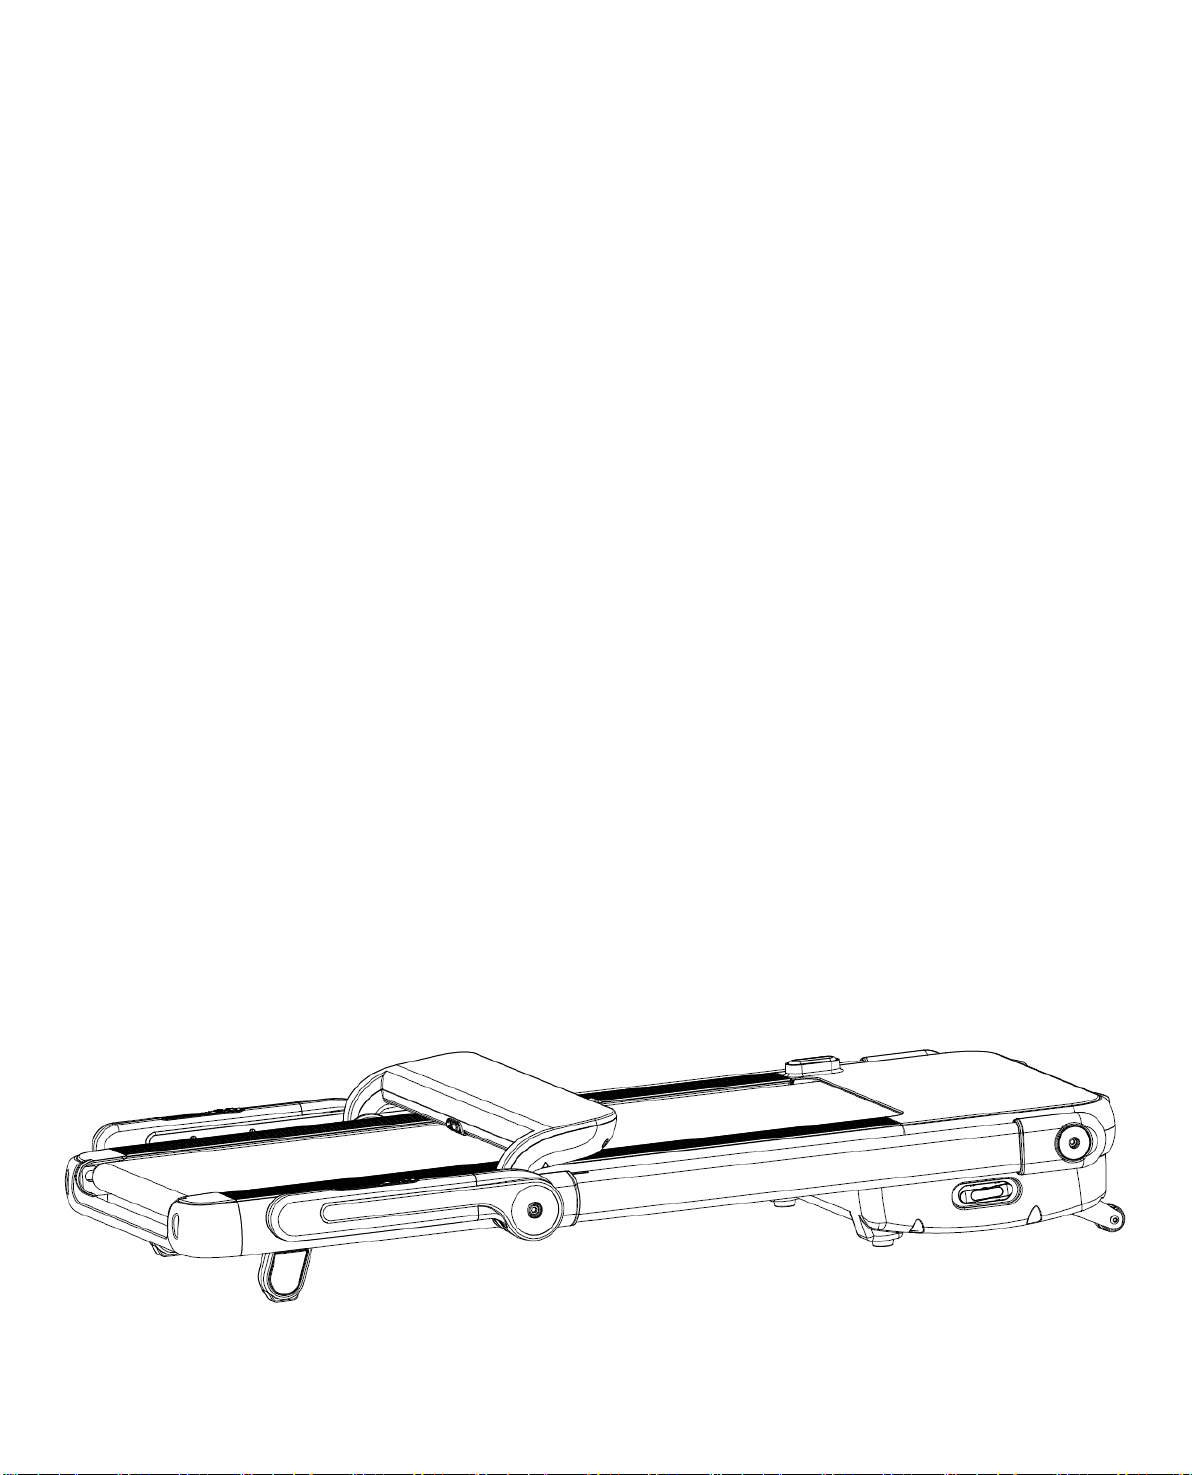
After folding, machine should store horizontally as shown in the following figure. If there are enough space for
storage, you also can push it under a desk or bed.
Note: Prohibit vertical storage.
WALL

11
GROUNDING METHODS
This product must be grounded. If it should malfunction or breakdown, grounding provides a path of least
resistance for electric current to reduce the risk of electric shock. This product is equipped with a cord
having an equipment-grounding conductor and a grounding plug. The plug must be plugged into an
appropriate outlet that is properly installed and grounded in accordance with all local codes and
ordinances.
DANGER –Improper connection of the equipment-grounding conductor can result in a risk of electric
shock. Check with a qualified electrician or serviceman if you are in doubt as to whether the product is
properly grounded. Do not modify the plug provided with the product –if it will not fit the outlet; have a
proper outlet installed by a qualified electrician. This product is for use on a nominal 220-240Volt circuit
and has a grounding plug that looks like the plug illustrated in sketch A in following figure. Make that the
product is connected to an outlet having the same configuration as the plug. No adapter should be
used with this product.
12
TECHNICAL PARAMETER
ASSEMBLY SIZE(mm)
1715x905x1280
POWER
AS ORDER
FOLDABLE SIZE(mm)
1715x905x325
MAX OUTPUT
POWER
AS ORDER
RUNNING SURFACE
SIZE(mm)
460X1300
INPUT CURRENT
AS ORDER
NET WEIGHT
67KG
SPEED RANGE
1.0-16 KM/H
MAX WEIGHT
120KG
INCLINE
0-15%
OPERATION INSTRUCTIONS
13
A. Buttons
1.1. Activation
The activation will be initiated after a three seconds count-down
1.2. Programs
14 programs, 3 customization U1-U3, HRC1-HRC3, FAT, 3 countdown models and 1 manual model
1.3. Safe Lock
1. Once the safe lock pulled off, the display will be replaced with “---” and the treadmill will stop instantly, sounding the
alarm with constant buzzing. Return the safe lock will lead to a display of “1 sec” on all areas, and the previous data will
be removed accordingly.
2. The motor will stop working once the safe lock pulled off, and the console keyboard will be disabled, too.
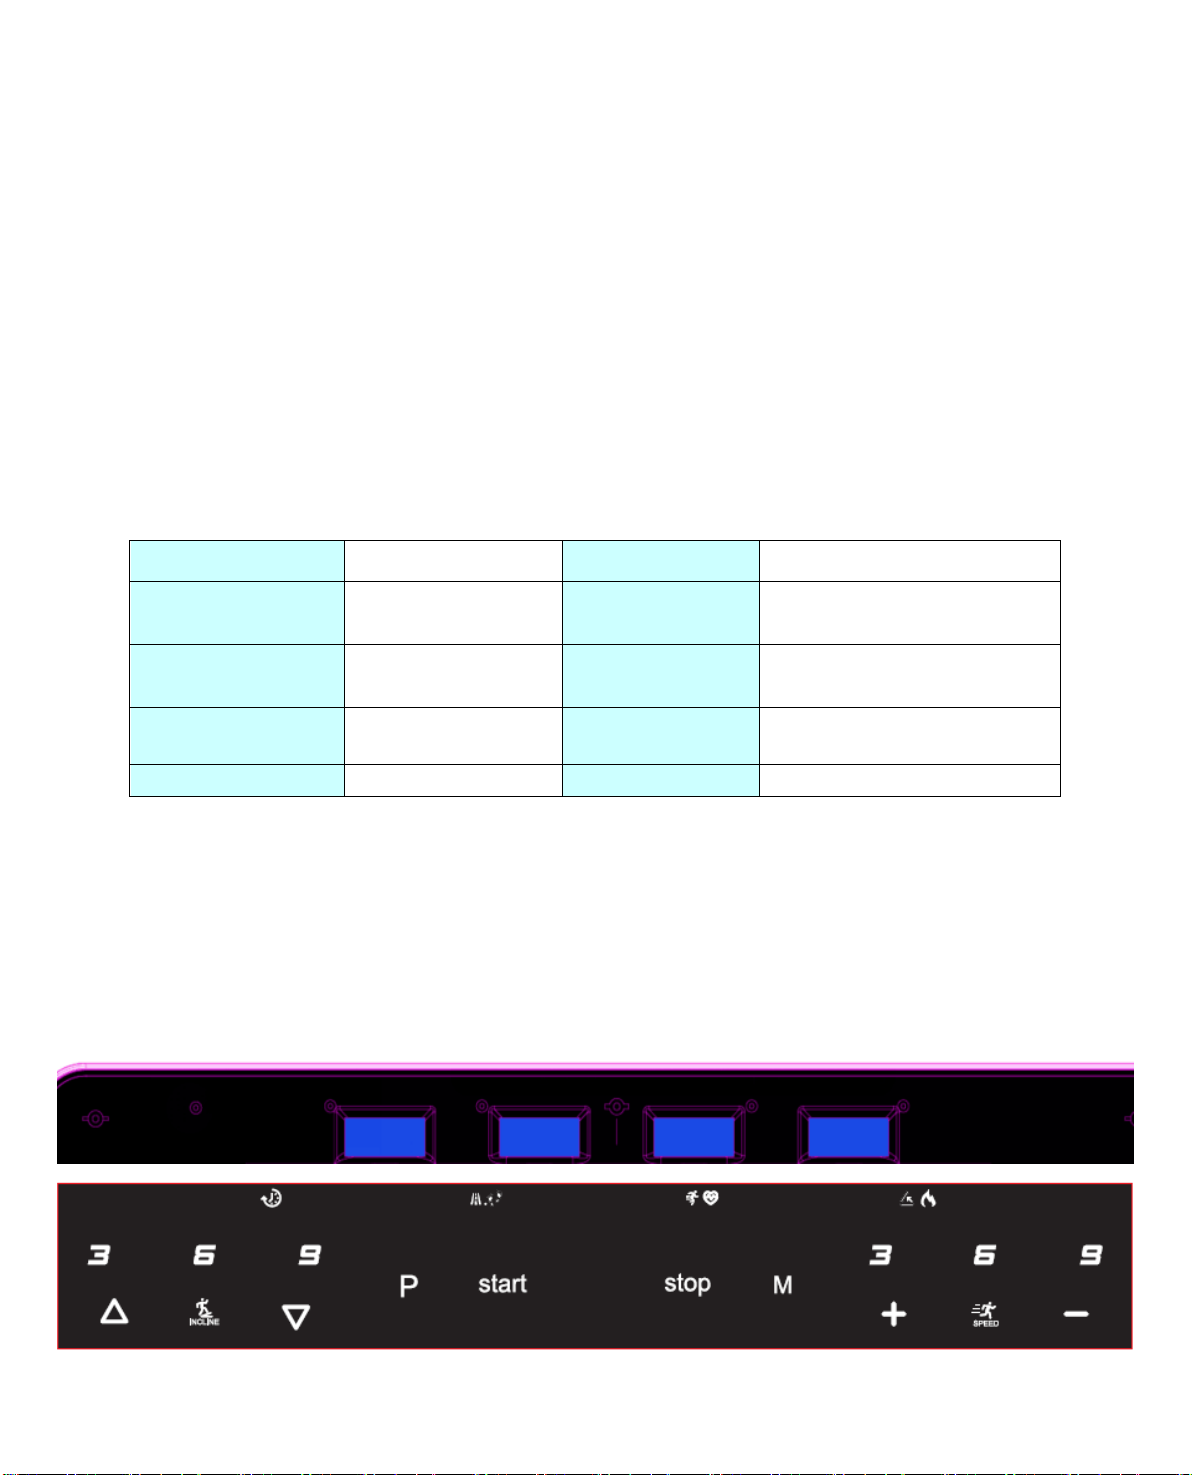
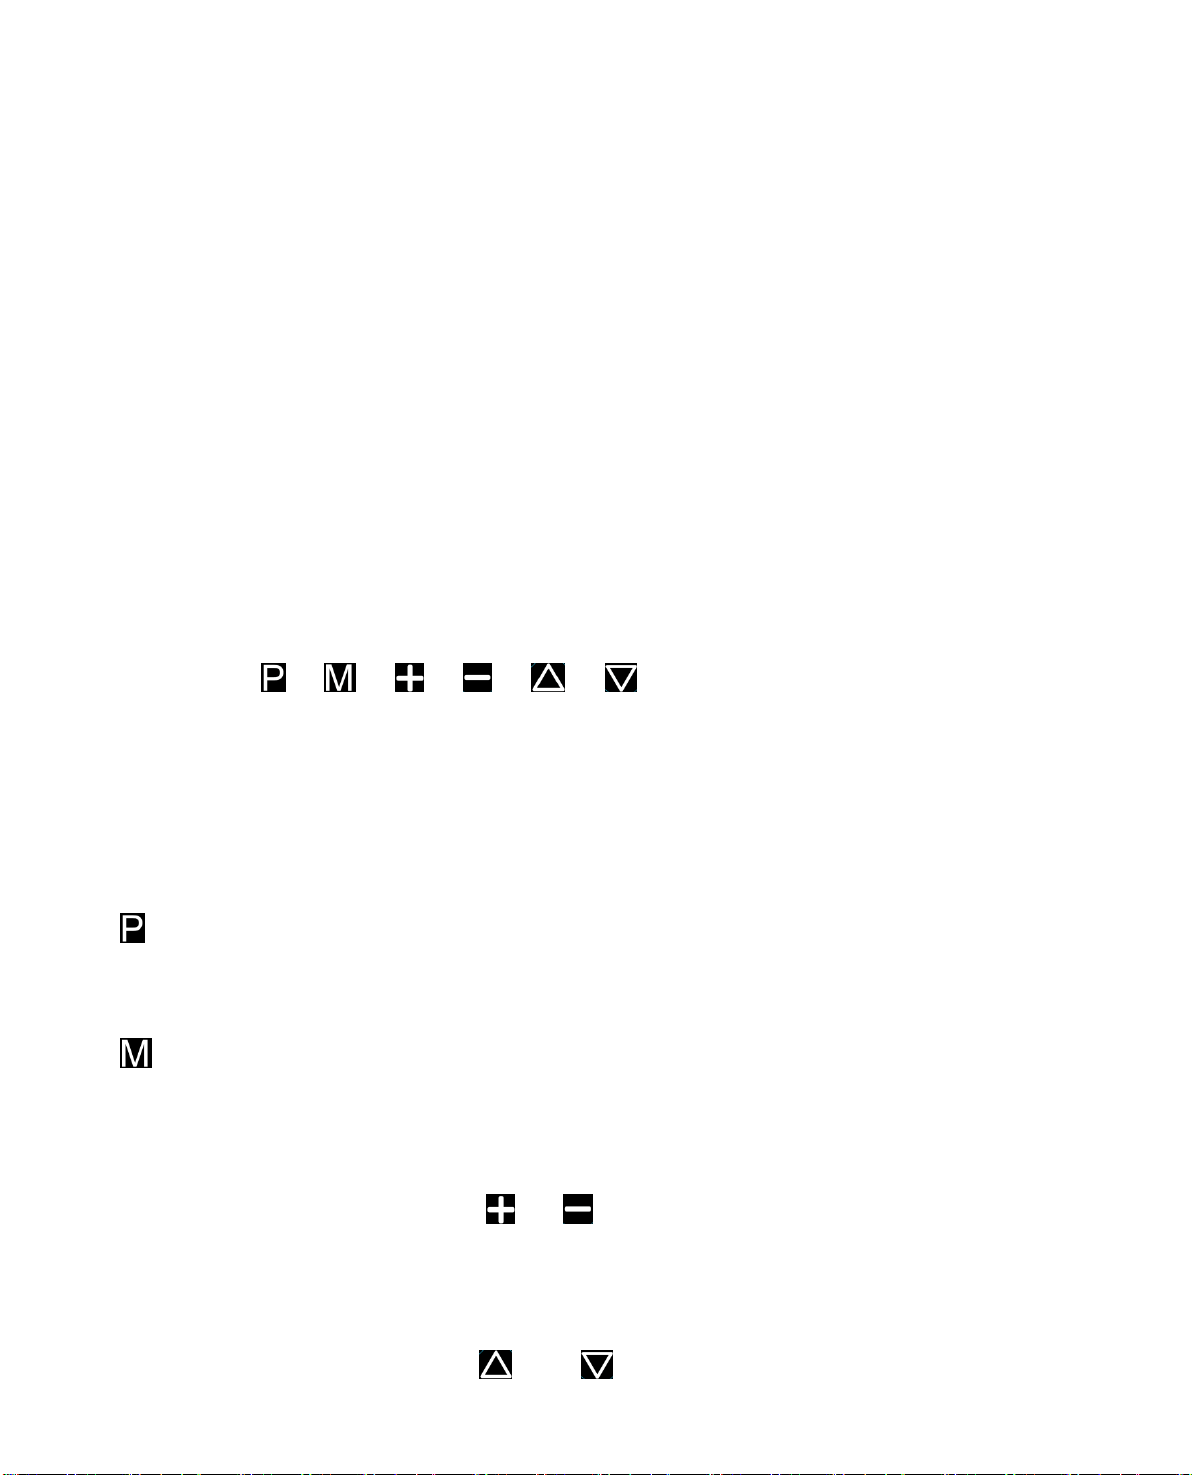
1.4. Buttons Function
“START”,“ STOP”, “ ”,“ ”,“ ”、“ ”,“ ”、“ ”。 Express Speed Control, 3km/h,6km/h, 9km/h。Express
Incline Control,3%,6%,9%.
①When stationary, the treadmill will be activated and start with the lowest speed once the user press “Start” button.
②During operation, the treadmill will stop once the user press the stop button.
③“ ”button allows users to switch programs among manual “1.0”, “p1-p14” “U1-U3” and “fat”. The manual model is the
default model starting with 1.0km/h, up to 16.0km/h.
④“ ”button allows users to switch among three different countdown models from H-1 to H-3. H-1 is time-countdown,
while H-2 and H-3 are distance and calories countdown, respectively. Users can use “+” and “-“to adjust the amount,
followed by a “Start” button to activate the treadmill once the setting is complete.
⑤During other model settings, the buttons “ ”and“ ”can be extended to increase/decrease other values. Once the
treadmill starts operating, they only function to increase/decrease running speed at a 0.1km interval, but such an interval
will enlarge exponentially once the buttons are held for more than 2 sec.
⑥During other model settings, the buttons “ ”and“ ”can be extended to increase/decrease other values. Once the

14
treadmill starts operating, they only function to increase/decrease incline level at a 1 level interval, but such an interval will
enlarge exponentially once the buttons are held for more than 2 sec.
⑦Express Speed Control: setting speed at 3km/h, 6km/h and 9km/h directly.
⑧Express Incline Control: setting incline at level 3, level 6 and level 9 directly.
1.5. Display
1.5.1.
Indicate your running time in ordinary model or time remaining in countdown model
1.5.2. :
Switch between current running distance in ordinary model and distance remaining in countdown model.
Note: Different User Weight and Usage Habits may result in differences in the number of displayed Steps from actual steps
once the speed below 3km/h or above 16km/h.
1.5.3.
Switch between current speed and heart rate.
Heart rate is for your own reference and cannot be used as a medical proof for professional use
1.5.3.
Show current calories consumption
1.5.7. Display Scale
TIME:0:00 –99.59(MIN)
DISTANCE: 0.0 –99.9(KM)
CALORIES: 0.0 –999 (KC)
SPEED: 1.0 –16.0(KM/H)

15
PULSE: 50 –200 (BPM)
INCLINE:0 –15%
B. Heart Rate Sensor
When the treadmill is powered, users can hold the sensors on both handles to gain a heart rate. To improve the accuracy,
please allow at least 30 seconds reaction time and test it when the treadmill is stationary. The value will be between 50-200 and
it only serves as a reference
C. Body Fat
Press button to enter the FAT program, and press to choose the right gender, age, height, weight, respectively. Users
can use“ ”and“ ”or“ ”and“ ”to adjust the value. In the final phase (F5), hold tight on sensors for 8 seconds and
users’ body fat will be measured.
Parameter Setting
Default
Scale
Remark
Gender(F1)
1(male)
1—2
1=male 2=female
Age(F2)
25 years old
10-99 years old
Height(F3)
170 CM
100—220 CM
Weight(F4)
70KG
20—150KG
Based onAsian standard F5:FAT≤19 -- Under weight
19<FAT ≤25 -- Normal weight
25<FAT ≤29 -- Over weight
FAT≥30 -- Obesity
D. User Customization
In addition to the 18 default programs, there are three customization programs U1, U2 and U3 for users to choose.
1、Customization Setting
When the treadmill is turned on and standby, repeatedly pressing the “ ” button to switch to U1, U2 and U3, and
then the “Time” window will start to blink and show set time. Press“ ”、“ ” 、“ ”、“ ”to adjust and
then press“ ”button to enter parameter setting. In this phase, users could adjust speed or incline with“ ”、“ ”
or “ ”、“ ”to set specific speed or incline level for up to 20 periods. Press “ ”by the end of each phase to

16
proceed to next periods. The setting will be automatically saved, and accidents such as a power outage will not remove
the setting.
2、Customization selection and start
Pressing “ ”button repeatedly until U1, U2 and U3, then users can set time duration and press“start”.
E. Parameter setting in the countdown models
The default time countdown setting starts with 30:00 min, ranging from 5 min to 90 min with a 1 min interval.
The default calories countdown starts with 50 calories, ranging from 20 to 990 with a 10 calories interval.
The default distance countdown starts with 1 km, ranging from 1 to 99 km with a 1 km interval.
The sequence is manual, time, distance and calories.
F. Others
1、When the countdown model expires, the screen will display “END” and keep sounding warning signals till the treadmill
comes to a complete stop. Then it will return to manual model.
2、When setting parameters, adding a value beyond the set range will automatically recycle to other end. E.g.: pressing
“ ”when it is already 99 min will automatically jump back to 5 min. User can use “ ”、“ ” to adjust.
3、Users can only count-down one of the time, calories and distance setting; the rest two will be displayed in an incremental
manner.
4、The calories consumption is based on a 70.3 kcal/km standard.
5、Speed acceleration and deceleration interval is 0.5 km/s
6、MP3 audio output could be amplified when accessed properly from the side.
7、KM/Miles Switch. Pulling off safe lock and pressing P and M button simultaneously for 3 seconds, users shall hear a
“beep” and the screen will display the maximum speed for both units.
8、If not set, the value will automatically amass till maximum and restart again; in manual model, when time exceeding 99:59
the treadmill will automatically power down.

17
G. Attachment
Each program will be divided into 20 periods and each period is comprised of equal amount of time. Below is the 14 program’s
work chart
Time
Program
Set time/20 =specific time for each period
1
2
3
4
5
6
7
8
9
1
0
1
1
1
2
1
3
1
4
1
5
1
6
1
7
1
8
1
9
2
0
P01
SPEED
2
3
3
4
5
3
4
5
5
3
4
5
4
4
4
2
3
3
5
3
INCLINE
1
1
2
2
2
3
3
3
2
2
1
2
2
1
1
3
3
2
2
2
P02
SPEED
2
4
4
5
6
4
6
6
6
4
5
6
4
4
4
2
2
5
4
2
INCLINE
1
2
2
2
2
3
3
2
2
2
2
2
3
3
3
4
4
3
2
2
P03
SPEED
2
4
4
6
6
4
7
7
7
4
7
7
4
4
4
2
4
5
3
2
INCLINE
2
3
3
2
2
3
3
3
2
2
2
2
4
4
4
6
6
3
2
2
P04
SPEED
3
5
5
6
7
7
5
7
7
8
8
5
9
5
5
6
6
4
4
3
INCLINE
2
3
3
2
2
3
3
3
2
2
2
2
4
4
4
6
6
3
2
2
P05
SPEED
2
4
4
5
6
7
7
5
6
7
8
8
5
4
3
3
6
5
4
2
INCLINE
3
3
3
4
4
5
5
5
4
4
4
4
5
5
3
3
3
2
2
2
P06
SPEED
2
4
4
4
5
6
8
8
6
7
8
8
6
4
4
2
5
4
3
2
INCLINE
3
5
5
5
4
4
4
3
3
3
3
4
4
4
3
3
3
4
3
2
P07
SPEED
2
3
3
3
4
5
3
4
5
3
4
5
3
3
3
6
6
5
3
3
INCLINE
4
4
4
4
3
3
6
6
6
7
7
8
8
9
9
6
6
5
4
4
P08
SPEED
2
3
3
6
7
7
4
6
7
4
6
7
4
4
4
2
3
4
4
2
INCLINE
4
5
5
5
6
6
6
7
8
9
9
9
10
10
10
12
12
8
6
3
P09
SPEED
2
4
4
7
7
4
7
8
4
8
9
9
4
4
4
5
6
3
3
2
INCLINE
5
5
5
6
6
6
4
4
6
6
5
5
8
8
9
9
9
7
4
2
P10
SPEED
2
4
5
6
7
5
4
6
8
8
6
6
5
4
4
2
4
4
3
3
INCLINE
5
6
6
6
7
5
8
8
4
4
4
5
5
8
8
10
10
8
6
3
P11
SPEED
2
5
8
10
7
7
10
10
7
7
10
10
5
5
9
9
5
5
4
3
INCLINE
4
5
3
2
6
6
2
2
2
2
2
4
5
6
3
2
5
5
2
0
P12
SPEED
3
4
9
9
5
9
5
8
5
9
7
5
5
7
9
9
5
7
6
3
INCLINE
1
2
3
2
3
5
5
0
0
2
3
5
7
3
3
5
6
5
3
3
P13
SPEED
3
6
7
5
9
9
7
5
5
7
9
5
8
5
9
5
9
9
4
3
INCLINE
3
3
5
6
5
3
3
7
5
3
2
0
0
5
5
3
2
3
2
1
P14
SPEED
2
2
4
5
6
5
4
3
2
1
2
3
4
5
6
5
4
3
2
1
INCLINE
4
4
4
4
3
3
6
6
6
7
7
8
8
9
9
6
6
5
4
4
H. HRC Function (optional)
HRC1 speed limit (Max-4.0km/h), HRC2 speed limit (max-2.0km/h), HRC3 Max.
1. HRC setting: after repeatedly pressing P button to get to HRC, press M to advance to the next setting, adjust speed or
inclination accordingly.
A: age setting:13-80, default 30

18
B: target heart rate: (220 minus age)*0.6
C: target heart rate is changeable, ranging from 0.45 to 0.75 (220 minus age)
D: maximum heart rate: (220 minus age)
2.Speed
A: change sequence, HRC detects heart rate every 30 sec
B: If the user’s heart rate is lower than target heart rate by 30 times/min, then speed increases by 2 km/h
C: if such a discrepancy is within 1-29 times/min, then speed increases by 1 km/h
D: Vice versa, if the user’s heart rate is higher than target heart rate, the speed decreases and the same rule applies
3. During the following circumstances, the treadmill will run at 1km/h for 15 sec and then shut down automatically; in the
15 sec, the treadmill will beep for each second elapsed
A: No heart rate detected for more than one minute
B: Heart rate exceeds (220 minus age)
I. MP3/USB/Bluetooth(optional)
MP3 Function: The console can play music when connected to MP3 or other audio devices after power
on. The volume control of sound is on the audio. Please pay attention to the volume
control of sound so as not to affect the quality of sound and the built-in audio circuit.
USB Function: Insert the USB disk containing mp3 audio files into the USB port of the treadmill when
power on, then it can play the music of the USB disk
Bluetooth Function: After the treadmill is powered up, turn on the Bluetooth function of the mobile
phone to connect with the Bluetooth on treadmill, and then it can play the music from the
phone.
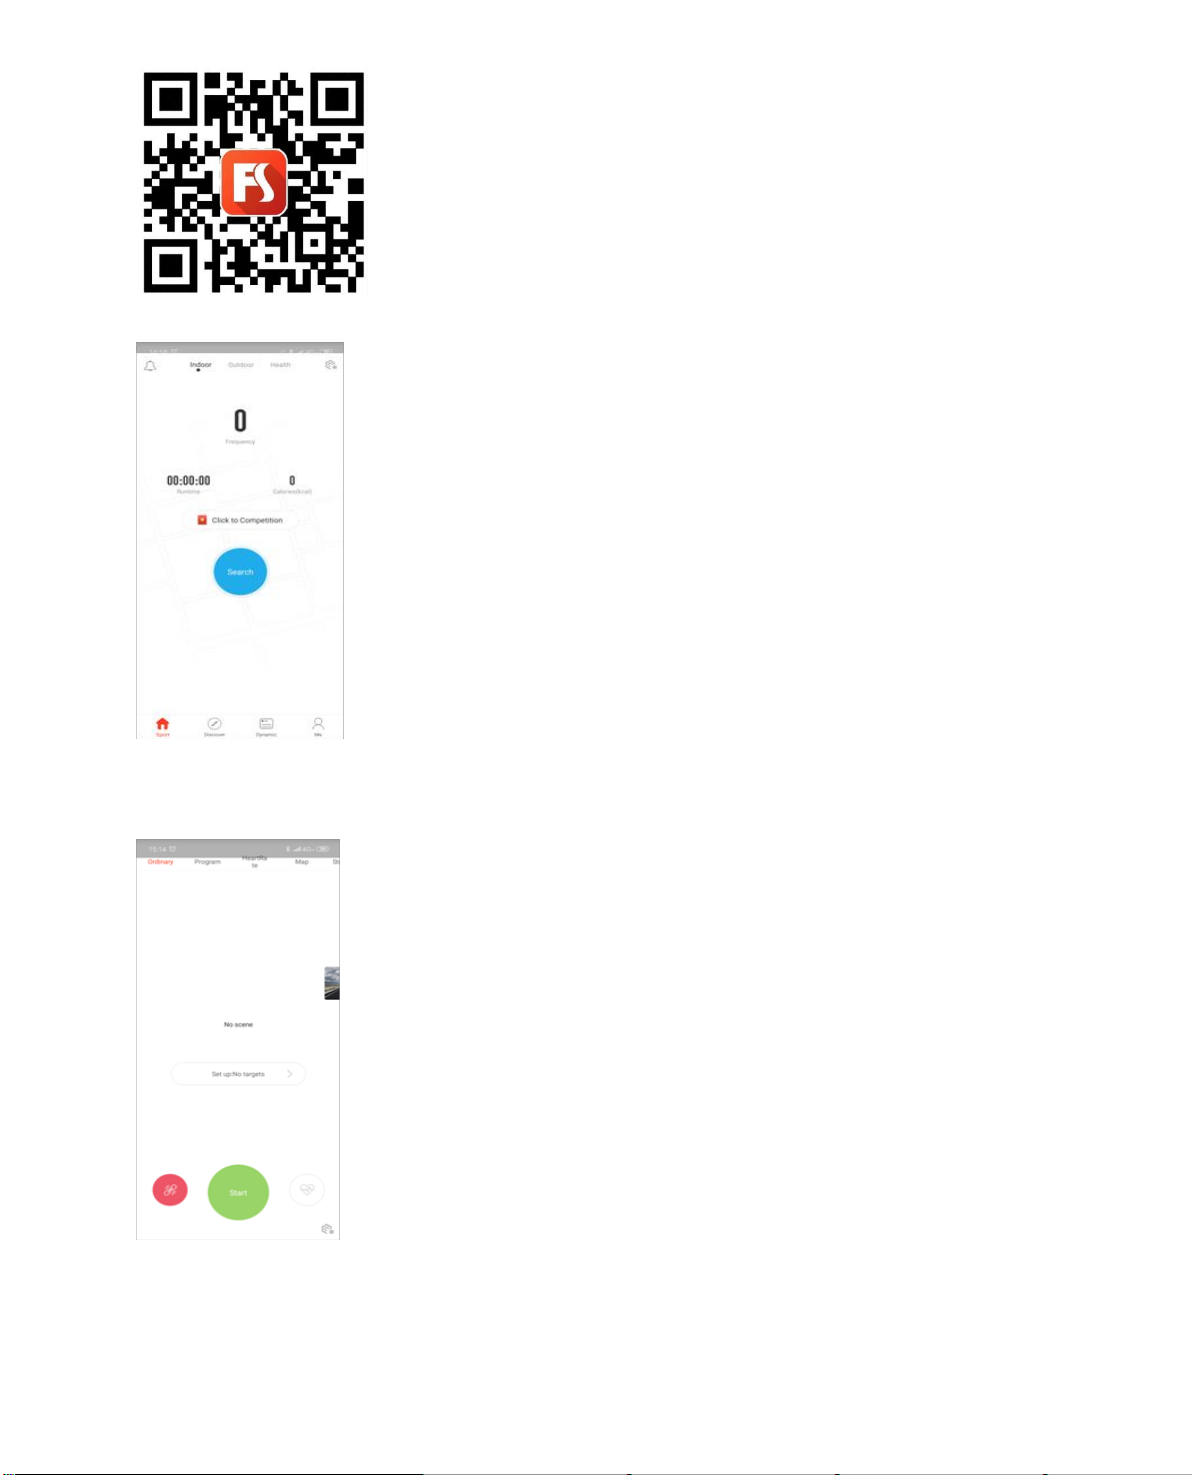
J. APP Bluetooth(optional)
Search for "sports show" in Application Store to download and install, or scan QR code to download.
Register and log in the account to use. Here's how to use the app to connect treadmill.
19
1. Open “sport show”APP, Search for devices
2. Connect to your devices
3. Choose Mode and Scene(or Quick Start)
4. Click Start
Music bluetooth: when the machine power on, open the mobile phone bluetooth, search and connect the signal from
treadmill, The music from mobile phone can be played through treadmill.
Table of contents
Other D.C. Athletics Treadmill manuals


