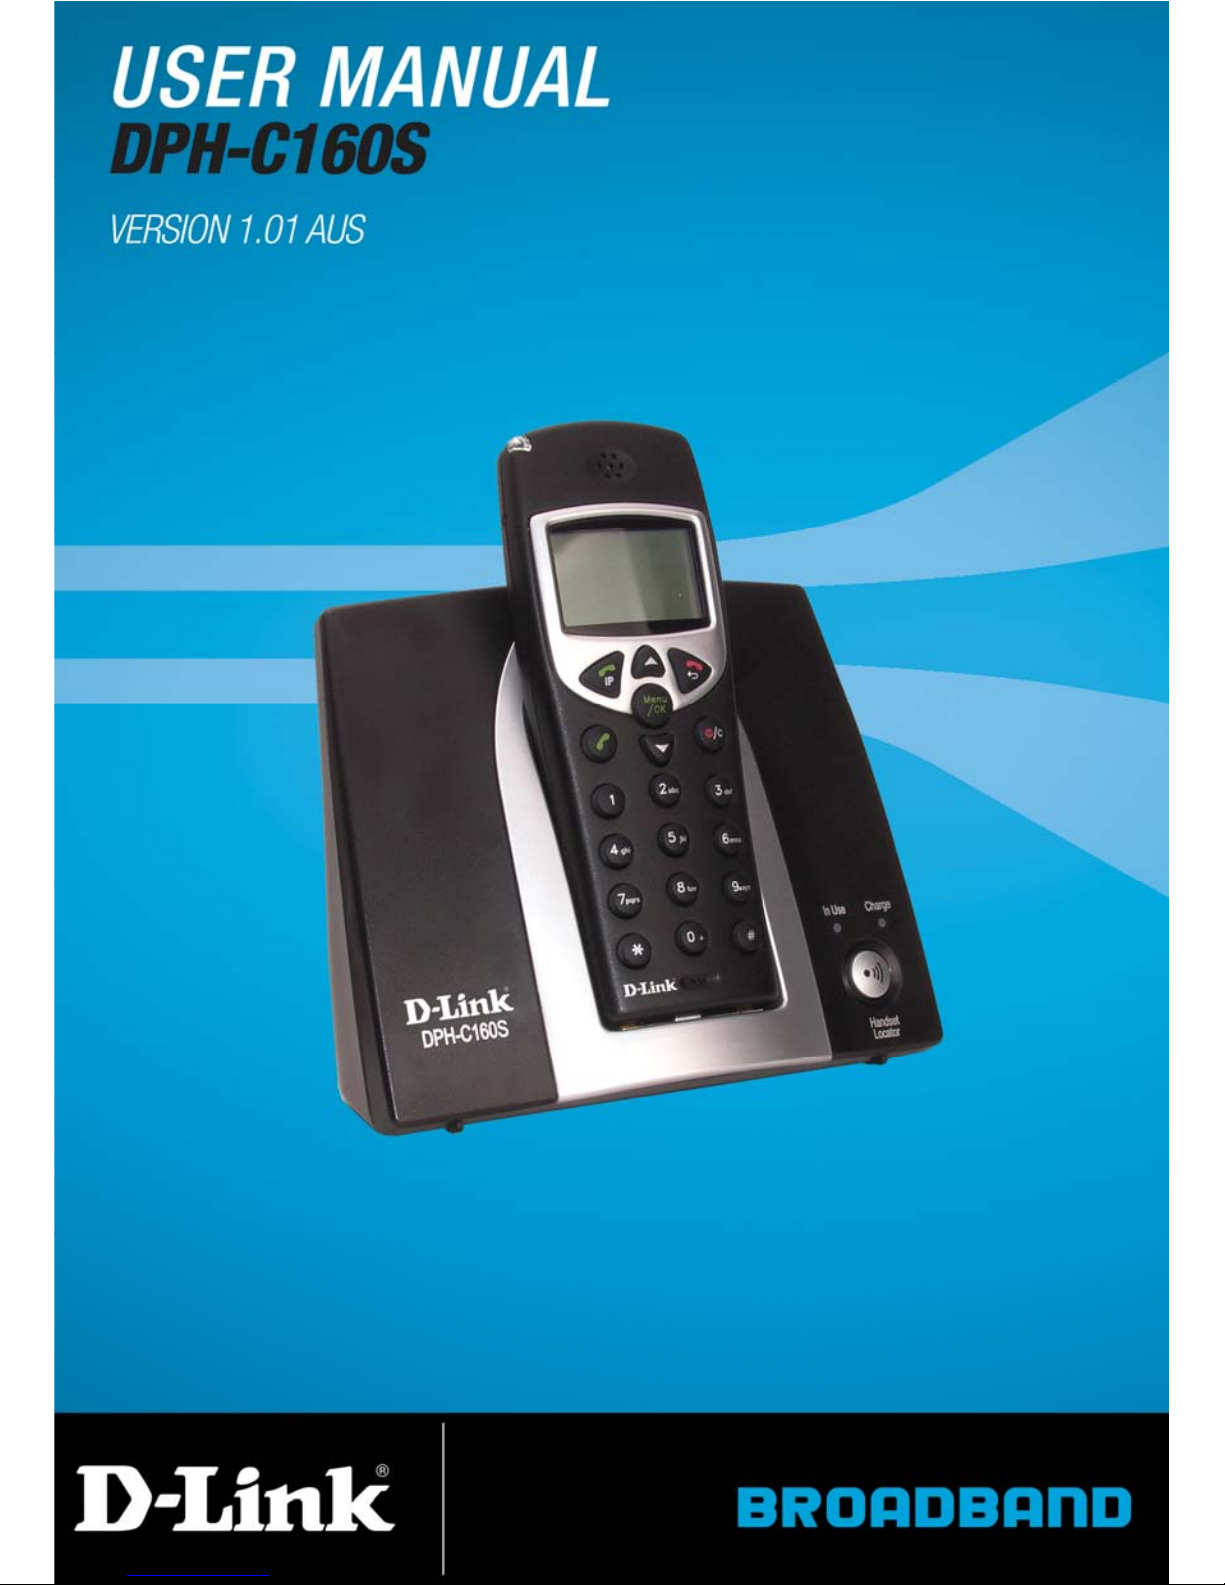
DPH-C160S – DECT Cordless VoIP Phone – User Manual
Contents
CONTENTS............................................................................................ 2
PACKAGE DETAILS................................................................................ 4
CONTENTS OF PACKAGE ............................................................................ 4
SYSTEM REQUIREMENTS FOR CONFIGURATION ................................................... 4
PRODUCT FEATURES............................................................................. 5
DECT FEATURES.................................................................................... 5
INTRODUCTION.................................................................................... 5
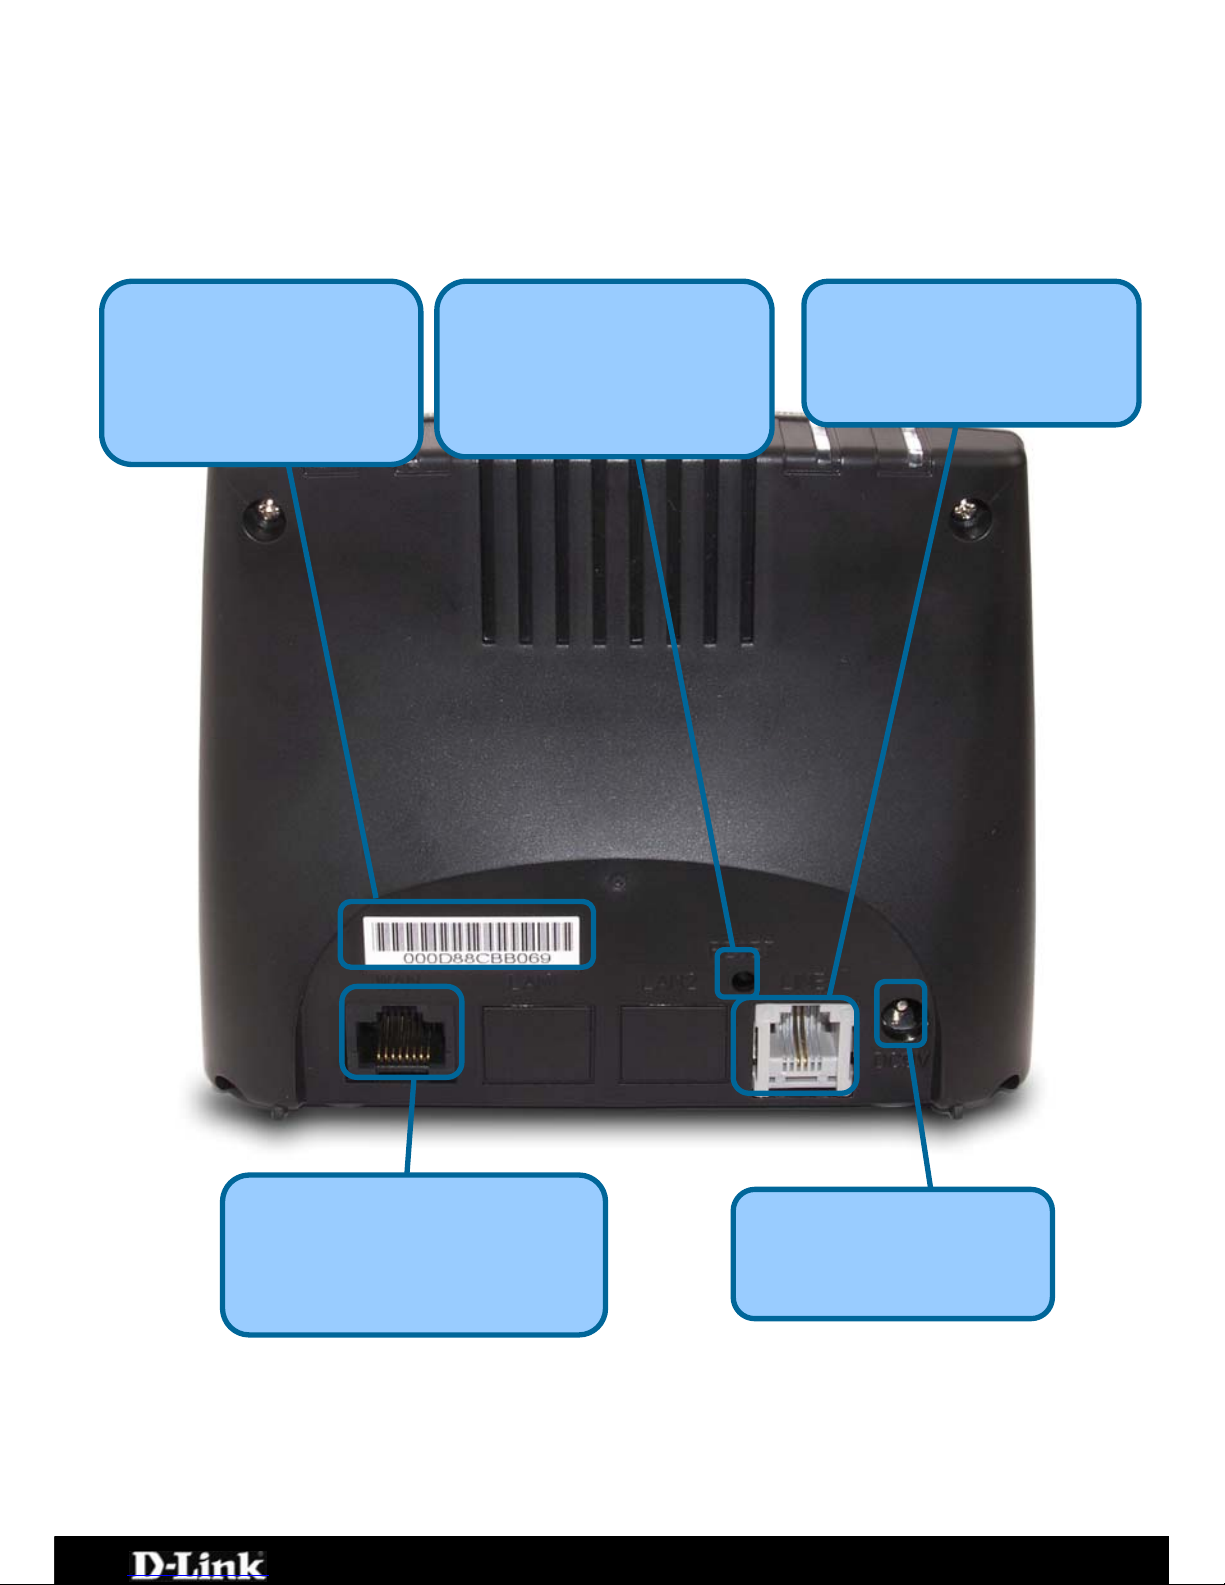
BASE UNIT CONNECTIONS.................................................................... 6
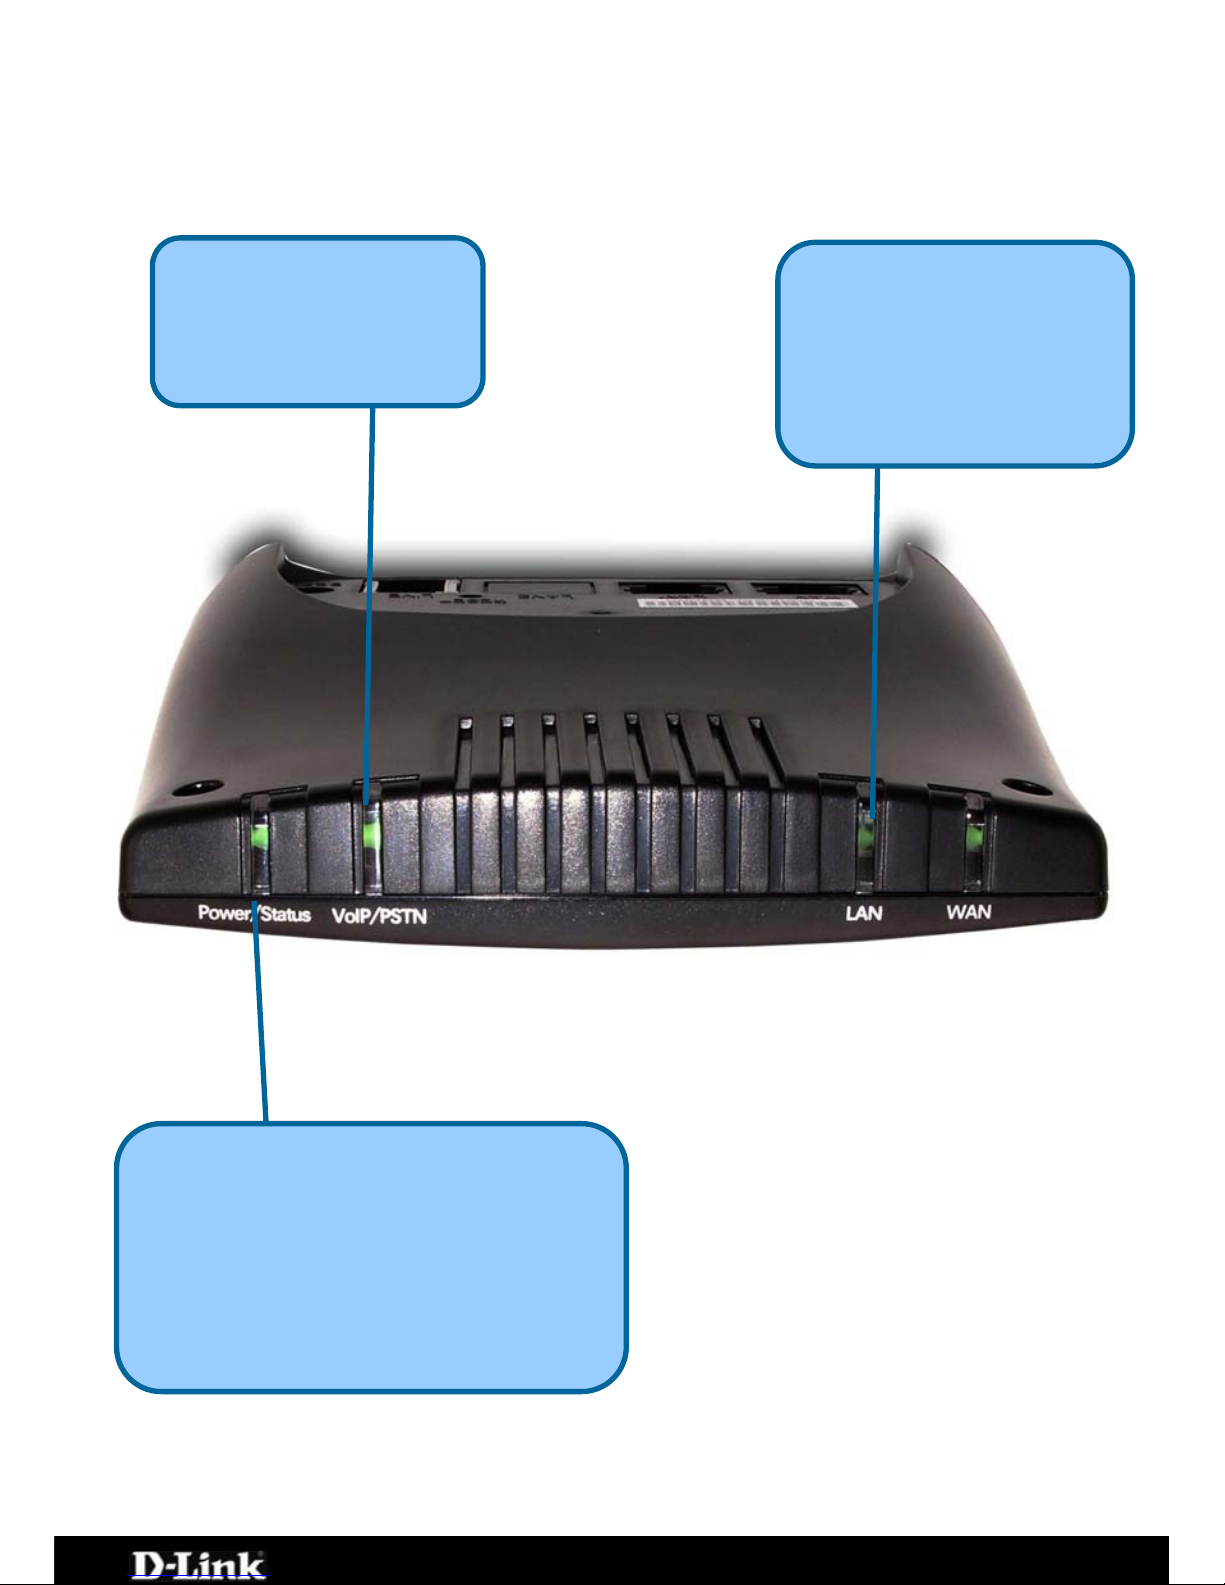
BASE UNIT LEDS................................................................................... 7
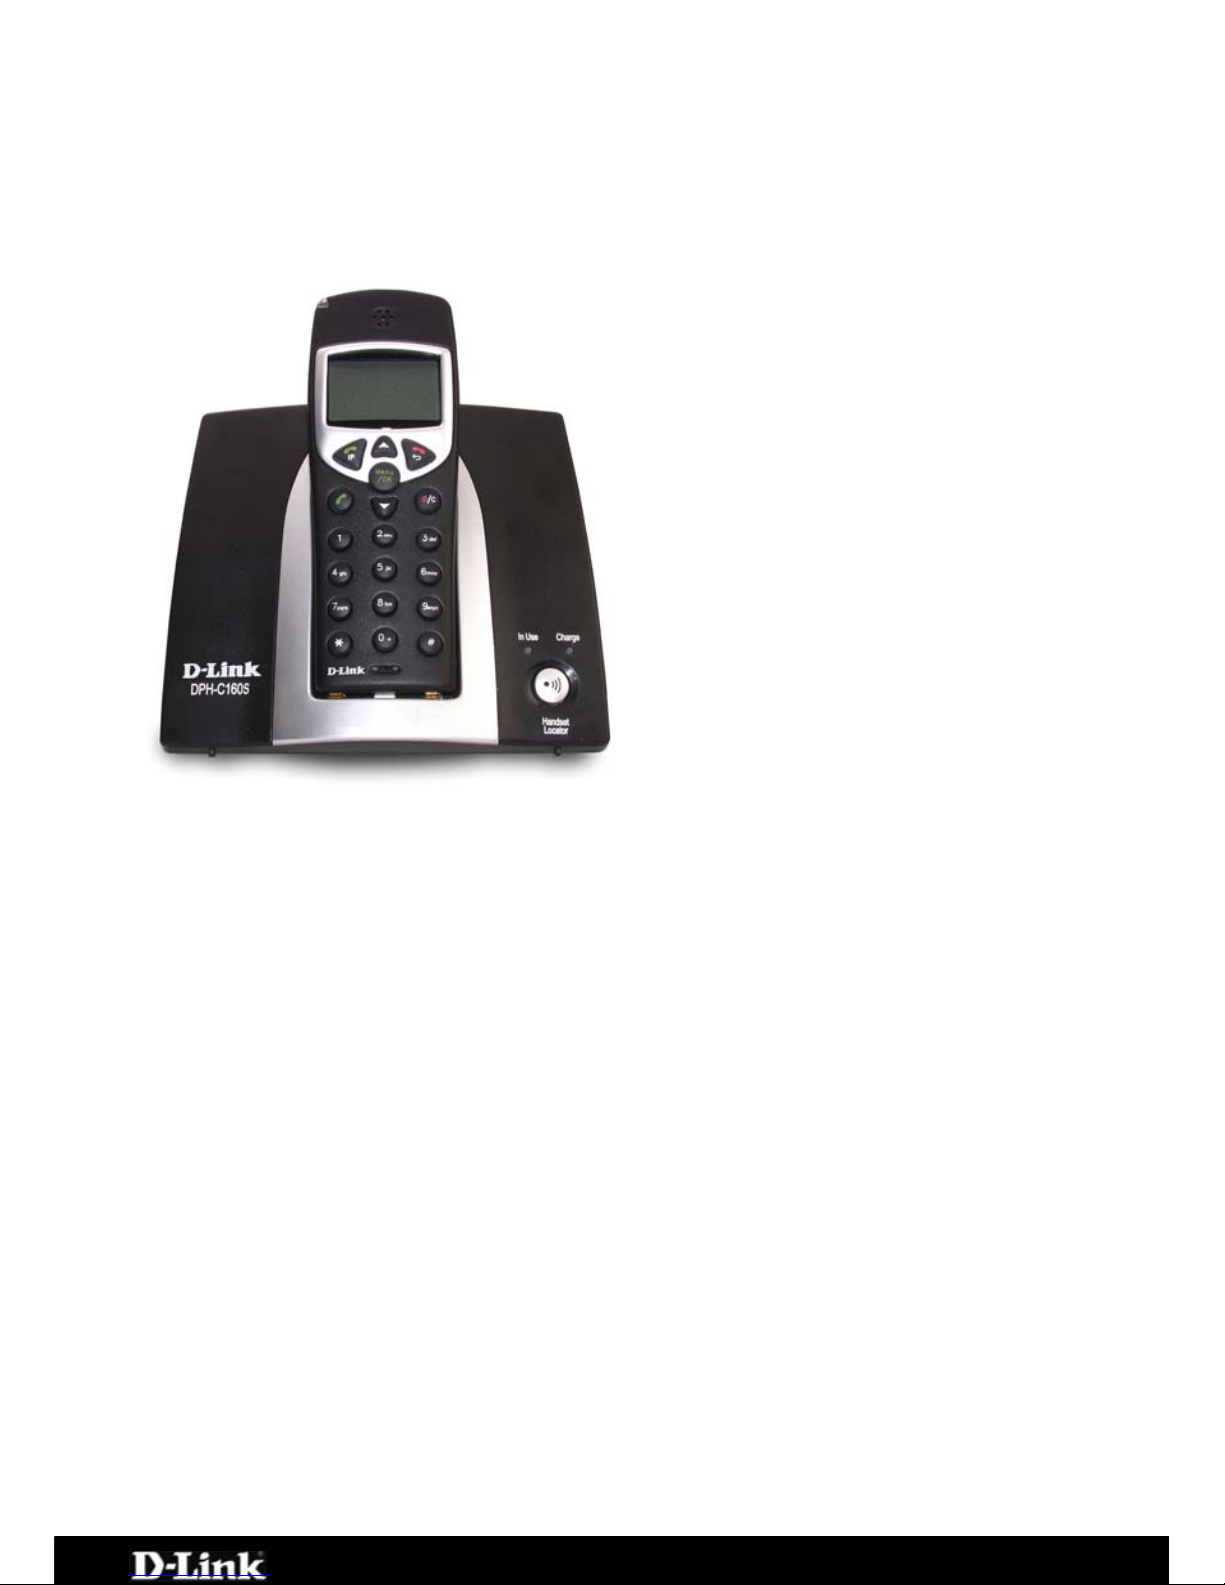
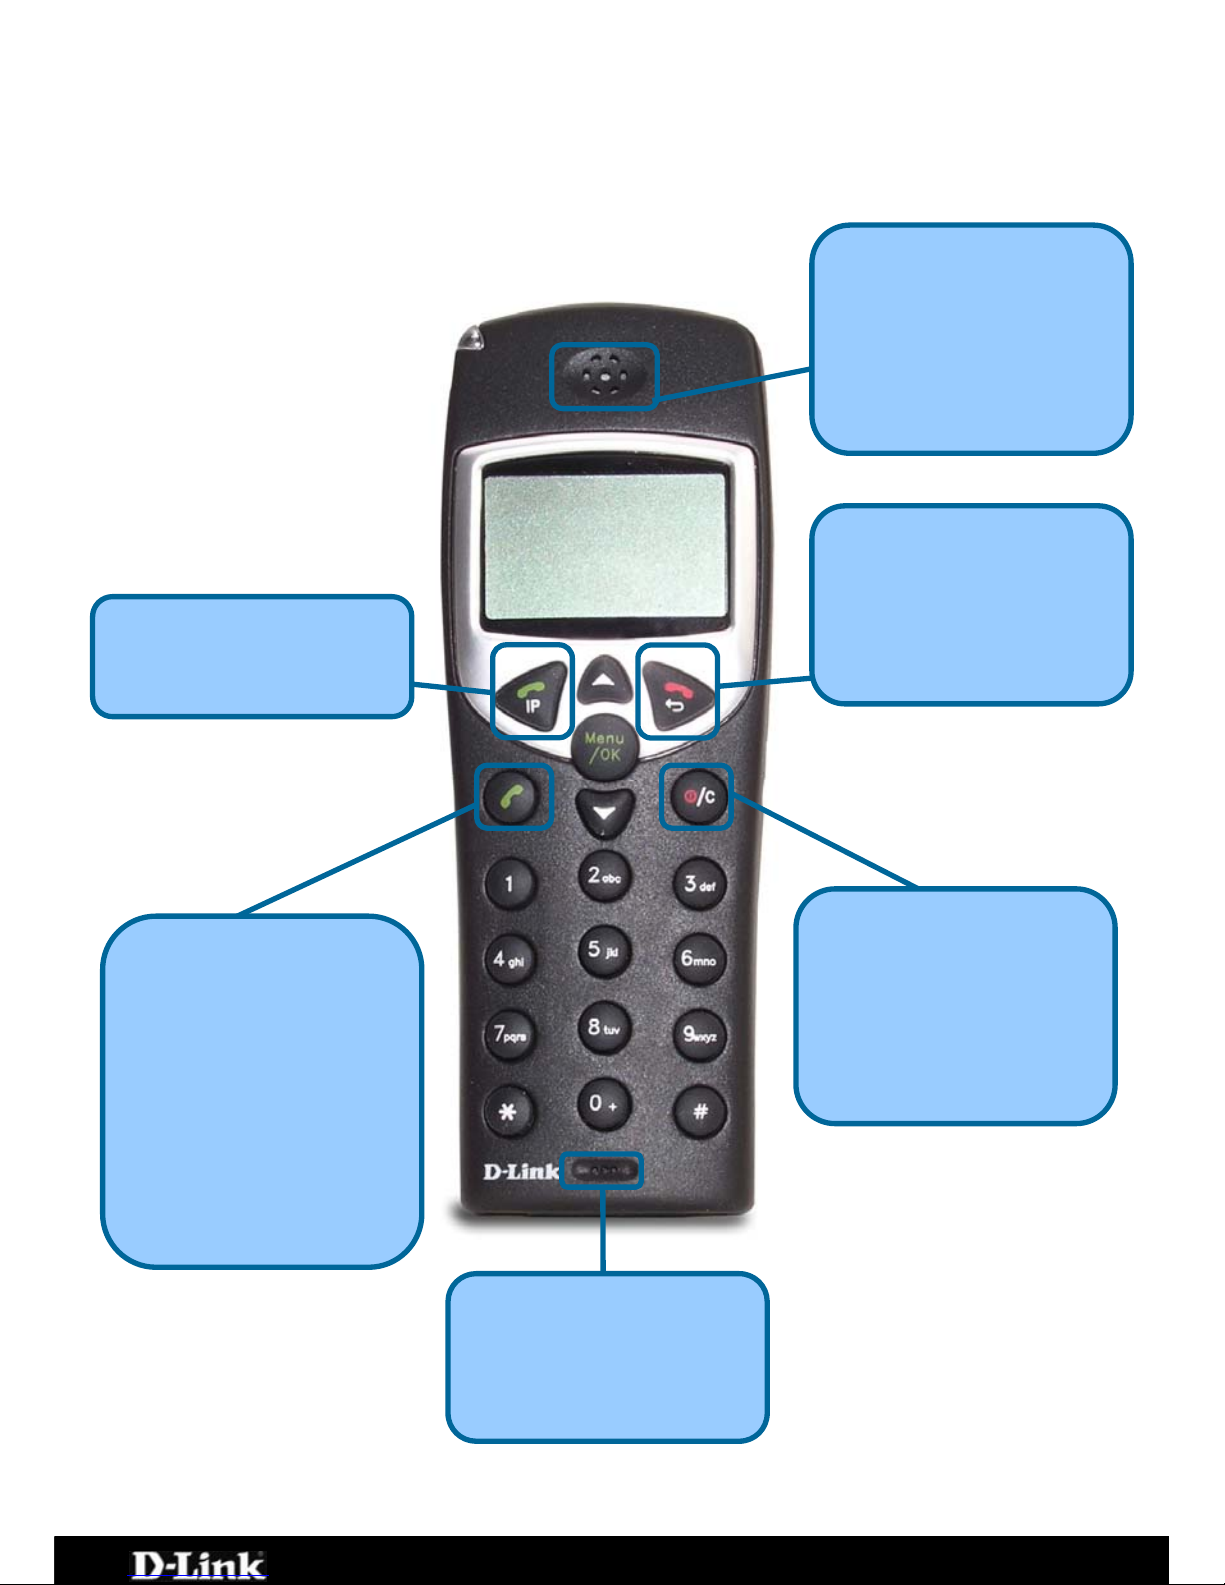
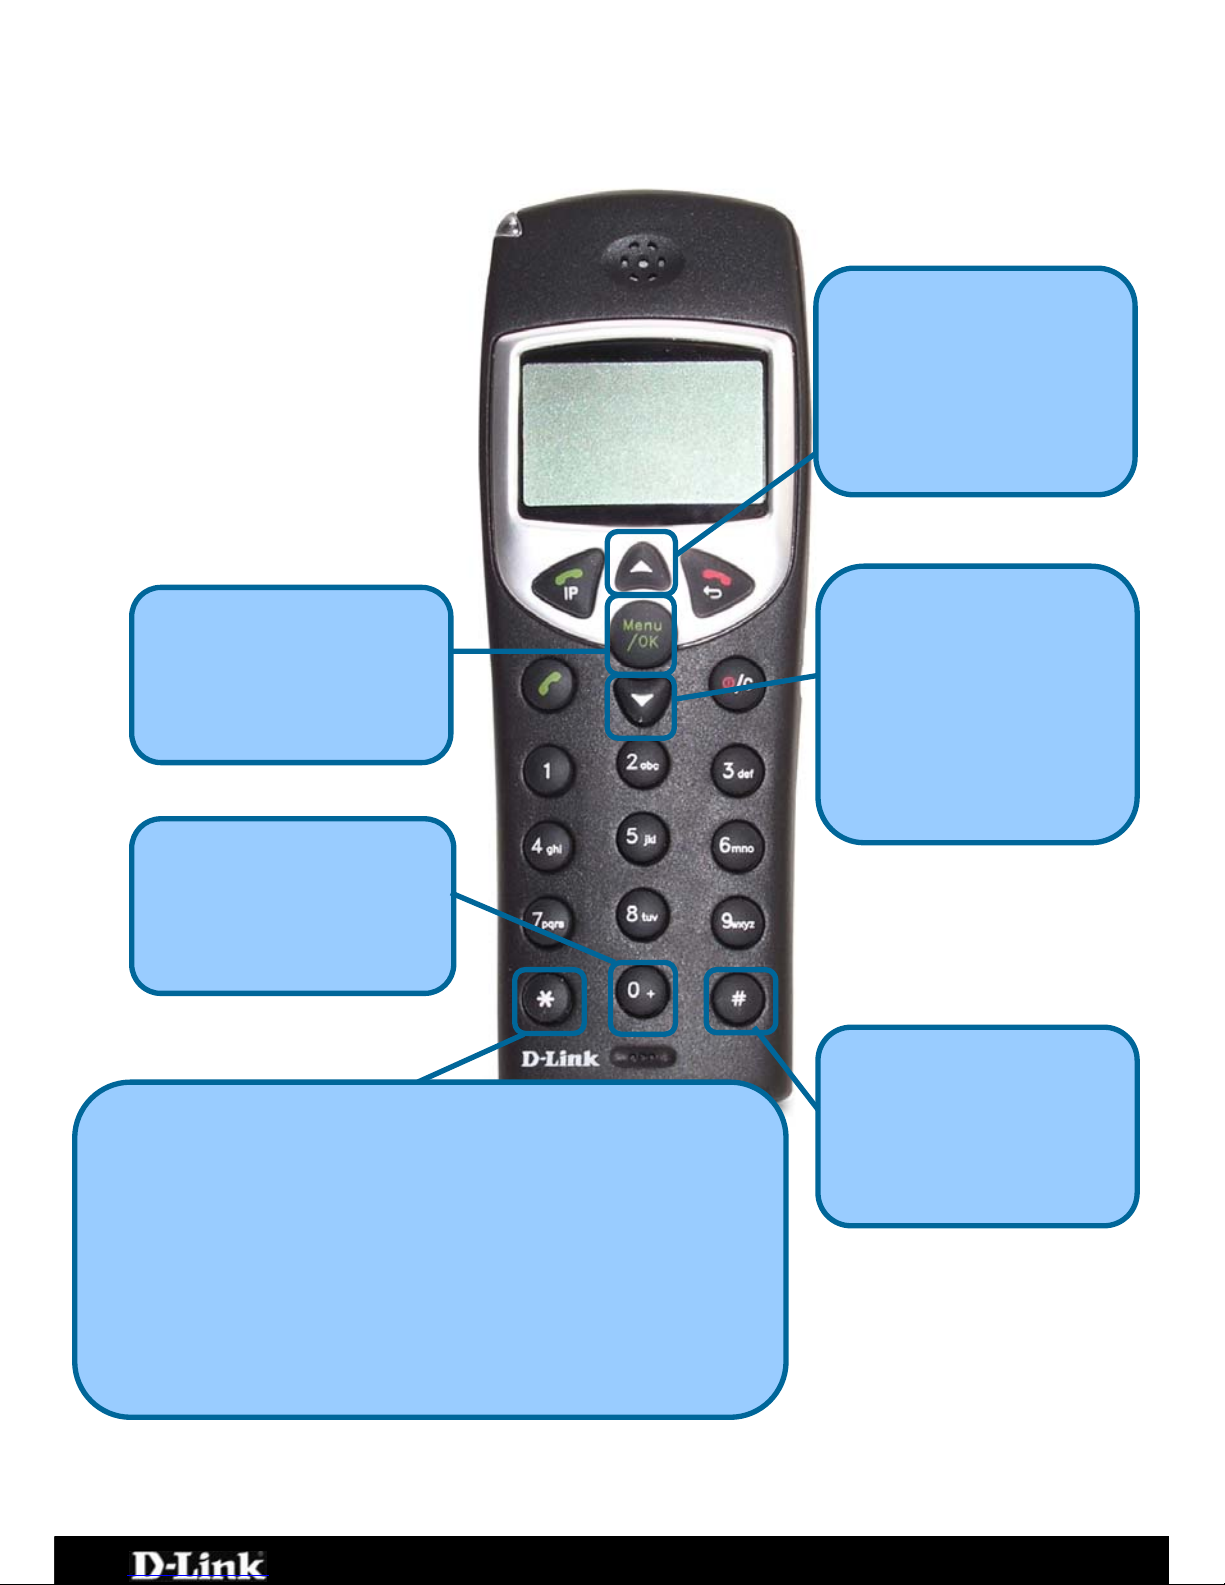
HANDSET BUTTONS AND FUNCTIONS................................................... 8
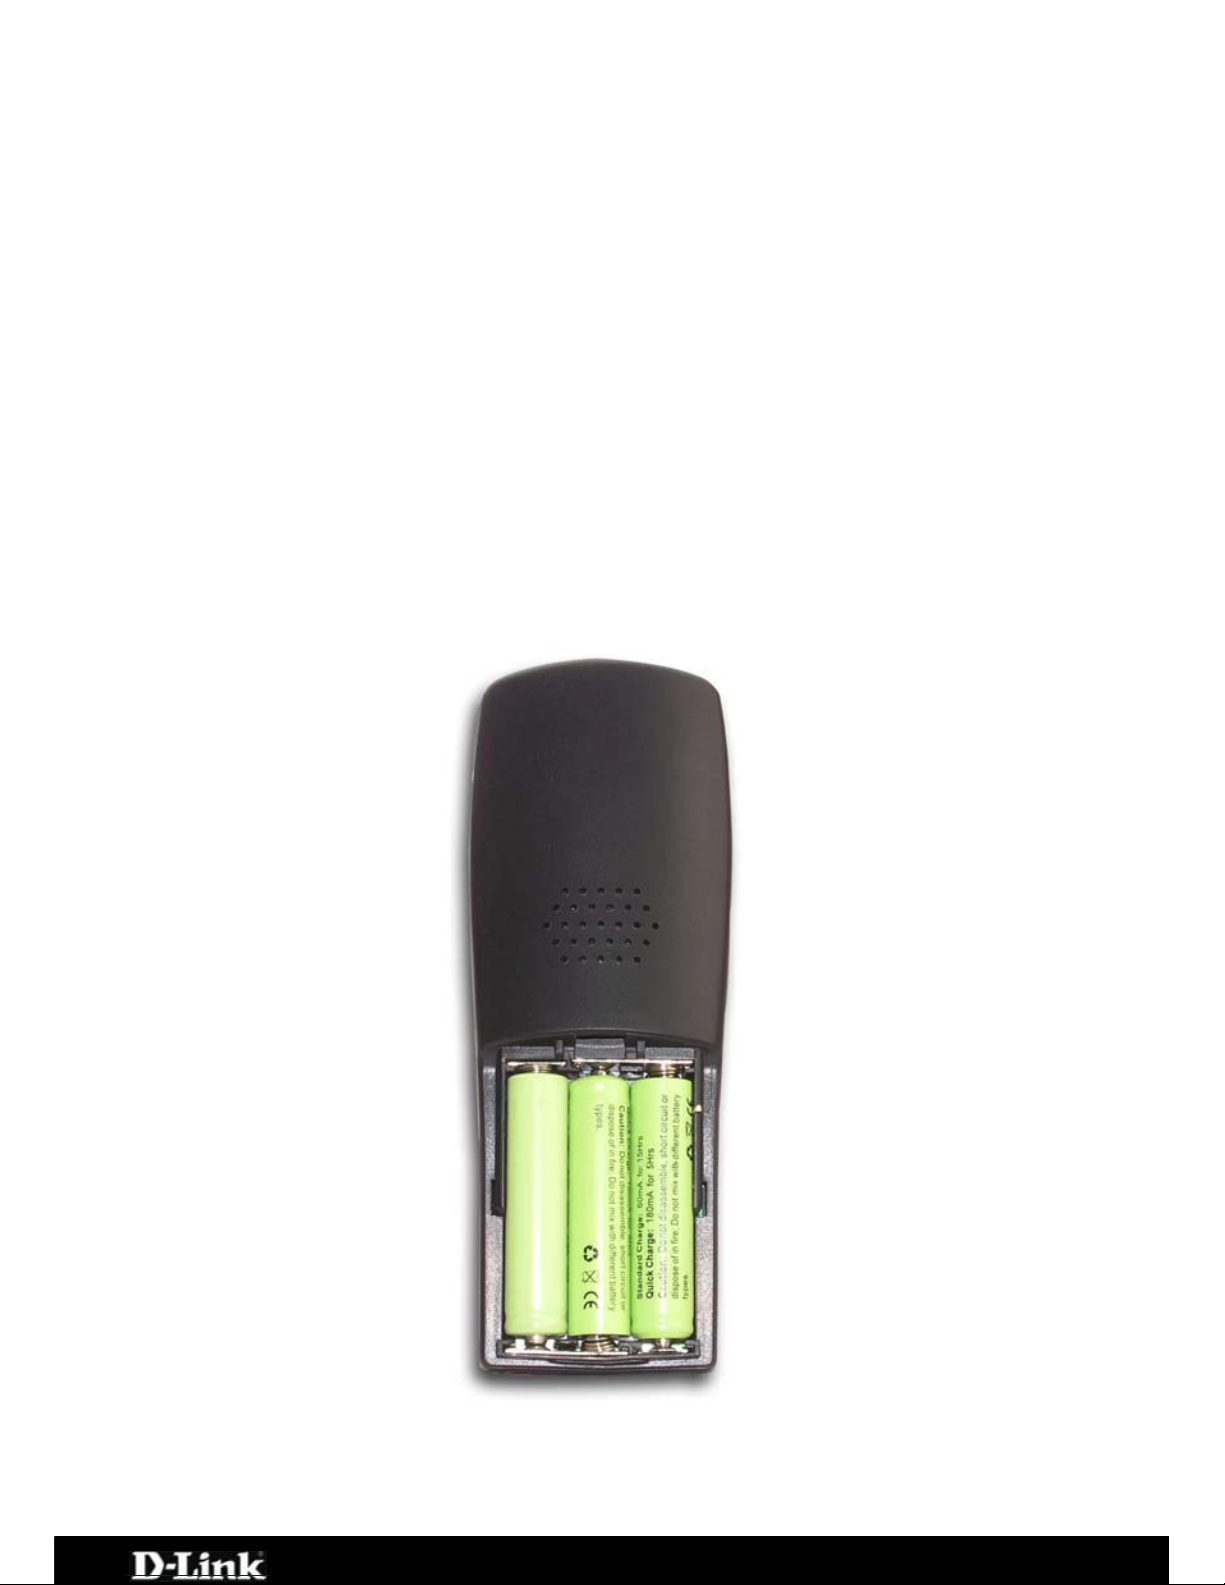
INSTALLING BATTERIES INTO THE HANDSET..................................... 10
CHARGING THE HANDSET................................................................... 11
USING THE HANDSET ......................................................................... 12
TURNING THE HANDSET ON AND OFF ........................................................... 13
MAKING A CALL TO THE PSTN (REGULAR TELEPHONE NETWORK)............................ 14
MAKING A CALL TO THE PSTN IN STANDBY MODE ............................................ 15
RECEIVING A CALL ................................................................................ 16
LAST NUMBER REDIAL ............................................................................ 17
USING THE SPEAKERPHONE ...................................................................... 18
ADJUSTING THE VOLUME LEVEL.................................................................. 19
CONNECTING THE DPH-C160S TO YOUR NETWORK............................ 20
CONNECTING/ACTIVATING YOUR VOIP SERVICE............................... 21
CONFIGURING THE DPH-C160S FOR USE WITH YOUR VOIP SERVICE
PROVIDER .......................................................................................... 22
USING THE WEB INTERFACE............................................................... 25
WEB INTERFACE MENU ITEMS ................................................................... 26
Home > LAN > Dynamic IP Address ...............................................................26
Home > LAN > Static IP Address ...................................................................28
Advanced > VOIP > Server Configuration .......................................................30
Advanced > VOIP > Provisioning....................................................................33
Advanced > VOIP > STUN Configuration.........................................................34
Advanced > VOIP > User Agent.....................................................................36
Advanced > VOIP > Peer to Peer ...................................................................38
Advanced > VOIP > Telephony ......................................................................40
Advanced > VOIP > Call Forwarding...............................................................42
Advanced > VOIP > Speed Dial/Contact List....................................................44
Advanced > Misc..........................................................................................46
Tools > Admin.............................................................................................47
Tools > System ...........................................................................................49
Page 2 of 67