Dacor CM24TBISAS User manual

Semi-Automatic Coffee System
Use and Care Manual
Models: CM24TBISAS (Tank model)
CM24PBISAS (Plumbed model)
®
The Life of the Kitchen?
Read this manual comoletelv before operating your appliance. Keep it for future reference.
Part No. 101984 Rev. A

To Our Valued Customer:
Congratulations on your purchase of the very latest in Dacor®products! Our unique combination of features, style
and performance make us The Life of the Kitchen ®, and a great addition to your home.
In order to familiarize yourself with the controls, functions, and full potential of your new Distinctive Appliance, we
suggest that you thoroughly read this use & care manual, beginning with the Important Safety Instructions section.
All Dacor ® appliances are designed and manufactured with quality and pride, while working within the framework of
our company value. Should you ever experience a problem with your product, please first check the Before You Call
for Service section of this manual for guidance. It provides useful suggestions and remedies prior to calling for
service.
Valuable customer input helps us to continuously improve our products and services, so please feel free to contact
our Customer Service Team for assistance with any of your product support needs.
Dacor ® Customer Service
1440 Bridge Gate Drive
Diamond Bar, CA 91765
Telephone:
Fax:
Hours of Operation:
Web Site:
(800) 793-0093
(626) 403-3130
Monday through Friday
6:00 A.M. to 5:00 P.M. Pacific Time
www.Dacor.com
Thank you for choosing Dacor ®for your home. We are a company built by families for families and we are dedicated
to serving yours. We are confident that your new Dacor ® product will deliver a high level of performance and
enjoyment for many years to come.
Sincerely,
Cheryl Crowe
Director, Customer Satisfaction

Important Safety Instructions ................. 2
About Safety Instructions ................................. 2
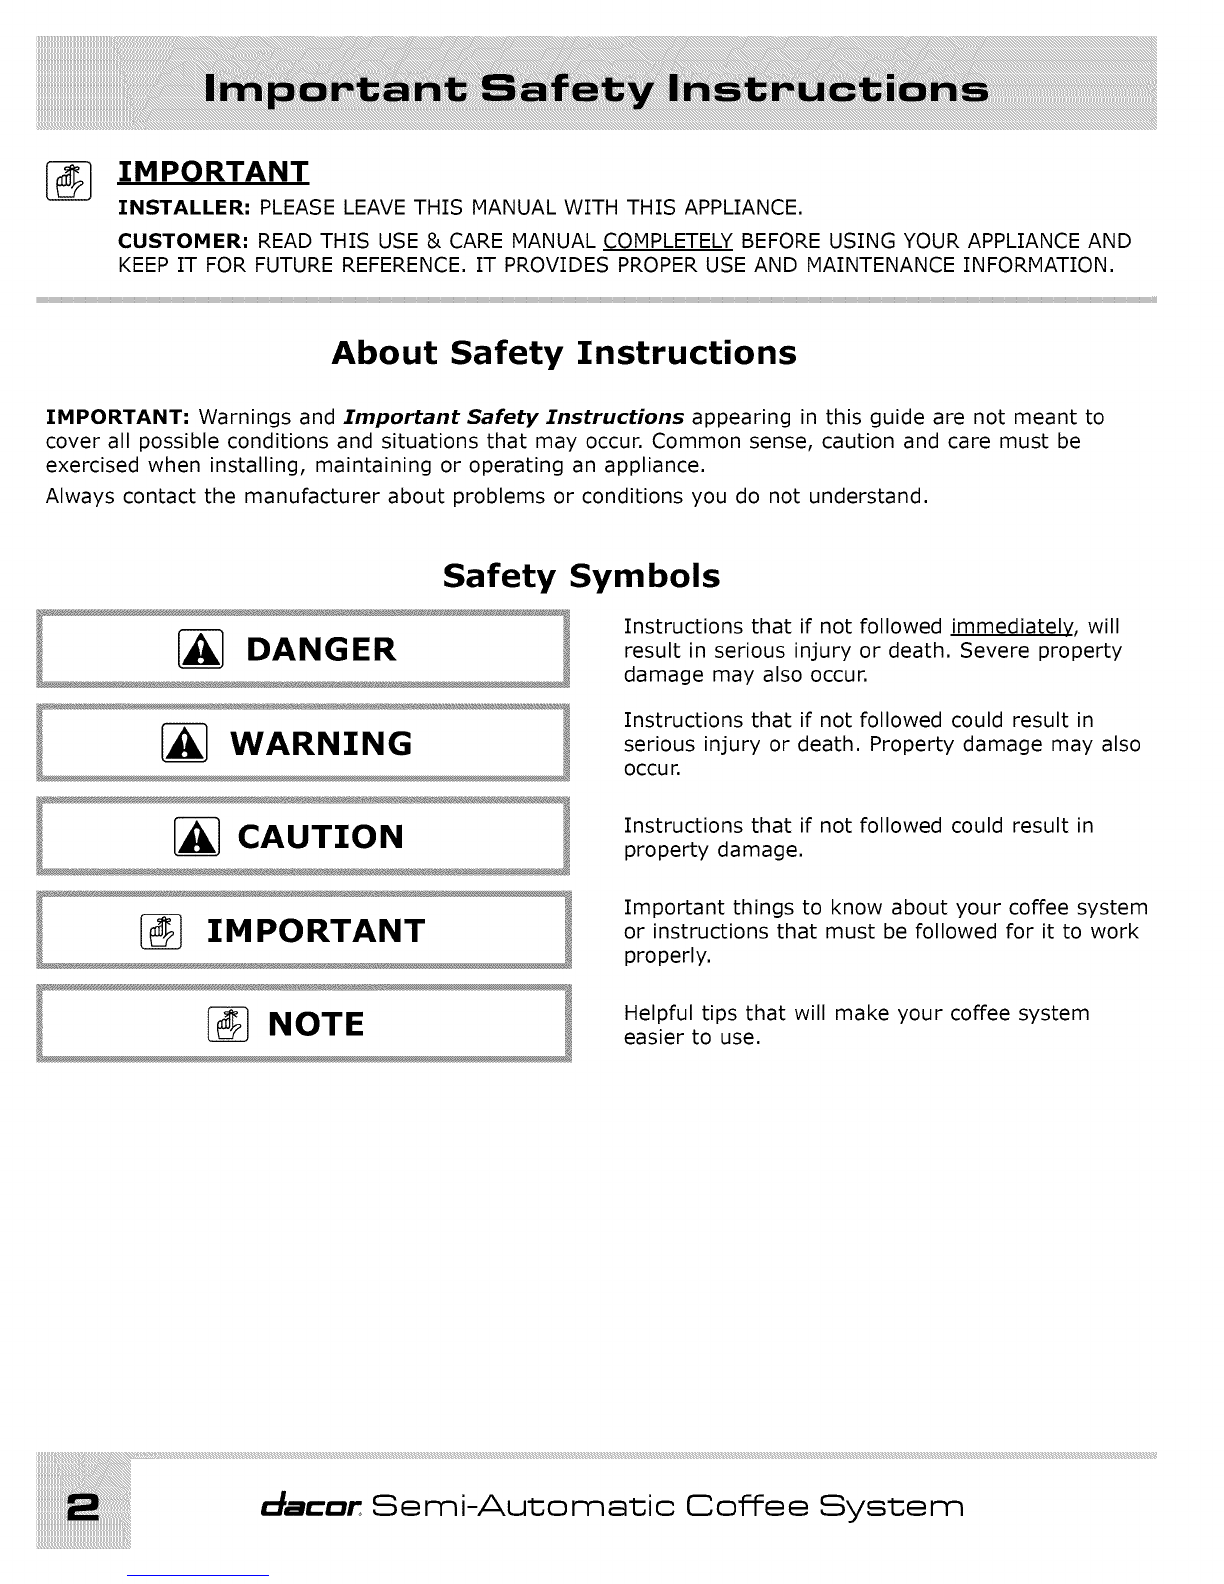
Safety Symbols ............................................... 2
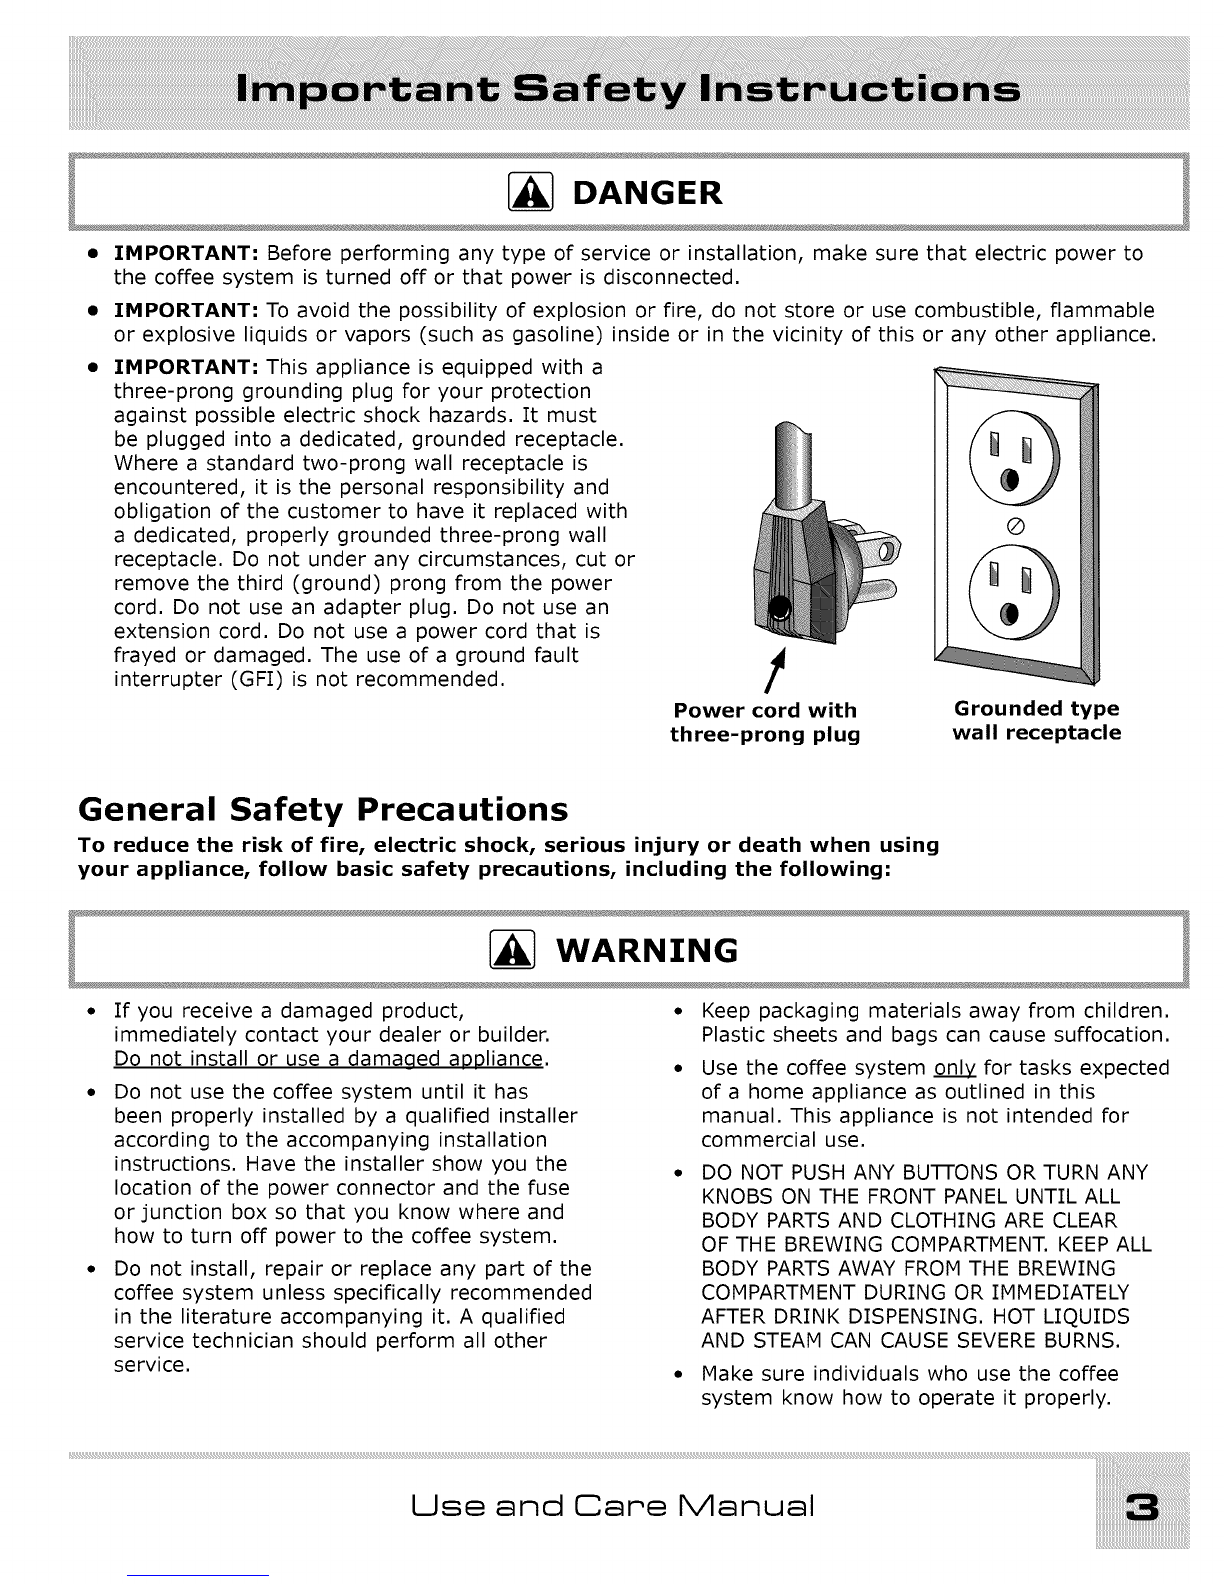
General Safety Precautions ............................... 3
Getting To Know Your Coffee System ...... 6
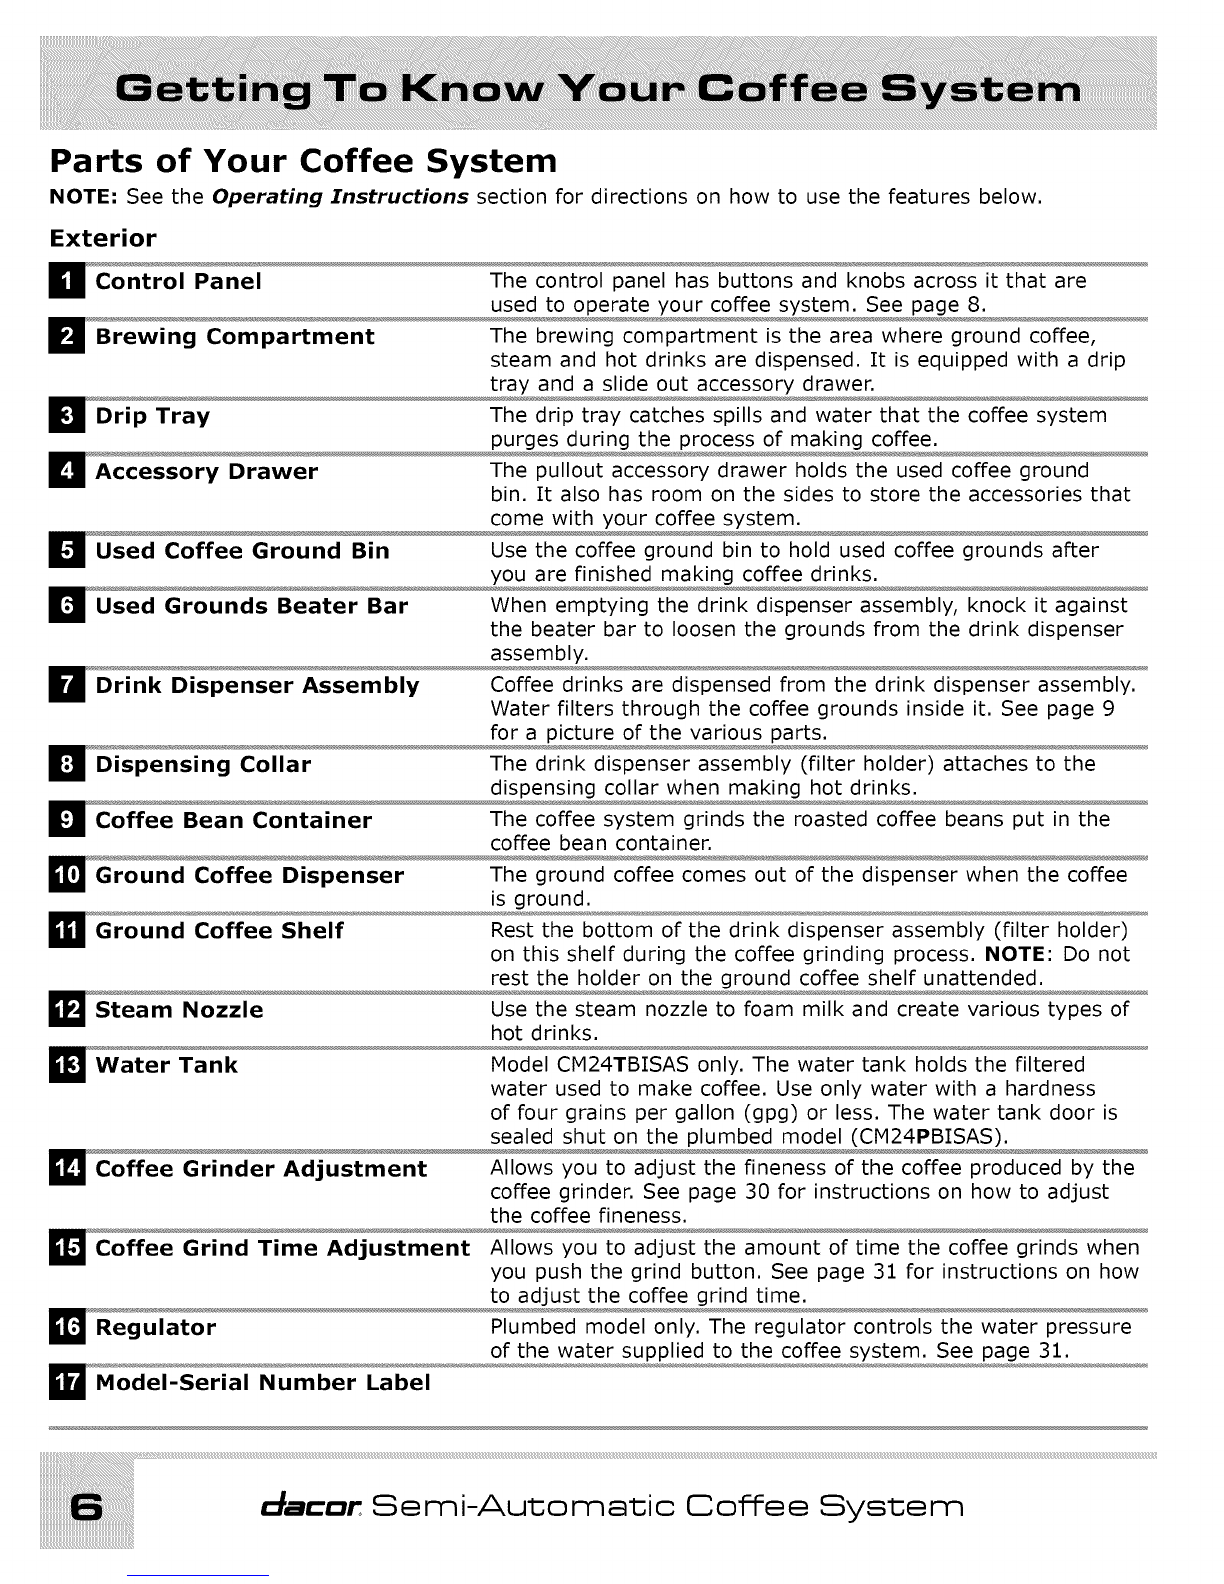
Parts of Your Coffee System ............................. 6
Exterior ........................................................ 6
Control Panel, Parts and Accessories ................ 8
Setting Up Your Coffee System .............. 10
Operating Instructions .......................... 11
Things to Know Before You Start ..................... 11
Preparing to Operate Your Coffee System ......... 12
Loading and Starting the Coffee System ......... 12
Assembling and Using the Drink Dispenser ...... 14
Making Hot Drinks ......................................... 15
Making Coffee ............................................. 15
Making Espresso .......................................... 16
How To Heat and Foam Milk .......................... 17
Making Hot Drinks (continued) ..................... 18
How To Make a Coffee Latte .......................... 18
Making Hot Drinks (continued) ..................... 20
How To Make a Cappuccino ........................... 20
Cleaning and Maintenance ..................... 22
Cleaning and Maintenance Schedule ................ 22
Approved Cleaners ........................................ 23
Cleaning the Steam Nozzle ............................. 23
What to Use ................................................ 23
Cleaning the Drink Dispenser Assembly ........... 24
What to Use ................................................ 24
Cleaning the Water Tank (CM24TBISAS Only)... 24
What to Use ................................................ 24
To Clean the Water Tank ............................... 24
Cleaning the Drip Tray ................................... 25
What to Use ................................................ 25
Cleaning the Used Coffee Grounds Bin ............. 25
What to Use ................................................ 25
Cleaning the Dispenser Collar ......................... 26
What to Use ................................................ 26
System Cleaning Instructions .......................... 27
Dispenser Collar Decalcification (both models). 27
What to Use ................................................ 27
Boiler Decalcification - Tank Model ................. 28
What to Use ................................................ 28
Cleaning the Exterior and Brewing Compartment
Surfaces ...................................................... 29
What to Use ................................................ 29
How to Clean the Surfaces ............................ 29
Adjusting the Coffee Grinder ........................... 30
What to Use ................................................ 30
Grinder Adjustment Process .......................... 30
Adjusting the Grind Time .............................. 31
Regulator Adjustment - Plumbed Model ............ 31
Light Replacement ......................................... 32
Before You Call for Service .................... 33
Problem Solution Guide .................................. 33
Warranty Information ........................... 35
Product Maintenance .................................... 35
Getting Help ................................................ 35
What is Covered .......................................... 36
What is Not Covered .................................... 36
Keep this manual and your sales receipt or
canceled check in a safe place for future
reference. Proof of original purchase date is
required for warranty service.
Have the model and serial number information
for your coffee system ready. The numbers are
found on the model-serial number plate located on
the side of the unit. See page 6 for the location.
Record the information below for easy access.
Model Number
Serial Number
If you have any questions about this
product, call:
Dacor ® Customer Service
1-800-793-0093 (U.S.A. and Canada)
Monday -- Friday 6:00 A.M. to 5:00 P.M. Pacific Time
Web site: www.Dacor.com
In our continuing effort to improve the quality
and performance of our appliances, it may be
necessary to make changes to the coffee system
without revising this guide.
Date of Purchase
Use and Care Manual

I M PO RTANT
INSTALLER: PLEASE LEAVE THIS MANUAL WITH THIS APPLIANCE.
CUSTOMER: READ THIS USE & CARE MANUAL COMPLETELY BEFORE USING YOUR APPLIANCE AND
KEEP IT FOR FUTURE REFERENCE. IT PROVIDES PROPER USE AND MAINTENANCE INFORMATION.
About Safety Instructions
IMPORTANT: Warnings and Important Safety Instructions appearing in this guide are not meant to
cover all possible conditions and situations that may occur. Common sense, caution and care must be
exercised when installing, maintaining or operating an appliance.
Always contact the manufacturer about problems or conditions you do not understand.
Safety Symbols
Instructions that if not followed immediately, will
result in serious injury or death. Severe property
damage may also occur.
Instructions that if not followed could result in
serious injury or death. Property damage may also
Occur.
Instructions that if not followed could result in
property damage.
Important things to know about your coffee system
or instructions that must be followed for it to work
properly.
Helpful tips that will make your coffee system
easier to use.
€:_acar Semi-Automatic Coffee System

IMPORTANT= Before performing any type of service or installation, make sure that electric power to
the coffee system is turned off or that power is disconnected.
IMPORTANT= To avoid the possibility of explosion or fire, do not store or use combustible, flammable
or explosive liquids or vapors (such as gasoline) inside or in the vicinity of this or any other appliance.
IMPORTANT= This appliance is equipped with a
three-prong grounding plug for your protection
against possible electric shock hazards. It must
be plugged into a dedicated, grounded receptacle.
Where a standard two-prong wall receptacle is
encountered, it is the personal responsibility and
obligation of the customer to have it replaced with
a dedicated, properly grounded three-prong wall
receptacle. Do not under any circumstances, cut or
remove the third (ground) prong from the power
cord. Do not use an adapter plug. Do not use an
extension cord. Do not use a power cord that is
frayed or damaged. The use of a ground fault 41_
interrupter (GFI) is not recommended. /
Power cord with
three-prong plug Grounded type
wall receptacle
General Safety Precautions
To reduce the risk of fire, electric shock, serious injury or death when using
your appliance, follow basic safety precautions, including the following:
If you receive a damaged product,
immediately contact your dealer or builder.
Do not install or use a damaoed appliance.
• Do not use the coffee system until it has
been properly installed by a qualified installer
according to the accompanying installation
instructions. Have the installer show you the
location of the power connector and the fuse
or junction box so that you know where and
how to turn off power to the coffee system.
• Do not install, repair or replace any part of the
coffee system unless specifically recommended
in the literature accompanying it. A qualified
service technician should perform all other
service.
• Keep packaging materials away from children.
Plastic sheets and bags can cause suffocation.
• Use the coffee system only_ for tasks expected
of a home appliance as outlined in this
manual. This appliance is not intended for
commercial use.
• DO NOT PUSH ANY BU-B-ONS OR TURN ANY
KNOBS ON THE FRONT PANEL UNTIL ALL
BODY PARTS AND CLOTHING ARE CLEAR
OF THE BREWING COMPARTMENT. KEEP ALL
BODY PARTS AWAY FROM THE BREWING
COMPARTMENT DURING OR IMMEDIATELY
AFTER DRINK DISPENSING. HOT LIQUIDS
AND STEAM CAN CAUSE SEVERE BURNS.
• Make sure individuals who use the coffee
system know how to operate it properly.
Use and Care Manual

General Safety Precautions (continued)
• Never allow anyone, including children to
sit, stand or climb on any part of the coffee
system. Doing so may cause damage, serious
injury or death.
• Do not leave children alone or unattended in
the area around the coffee system. Do not
allow children to use it or touch any part of it.
• Do not store items of interest to children on
top of or above the coffee system. Children
could be burned or injured while climbing on
the appliance.
• Do not tamper with the controls.
• Clean the coffee system completely according
to the Cleaning and Maintenance section
(including System Cleaning) of this manual
before operating it for the first time.
• Clean and maintain the coffee system
according to the maintenance schedule on
the facing page. Clean it only in the manner
indicated in the Cleaning and Maintenance
section. Use only the cleaning agents
specified.
• Do not use a steam or pressure cleaner to
clean the coffee system or any part of it.
Damage caused by cleaning the unit in this
manner could result in electric shock, fire or
explosion.
• Turn off the coffee system and allow it to cool
before cleaning, except when cleaning the
steam nozzle or performing a system cleaning.
• To prevent sickness due to food poisoning,
clean the steam nozzle immediately after
foaming milk. See page 23.
• On model CM24TBISAS (tank model): Change
the water in the tank daily to prevent sickness
due to bacteria growth.
• When cleaning the mechanical parts of the
coffee system, exercise care with hands and
arms around the metal edges.
• Many metal surfaces on top of the coffee
system and inside the brewing compartment
become and remain hot when the power
switch is turned on. Exercise care around the
coffee system's metal surfaces even after
turning off the Dower switch.
• During normal operation, the person using the
coffee system may pull it out from the cabinet
to fill the coffee bins, etc. To prevent personal
injury, when pushing the coffee system back
into the cabinet, make sure body parts and
clothing are clear of the portion of the coffee
system behind the front panel.
• To avoid personal injury, make sure no one is
under the coffee system when sliding it in and
out of the cabinet.
To avoid steam coming out of the unit
unexpectedly, rotate the steam nozzle knob
fully counter-clockwise before turning on the
power switch.
• To prevent jamming of the grinding
mechanism, use only the types of coffee beans
specified in this manual.
• To prevent clogging of the internal parts, use
only filtered water as specified on the facing
page. Do not use distilled water.
Do not put any part of your coffee system
in a dishwasher. Many of the parts are not
dishwasher safe.
To avoid damage to the coffee system, do not
put pre-ground coffee into the coffee bean
container.

Before operating your coffee system for the first time:
.Make sure you are using the right type of water.
Call your local water company. Ask them for the water hardness level of the water supplied to
the building where the coffee system will be installed.
If the water hardness level is above four grains per gallon (4gpg):
>> For CM24TBISAS (tank model), pour only filtered water with a hardness level of 4gpg or
less into the water tank. Do not use distilled water.
>> For CM24PBISAS (plumbed model), contact a water treatment specialist and have a water
treatment system installed to reduce the water hardness level to 4gpg or less.
IMPORTANT: Dacor _) does not recommend installation of a reverse osmosis filtration system. Reverse
osmosis systems can cause low water pressure. When the water pressure is low, the coffee water
volume (level) can fluctuate and the water pump may make a "hammering" sound.
2. Clean the system completely according to the Cleaning and Maintenance section
(including) System Cleaning, to remove bacteria that may have accumulated during
storage and shipping.
Clean your coffee system regularly according to the chart below:
Immediately
after use
Drink Dispenser
Assembly
Water Tank
(CM24TBISAS Only)
Drip Tray
Used Coffee Ground
Bin and Drawer
Collar Gasket
Steam Nozzle* v/
System Cleaning
Outside Surfaces and
Brewing Compartment
Daily Weekly
v_
v_
Monthly
* Always clean the steam nozzle immediately after steaming milk. Otherwise, you may clean it daily.
See the Cleaning and Maintenance section on page 22 for complete instructions.
i i i i i i i i i i i i i i i i ii !i!iiiiiiiii ii ii i! i! i! i!i!i!i! !:i!iii ii ii ii ii ii ii ii ii ii ii ii ii ii ii ii ii ii ii i! !i i! !i iiiii
Use and Care Manual

Parts of Your Coffee System
NOTE: See the Operating Instructions section for directions on how to use the features below.
Exterior
DControl Panel
I_l Brewing Compartment
BDrip Tray
Accessory Drawer
Used Coffee Ground Bin
DUsed Grounds Beater Bar
DDrink Dispenser Assembly
DDispensing Collar
Coffee Bean Container
The control panel has buttons and knobs across it that are
used to operate your coffee system. See page 8.
The brewing compartment is the area where ground coffee,
steam and hot drinks are dispensed. It is equipped with a drip
tray and a slide out accessory drawer.
The drip tray catches spills and water that the coffee system
purges during the process of making coffee.
The pullout accessory drawer holds the used coffee ground
bin. It also has room on the sides to store the accessories that
come with your coffee system.
Use the coffee ground bin to hold used coffee grounds after
you are finished making coffee drinks.
When emptying the drink dispenser assembly, knock it against
the beater bar to loosen the grounds from the drink dispenser
assembly.
Coffee drinks are dispensed from the drink dispenser assembly.
Water filters through the coffee grounds inside it. See page 9
for a picture of the various parts.
The drink dispenser assembly (filter holder) attaches to the
dispensing collar when making hot drinks.
The coffee system grinds the roasted coffee beans put in the
coffee bean container.
E!Ground Coffee Dispenser
Ground Coffee Shelf
ESteam Nozzle
B Water Tank
Coffee Grinder Adjustment
The ground coffee comes out of the dispenser when the coffee
is ground.
Rest the bottom of the drink dispenser assembly (filter holder)
on this shelf during the coffee grinding process. NOTE: Do not
rest the holder on the ground coffee shelf unattended.
Use the steam nozzle to foam milk and create various types of
hot drinks.
Model CM24TBISAS only. The water tank holds the filtered
water used to make coffee. Use only water with a hardness
of four grains per gallon (gpg) or less. The water tank door is
sealed shut on the plumbed model (CM24PBISAS).
Allows you to adjust the fineness of the coffee produced by the
coffee grinder. See page 30 for instructions on how to adjust
the coffee fineness.
Coffee Grind Time Adjustment Allows you to adjust the amount of time the coffee grinds when
you push the grind button. See page 31 for instructions on how
to adjust the coffee grind time.
_!_! Regulator Plumbed model only. The regulator controls the water pressure
of the water supplied to the coffee system. See page 31.
_! Model-Serial Number Label
c_acar Semi-Automatic Coffee System

Left Side Panel
Use and Care Manual

Control Panel, Parts and Accessories
El
ll
Coffee Grinder Button Push in on the button to start the coffee grinder.
Steam Nozzle Knob
Water Tank Empty Light
Heating Element Light
Drink Volume Knob
Drink Dispensing Button
Power Switch
Light Switch
Filter Holder
BFilter - Double
Use the steam nozzle knob to turn the steam nozzle on
and off. Turing the knob clockwise to turn it on. Turn
the knob counter-clockwise to turn it off.
The water tank empty light comes on when the water
tank needs to be refilled. The light does not work on the
plumbed model (CM24PBISAS) since the water tank is
not used.
Filter - Single
Filter- Blind
Glows when the heating element is on. NOTE: The unit
may still be hot when the liQht is off. The element turns
on and off automatically when the power switch is on to
maintain optimal drink heating temperature.
Adjusts the amount of coffee that is dispensed when the
drink dispensing button is pushed.
Push the drink dispensing button to start dispensing.
The light next to it glows during the drink dispensing
process.
Push in on the power switch to turn your coffee system
on or off. The light next to it glows when the unit is on.
Push in on the light switch to turn the lights in the
brewing compartment on or off.
Holds the filters that contain the ground coffee. Water
pours through it, making the coffee that pours into the
cup you put below it on the drip tray.
Holds the ground coffee during drink dispensing. Use it
to create two drinks at a time.
Holds the ground coffee during drink dispensing. Use it
to create one drink at a time.
Used during the system cleaning process. See page 27.
Use the double dispensing nozzle to create one or two
hot drinks at a time. See the operating instructions.
Use the single dispensing nozzle to create one hot drink
at a time. See the operating instructions.
Use the tamper to compact the coffee grounds into the
filters.
Dispensing Nozzle - Double
Dispensing Nozzle - Single
Tamper
Coffee Scoop
Cleaning Brush
Filter Removal Tool
Grinder Adjustment Tool
Use the coffee scoop to poor pre-ground coffee into the
filter.
Use the brush clean the inside of the
cleaning to
brewing unit.
Use the filter removal tool the filters from the
to remove
filter holder.
Use the coffee wrench the
grinder adjustment to turn
coffee grinder adjustment screw. See page 30.

I
I
I1
Drink Dispenser Assembly
Accessories

WARNING
• To avoid sickness, clean the coffee system completely according
to the Cleaning and Maintenance section (including System
Cleaning) before operating it for the first time. Doing so will
remove any bacteria left in the unit during shipping and storage.
• Make sure the hardness of the water supplied to, or poured into
your coffee system does not exceed the maximum stated below.
Using water harder than that specified will eventually damage the
internal parts and void your warranty.
• DO NOT PUSH ANY BU-I-I-ONS OR TURN ANY KNOBS ON THE
CONTROL PANEL UNTIL ALL BODY PARTS AND CLOTHING ARE
CLEAR OF THE BREWING COMPARTMENT. KEEP ALL BODY
PARTS AWAY FROM THE BREWING COMPARTMENT DURING OR
IMMEDIATELY AFTER DRINK DISPENSING. HOT LIQUIDS AND
STEAM CAN CAUSE SEVERE BURNS.
Before Your Coffee System is Installed
1. Call your local water company. Ask them for the water hardness level of the
water supplied to the building where your coffee system will be installed.
2. If the water hardness level is above four grains per gallon (4gpg):
•If you are installing model CM24PBISAS, contact a water
treatment specialist and have a water treatment system installed to
reduce the water hardness level to 4gpg or less.
• If you are installing model CM24TBISAS, pour only filtered water with a
hardness level of 4gpg or less into the water tank. DO NOT use
distilled water.
3. Have a licensed electrician install a dedicated, grounded power receptacle
near the coffee system, if one is not available.
4. Have a qualified installer install the coffee system in the desired location
according to the accompanying installation instructions.
Semi-Automatic Coffee System

Things to Know Before You Start
WARNING
•To prevent personal injury, keep your hands out of the coffee
bean container.
Some of the metal surfaces behind the front panel are
hot when the power switch is on. Avoid contact with these
surfaces.
• Do not pour flavored, un-roasted, partial coffee beans or
ground coffee into the coffee bean container. Doing so may
cause the coffee grinding mechanism to jam. Use flavored
coffee creamers or syrups after making the coffee to flavor it.
You may also make flavored coffee using ground coffee pods
placed inside the dispenser filter instead of ground coffee.
• To avoid steam coming out of the unit unexpectedly, rotate
the steam nozzle knob fully counter-clockwise before turning
on the power switch.
For best results, the filter holder (drink dispensing assembly) must
be hot. Keep it attached to the dispensing collar when the coffee
system is heating up.
A small amount of dripping from the drink dispenser is normal after
drinks are dispensed.
This coffee system is designed to make one or two hot drink(s) at a
time.
For proper operation, clean your coffee system regularly according to
the cleaning schedule on page 22.
The coffee system purges water into the drip tray to ensure that the
water used for drink making is hot. Empty out the drip tray when it
starts to get full.
IMPORTANT
Drink volume and strength will vary due to coffee
type, coffee fineness, grind time, amount of
tamping and the drink volume setting. You may
need to experiment for best results. To adjust the
coffee fineness (grinder adjustment) see page 30.
To adjust the grind time see page 31.
With your coffee system you can experiment to come up with all
sorts of coffee drinks that suit your personal preference!
Use and Care Manual

Preparing to Operate Your Coffee System
Loading and Starting the Coffee System
IMPORTANT
If using your coffee system for the very
first time, make sure to start it according to
the First Time Start Up Procedure in the
installation instructions. The coffee system
will not function properly if not properly
prepared for use the first time.
1. Make sure the drip tray is in place.
.
3. Grasp both sides of the front panel and slide the unit out.
On model CM24TBISAS (tank version), open the water tank door
and pour filtered water (with a water hardness of 4gpg or less) into
the water tank. The tank holds 1 1/4
gallons (2.5 liters) of water. DO NOT
use distilled water. If you want, you can
remove the tank from the machine to
fill it. To do so, grasp the handles firmly
and pull up. Make sure the outside of
the tank is dry before replacement.
Push down firmly on the handles when
replacing it.
NOTE:
On the tank version of
the coffee system (model
CM24TBISAS), the tank empty
light comes on when the
water tank is nearly empty.
Tank Empty Light
Removing the Water Tank
_] WARNING
On model CM24TBISAS (tank version), clean the
water tank daily to avoid sickness due to bacteria
growth. See page 24.
_acar Semi-Automatic Coffee System

.
.
Open the coffee bean container lid. Fill it to 1/2"
from the top with, whole, unflavored, roasted
coffee beans. Do not over-fill!
Make sure the water tank and the coffee bean
container lids are closed. Push the coffee system
back into the cabinet.
6. Using the handle, push the steam nozzle back
into the brewing compartment until the end is
over the drip tray.
7. Turn the steam nozzle knob fully counter-
clockwise.
Steam Nozzle Knob
8. Turn on the power switch. The power indicator light will come on.
The system will automatically load the boiler tank with water. This
process can take up to three minutes. When the required water
level has been reached, the water will begin to heat. The heating
element light comes on during the heating process. The light will
turn off again when the heating process is complete. Once the
water is heated, the element will go on and off to keep the water
at a constant temperature.
9. Turn the steam nozzle knob 1/4 turn
clockwise until water starts to come
out of the nozzle, then turn the knob
to the off position.
Power Switch
NOTE
The coffee system is equipped with a safety device
that will stop the unit after approximately 1.5
minutes of continuous pump operation (to prevent
the pump from overheating). If the power indicator
stops glowing when the power switch is on, turn the
power switch off and then back on.
Use and Care Manual

Preparing to Operate Your Coffee System
Assembling and Using the Drink Dispenser
1. Screw either the single or double dispenser nozzle into the
bottom of the filter holder. The double nozzle is for making two
cups of coffee at the same time. When making two cups at the
same time, put the cups side by side, one on each side of the
nozzle. Or to save time changing nozzles you may center one
cup under the double nozzle.
Making Two Cups Using the Double
Nozzle for One Cup
(continued)
Filter@
I
Filter Holder
Dispenser Nozzle
,Insert the single filter into the top of the filter holder for one
cup of coffee or a shot of Espresso. Insert the large filter for two
shots of espresso, two cups of coffee or for a large travel mug.
When inserting a filter into the dispenser, push down firmly on
both sides until it snaps into place.
3. To insert the filter holder into the dispenser collar: Insert the
top of the round end of the filter holder into the dispenser collar
with the handle pointed to the left. Turn the handle to the right
to lock it in place. The handle should point straight out when
locked in place.
To remove the filters, use the tool provided. Insert it
between the filter holder and the filter and pry the filter
loose.
WARNING
When the filter holder is attached to
the coffee system it will become hot
when the power switch is on.
Inserting the Filter Holder

Making Hot Drinks
Making Coffee
1. Snap the single filter onto the filter holder for a single cup of coffee.
Use the double filter for two cups or a single large cup.
2. Attach the desired dispensing nozzle to the bottom of the filter holder.
3. To grind the coffee, put the filter holder under the
ground coffee dispenser. Push the coffee grinder
button. NOTE: Do not rest the holder on the
ground coffee shelf unattended.
.
7.
4. Tamp the ground coffee down in the
filter holder using the tamper provided
with the coffee system. Pack the grounds
together firmly. The more firmly packed
the grounds, the slower the coffee will
flow, creating a stronger flavored coffee.
Packing also affects the coffee volume.
5. Insert the filter holder into the dispenser
collar inside the brewing compartment.
See page 14 for instructions.
Place an empty cup (or two cups) under
the filter holder.
.
Coffee Grinder
Button
Before Tamping
Set the drink volume knob to half for
smaller drink sizes. Set the knob to full for
larger drink sizes.
Push the drink dispenser button. Coffee will begin to dispense, dark at
first, then becoming lighter.
ii i_iiiiiiiiii
Drink Volume
Knob Drink Dispenser
Button
Grinding the Coffee
After Tamping
9. Once the coffee is dispensed, remove the cup(s).
10. Remove the filter holder. Open the accessory drawer and tap the filter
holder on the beater bar inside the coffee grounds bin to remove the Coffee Ground
used coffee grounds. Erljoy! Removal
Use and Care Manual '1

Making Hot Drinks (continued)
Making Espresso
1. Snap the single filter onto the filter holder for a single shot of
espresso. Use the double filter for two shots.
2. Attach the desired dispensing nozzle to the bottom of the filter holder.
3. Put the filter holder under the coffee ground
dispenser. Push the coffee grinder button.
NOTE: Do not rest the holder on the ground
coffee shelf unattended.
.
7.
4. Tamp the ground coffee down in the
filter holder using the tamper provided
with the coffee system. Pack the grounds
together firmly. The more firmly packed
the grounds, the slower the espresso
will flow, creating a stronger flavored
espresso. Packing also affects the
espresso volume.
5. Insert the filter holder into the dispenser
collar inside the brewing compartment.
See page 14 for instructions.
Place an empty cup (or cups) under the
filter holder.
.
Coffee Grinder
Button
Before Tamping
Set the drink volume knob to the first
setting for a single shot of espresso. Set the knob to the second
setting for two shots.
Push the drink dispenser button. The Espresso will begin to dispense,
dark at first, then becoming lighter.
Setting for
One Shot
.
10.
Setting for
Two Shots Drink Dispenser
Button
Once the coffee is dispensed, remove the cup(s).
Remove the filter holder. Open the accessory drawer and tap the filter
holder on the beater bar inside the coffee grounds bin to remove the
used coffee grounds. Enjoy!
Grinding the Coffee
for Espresso
After Tamping
Coffee Ground
Removal
€:_acar Semi-Automatic Coffee System

How To Heat and Foam Milk
1.
2.
.
Fill a 12 ounce pitcher 2/3 of the way with milk.
Insert the steam nozzle into the pitcher. Submerge only
the tip of the steam nozzle in the milk.
Slowly open the steam nozzle to maximum as you slowly
move the cup up and down so that the nozzle dips in
WARNING
To avoid sickness, clean the
steam nozzle immediately after
steaming milk. See page 23.
and out of the milk. Every fifth dip, submerge the nozzle as far
as possible into the cup. Continue this process until the milk is
hot. This process will take approximately two minutes.
Opening the
Steam Knob Foaming and Steaming Milk
4. Once the milk is hot, turn the steam nozzle knob to the off
position.
5. Remove the pitcher and using the handle on the nozzle, push it
back over the drip tray.
6. Turn the steam knob on
slowly to get excess milk out
of the nozzle. Turn the knob
off.
Enjoy!
@IMPORTANT
•Using non-dairy creamers or half-and-half may cause poor
quality foam.
• The fat content in milk varies according to region and milk
brand. For best results you may need to experiment with
different milk fat contents (whole, 2%, 1%) and brand
names.
With your coffee system you can foam milk
for hot chocolate!
Use and Care Manual

Making Hot Drinks (continued)
How To Make a Coffee Latte
1. Snap the single filter onto the filter holder.
2. Attach the desired dispensing nozzle to the bottom of the filter holder.
3. Put the filter holder under the ground coffee
dispenser. Push the coffee grinder button.
NOTE: Do not rest the holder on the ground coffee
shelf unattended.
.
.
.
7.
.
Tamp the ground coffee down in the filter
holder using the tamper provided with the
coffee system. Pack the grounds together
firmly. The more firmly packed the grounds,
the slower the coffee will flow, creating a
stronger flavored coffee. Packing also affects
the coffee volume.
Coffee Grinder
Button
Insert the filter holder into the dispenser
collar inside the brewing compartment. See
page 14 for instructions.
Place an empty cup under the filter holder.
Set the drink volume knob to the second
setting (approximately two ounces).
Push the drink dispenser button. Coffee will begin to dispense, dark at
first, then becoming lighter.
Before Tamping
.
10.
Setting for a
Coffee Latte Drink Dispenser
Button
Once the coffee is dispensed, remove the cup.
Remove the filter holder. Open the accessory drawer and tap the filter
holder on the beater bar inside the coffee grounds bin to remove the
used coffee grounds.
Continued...
Grinding the Coffee
for a Coffee Latte
After Tamping
Coffee Ground
Removal
_acar Semi-Automatic Coffee System
Other manuals for CM24TBISAS
2
This manual suits for next models
1
Table of contents
Other Dacor Coffee Maker manuals