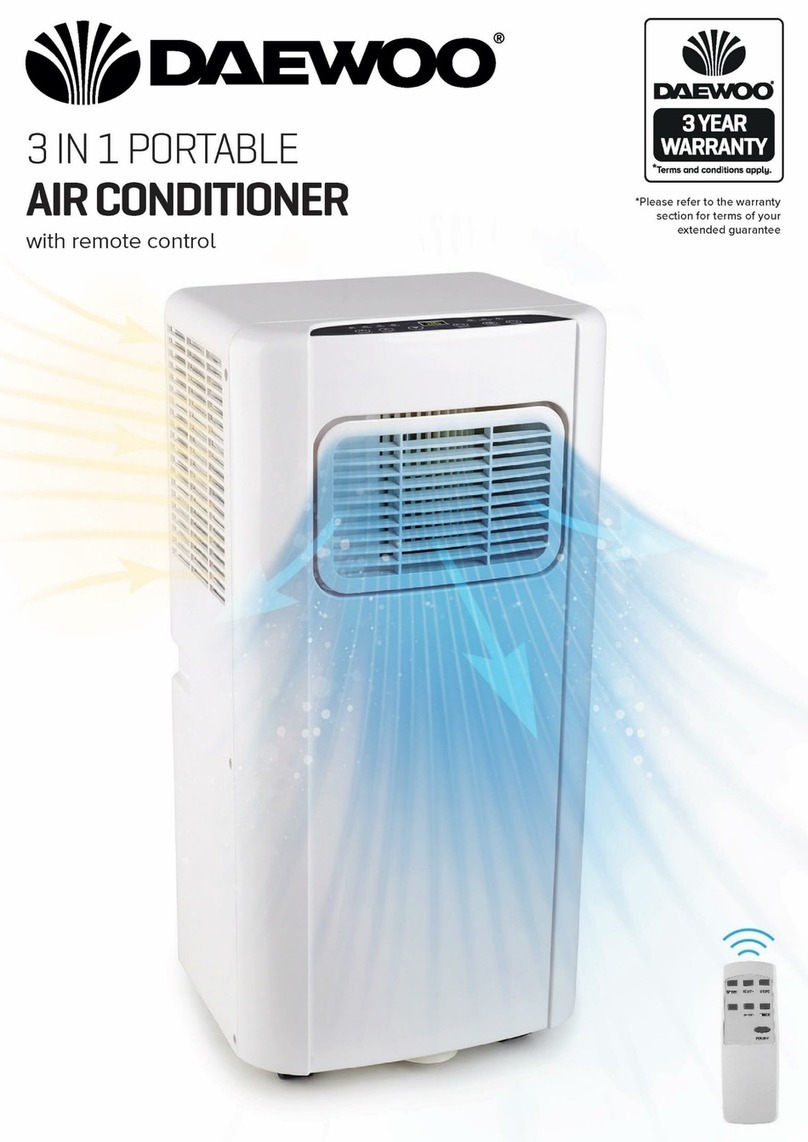
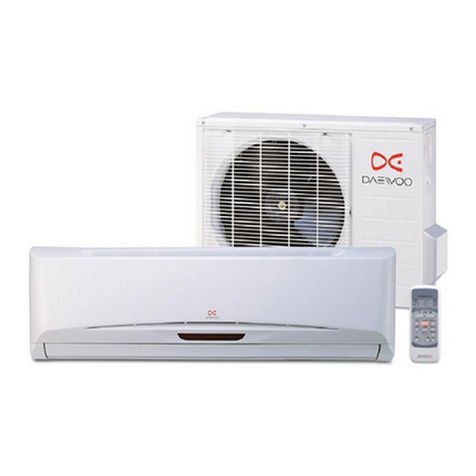
Daewoo DHOME DA7KWE User manual

DA7KWE
AIR CONDITIONER / AIRCONDITIONER /
KLIMAANLAGE / CLIMATISEUR /
ACONDICIONADOR
USER MANUAL 4
GEBRUIKERSHANDLEIDING 11
GEBRAUCHSANWEISUNG 19
MODE D’EMPLOI 27
MANUAL DEL USARIO 35

1
High Up Cool
Sleep °C/°F
Low Fan
Timer
ModeSpeed
°C/°F Cool
Dry
Fan
High
Low
Hr
Timer
Power
Down Dry
1
a f
g
h
j
p
y
s
d
w
u
2
4
35
6
7
8
q
k
z
x
l
w e r t y u i o p
9

2
3

4
User manual
1 INTENDED USE
The air conditioner is intended for cooling and removing moisture.
5Read the manual carefully before the first use.
2 SAFETY
2.1 Labels in this manual
6 WARNING A warning means that injury is possible if the instructions are not obeyed.
1 CAUTION A caution means that damage to the equipment is possible.
5A note gives additional information, e.g. for a procedure.
2.2 Safety features
Automatic defrost
When frost builds up on the evaporation filter, the appliance starts defrosting. The power
button blinks.
Overload protection
In the event of a power loss, the overload protection switches the appliance off. The
appliance switches on after 3 minutes.
2.3 General safety instructions
General
1 To prevent damage or malfunctions: Please take time and read the general safety
instructions. This will avoid fire, explosions, electric shocks or other hazards that may
result in damage to property and/or severe or fatal injuries.
1 The manufacturer is not liable for cases of material damage or personal injury caused
by incorrect handling or non compliance with the safety instructions. In such cases, the
warranty will be voided.
WARNING
6 This product can be used by children aged from 8 years and above and persons with
reduced physical, sensory or mental capabilities or lack of experience and knowledge
if they have been given supervision or instruction concerning use of the product in a
safe way and understand the hazards involved. Children shall not play with the product.
Cleaning and user maintenance shall not be done by children without supervision.

5
6 Do not open the refrigerant loop.
6 If the refrigerant leaks, immediately evacuate all persons in the room. Ventilate the room
and contact the local fire department to inform them about the propane leakage. Do not
enter the room until a qualified technician declares the room safe. Do not use a lighter,
sigarette or other flamable item near the room.
6 Only use R-290 (propane) gas as the refrigerant.
6 Do not get refrigerant in your eyes, on your skin or on your clothing.
6 Do not put force on the appliance.
6 Always check that the mains voltage corresponds to the voltage on the rating plate.
6 Only use original accessories from the manufacturer.
6 Do not spill any liquid on the appliance.
6 Never leave children unattended with the packaging material. The packaging material
represents a danger of suffocation. Children frequently underestimate the danger.
Always keep children away from the packaging material.
6 It is not permitted to open the product yourself or to have it opened, neither is it
permitted to repair the product yourself or to have it repaired. This will void the
warranties. Let any maintenance be carried out by certified maintenance personnel.
6 Do not block the ventilation holes.
6 Do not insert any objects in the ventilation holes.
6 Power cords should be placed so that they cannot be walked on and they cannot easily
become trapped due to items resting on or against them. Pay particular attention to the
power cords at plugs, sockets, and points where the cords exit the product.
6 Disconnect the appliance from the power source during service or when not in use.
6 Do not operate the appliance with wet hands.
6 Do not leave the appliance unattended.
6 Do not unplug the appliance during operation.
6 Do not operate the appliance when damaged.
CAUTION
1 Do not place the appliance near a heat source. This could damage the appliance.
1 Place the appliance on a horizontal flat surface.
Remarks
5We recommend that you retain the original carton and packaging materials in case it
ever becomes necessary to return your product for service. This is the only way to safely
protect the product against damage in transit. If you do dispose of the carton and the
packaging materials, please remember to recycle with due care to the environment.
3 PREPARATIONS FOR USE
3.1 Unpacking
• Unpack the appliance carefully.
• Check the package contents as described below. If any item is missing, please contact
your reseller.
6
5We recommend that you retain the original carton and packaging materials in case it
ever becomes necessary to return your product for service. This is the only way to safely
protect the product against damage in transit. If you do dispose of the carton and the
packaging materials, please remember to recycle with due care to the environment.
3.2 Package contents
5If any item is missing, please contact your reseller.
The following items are included in the received package:
• Exhaust hose
• Hose connector
• Window kit adapter
• Window kit
• Remote control
• Air conditioner
• User manual
4 FUNCTIONS
See image 1.
1. Control panel
2. Adjustable air outlet
3. Handle
4. Castor wheels (4x)
5. Evaporation filter
6. Air filter
7. Air inlet
8. Air exhaust
9. Drain
10. Power cable
11. Timer button
12. Speed button
13. Speed indicator
14. Display
15. Arrow button down
16. Arrow button up
17. Mode indicator
18. Mode button
19. Power button
20. High button
21. Low button
22. Sleep button
23. Cool button
24. Dry button
25. Fan button
26. Change unit button
27. Hose connector
28. Window kit adapter
29. Exhaust hose
30. Window kit
5 INSTALLATION
5.1 Placing the appliance
1. Place the appliance in a room of 9 m2 or bigger.
2. Place the appliance on a horizontal flat surface.

7
3. Keep minimum (50 mm) space around the appliance for optimal ventilation.
4. Do not place the appliance near a heat source. This could damage the appliance.
5. Do not expose the appliance to direct sunlight.
6. Do not install the appliance where it could be subjected to:
-Mechanical vibration or shock
-Excessive dust
-Lack of ventilation, such as cabinet or bookcase
7. Make sure the air inlet and outlet are not blocked, or close to loose objects e.g. curtains.
5If the appliance is tipped more than 45°, let the appliance stand in an upright position for
24 hours before use.
5.2 Connecting the exhaust hose
See image 2.
1 Do not extend the exhaust hose with another hose.
1. Connect the hose connector to the exhaust hose.
5Make sure to fully extend the exhaust hose.
2. Connect the window kit adapter to the other end of the exhaust hose.
3. Extend the window kit to fit the window opening.
4. Lock the window kit between the window and the window frame.
5. Connect the window kit adapter to the window kit.
6. Connect the hose connector to the air exhaust of the appliance.
6 OPERATION
1. Press the power button to switch on the appliance.
5The appliance switches on after 3 seconds.
2. Press the mode button to select the desired operation mode. The different modes are:
-Cool: air circulation and cooling
-Dry: low air circulation and dehumidifying
-Fan: air circulation without cooling
3. Repeatedly press the speed button to select the desired speed.
4. Use the arrow buttons to set the desired temperature.
5. Press the power button to switch off the appliance.
5The appliance switches off after 10 seconds.
6.1 Sleep mode (remote control)
5The sleep mode can only be activated in cool mode.
1. Press the sleep button on the remote control. Every hour the temperature increases by
1°C.

8
6.2 Using the timer
5When the appliance is switched on, the timer works as a shut of timer and vice-versa.
5To cancel the timer, press the power button or press the arrow buttons repeatedly until
the display shows '00'.
1. Press the timer button to switch on the timer function.
2. Use the arrow buttons to set the timer. The display shows the set time.
6.3 Storage
1. Unplug the power cable and the window kit.
2. Drain the water from the appliance.
3. Clean the filter.
4. Store the appliance in an upright position in a dry place.
7 CLEANING AND MAINTENANCE
6 Turn the appliance off and remove the main plug out the socket before you start
cleaning the device.
6 It is not permitted to open the product yourself or to have it opened, neither is it
permitted to repair the product yourself or to have it repaired. This will void the
warranties. Let any maintenance be carried out by certified maintenance personnel.
• Clean the outside of the appliance with a soft cloth. When the appliance is very dirty,
dampen the cloth slightly with water and a neutral solution.
7.1 Draining the appliance
See image 3.
5Draining is only needed in dry mode.
5The appliance shuts off automatically when the reservoir is full.
5You can also drain the appliance automatically by attaching a drain hose to the drain.
Place a drain reservoir on a lower level than the drain.
1. Carefully place the appliance above a sink.
2. Open the drain.
3. When the appliance is drained, close the drain.
7.2 Cleaning the filters
6 Do not touch the evaporation filter with bare hands.
1. Remove both filters from the appliance.
2. Clean the filter with a vacuum cleaner.

9
3. Rinse water through the filter in opposite direction of the airflow.
4. Let the filters completely dry before reïnstalling
8 TROUBLESHOOTING
Problem Possible cause Solution
The appliance does not
switch on.
The power cable is not
connected correctly.
Reconnect the power cable.
The water level in the
reservoir is too high. The
water level indicator lights
up.
Empty the reservoir.
The room temperature
exceeds the working range.
Make sure the room
temperature is between 5
- 35 °C.
The appliance runs with
reduced capacity.
A low fan speed is selected
or the appliance runs in dry
mode.
Select another mode or
another fan speed.
The air filters are blocked. Remove objects from the air
filters. When necessary,
clean the filters.
There is an open door or
window.
Close all doors and
windows.
The exhaust hose is
detached.
Re-attach the exhaust hose.
Water leakage occurs. The appliance has leaked
while moving.
Be careful when moving the
appliance.
The drain hose is leaking. Replace the drain hose.
The drain hose is kinked or
clogged.
Straighten the drain hose.
Unclog a clogged hose.
The appliance makes
excessive noise.
The appliance is not placed
on a flat and stable surface.
Choose a suitable location
for the appliance.
Loose parts are vibrating. Tighten loose parts.
The noise sounds like
flowing water.
This sound is coming from
the refrigerant and is
normal.
If the above solutions do not resolve the problem, please contact your reseller.
10
8.1 Error codes on the display
Error code Possible cause Solution
E0 Communication fault
between PCB and display.
Contact your reseller.
E1 Temperature sensor is
broken.
E2 Coil temperature sensor is
broken.
Ft High water level in the
reservoir.
Empty the reservoir.
9 TECHNICAL SPECIFICATIONS
• Cooling capacity: 7000 Btu
• EER: Class A
• Power supply: 220 - 240 V / 50 Hz
• Sound pressure level: ≤54 dB (A)
• Sound power level: ≤65 dB
• Rated input (cooling): 780 W
• Rated current (cooling): 3.5 A
• EER for cooling: 2.61
• Refrigerant/Charge: R290/120g
• Dehumidifying capacity: 19.2 L / day
• Air circulation: 290 m3/h
• Body size: 300 x 300 x 700 mm
10 DISPOSAL OF USED ELECTRIC AND ELECTRONIC EQUIPMENT
The meaning of the symbol on the material, its accessory or packaging indicates that this
product shall not be treated as household waste. Please, dispose of this equipment at your
applicable collection point for the recycling of electrical and electronic equipments waste.
In the European Union and other European countries which there are separate collection
systems for used electrical and electronic product. By ensuring the correct disposal of this
product, you will help prevent potentially hazardous to the environment and to human
health, which could otherwise be caused by unsuitable waste handling of this product. The
recycling of materials will help conserve natural resources. Please do not therefore dispose
of your old electrical and electronic equipment with your household waste.
For more detailed information about recycling of this product, please contact your local
city office, your household waste disposal service or the shop where you purchased the
product.

11
Gebruikershandleiding
1 BEOOGD GEBRUIK
De airconditioner is bedoeld om lucht af te koelen en vocht af te voeren.
5Lees de handleiding voor het eerste gebruik zorgvuldig.
2 VEILIGHEID
2.1 Pictogrammen in deze handleiding
6 WAARSCHUWING Een waarschuwing betekent dat letsel mogelijk is indien de
instructies niet worden opgevolgd.
1 VOORZICHTIG Voorzichtig betekent dat schade aan de apparatuur mogelijk is.
5Een opmerking verschaft extra informatie, bijv. voor een procedure.
2.2 Veiligheidsvoorzieningen
Automatisch ontdooien
Wanneer er zich vorst op het verdampingsfilter heeft gevormd, begint het apparaat met
ontdooien. De aan-uitknop knippert.
Overbelastingsbeveiliging
In het geval van een stroomonderbreking wordt het apparaat uitgeschakeld door de
overbelastingsbeveiliging. Het apparaat gaat na 3 minuten weer aan.
2.3 Algemene veiligheidsvoorschriften
Algemeen
1 Om schade of storingen te vermijden: Neem de tijd om de algemene
veiligheidsvoorschriften te lezen. Dit voorkomt brand, explosies, elektrische schokken
of andere risico’s die kunnen leiden tot beschadiging van eigendom en/of ernstige of
fatale letsels.
1 De fabrikant is niet aansprakelijk voor gevallen van materiële schade of persoonlijk letsel
veroorzaakt door het onjuist behandelen of niet naleven van de veiligheidsvoorschriften.
In dergelijke gevallen is de garantie nietig.
WAARSCHUWING
6 Dit product mag alleen door kinderen vanaf 8 jaar en personen met een fysieke,
zintuiglijke of mentale beperking of een gebrek aan ervaring en kennis worden gebruikt,
indien ze onder toezicht staan of instructies hebben gekregen over het veilig gebruiken

12
van het producten en eventuele gevaren die een dergelijk gebruik met zich meebrengt.
Kinderen mogen niet met het product spelen. De reiniging en het onderhoud van het
apparaat mag niet zonder toezicht door kinderen worden uitgevoerd.
6 Open de koelmiddellus niet.
6 Als het koelmiddel lekt, dient u onmiddellijk alle personen uit de ruimte te evacueren.
Ventileer de ruimte en neem contact op met de plaatselijke brandweer om hen
te informeren over de lekkage van propaan. Betreed de ruimte niet voordat een
gekwalificeerde technicus de ruimte als veilig heeft aangemerkt. Gebruik geen
aanstekers, sigaretten of ander brandbare voorwerpen in de buurt van de ruimte.
6 Gebruik alleen R-290 (propaangas) als koelmiddel.
6 Zorg ervoor dat u geen koelmiddel in uw ogen, op uw huid of op uw kleding krijgt.
6 Oefen geen druk uit op het apparaat.
6 Controleer steeds of de netspanning overeenkomt met de spanning op het typeplaatje.
6 Gebruik alleen originele accessoires van de fabrikant.
6 Mors geen vloeistoffen op het apparaat.
6 Laat kinderen nooit zonder toezicht achter bij het verpakkingsmateriaal. Het
verpakkingsmateriaal vormt verstikkingsgevaar. Kinderen onderschatten vaak het gevaar.
Houd kinderen steeds buiten bereik van het verpakkingsmateriaal.
6 Het is niet toegestaan om zelf het product open te (laten) maken of te (laten) repareren.
In dat geval vervallen garanties. Laat onderhoud uitvoeren door gecertificeerd
onderhoudspersoneel.
6 Blokkeer de ventilatieopeningen niet.
6 Steek geen voorwerpen in de ventilatieopeningen.
6 Netsnoeren moeten zo gelegd worden dat er niet gemakkelijk op gelopen kan worden
en ze niet gemakkelijk bekneld kunnen raken door voorwerpen die erop of ertegen
rusten. Let bijzonder goed op snoeren bij stekkers, stekkerdozen en punten waar de
snoeren het product verlagen
6 Ontkoppel het apparaat van de stroombron tijdens onderhoud of wanneer het niet in
gebruik is.
6 Bedien het apparaat niet met natte handen.
6 Laat het apparaat niet onbeheerd achter.
6 Trek de stekker niet uit het stopcontact als het apparaat in bedrijf is.
6 Gebruik het apparaat niet wanneer het beschadigd is.
VOORZICHTIG
1 Plaats het apparaat niet in de buurt van een warmtebron, dit kan het apparaat
beschadigen.
1 Plaats het apparaat op een horizontale, vlakke ondergrond.
Aanbevelingen
5Wij raden u aan de originele doos en verpakkingsmaterialen te bewaren voor het
geval dat u het product voor reparatie moet retourneren. Dit is de enige manier om
het product veilig tegen transportschade te beschermen. Indien u de doos en de
verpakkingsmaterialen toch afdankt, vergeet dan niet deze te recyclen ter bescherming
van het milieu.

13
3 VOORBEREIDINGEN VOOR GEBRUIK
3.1 Uitpakken
• Pak het apparaat voorzichtig uit.
• Controleer de inhoud van de verpakking die hieronder is beschreven. Neem contact op
met uw verkooppunt als een onderdeel ontbreekt.
5Wij raden u aan de originele doos en verpakkingsmaterialen te bewaren voor het
geval dat u het product voor reparatie moet retourneren. Dit is de enige manier om
het product veilig tegen transportschade te beschermen. Indien u de doos en de
verpakkingsmaterialen toch afdankt, vergeet dan niet deze te recyclen ter bescherming
van het milieu.
3.2 Inhoud van de verpakking
5Neem contact op met uw verkooppunt als een onderdeel ontbreekt.
De ontvangen verpakking bevat de volgende onderdelen:
• Uitlaatslang
• Slangaansluiting
• Opzetstuk voor de raamkit
• Raamkit
• Afstandsbediening
• Airconditioner
• Gebruikershandleiding
4 FUNCTIES
Zie afbeelding 1.
1. Bedieningspaneel
2. Verstelbare luchtuitlaat
3. Handgreep
4. Zwenkwielen (4x)
5. Verdampingsfilter
6. Luchtfilter
7. Luchtinlaat
8. Luchtuitlaat
9. Afvoer
10. Stroomkabel
11. Timerknop
12. Snelheidsknop
13. Snelheidsindicator
14. Display
15. Pijltjestoets omlaag
16. Pijltjestoets omhoog
17. Modusaanduiding
18. Modusknop
19. Aan-uitknop
20. Knop voor hoger
21. Knop voor lager
22. Slaapknop
23. Knop voor koele modus
24. Knop voor droge modus
25. Knop voor ventilatiemodus
26. Knop voor het wijzigen van de
eenheid
27. Slangaansluiting
28. Opzetstuk voor de raamkit
29. Uitlaatslang
30. Raamkit

14
5 INSTALLATIE
5.1 Plaatsing van het apparaat
1. Plaats het apparaat in een ruimte van minstens 9 m2 .
2. Plaats het apparaat op een horizontale, vlakke ondergrond.
3. Houd minimale ruimte (50 mm) rondom het apparaat voor voldoende ventilatie.
4. Plaats het apparaat niet in de buurt van een warmtebron, dit kan het apparaat
beschadigen.
5. Stel het apparaat niet bloot aan direct zonlicht.
6. Plaats het apparaat niet op een plek waar het kan worden blootgesteld aan:
-Mechanische trillingen of schokken
-Overmatige stofvorming
-Gebrek aan ventilatie, zoals een kast of boekenkast
7. Zorg ervoor dat de luchtinlaat en -uitlaat niet geblokkeerd zijn of zich in de buurt van
losse voorwerpen bevinden, zoals gordijnen.
5Als het apparaat meer dan 45° is gekanteld, moet u het vóór gebruik 24 uur rechtop
laten staan.
5.2 De uitlaatslang aansluiten
Zie afbeelding 2.
1 Verleng de uitlaatslang niet met een andere slang.
1. Verbind de slangaansluiting met de uitlaatslang.
5Zorg ervoor dat de uitlaatslang volledig uitgetrokken is.
2. Sluit het opzetstuk voor de raamkit aan op het andere uiteinde van de uitlaatslang.
3. Verstel de raamkit zodat deze in de raamopening past.
4. Maak de raamkit vast tussen het raam en het raamkozijn.
5. Sluit het opzetstuk voor de raamkit aan op de raamkit.
6. Sluit de slangaansluiting aan op de luchtuitlaat van het apparaat.
6 BEDIENING
1. Druk op de aan-uitknop om het apparaat in te schakelen.
5Het apparaat gaat na 3 seconden aan.
2. Druk op de modusknop om de gewenste bedieningsmodus te selecteren. De
verschillende modi zijn:
-Koel: luchtcirculatie en koeling
-Droog: lage luchtcirculatie en ontvochtiging
-Ventilatie: luchtcirculatie zonder koeling
3. Druk herhaaldelijk op de snelheidsknop om de gewenste snelheid te kiezen.
4. Gebruik de pijltjestoetsen om de gewenste temperatuur in te stellen.
5. Druk op de aan-uitknop om het apparaat uit te schakelen.
5Het apparaat gaat na 10 seconden uit.

15
6.1 Slaapmodus (afstandsbediening)
5De slaapmodus kan alleen worden geactiveerd in de cool-modus.
1. Druk op de slaapknop op de afstandsbediening. Elk uur stijgt de temperatuur 1 °C.
6.2 De timer gebruiken
5Als het apparaat wordt ingeschakeld, kunt u met de timer aangeven wanneer het moet
worden uitgeschakeld en omgekeerd.
5Om de timer te annuleren, drukt u op de aan-uitknop of drukt u op de pijltjestoetsen
totdat op het display '00' verschijnt.
1. Druk op de timerknop om de timerfunctie in te schakelen.
2. Gebruik de pijltjestoetsen om de timer in te stellen. Op het display verschijnt de
ingestelde tijd.
6.3 Opslag
1. Koppel het netsnoer en de raamkit los.
2. Laat het water uit het apparaat lopen.
3. Maak het filter schoon.
4. Sla het apparaat in een rechtopstaande positie op een droge plaats op.
7 REINIGING EN ONDERHOUD
6 Schakel het apparaat uit en haal de stekker uit het stopcontact voordat u het apparaat
gaat reinigen.
6 Het is niet toegestaan om zelf het product open te (laten) maken of te (laten) repareren.
In dat geval vervallen garanties. Laat onderhoud uitvoeren door gecertificeerd
onderhoudspersoneel.
• Reinig de buitenkant van het apparaat met een zachte doek. Indien het apparaat zeer
vuil is, maak de doek dan een beetje vochtig met water en een neutrale oplossing.
7.1 Vocht uit het apparaat afvoeren
Zie afbeelding 3.
5Afvoeren is alleen nodig in droge modus.
5Het apparaat schakelt automatisch uit wanneer het reservoir vol is.
5U kunt het apparaat ook automatisch laten afvoeren door een slang op de afvoer aan te
sluiten. Plaats een reservoir dat lager is gelegen dan de afvoer.
1. Plaats het apparaat voorzichtig boven een gootsteen.
2. Open de afvoer.
3. Sluit de afvoer zodra het apparaat is leeggelopen.

16
7.2 Reinigen van de filters
6 Raak het verdampingsfilter niet met blote handen aan.
1. Verwijder beide filters uit het apparaat.
2. Maak het filter schoon met een stofzuiger.
3. Spoel water door het filter in de tegengestelde richting van de luchtstroom.
4. Laat de filters volledig drogen voordat u ze opnieuw plaatst
8 PROBLEMEN OPLOSSEN
Probleem Mogelijke oorzaak Oplossing
Het apparaat gaat niet aan. De stroomkabel is niet
correct aangesloten.
Sluit de stroomkabel
opnieuw aan.
Het waterpeil in het
reservoir is te hoog. De
waterpeilindicator licht op.
Maak het reservoir leeg.
De kamertemperatuur
overschrijdt de
werktemperatuur.
Zorg ervoor dat de
kamertemperatuur tussen
de 5 - 35 °C is.
Het apparaat heeft een
verminderd vermogen.
Er is een lage
ventilatorsnelheid
geselecteerd of het
apparaat is ingesteld in de
droge modus.
Kies een andere modus of
een andere
ventilatorsnelheid.
De luchtfilters zijn verstopt. Verwijder eventuele
voorwerpen uit de
luchtfilters. Reinig, indien
nodig, de filters.
Er is een deur of raam
geopend.
Sluit alle deuren en ramen.
De uitlaatslang is
losgeraakt.
Bevestig de uitlaatslang
opnieuw.
Er lekt water. Het apparaat heeft gelekt
tijdens het verplaatsen.
Wees voorzichtig bij het
verplaatsen van het
apparaat.
De afvoerslang lekt. Plaats de afvoerslang
opnieuw.
De afvoerslang is geknikt of
verstopt.
Controleer de afvoerslang
op kinken. Ontstop een
verstopte slang.

17
Probleem Mogelijke oorzaak Oplossing
Het apparaat maakt
overmatig veel lawaai.
Het apparaat is niet op een
vlakke en stabiele
ondergrond geplaatst.
Kies een geschikte plek
voor het apparaat.
Losse, trillende onderdelen
zorgen voor lawaai.
Maak losse onderdelen vast.
Het geluid klinkt als
stromend water.
Dit geluid wordt
veroorzaakt door het
koelmiddel en is normaal.
Als de bovenstaande oplossingen het probleem niet oplossen, neem dan contact op met
uw wederverkoper.
8.1 Foutcodes op het display
Foutcode Mogelijke oorzaak Oplossing
E0 Communicatiefout tussen
het PCB en het display.
Neem contact op met uw
wederverkoper.
E1 Temperatuursensor is
defect.
E2 Temperatuursensorspoel is
defect.
Ft Hoog waterpeil in het
reservoir.
Maak het reservoir leeg.
9 TECHNISCHE SPECIFICATIES
• Koelvermogen: 7000 BTU
• Energie-efficiëntieverhouding: Klasse A
• Stroomvoorziening: 220 - 240 V / 50 Hz
• Geluidsdrukniveau: ≤54 dB (A)
• Geluidsvermogensniveau: ≤65 dB
• Nominaal vermogen (koeling): 780 W
• Nominale stroom (koeling): 3,5 A
• Energie-efficiëntieverhouding voor koeling: 2.61
• Koelmiddel/dosering: R290/120 g
• Ontvochtigingscapaciteit: 19.2 liter/dag
• Luchtcirculatie: 290 m3/u
• Formaat behuizing: 300 x 300 x 700 mm

18
10 AFVOER VAN GEBRUIKTE ELEKTRISCHE EN ELEKTRONISCHE
APPARATUUR
Het symbool op het materiaal, de accessoires of verpakking geeft aan dat dit product niet
als huishoudelijk afval mag worden behandeld. Voer het apparaat af via het verzamelpunt
voor de recycling van afgedankte elektrische en elektronische apparatuur binnen de EU
en in andere Europese landen die aparte verzamelsystemen voor gebruikte elektrische
en elektronische apparatuur kennen. Door het apparaat op de juiste manier af te voeren,
helpt u mogelijke gevaren voor het milieu en de volksgezondheid te voorkomen die anders
door verkeerde behandeling van het afgedankte apparaat zouden worden veroorzaakt.
Het recyclen van materialen draagt bij aan het behoud van natuurlijke rijkdommen. Voer
daarom uw oude elektrische en elektronische apparatuur niet af via het huishoudelijke afval.
Neem voor meer informatie over de recycling van dit product contact op met het
plaatselijke gemeentehuis, de vuilnisophaaldienst of de winkel waar u het product heeft
gekocht.

19
Benutzerhandbuch
1 BESTIMMUNGSGEMÄSSER GEBRAUCH
Die Klimaanlage ist für die Kühlung und den Abtransport von Feuchtigkeit vorgesehen.
5Lesen Sie vor dem ersten Gebrauch die Anleitung genau durch.
2 SICHERHEIT
2.1 Zeichen in dieser Anleitung
6 WARNUNG Ein Warnung-Zeichen bedeutet, dass Verletzungen die Folge sein können,
wenn die Anweisungen nicht befolgt werden.
1 VORSICHT Ein Vorsicht-Zeichen bedeutet, dass Schäden am Gerät möglich sind.
5Ein Info-Zeichen liefert Zusatzinformation, z.B. für eine Vorgehensweise.
2.2 Sicherheitsmerkmale
Automatische Abtauung
Wenn sich Frost auf dem Verdunstungsfilter bildet, beginnt das Gerät, abzutauen. Die
Netztaste blinkt.
Überlastschutz
Bei einem Stromausfall schaltet der Überlastungsschutz das Gerät ab. Das Gerät schaltet
sich nach 3 Minuten ein.
2.3 Allgemeine Sicherheitsanweisungen
Allgemeine Wartung
1 Zur Vermeidung von Schäden oder Fehlfunktionen: Bitte nehmen Sie sich die Zeit und
lesen Sie die allgemeinen Sicherheitshinweise. Dadurch werden Feuer, Explosionen,
Stromschläge oder andere Gefahren vermieden, die zu Sachschäden und/oder
schweren oder tödlichen Verletzungen führen können.
1 Der Hersteller haftet nicht für Sach- oder Personenschäden, die durch unsachgemäße
Handhabung oder Nichteinhaltung der Sicherheitshinweise entstanden sind. In solchen
Fällen erlischt die Garantie.
WARNUNG
6 Dieses Produkt kann von Kindern ab 8 Jahren und darüber sowie von Personen mit
verringerten physischen, sensorischen oder mentalen Fähigkeiten oder Mangel an
Erfahrung und Wissen benutzt werden, wenn sie beaufsichtigt oder bezüglich des

20
sicheren Gebrauchs des Produkts unterwiesen wurden und die daraus resultierenden
Gefahren verstehen. Kinder dürfen nicht mit dem Produkt spielen. Die Reinigung und
Benutzerwartung darf nicht von Kindern ohne Aufsicht durchgeführt werden.
6 Öffnen Sie den Kühlmittelkreislauf nicht.
6 Wenn das Kühlmittel austritt, evakuieren Sie sofort alle Personen im Raum. Lüften Sie den
Raum und verständigen Sie die örtliche Feuerwehr, um sie über den Propanaustritt zu
informieren. Betreten Sie den Raum erst, wenn ein qualifizierter Techniker den Raum für
sicher erklärt. Verwenden Sie kein Feuerzeug, keine Zigarette oder andere brennbare
Gegenstände in der Nähe des Raums.
6 Verwenden Sie als Kühlmittel nur R-290 (Propangas).
6 Bringen Sie kein Kühlmittel in Ihre Augen, auf Ihre Haut oder auf Ihre Kleidung.
6 Üben Sie keinen Druck auf das Gerät aus.
6 Vergewissern Sie sich stets, dass die Netzspannung der auf dem Typenschild
angegebenen Spannung entspricht.
6 Verwenden Sie ausschließlich Originalzubehör des Herstellers.
6 Lassen Sie keine Flüssigkeiten auf das Gerät gelangen.
6 Lassen Sie niemals Kinder unbeaufsichtigt in die Nähe des Verpackungsmaterials. Das
Verpackungsmaterial stellt eine Erstickungsgefahr dar. Kinder unterschätzen häufig die
Gefahr. Halten Sie Kinder stets vom Verpackungsmaterial fern.
6 Es ist nicht zulässig, selbst das Produkt zu öffnen oder zu reparieren (bzw. öffnen oder
reparieren zu lassen). In diesem Fall werden sämtliche Garantien hinfällig. Überlassen Sie
die Wartung zertifiziertem Wartungspersonal.
6 Stecken Sie keine Gegenstände in die Lüftungsschlitze.
6 Blockieren Sie nicht die Lüftungsöffnungen.
6 Netzkabel müssen so verlegt werden, dass man nicht darüber stolpern kann und sie
nicht durch Gegenstände, die auf ihnen ruhen oder an ihnen anliegen, eingeklemmt
werden können. Achten Sie besonders auf Kabel an Steckern, Steckdosen und Punkten,
an denen die Kabel an das Produkt angeschlossen sind.
6 Trennen Sie das Gerät während der Wartung oder bei Nichtgebrauch von der
Stromquelle.
6 Bedienen Sie das Gerät nicht mit nassen Händen.
6 Lassen Sie das Gerät nicht unbeaufsichtigt.
6 Ziehen Sie den Stecker des Geräts nicht während des Betriebs.
6 Nehmen Sie das Gerät nicht in Betrieb, wenn es beschädigt ist.
VORSICHT
1 Stellen Sie das Gerät nicht in die Nähe einer Wärmequelle. Dies könnte das Gerät
beschädigen.
1 Stellen Sie das Gerät auf eine waagerechte ebene Oberfläche.
Anmerkungen
5Wir empfehlen, den Originalkarton und das Verpackungsmaterial aufzubewahren, falls
es jemals erforderlich sein sollte, Ihr Produkt zum Kundendienst zurückzubringen. Dies
ist die einzige Möglichkeit, das Produkt sicher vor Transportschäden zu schützen. Falls
Sie den Karton und das Verpackungsmaterial dennoch entsorgen, denken Sie bitte an
ein umweltgerechtes Recycling.
Table of contents
Languages:
Other Daewoo Air Conditioner manuals

Daewoo
Daewoo DWB-180C-R User manual

Daewoo
Daewoo DWA-122C User manual

Daewoo
Daewoo DWC-054R User manual

Daewoo
Daewoo COL1579 User manual

Daewoo
Daewoo DSB-075LH User manual

Daewoo
Daewoo DWC-084R User manual

Daewoo
Daewoo DWA-182R User manual

Daewoo
Daewoo DSB-F183L User manual

Daewoo
Daewoo DWC-051C User manual

Daewoo
Daewoo WM-501 User manual

Daewoo
Daewoo DSB-F154LH User manual

Daewoo
Daewoo DWB-072C User manual

Daewoo
Daewoo DWC-121C User manual

Daewoo
Daewoo DWA-182C User manual

Daewoo
Daewoo DSB-122L User manual

Daewoo
Daewoo DSB-071AH User manual

Daewoo
Daewoo DWC-052C User manual

Daewoo
Daewoo DSB-H1202JLH-VKW User manual

Daewoo
Daewoo DWC-055RL User manual

Daewoo
Daewoo DA6LWE User manual