Daewoo DBU-34 User manual

DBU-34
MANUAL DE INSTRUCCIONES
REPRODUCTOR PORTÁTIL
USB/SD/MP3/CD/RADIO

ES
2
ADVERTENCIA
1. ADVERTENCIA: Consulte la información eléctrica y de seguridad de la parte inferior de la
caja exterior antes de instalar o poner en funcionamiento el aparato.
2. ADVERTENCIA: Para reducir el riesgo de incendio o descarga eléctrica, no exponga este
aparato a la lluvia ni a la humedad. El aparato no debe ser expuesto a goteos ni salpicaduras,
ni se deben colocar objetos llenos de líquido, como jarrones, encima del aparato.
3. ADVERTENCIA: La pila (pila o pilas o conjunto de pilas) no debe ser expuesta a calor
excesivo, como el del sol directo, fuego o similar.
4. ADVERTENCIA: El enchufe de alimentación de la red se utiliza como dispositivo de
desconexión; el dispositivo de desconexión permanecerá listo para funcionar.
5. El aparato emite radiación láser cuando está abierto y los enclavamientos
desactivados. Evite la exposición al rayo láser.
6. Eliminación correcta de este producto. Este símbolo indica que este producto no
debería ser desechado con los residuos domésticos en toda la UE. Para prevenir posibles
daños al medio ambiente o a la salud pública provocados por residuos incontrolados,
recicle el aparato de forma responsable para favorecer la reutilización sostenible de recursos
materiales. Para devolver su aparato usado, utilice los sistemas de devolución y recogida o
póngase en contacto con el comerciante que le vendió el producto. Podrán hacerse cargo
del producto y destinarlo a un reciclado seguro para el medio ambiente.
7. No deben colocarse sobre el aparato fuentes de llama, como velas encendidas.
8. Preste atención a los aspectos medioambientales para la eliminación de las pilas.
9. Utilice el aparato en condiciones meteorológicas moderadas.
10. La información sobre características eléctricas y marcado está situada en la parte inferior
de la unidad.
11. Una excesiva presión acústica de cascos o auriculares puede provocar pérdida auditiva.
12. El enchufe de red de la unidad debería quedar inmovilizado o ser fácilmente accesible
durante su uso previsto.
13. Para desconectar por completo la entrada de corriente se debe extraer el enchufe de la
toma de la pared.
CUIDADO
Existe peligro de explosión si la pila se reemplaza
incorrectamente. Reemplácela únicamente por otra
del mismo tipo o equivalente.

ES
3
CLASS 1 LASER PRODUC T
KLASS 1 LASER APPARA T
LUOKEN 1 LAISERLAITE
KLASSE 1 LASER PRODUK T
CUIDADO
ADVERTENCIA: PELIGRO DE DESCARGA – NO ABRIR
RIESGO DE DESCARGA
ELÉCTRICA. NO ABRIR
ADVERTENCIA
PARA PREVENIR INCENDIOS O PELIGRO DE DESCARGA ELÉCTRICA, NO EXPONGA ESTE
APARATO A LA LLUVIA NI A LA HUMEDAD.
Se ha jado sobre la unidad la siguiente etiqueta, que indica el procedimiento correcto
para trabajar con el rayo láser:
ETIQUETA DE PRODUCTO LÁSER DE CLASE 1:
Se ja esta etiqueta como se muestra en la
ilustraciónparainformardequeelaparatocontiene
un componente láser.
ETIQUETA DE ADVERTENCIA PARA INFORMAR
SOBRE RADIACIÓN:
Esta etiqueta se encuentra en el interior de la
unidad, como se muestra en la ilustración, para
advertir contra otro tipo de medidas sobre la
unidad. El equipo contiene un láser que emite
rayos láser de acuerdo con el límite impuesto a los
productos láser de la clase 1.
SÍMBOLO DE RAYO ACABADO EN FLECHA:
dentro de un triángulo equilátero,
su objeto es advertir al usuario de la
presencia de voltaje peligroso sin aislar
dentro de la caja del producto que puede
ser de magnitud suciente como para
constituir riesgo de descarga eléctrica para
las personas.
SIGNO DE EXCLAMACIÓN: dentro de
un triángulo equilátero, se utiliza para
indicar que un componente especíco
debe ser reemplazado únicamente
por el componente especicado en
la documentación por razones de
seguridad.

ES
4
INSTRUCCIONES DE SEGURIDAD
1. LEA LAS INSTRUCCIONES: Es necesario leer todas las instrucciones de seguridad y de uso
antes de poner en funcionamiento el aparato.
2. GUARDE LAS INSTRUCCIONES: Las instrucciones de seguridad y de uso deben guardarse
para futuras consultas.
3. OBSERVE LAS ADVERTENCIAS: Observe todas las advertencias en relación con el aparato
de las instrucciones de uso.
4. SIGA LAS INSTRUCCIONES: Siga todas las instrucciones de uso.
5. AGUA Y HUMEDAD: No se debe utilizar el aparato cerca del agua, por ejemplo, junto a la
bañera, lavabo, fregadero, pila de lavar, piscina o en un sótano húmedo.
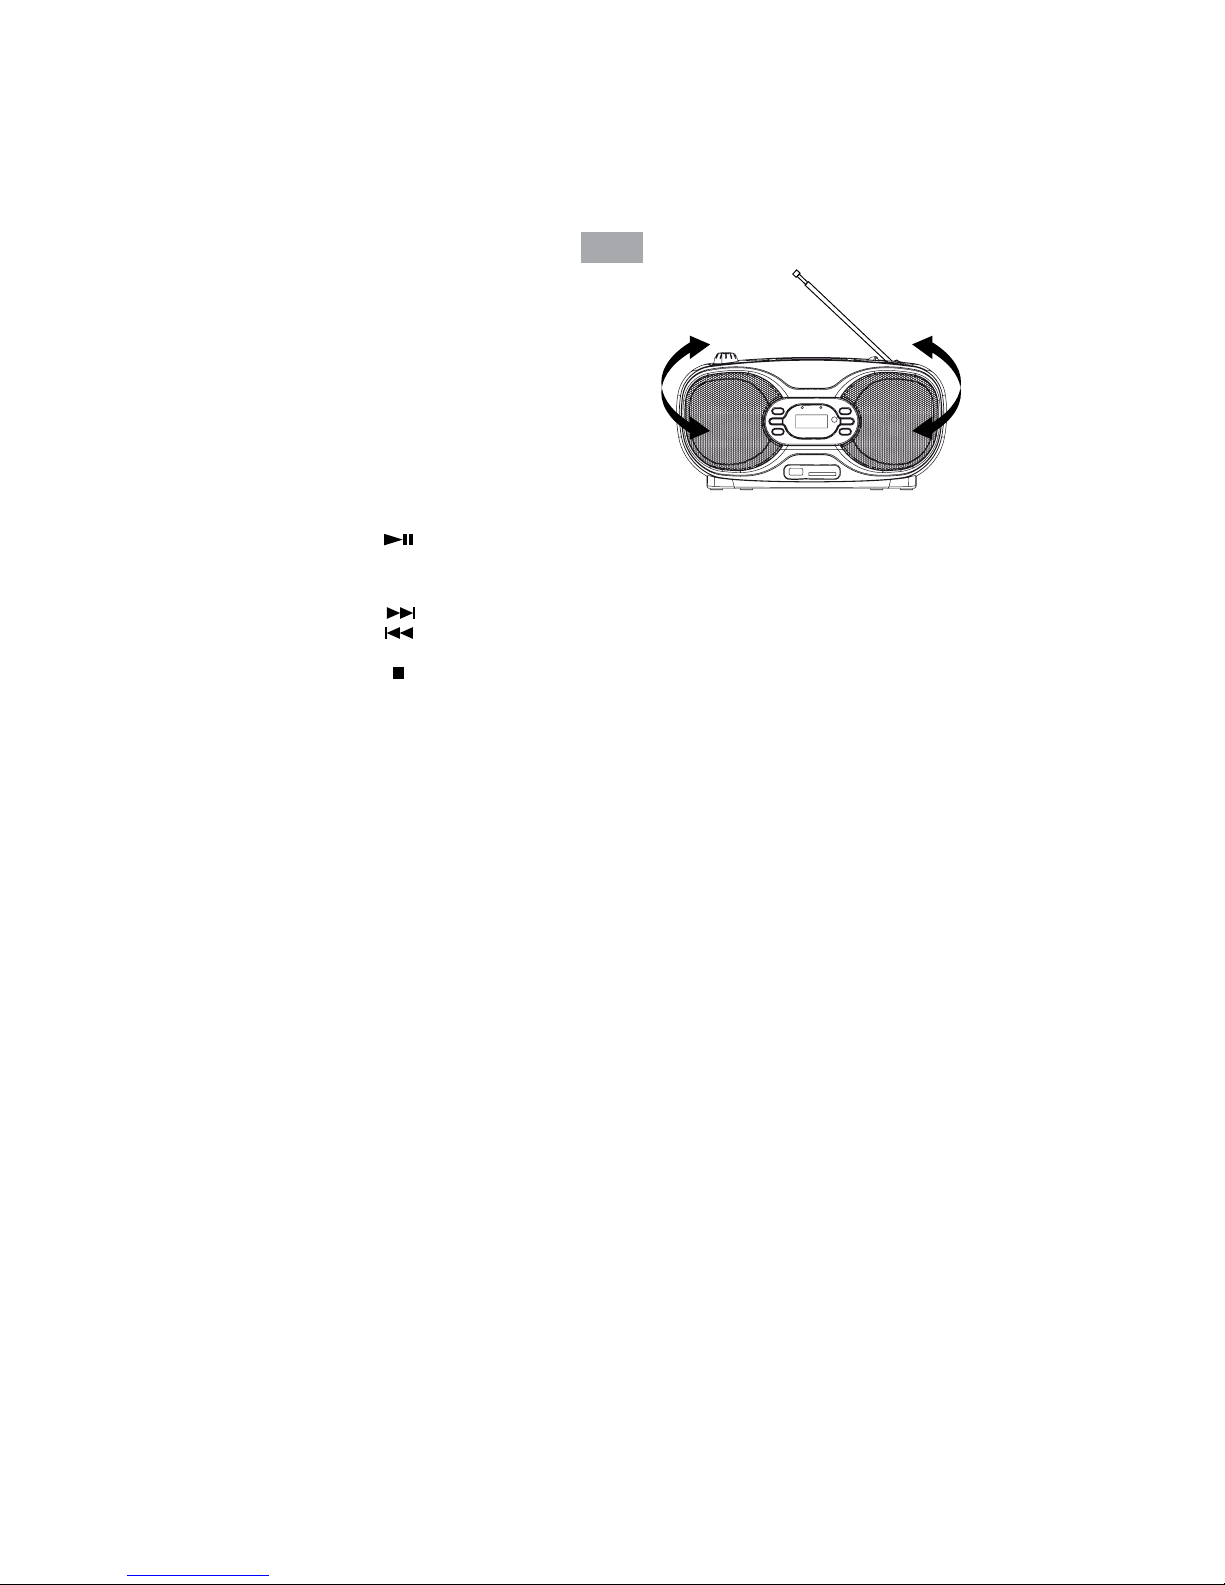
6. VENTILACIÓN: Conviene situar el aparato en una ubicación o posición que no impida su
correcta ventilación.
No lo sitúe sobre una cama, sofá, alfombra o supercie similar que pudiera bloquear sus
aberturas de ventilación, ni en instalaciones empotradas, como en librerías o armarios que
pudieran impedir el ujo de aire por las aberturas de ventilación.
7. CALOR: Conviene situar el aparato lejos de fuentes de calor, como radiadores, fogones u
otros dispositivos (amplicadores incluidos) que produzcan calor.
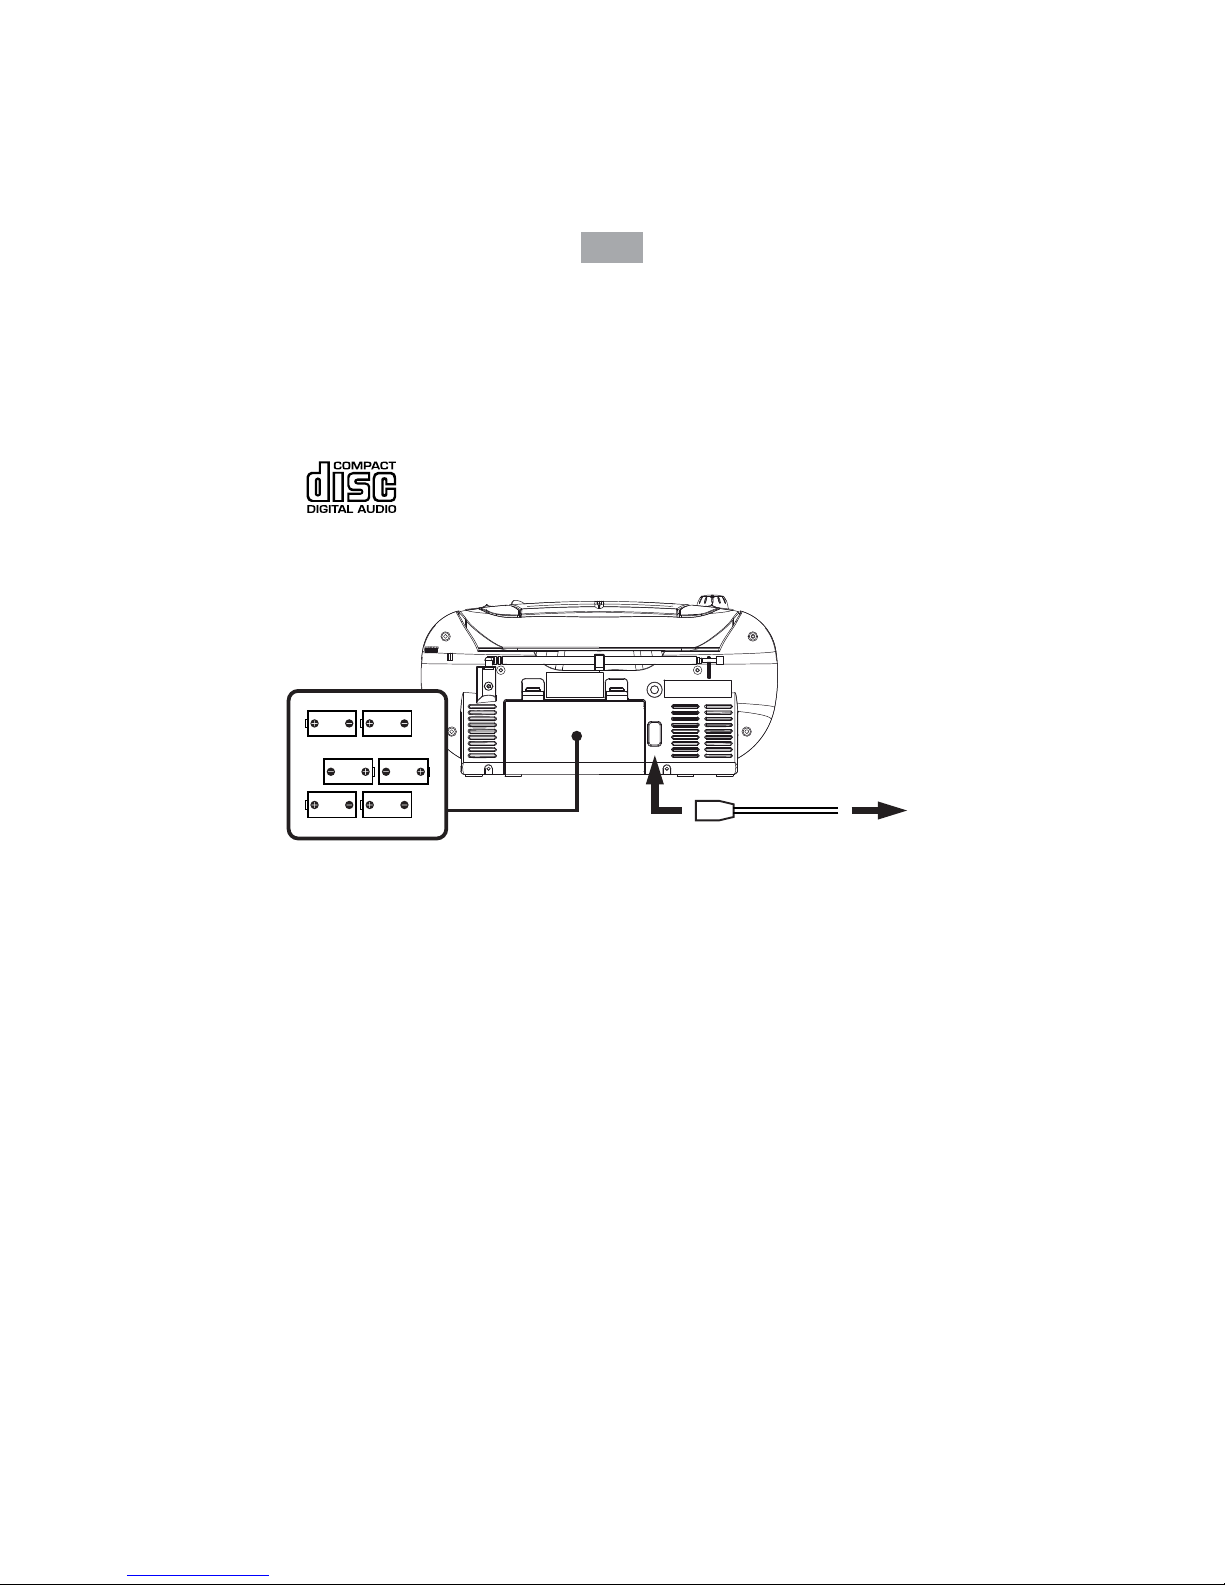
8. FUENTE DE ALIMENTACIÓN: El aparato debe conectarse únicamente a una fuente
de alimentación del tipo descrito en las instrucciones de uso o según la placa de
características.
9. PROTECCIÓN DEL CABLE DE ALIMENTACIÓN: Los cables de alimentación deben tenderse
de modo que no sea probable que sean pisados ni aplastados por objetos situados sobre o
contra ellos.
10. LÍNEAS DE ALTA TENSIÓN: Conviene situar una antena exterior alejada de líneas de alta
tensión.
11. OBJETOSY ENTRADA DE LÍQUIDOS: Tenga cuidado de que ningún objeto caiga sobre el
aparato ni se derramen líquidos que puedan penetrar a través de sus aberturas.
12. ADVERTENCIA SOBRE DESCARGAS ELECTROSTÁTICAS: Si la pantalla no funciona
correctamente o el aparato no reacciona a los mandos, puede ser debido a descargas
electrostáticas. Apague y desenchufe el aparato. Vuelva a conectar tras unos segundos.
13. DAÑOS QUE PRECISAN ASISTENCIA TÉCNICA: El aparato deberá llevarse a un servicio
técnico cualicado cuando:
a. El cable o el enchufe de alimentación hayan resultado dañados.
b. Le haya caído un objeto encima o se haya derramado líquido y haya penetrado en la
caja del aparato.
c. El aparato haya estado expuesto a la lluvia.
d. El aparato haya caído al suelo o su caja haya resultado dañada.
e. El aparato no parezca estar funcionando normalmente.
14. REPARACIONES: El usuario no debería intentar reparar el aparato más allá de lo descrito
en las instrucciones de uso. Para cualquier otra reparación deberá recurrirse a personal
técnico cualicado.
Notas:
a. Los CD sucios o rayados pueden provocar problemas de saltos en el sonido. Limpie o
cambie el CD.
b. Si se indica un error en pantalla o se produce un fallo de funcionamiento, desconecte el
cable de CA y retire todas las pilas. Luego, vuelva a conectar la alimentación.

ES
5
A una toma de
corriente de la pared
A la toma de
corriente
Introduzca 6 pilas de tamaño
C en el compartimento de las
pilas
ANTES DEL USO
Notas: SOBRE LOS DISCOS COMPACTOS.
Puesto que los discos sucios, dañados o combados pueden dañar el aparato, tenga cuidado
con lo siguiente:
a. Discos compactos utilizables: utilice solamente discos compactos con la marca
mostrada a continuación.
b. Discos compactos CD solamente con señal de audio digital.
FUENTES DE ALIMENTACIÓN
ALIMENTACIÓN POR CORRIENTE
Puede usted alimentar su equipo portátil enchufando el cable de alimentación por corriente
extraíble en la toma de corriente situada en la parte posterior de la unidad y en una toma
de corriente de pared. Compruebe que el voltaje de su aparato coincide con el voltaje local.
Asegúrese de que el cable de alimentación por corriente está bien insertado en el aparato.
ALIMENTACIÓN A PILAS
Introduzca 6 pilas de tamaño C en el compartimiento de las pilas. Asegúrese de que las pilas
están correctamente colocadas para evitar daños en el aparato. Saque siempre las pilas
cuando no vaya a utilizar el aparato durante un largo periodo; evitará así el riesgo de fugas
en las pilas y en consecuencia daños en su equipo.
Notas:
- Utilice pilas del mismo tipo. No junte nunca diferentes tipos de pilas.
- Para utilizar el aparato con pilas, desenchufe el cable de alimentación por corriente
del mismo.

ES
6
15
6
7
8
2
3
4
ANTENA FM
SELECTOR DE
FUNCIÓN
CONTROL DE
VOLUMEN
CONTROL DE
SINTONIZACIÓN
TAPA DEL CD
SELECTOR DE
BANDA
ABRIR/CERRAR
INDICADOR DE
DIAL
AVANZAR +
PARAR
RETROCEDER -
PUERTO USB
PANTALLA LCD
INDICADOR FM
ESTEREO INDICADOR DE
ENCENDIDO
RECEPTOR MAN-
DO A DISTANCIA
PUERTO TARJETA
SD
MODO
ALBUM
REPRODUCIR/
PAUSA
SITUACIÓN DE LOS CONTROLES
MANDO A DISTANCIA
1. PARAR
2. MODO
3. AVANZAR +
4. + 10
5. REPRODUCIR / PAUSA
6. PROGRAMA
7. RETROCEDER -
8. ALBUM

ES
7
+
INSTALACIÓN DE
LAS PILAS
Deslice la tapa e introduzca una pila de botón
con la polaridad tal y como se indica
INSTALACIÓN DE LAS PILAS
Introduzca una pila de botón en el compartimento de las pilas. Asegúrese de que las pilas
estén bien insertadas para evitar dañar el mando a distancia. Si prevé que no utilizará el
aparato durante un largo período de tiempo, extraiga las pilas ya que cualquier fuga puede
dañar el aparato.
Notas:
- Si la distancia necesaria entre el mando a distancia y el aparato se reduce, signica que las
pilas se agotan. Sustitúyalas por otras nuevas.
- El botón de encendido/apagado de la unidad principal debe estar en posición de
encendido para que funcione el mando a distancia.
VENTANA DEL SENSOR DEL RECEPTOR
- Aunque se utilice el mando a distancia dentro de su alcance efectivo, es posible que no
funcione si hay algún obstáculo entre el aparato y el mando a distancia.
- Si el mando a distancia se utiliza cerca de otros aparatos que generen rayos infrarrojos,
o si se utilizan cerca del aparato otros dispositivos de control remoto que utilicen rayos
infrarrojos, el aparato podría funcionar incorrectamente.
FUNCIONAMIENTO DE LA RADIO
FUNCIONES BÁSICAS
1. Sitúe el selector «FUNCTION» en modo «RADIO».
2. Seleccione la banda que desee mediante el selector «BAND».
3. Ajuste la frecuencia de radio de la emisora que desee mediante el control «TUNING»
(sintonización).
4. Ajuste el volumen en el nivel deseado con el control «VOLUME».
RECEPCIÓN DE FM / FM ESTÉREO
- Sitúe el selector «BAND» en modo FM para recepción en MONO.
- Sitúe el selector «BAND» en modo FM ST. para recepción en FM ESTÉREO. El indicador de
estéreo se encenderá para indicar el modo FM ESTÉREO.
PARA UNA MEJOR RECEPCIÓN
- Busque la mejor orientación de la antena para
mejorar la recepción.

ES
8
- Cambie la orientación del aparato para
mejorar la recepción de AM.
FUNCIONAMIENTO GENERAL
REPRODUCIR / Pulse para iniciar la reproducción del disco de CD / MP3.
PAUSA Pulse de nuevo para detener temporalmente la reproducción de
CD / MP3.
Vuelva a pulsar para reanudar la reproducción.
AVANZAR + y Pulse para ir a la siguiente pista o volver a la anterior.
SKIP - Pulse y mantenga pulsado durante la reproducción hasta
encontrar el momento deseado.
STOP Pulse para detener todo el funcionamiento de CD / MP3.
REPRODUCIR
1. Sitúe el selector «FUNCTION» en modo «CD / MP3 / USB».
2. Abra la tapa del CD y coloque un disco de CD / MP3 con la etiqueta hacia arriba en el
compartimiento del CD.
3. Cierre la tapa del CD.
4. Cuando hay un disco dentro, se realiza una búsqueda selectiva. Se lee el número total de
pistas, que aparece en pantalla.
5. La reproducción comenzará automáticamente desde la primera pista.
6. Ajuste el volumen en el nivel deseado con el control «VOLUME».
7. Pulse de nuevo el botón «REPRODUCIR / PAUSA» cuando desee detener temporalmente
la reproducción.
8. Pulse el botón «PARAR» cuando acabe.
FUNCIONAMIENTO DEL CD / MP3
PROGRAMA
Pueden programarse hasta 20 pistas de un disco CD y 99 pistas de un disco MP3 para ser
reproducidas en cualquier orden.
Asegúrese de pulsar el botón «PARAR» antes del uso.
1. Pulse el botón «PROGRAM», la pantalla parpadeará mostrando «P01».
2. Seleccione la pista deseada mediante los botones «AVANZAR / SKIP +» o
«RETROCEDER / SKIP - ».
3. Pulse de nuevo el botón «PROGRAM» para conrmar la pista deseada en la memoria del
programa.
4. Repita los pasos 2 y 3 para incluir más pistas en la memoria del programa.
5. Cuando haya programado todas las pistas que desee, pulse el botón «REPRODUCIR /
PAUSA» para reproducir el disco en el orden programado.
6. Pulse dos veces el botón «PARAR» para nalizar la reproducción programada.

ES
9
REP REP
ALBUM REP
ALL
RAND
REPETIR 1
REPRO-
DUCCIÓN
ALEATORIA
REPETIR
TODO
REPRO-
DUCCIÓN
NORMAL
REPETIR
ALBUM
MODO
Pulse el botón «MODO» antes o durante la reproducción del disco de CD / MP3, cada pulsación
cambiará la función como sigue:
1 - REPETIR 1
2 - REPETIR ÁLBUM (*SOLO MP3)
3 - REPETIR TODO (REP ALL)
4 - REPRODUCCIÓN ALEATORIA (RAND)
5 - REPRODUCCIÓN NORMAL
FUNCIONAMIENTO DE LOS DISPOSITIVOS USB / SD
FUNCIONAMIENTO GENERAL
REPRODUCIR / Pulse para empezar a reproducir pistas del USB.
PAUSA Pulse de nuevo para detener temporalmente la reproducción de
USB. Vuelva a pulsar para reanudar la reproducción.
AVANZAR + Y Pulse para ir a la siguiente pista o volver a la anterior.
RETROCEDER - Pulse y mantenga pulsado durante la reproducción hasta
encontrar el momento deseado.
PARAR Pulse para detener todo el funcionamiento de USB.
REPRODUCIR
1. Inserte un dispositivo en el puerto USB o de la tarjeta SD.
2. Sitúe el selector «FUNCTION» en modo «CD / MP3 / USB».
3. El aparato leerá y reproducirá automáticamente el USB/SD si no hay ningún disco en el
compartimiento del disco.
4. El aparato leerá y reproducirá automáticamente el DISCO si hay un disco en el
compartimiento del disco.
5. Pulse y mantenga pulsado el botón «REPRODUCIR / PAUSA» durante unos segundos para
acceder al modo USB/SD.
6. Pulse y mantenga pulsado el botón «STOP» durante unos segundos para
cambiar la reproducción al dispositivo USB o SD.
PROGRAMA, MODO
El funcionamiento de PROGRAMA y MODO es el mismo que con CD / MP3. Consulte
FUNCIONAMIENTO DE CD / MP3.
DECLARACIÓN DE CONFORMIDAD
Por medio de la presente Flamagas SA declara que el producto DBU-34 cumple los requisitos
y objetivos de protección básicos de:
• La Directiva 2006/95/EC de Baja Tensión
• La Directiva 2004/108/EC de Compatibilidad Electromagnética
Para obtener una copia completa de la declaración de conformidad visite la dirección
www.electronicaamagas.com

DBU-34
USER MANUAL
USB/SD/MP3/CD/RADIO
PORTABLE PLAYER

ENG
11
WARNING
1. WARNING: Please refer the information on exterior bottom enclosure for electrical and
safety information before installing or operating the apparatus.
2. WARNING: To reduce the risk of re or electric shock, do not expose this apparatus to rain
or moisture. The apparatus shall not be exposed to dripping or splashing and that no objects
lled with liquids, such as vases, shall be placed on apparatus.
3. WARNING: The battery (battery or batteries or battery pack) shall not be exposed to
excessive heat such as sunshine, re or the like.
4. WARNING: The mains plug is used as disconnect device, the disconnect device shall remain
readily operable.
5. Invisible laser radiation when open and interlocks defeated. Avoid exposure to
beam of laser.
6. Correct Disposal of this product. This marking indicates that this product should not
be disposed with other household wastes throughout the EU. To prevent possible harm to
the environment or human health from uncontrolled waste disposal, recycle it responsibly to
promote the sustainable reuse of material resources. To return your used device, please use
the return and collection systems or contact the retailer where the product was purchased.
They can take this product for environmental safe recycling.
7. No naked ame sources, such as lighted candles, should be placed on the apparatus.
8. Attention should be drawn to environmental aspects of battery disposal.
9. Use of the apparatus in moderate climates.
10. The rating and marking information are located at the bottom of the unit.
11. Excessive sound pressure from earphone and headphones can cause hearing loss.
12. The mains plug of unit should be obstructed or should be easily accessed during
intended
use.
13. To be completely disconnect the power input, the mains plug of apparatus shall be
disconnected from the mains.
CAUTION
Danger of explosion if battery is incorrectly replaced.
Replace only with the same or equivalent type

ENG
CLASS 1 LASER PRODUC T
KLASS 1 LASER APPARA T
LUOKEN 1 LAISERLAITE
KLASSE 1 LASER PRODUK T
CAUTION
WARNING : SHOCK HAZARD-DO NOT OPEN
RISK OF ELECTRIC SHOCK DO
NOT OPEN
12
WARNING
TO PREVENT FIRE OR SHOCK HAZARD DO NOT EXPOSE THIS APPLIANCE TO RAIN OR
MOISTURE.
The following label has been axed to the unit, listing the proper procedure for working
with the laser beam:
CLASS 1 LASER PRODUCT LABEL -
This label is attached to the place as illustrated
to inform that the apparatus contains a laser
component.
WARNING LABEL INFORMING OF RADIATION -
This label is placed inside the unit. As shown in the
illustration. To warn against further measures on
the unit. The equipment contains a laser radiating
laser rays according to the limit of laser product of
class 1.
LIGHTNING FLASH WITH ARROWHEAD
SYMBOL - within an equilateral triangle, is
intended to alert the user to the presence
of uninsulated dangerous voltage within
the products enclosure that may be of
sucient magnitude to constitute a risk of
electric Shock to persons.
EXCLAMATION POINT - within an
equilateral triangle, is used to indicate
that a specic component shall be
replaced only by the component
specied in that documentation for
safety reason.

ENG
13
SAFETY INSTRUCTIONS
1. READ INSTRUCTIONS - All the safety and operating instructions should be read before the
appliance is operated.
2. RETAIN INSTRUCTIONS - The safety and operating instruction should be retained for
future reference.
3. HEED WARNINGS - All warnings on the appliance and in the operating instructions should
be adhered to.
4. FOLLOW INSTRUCTIONS - All operating instructions should be followed.
5. WATER AND MOISTURE - The appliance should not be used near water, for example, near
a bathtub, washbowl, kitchen sink, laundry tub, swimming pool or in a wet basement.
6. VENTILATION - The appliance should be situated so that its location or position does not
interfere with its proper ventilation. Do not place on bed, sofa, rug or similar surface that may
block the ventilation openings, in a built-in installation, such as a bookcase or cabinet that
may impede the ow of air through the ventilation openings.
7. HEAT - The appliance should be situated away from heat sources such as radiators, stoves,
or other appliances (including ampliers) that produce heat.
8. POWER SOURCE - The appliance should be connected to power supply only of the type
described in the operating instructions or as marked on the appliance.
9. POWER CORD PROTECTION - Power supply cords should be routed so that they are not
likely to be walked on or pinched by items placed upon or against them.
10. POWER LINES - An outdoor antenna should be located away from power lines.
11. OBJECT and LIQUID ENTRY - Care should be taken so that objects do not fall and liquids
are not spilled into the enclosure through openings.
12. ESDWARNING - The display does not function properly or no reaction to operation of any
the control may due to the electrostatic discharge. Switch o and unplug the set. Reconnect
after a few seconds.
13. DAMAGE REQUIRING SERVICE - The appliance should be serviced by qualied service
personnel when:
a. The power-supply cord or plug has been damaged.
b. Objects have fallen into, or liquid has been spilled into the appliance enclosure.
c. The appliance has been exposed to rain.
d. The appliance has been dropped, or the enclosure damaged.
e. The appliance does not appear to operate normally.
14. SERVICING - The user should not attempt to service the appliance beyond that described
in the user operating instructions. All other servicing should be referred to qualied service
personnel.
Notes:
a. Dirty or scratched CD may cause a skipping problem. Clean or replace the CD.
b. If an error display or malfunction occurs, disconnect the AC cord and remove all the
batteries. Then turn the power back on.

ENG
to a wall outlet
to AC IN
Insert 6 x“C” size batteries into
the battery compartment
14
BEFORE OPERATION
Notes: CONCERNING COMPACT DISCS.
Since dirty, damaged or warped discs may damage the appliance, care should be taken of
the followings items:
a. Usable compact discs. Use only compact disc with the mark shown below.
b. CD compact disc only with digital audio signals.
POWER SOURCES
AC POWER
You can power your portable system by plugging the detachable AC power cord into the AC
inlet at the back of the unit and into a wall AC power outlet. Check that the rated voltage of
your appliance matches your local voltage. Make sure that the AC power cord is fully inserted
into the appliance.
BATTERY POWER
Insert 6 x “C” size batteries into the battery compartment. Be sure that the batteries are
inserted correctly to avoid damage to the appliance. Always remove the batteries when
appliance will not be used for a long period of time, as this will cause leakage to the batteries
and subsequently damage to your set.
Notes:
- Use batteries of the same type. Never use dierent types of batteries together.
- To use the appliance with batteries, disconnect the AC power cord from it.

ENG
15
6
7
8
2
3
4
FM ANTENNA
FUNCTION
SELECTOR
VOLUME
CONTROL
TUNNING
CONTROL
CD DOOR
BAND SELECTOR
OPEN/CLOSE
DIAL POINTER
SKIP +
STOP
SKIP -
USB SLOT
LCD DISPLAY
FM STEREO
INDICATOR POWER
INDICATOR
REMOTE SENSOR
SB CARD SLOT
MODE
ALBUM
PLAY/PAUSE
15
LOCATION OF CONTROLS
REMOTE CONTROL
1. STOP
2. MODE
3. SKIP +
4. + 10
5. PLAY / PAUSE
6. PROGRAM
7. SKIP -
8. ALBUM

ENG
+
INSTALLING
BATTERIES
Slide out cover and install single
Cell battery with polarities as
shown
16
BATERY INSTALLATION
Insert a “Cell” size batteries into the battery compartment. Be sure that the batteries are
insertedcorrectly to avoid damage to the remote control. Always remove the batteries when
the remotecontrol will not be used for a long period of time, as this will cause leakage to the
batteries and subsequently damage to your set.
Notes:
- If the distance required between the remote control and the appliance decreases, the
batteries are exhausted. In this case replace the batteries with new one.
- Power button on main unit must be‘On’in order for Remote Control to operate.
SENSOR WINDOW OF THE RECEIVER
- Even if the remote control is operated within the eective range, its operation may be
impossible if there are any obstacies between the appliance and the remote control.
- If the remote control is operated near other appliances which generate infrared rays, or
if other remote control devices using infrared rays are used near the appliance, it may
operate incorrectly.
RADIO OPERATION
GENERAL OPERATION
1. Set the “FUNCTION”selector to“RADIO”mode.
2. Select desired band by using the“BAND” selector.
3. Adjust radio frequency to your desired station by using the“TUNING” control.
4. Adjust the“VOLUME”control to the desired level.
FM / FM-STEREO RECEPTION
- Set the “BAND” selector to FM mode for MONO reception.
- Set the “BAND” selector to FM ST. mode for FM STEREO reception. The Stereo indicator
light up to show FM ST. mode.
FOR BETTER RECEPTION
- Reorient the antenna for better reception.

ENG
17
- Reorient the appliance to get better AM reception.
GENERAL OPERATION
PLAY / PAUSE Press to start playing CD / MP3 disc.
Press again to stop playing CD / MP3 operation temporarily.
Press again to resume playback.
SKIP + & Press to go to the next track or back to the previous track.
SKIP - Press and hold while playing until you nd the point of the
sound.
STOP Press to stop all CD / MP3 operation.
PLAYBACK
1. Set the “FUNCTION”selector to“CD / MP3 / USB”mode.
2. Open the CD door and place a CD / MP3 disc with the label up in the CD compartment.
3. Close the CD door.
4. Focus search is performed if disc is inside.
For CD disc - Total number of tracks is read and appears on the display.
For MP3 disc - “MP3”appears on the display.
5. Press the “PLAY / PAUSE” button to start playing CD / MP3 disc.
6. Adjust the“VOLUME”control to the desired level.
7. Press the “PLAY / PAUSE” button again when you want to stop playback temporarily.
8. Press the “STOP”button when nished.
CD / MP3 OPERATION
PROGRAM
Up to 20 tracks of CD disk, 99 tracks of MP3 disc can be programmed for disc play in any
order.
Be sure to press the“STOP”button before use.
1. Press the “MODE” button, the display will show“P01” and ash.
2. Select desired track by using the “SKIP +” or “SKIP -” button. ( You may select a desired
album by pressing“ALBUM” button. )
3. Press the “MODE” button again to conrm desired track into the program memory.
4. Repeat step 2 and 3 to enter additional tracks into the program memory.

ENG
REP REP
ALBUM REP
ALL
RAND
REPEAT 1
RANDOM
REPEAT
ALL
NORMAL
PLAYBACK
REPEAT
ALBUM
18
5. When all the desired tracks have been programmed, press the “PLAY / PAUSE” button to
play thedisc in the order you have programmed.
6. Press the “STOP”button twice to terminate programmed playback.
MODE
Press the “MODE” button during playing CD / MP3 disc, each press switches the mode
function as follows:
1 - REPEAT 1
2 - REPEAT ALBUM ( *MP3 ONLY )
3 - REPEAT ALL
4 - RANDOM
5 - NORMAL PLAYBACK
USB / SD OPERATION
GENERAL OPERATION
PLAY / PAUSE Press to start playing tracks from the USB / SD card.
Press again to stop playing USB / SD operation temporarily.
Press again to resume playback.
SKIP + & Press to go to the next track or back to the previous track.
SKIP - Press and hold while playing until you nd the point of the
sound.
STOP Press to stop all USB / SD operation.
PLAYBACK
1. Plug or slot in USB / SD card device to the port.
2. Set the “FUNCTION”selector to“CD / MP3 / USB”mode.
3. It will read and automatic playing USB / SD card, if no disc on disc tray.
4. It will read and automatic playing DISC, if have disc on disc tray.
5. Press and hold the “PLAY / PAUSE” button for a few seconds to entry USB / SD mode.
6. Press and hold the “STOP”button for a few seconds to change play USB or SD card.
PROGRAM, MODE
The operation of PROGRAM, MODE are as the same as that of CD / MP3. Please refer to CD /
MP3 OPERATION.
DECLARATION OF CONFORMITY
Flamagas, S.A. declares product DBU-34 complies with the essential protective requirements
and objectives of:
• EMC Directive 2004/108/EC
• Low Voltage Directive 2006/95/EC
To check the entirely declaration of conformity of this model, visit
www.electronicaamagas.com

DBU-34
MANUEL D’INSTRUCTIONS
REPRODUCTEUR PORTABLE
USB/SD/MP3/CD/RADIO

FR
20
AVERTISSEMENT
1. AVERTISSEMENT: Consultez l’information électrique et de sécurité de la partie inférieure
de la boîte extérieure avant d’installer ou de mettre en marche l’appareil.
2. AVERTISSEMENT: Pour réduire le risque d’incendie ou de décharge électrique, ne pas
exposer cet appareil ni à la pluie ni à l’humidité. Cet appareil ne peut pas être exposé ni à des
dégoulinements ni à des éclaboussures, et ne pas placer des objets pleins de liquide, tels que
les vases, sur l’appareil.
3. AVERTISSEMENT: La pile (pile, piles ou ensemble de piles) ne peut pas être exposée à la
chaleur excessive, tels que le soleil direct, le feu ou source similaire.
4. AVERTISSEMENT: La che d’alimentation du réseau s’utilise comme dispositif de
déconnexion; le dispositif de déconnexion demeurera prêt pour fonctionner.
5. L’appareil émet une radiation laser lorsqu’il est ouvert et les enclaves sont
désactivées. Eviter l’exposition au rayon laser.
6. L’élimination correcte de ce produit. Ce symbole indique que ce produit ne devrait
pas être éliminé avec les résidus domestiques dans toute l’UE. Pour prévenir de possibles
dommages à l’environnement ou à la santé publique causés par des résidus incontrôlés,
recyclez l’appareil avec responsabilité pour favoriser la réutilisation durable des ressources
matérielles. Pour rendre un appareil usé, utilisez les systèmes de remise et collecte ou
contactez avec votre commerçant. Ils pourront prendre en charge le produit et le destiner à
un recyclage sûr pour l’environnement.
7. Ne pas placer sur l’appareil des sources à ammes, tels que les bougies allumées.
8. Soyez attentifs aux aspects environnementaux pour l’élimination des piles.
9. Utilisez l’appareil dans des conditions météorologiques modérées.
10. L’information sur les caractéristiques électriques et marque se trouve sur la partie
inférieure de l’appareil.
11. Une pression acoustique excessive des casques ou écouteurs peut provoquer une perte
d’audition.
12. La che de réseau de l’unité doit demeurer immobile et doit être d’accès facile pendant
son utilisation.
13. Pour déconnecter complètement l’entrée de courant, il faut retirer la che de la prise de
courant du mur.
ATTENTION
Danger d’explosion si la pile est remplacée de façon
incorrecte. Remplacer la pile seulement par une autre
pile du même type ou équivalent.
Table of contents
Languages:
Other Daewoo CD Player manuals