Daewoo DVR-5088N User manual

DVR-5088N
OperatingInstructions
VIDEO CASSETTE RECORDER
•On Screen Display &Programming
•VHS Index Search System
•Dt_,ital Auto Tracking
• Real Time Counter

CAUTION
Thank you for purchasing DAEWOO VCR, developed to provide advanced features and functions for high quality performance.
To obtain the best results and to avoid malfunction, please read the following instructions carefully before using.
J WARNING: TO REDUCE THE RISK OF FIRE OR ELECTRIC SHOCK, DO NOT EXPOSE THIS APPLIANCE TO RAIN I
OR MOISTURE. DANGEROUS HIGH VOLTAGESARE PRESENT INSIDE THE ENCLOSURE. DO NOT
OPEN THE CABINET REFER SERVICING TO QUALIFIED PERSONNEL ONLY.
CAUTION 1
RISK O_OCKS
lDO NOT OPEN J
CAUTION:TOREDUCETHERISK OF ELECTRIC
SHOCK, DO NOTREMOVECOVER(ORBACK).
NO USER-SERVICEABLE PARTSINSIDE.
REFER SERVICING TO QUAUFIED SERVICE
PERSONNEL.
The lightning flash with arrowhead symbol,
within an equilateral triangle, is intended to
alert the user to the presence of uninsulated
"dangerous voltage" within the product's
enclosure that may be of sufficient magnitude
to constitute a riskof electric shock to persons.
The exclamation point within an equilateral
triangle is intended to alert the user to the
presence of important operating and main-
tenance (servicing) instructions in the litera-
ture accompanying the appliance.
Warning: Toprevent fire or shock hazard, do not ex-
pose this unit to rain or moisture.
Thisvideo cassette recorder should be used with AC
120V, 60 PIz only.
Caution=Toprevent electric shocks and fire hazards,
do NOT use any other power source.
ICaution: Toprevent electric shock do not use this
polarized plug with an extension cord receptacle or
other outlet unless the blades can be fully inserted
to prevent blade exposure.
Note to CATV System Installer:
This reminder is providedto call the CATV system installer's
attention to Article 820-40 of the NEC that provides
guidelinesfor proper grounding and, in particular, specifies
that the cable groundshall be connected to the grounding
system of the building, as close to the point of cable entry
as practical.
Caution:
When you are not using the VCR for a long period of time,
it is recommended that you disconnect the power cord from
the AC outlet.
Caution:
Any changes or modification in construction of the device
which are not expressly approved bythe party responsible for
compliance could void the user's authority to operate the
equipment.
NOTE:
This equipmenthas been tested andfound to comply with the
limit for a Class B digital device, pursuant to Part "t5of the
FCC Rules. These limits are designed to provide reasonable
protection against harmful interference in a residential in-
stallation.
This equipment generates, uses and can radiate radio frequen-
cy energy and if not installed andused in accordance with the
instructions may cause harmful interference to radio com-
munications. However, there is no guarantee that interference
wilt not occur in a particular installation.If this equipment does
cause harmful interference to radio or television reception,
which can be determined byturning the equipment off and on,
the used isencouraged to try to correct the interference by
one or more of the following measures:
--Reorient or relocate the receiving antenna.
--Increase the separationbetween the equipment and receiver.
--Connect the equipment into an outlet on a circuit different
from that to which the receiver is connected.
--Consult th_ dealer or an experienced radio/TV technician
for help.

IMPORTANT SAFEGUARDS
For your protection, please read these safely instructionscompletely before operating the appliance, and keep this
manual for future reference.
Carefully observe all warnings, precautions, and instructions on the appliance, or the one described inthe operating
instructions and adhere to them.
USE
Power Sources--This set should be operated only
from the type of power source indicated on the
marking label, If you are not sure of the type of elec-
trical power supplied at your home, consult your
dealer or local power company For those sets
designed to operate from battery power, or other
sources, refer to the operating instructions
Grounding or Foferlzatfen--This set is equipped
with a polarized AC power cord plug (a plug having
one blade wider than the other), or with a three-wire
grounding type plug (a plug having a third pin for
grounding). Follow the instructions below
For the set with I polarized AC power cord plug:
Thisplug will fit into the power outlet onlyone way
This is a safety feature¸ If you are unable to insert
the plug tully intothe outlet, try reversing the plug.
If the plug should still fail to fit, contact your eleo-
trician to have a sudab_e outlet installed. Do not
defect the safety purpose of the polarized plug by
forcing it in J
Water and Moieture--Do not use power-line
operated sets near water--for example, near a
bathtub, washbowl, kitchen sink, laundry tub, in a
wet basement, or near a swimming POoL cot
Accessories--Do not place the set on an unstable
cart, stand, tripod, bracket, or table The set may
tail, causing serious injury to a child or an adult, and
serious damage to the set Use only a cart stand
ripod, bracket, or table recommended by the
manofacturer
Alternate Warning--For the set with a three-wire
grounding type AC plug
This plug will only fit into a grounding type power
outlet This is a safety feature If you are unable to
insert the plug into the outlet contact your electri-
clanto haveasuitable outletinstalled Donot defeat
the safety purpose of the grounding plug
Otterloadfeg--Do notoverload wail outlets, exten-
sioncords Oreorwenience receplaoles beyondtheir
capacity, since this can result in fire or electric
shock.
Object and Liquid Entry--Never push objects of
any kind into the set throughopenings as they may
touch dangerous voltage points or should Outparts
that could result in a fire orelectric shock. Never
spill liquid of any kind on the set.
Ventilation--The slots and openings in the cabinet
are provided for necessary ventilation. Toensure
reliable operation Of the set, and to protect it from
overheating, these slotsand openings must never
be blOcked or covered
--Never cover the soils and openings with a cloth
or other materials tP
--Never block the slets and openings by placing
the set on abed, sofa, rug or other similar surface
Attachments--Do not use attachments not recom-
mended by the manufacturer, as they may cause
hazards
Oleantng--Unplug the set from the wall outlet
before cleaning or polishing it. DOnot use liquid
cleaners or aerosol cleaners Use ac_oth lightly
dampended with water to clean the exterior of the
set
/
Pottabll Clltt warning--An appliance and cart
combination should be moved with care. Quick
stops, excessive force, and uneven SUFfeCeS may
cause the appliance _[nd cart combination to
overtum
2,,

Never place 1he set in a conlined space such as
abookcase, or built-in cabinet, unless proper venila-
lion is provided¸
Fower-Cord Protection--Route the power cord so
that it is not likelyto be walked On or p{nched by
items placed upon or against them, playing par-
ticular attention to the plugs, receptacles, and the
point where the cord exits from the appliance
--Do not place the set near over a radiator or heat
register, or where it is exposed to direct sunlight
OUTSIDE ANTENNA, EQUIPMENT, AND POWERLINE EXPOSURE
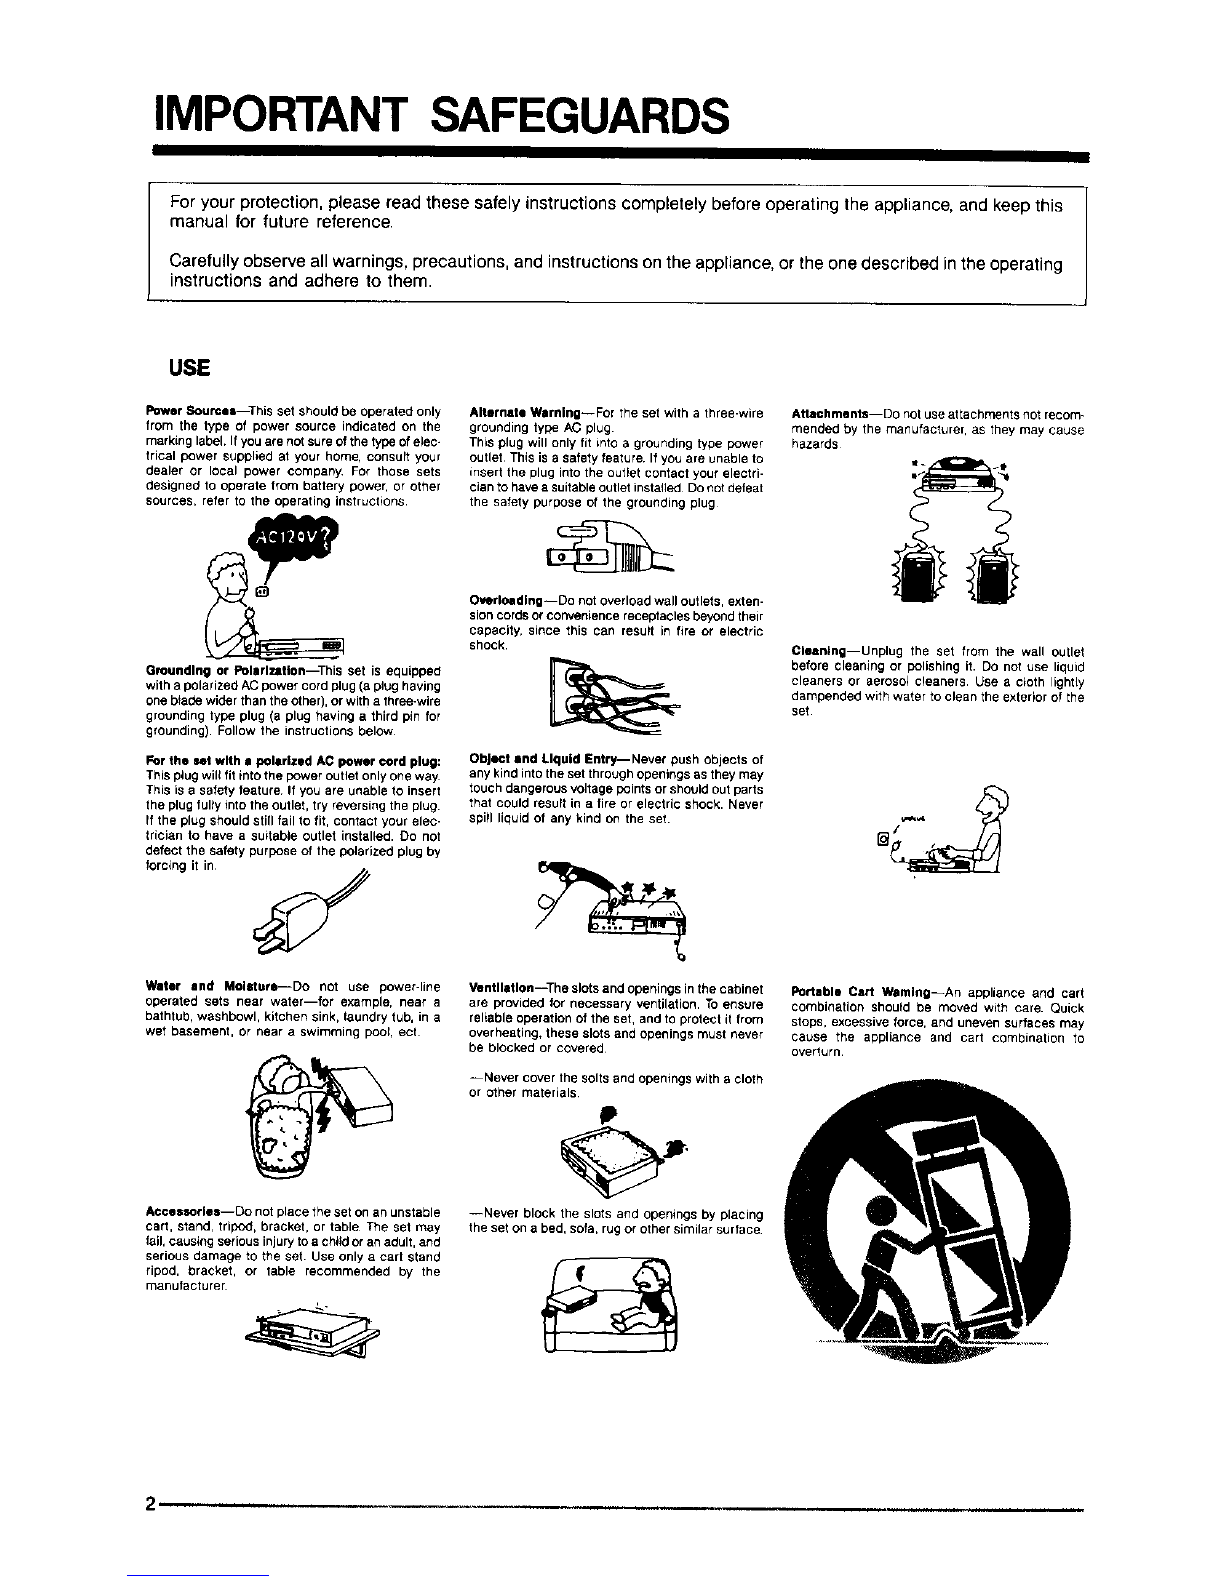
1 ENSURE SAFE ANTENNA AND CABLE CONNECTIONS
It an outside antenna or cable system is connected to provide some pro-
tection the antenna or cable system is grounded so as to provide some pro*
teetion against built up static charges and voltage surges• Section 810 of
the Netional Eleetional Code ANSt/NEPA NO 70.1984, provides information
with respect to proper groundingofthe mast and suPPOrtingstructure,groun-
dangof the lead-in wire to an antenna discharge unit size of grounding con-
ductors, location of antenna discharge unit, connection to grounding
electrodes and requirements for the grounding electrode:
See figure 1 for items a-d below
a. Use NO 10 AWG (5.3mm 2)aluminum NO.8 AWG (8.4mm 2)NO. 17-AWG
(10ram2)copper-etad eteel or bronze wire, or larger, as ground wire
b. Secure antenna tead-in and ground wires to house with stand-off in-
sulators spaced from 4 feet (1.22m) to 6 feet (1.83m) apart•
c Mount antenna discharge unit as close as possible to where lead-in enters
house
d Use jumper wire not smaller than No 6 AWG (13.3 mm _) copper, or the
equivalent, when a separate antenna grounding electrode is used See
NEC Section 810-21 (I)
2ELIMINATE ANTENNA PROXIMITY TO H_GH VOLTAGEPOWER SOURCES
OR CHANCE OF ACCIDENTAL CONTACT BY iNSTALLER
An outside antenna system should be located where it will never be reach
ed by power lines, e_eetdc light or power circuits and where it will never
contact these power sources if it fails, Ineta_ler should use extreme care
to avoid possible fatal contact by touching power fines, circuits or other
power sources when installing OUtSide antenna
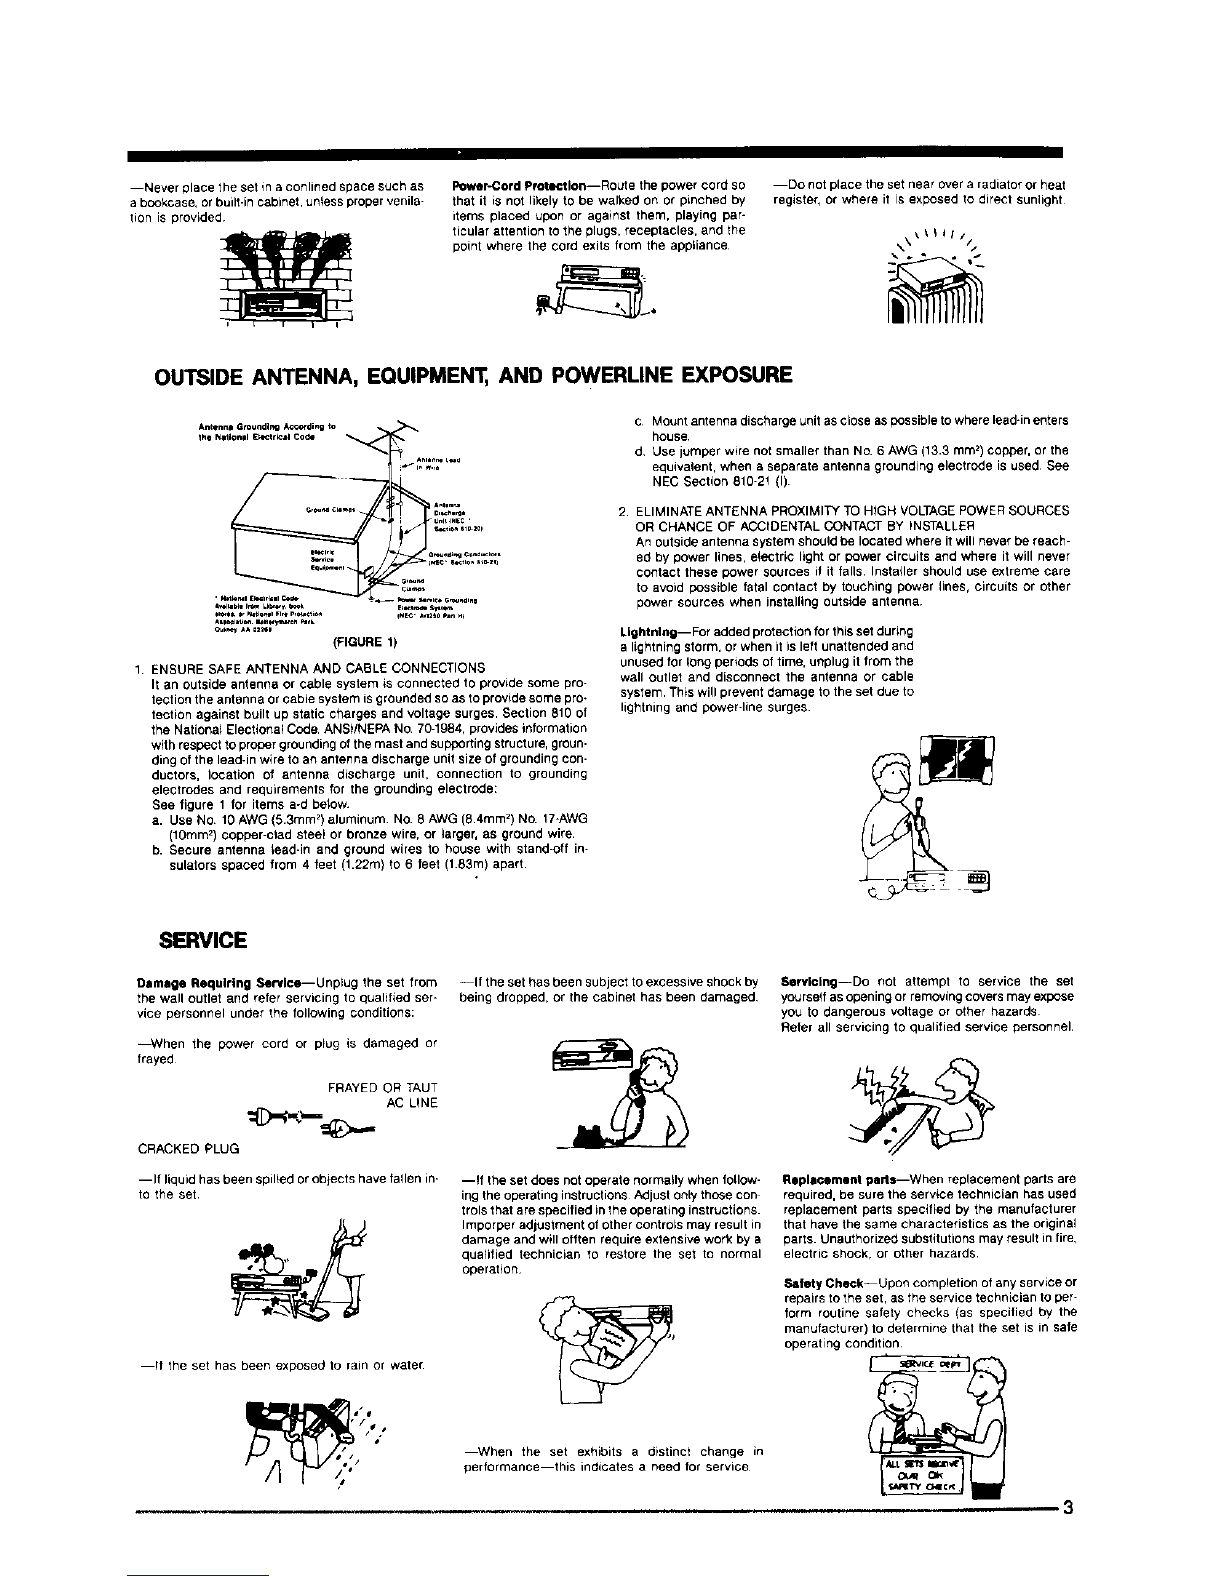
Lightning--For added protection for this set during
a lightning storm, or when it is left unattended and
unused for _dng periods of time, ur_plug it from the
wall outlet and disconnect the antenna or cable
system. This will preveet damage to the set due to
lightning and power-line surges.
SERVICE
Damage Requiring Service--Unplug the set from
the wall outlet and refer servicing to qualified ser-
vice personnel under the following conditions:
--When fhe power cord or plug is damaged or
frayed
FRAYED OR TAUT
AC LINE
CRACKED PLUG
--Ifliduid has been spilled or objects have fallen in-
to the set
--if the set has been exposed to rain or water
--If the set has been subject to excessive shock by
being dropped, or the cabinet has been damaged
--If the set does not operate nor really when follow-
ingthe operatinginstructions Adjust ontythose con
troisthat are specified inthe operating instructions
Imporper adjustment of othercontrols may result in
damage and will etffen require extensive work by a
dualgied technician to restore the set to normal
operation
When the set exhibits a distinct change in
performance--this indicates ar_eed for service
Servicing--Do not attempt to service the set
yourself as openingor removing covers may expose
you to dangerous voltage or other hazards
Refer all servicing to qualified service personnel,
Replacemen! parts--When replacement parts are
required, be sure fhe service technician has used
replacement parts specified by the manufacturer
that have the same characteristics as the original
parts Unauthorized substitutions may result in fire,
electric shock, or other hazards
Safety Check--Upon completion of any serwce or
repairs to the set, as the service technician to per-
form routine safety checks (as specified by the
manufacturer) to determine that the set is in safe
operating condition

Thank you for purchasing this Daewoo videocassette recorder. It contains a number of features designed to make
this recorder easy to operate while at the same time capable of producing outstanding recordings. In the pages that
follow, you'll learn about these features and how to use them. Please take time now to familiarize yourself with the
details of your new VCR, and its various functions and controls.
CONTENTS
1
2
6
11
14
24
34
35
CAUTION
IMPORTANT SAFEGUARDS
IDENTIFICATION (1) (2) (3)
INSTALLATION (1) (2)
BASIC OPERATION
--VIDEO CASSETTE
--PLAYBACK
--SPECIAL EFFECTS AND OPERATIONS
--RECORDING TV PROGRAMS
--ONE TOUCH RECORDING
--CLOCK ADJUSTMENT
PROGRAMMING THE RECORD TIMER
--DUPLICATION
--TIMER RECORDING
--CHECKING AND CANCELLING INPUT PROGRAMS
--VlSS (VHS INDEX SEARCH SYSTEM)
--CALENDAR
SPEAKING THE LANGUAGE: A GLOSSARY OF TERMS
TROUBLE SHOOTING GUIDE

IMPORTANTNOTES
•Audio-visual material may include works of copyright which must NOT be recorded without the authority of the owner
of copyright.
• Note that main voltage is supplied to the unit whenever the main plug is connected to the supply socket.
• Clock display on the front panel indicates that the main supply is on.
• To avoid the risk of fire or electric shock, do not expose the unit to rain or moisture.
• Do not attempt to open the cabinet. There are no user-serviceable parts inside, Refer all servicing to qualified service
personnel.
• Keep the unit away from radiators or other sources of heat,
Q Do not operate or store the unit close to strong magnetic fields.
• Do not spill liquid of any kind onto the unit. If liquid is accidently spilled onto the unit, immediately remove the main
plug from the supply socket, and consult a qualified service engineer.
MOISTURE CONDENS&TION: If you pour a cold liquid into a glass, water vapor in the air will condense on the surface of the glass This is moisture condensation
Moisture condensation on the head drum, one of the most crucia_parts of the video recorder, wLIIcause damage to the tape. Whenever the video recorder
is exposed to extreme cold and heat at the same time, some condensation will occur. When moisture is present, turn the power switch on, and atlow at least
2 hours for the video recorder to dry out
•Use the video recorder in ahorizontal (flat) position only.
• Before operating, remove any paper wrapping which may have been affixed to the recorder during manufacture. DO
NOT COVER VENTILATION OPENINGS ON TOP AND SIDES OF THE RECORDER DURLNG OPERATION.
•When acassette isinserted into the loadingcompartment, the power is switched on automatically as long as the power
cord is plugged intoan AC outlet. DO NOT force acassette intothe compartment when the power cord is unplugged.
•Keep the recorder and video cassette away from strong magnetic fields.
•After playing a video cassette, remove it from the recorder.
DO NOT move the recorder with acassette in the compartment.
•Store video cassettes in their sleeve or case and position then vertically.
• If a cassette has been subjected to cold temperature, allow itto warm to roomtemperature before recordingor playback.
For your protection, record the model and serial numbers
of your videocassette recorder here. In the event your
recorder requires servicing or is stolen, you may need
this information. You may also wish to clipor staple your
sales receipt to this page.
Model Number:.
Serial Number:
Date Purchased:
Store's Name and Address:
ACCESSORIES
Check to be sure the following items are packed with your VCR.
1. REMOTE CONTROLLER 2. COAXIAL CABLE

IDENTIFICATION (1)
FRONTOFVCR
CASSE"FFE COMPARTMENT
POWER
STOP/EJECT
REWINDINGJREVIEW
PLAYBACK
-I_LI--I_I_
L
--- MULTIFUCTION DISPLAY (DIGITRON)
l REMOTESE,,,2.;
L_---.-REC/ONE TOUCH TIMER RECORD
CHANNEL SELECTION/TRACKING
FASTFORWARDING/CUE PAUSE/STILL
MULTI-FUNCTIONDISPLAY
TIMER REC
VCR
WEEKLY CLOCK AND REAL TIME COUNTER
DAYS
CHANNEL
FUNCTION
PROGRAM
TIMER ON/OFF
MO
OFF SLP
Li
OTR ERR
I -- INDEX
ERROR
ONE TOUCH REC
.TAPE SPEED
6

FUNCTIONINDICATOR
(_) PLAy:
_) CUE:
_) REVIEW:
_) RECORDING:
(_ STILL:
® PAUSE
\I/
©
>11
(_ SLOW:
Q FAST
FORWARDING
(_ REWINDING:
(_) AUTO TRACKING:
_)EMERGENCY
\ I /
.11-_1>1>-.111>1>--<1<1-
<1<1
. "-,[/
-- -- means blinking
/L\
*Malfunction might happen due to external influences,
In that case, emergency sign appears on Multi-Function
Display and press POWER key to re_ease it.
..... 7

IDENTIFICATION (2)
REALTIMECOUNTER
•Real time counter is a numerical guide indicating how much a tape moved in PLAY, REW, FF, or SLOW mode, with
the sign of hour, minute and second displayed on digitron.
EXAMPLE 1) When a tape plays for one hour twenty minutes and fifty five seconds.
0.00.00, t.20.55,
EXAMPLE 2) When a tape rewinds for the time equivalent to the playing time of twenty five minutes and thirty seconds•
0.0.%00, ] -n,25.30,
• COUNT RESET
Please reset the counter " n nn nn
Intou.uu,.uu, by pressing the COUNT RESET button.
•COUNT _ STOP
This button makes you search easily the 0.00.00. part of the tape with fast rewinding/forwarding operation. (Refer
to page 18)
REAR OF VCR
CHANNEL SELECTION SWITCH
RFOUT-- I
AUDIO IN
VIDEO IN
IRC/HRC/STD SELECTION SWITCH
(Refer to the below note)
ANT IN--
.VIDEO OUT
AUDIO OUT
POWERCORD
•NOTE: CABLE SYSTEM SELECTION
1. If your cable system includes a converter box supplied by Cable Company, from which you select channels, you
do not need to set the cable select switch on the rear panel of the VCR.
2. If your cable system does not include a converter box, please set the cable selection switch to correspond with
your cable system (HRC, STD, or IRC). Please consult with your Cable Company if necessary to confirm their type
of cable transmission (HRC, STD or IRC).

IDENTIFICATION (3)
REMOTECONTROLLER(1)-BASICFUNCTIONS
POWER
CHANNEL DIRECT ACCESS--
STOP/EJECT
PAUSE/STILL
REWINDING/REVIEW
RECORD/ONE TOUCH
RECORDING
TVNCR SELECTION
TRACKING/CHAN NEL
SELECTION
SLOW
FORWARDING/CUE
.PLAY
TAPE SPEED
HOWTOUSEREMOTECONTROLLER
•Remote controller can be worked within 7m
distance from VCR
• Function keys do not work when pressing
several keys at the same time, except for REC
buttons.
• It is advisable to take batteries out of remote
controller when not in use for long time.
9

REMOTECONTROLLER(2)-ADDmONALFUNCTIONS
MULTI-FUNCTION DISPLAY
ON/OFF
TIMER RECORDING
CLOCK/COUNTER
SELECTION
THE VISS BuTroNs
RELATEDTO VISS
(VHS INDEX SEARCH SYSTEM)
pAU_FJ_nLL S_Op_.JECT SLOW
CLOcK/T'REC CLEAR
TV/CATV SELECTION
TV/LINE INPU1
SELECTION
CONTROLLING
SHARPNESS
CLOCK SETTING
--TIMER PROGRAMMING
MFT
--(MANUAL FINE TUNING)/
RETRACKING
RESET/COUNTER
ZERO STOP
ON SCREEN DISPLAy
10

INSTALLATION (1)
ANTENNACONNECTION
•In case of unified VHF/UHF antenna
VHF and UHF Antenna
l
RF IN
IIB_lD_olU,_D1[
IIIgIIOIIIIII
•In case of separate VHF/UHF antenna
VHF ANTENNA CONNECTION
indoor antenna TWIN-LEAD
CABLE
75 OHM
COAXIAL CABLE
UHF, VHF
RECEIVER
RF IN
,, rN,ml UUUUUIUIIIIU
_IolIIIIIIIIIII
_0'_IIIIIIIolIIII
IIIIIIIIIIIIII
.... 11

INSTALLATION (2)
CONNECTINGVCRTO TV (1) USINGCOAXIALCABLE
• In Case of TV with separate VHF/UHF terminal
VHF/UHF SPLITTER
ANTENNA
CABLE
VCR
'Tc_ _| HDIDODoODIDO
VHF ANTENNA
PLUG POWER
CORD
r i iii
TV POWER CORD
• In case of "IV with unified VHF/UHF terminal
VCR
=Fout © _'[] UUUUUUUUUUUU
IOIlOIIlOIIl
IIIII o IIIII
IIIIIIIIIIII
IIIIIIIIIIII
TV ANTENNA
JACK
i ii1'
TV POWER CORD
POWER
CORD
12

CONNECTINGVCRTOAUDIO
TV
*REFER
TO
PAGE 12
AUDIO
OUT
___ AUDIO IN
-_mill_'_,_
I_ E:_:::_' -I_l"'----,'
POWER CORD
STEREO AUDIO
* NOTE: It is advisable to turn POWER OFF while connecting VCR, TV, as well as Audio.
This VCR is a monoral player. It will not play in stereo even if it is connected to a stereo system.
CONNECTINGVCRTOTV(2)-USINGAN JACK
• In case of TV with AN jacks
COAXIAL CABLE
AUDIO ! VIDEO
JACK JACK
TV POWER CORD
POWER
CORD
13

BASIC OPERATION
14 __

VIDEO CASSETTE
LOADING UNLOADING
Upon inserting the cassette, the power is
automatically on without pressing the button.
,,
The new motorized load;rig system allows a cassette to
be loaded even when the power has not been turned on,
as long as the AC power cord is plugged in.
•Inserting a cassette with its safety tab in place turns
the recorder on automatically.
[LOAO NG!--'lPOWERONI
• Inserting a cassette with its safety tab removed not
only turns the recorder on, but playback of the cassette
begins automatically, due to the new auto-play func-
tion.
JLOADING ]--_1 POWER ON J---'.-[_
• With a cassette inserted, the _ mark appears on
the fluorescent display panel to indicate a cassette has
been inserted.
Press Eject button.
Remove the cassette smoothly.
Due tothe new motorized unloading system, a cassette can
be unloaded even when the power has been turned off.
• If a cassette is inside, pressing the EJECT button turns
power on automatically and, after ejection of the cassette,
shuts it off automatically.
Notoe:
• An inverted cassette cannot be inserted.
• Be sure to insert the cassette firmly into the slot;
otherwise, it will be automatically ejected.
• The automatic loading mechanism will operate on-
ly when the cassette is inserted correctly.
• When the unit is unplugged into a power outlet,
do not insert cassette.
CAOTION
• If unloading of a cassette is not possible, check to
see whether the TIMER indicator is its. If so, press
the TIMER button so the TIMER indicator ex-
tinguishes.
• Do not attempt to pull out the cassette once auto-
matic loading has started.
• Do not insert fingers or any foreign object beyond
the door flaps of the cassette Loadingslot, as this
could lead to injury or damage to the mechanism.
Show special caution with children.
.......... ._-- ............................................. 15

CASSE-FI-E FORWARDING DIRECTION
(BEGINNING) (ENDING)
PLAY
• Avoid exposing the cassettes to direct s0nlight. Keep them away from heaters.
• Avoid extreme humidity, violent vibrations or shocks, strong magnetic fields (near a motor, transformer or magnet) and
dustry places.
• Place the cassettes in casette cases and position vertically.
TYPESOFVIDEOCASSE11"E
Use type with the _ mark in this unit.
Maximum Recording/Playback Time
Type SP Mode LP Mode SLP Mode
(Standard Play) (Long Play) (Super Long Play)
T-160 160 min. 320 min. 480 min,
T-120 120 rain. 240 rain. 360 min.
T-90 90 min. 180 min. 270 min.
T-60 60 rain. 120 min. 180 min.
ERASEPROTECTION
Video cassettes are equipped with a safety tab to prevent accidental erasure. When the tab is removed, recording can
not be performed. If you wish to record on a cassette whose tab has already been removed, use adhesive tape to block
the hole.
• Safety tab-intact cassette
Safety tab
• TOprevent accidental erasure
• Break off the tab with a
screwdriver
• To record again
(2
• Cover the hole with cellophane
tape

PLAYBACK
BASICPLAYBACKOPERATION
POWER
PowerON /-%
m
Set "IV channel to 3 or 4, whichever
is not in use in your _ broadcasting
area.
(_ TRACKING
Adjust picture quality with
CH/TRACKING keys
CHITRACKING
(_ LOADING
Insert a cassette
/
Upon insertingacassette,power
will be on automatically.
(_) STOP/EJECT
Press once to stop and twice to
eject
STOP/EJECT
PLAYBACK
Press PLAY
PLAy
* When VCR turned on and a
cassette is inserted, a motor in
VCR is operating for stand-by to
another mode. if you want to stop
watching VCR, please turn off or
eject the cassette•
•This VCR automatically adjust tracking. If it is necessary to adjust picture quality, use tracking keys.
•Pressing TRACKING key will indicate -_,_'-(blinking) sign on digitron display and will adjust tracking automatically.

FAST FORWARDING REWINDING EJECTING
Press FF key (in STOPmode) Press REW key (in STOPmode) Press EJECt key (in STOPmode)
FF
(55 REW STOP_JECT
TO SET COUNTER MEMORY
Press the COUNTER RESETkey at a point which you
may wish to locate later. The counter will indicate. _],J'],un.t]P,,
13 rlrl I-In
UHLI U.U Us
TO LOCATE SPECIFIC SCENE
Press the COUNTER $STOPkey.
RESt" @STOP
The tape will rewind (or fast forward) and stop at about
the a.a _.un n counter reading automatically.
\ I /
-- STOP -
/I\
18, ,,,,

SPECIAL EFFECTS AND OPERATIONS
SPECIALEFFECTSINPLAYBACKMODE(BESTINSP+SLPSPEED:.SOUNDISMUTED)
(_ TO RAPIDLYLOCATEA _ TOVIEWADOUBLESPEED
PARTICULARSEGMENT _ PLAYBACKPICTURE
• Press the REW or FF Button.
This starts a fast forward or
reverse visual search in the
first step.
(SP: x3, SP: x5)
FF REW
• Press the PLAY Buttonto return
to playback.
(_) TO VIEW A SLOW
PICTURE
• Press the SLOW button.
• Press the REW or FF Button twice.
Thisstarts a fast forward or
reverse visual search in the
second step.
(SP: x7, SLP: x21)
(_)T0 VIEWA STILLPICTURE
(DURINGPLAYBACK)
• Press the PAUSE/STILLButton.
A freeze frame picture of the
playback image appears.
FF REW
SLOW
pAUSFJSTILL
• Press the PLAY Buttonto return to •Press the PLAY Button to return
playback to playback
• The picture will slowly advanced
frame by frame. ®®
r_ O_
®
@®
PLEASE NOTE:
1. In SEARCH and STILL as well as SLOW mode, no sound will be heard.
2. After 5 minute in SLOW mode, PLAY mode will be resumed automatically.
3. Squeezed picture could be seen while switching from search mode to PLAY mode.
This is NOT a sign of malfunction.
4. In SEARCH and STILL as well as SLOW mode, OSD sign cannot be displayed on TV screen.
,,-19
Table of contents
Other Daewoo VCR System manuals

Daewoo
Daewoo DV-S103WN User manual

Daewoo
Daewoo DVST7C3 User manual

Daewoo
Daewoo EV-VCR960R User manual

Daewoo
Daewoo Q817 User manual

Daewoo
Daewoo DVST7C3 User manual

Daewoo
Daewoo VQ230D User manual

Daewoo
Daewoo DVK84N User manual

Daewoo
Daewoo DV-K8J5A User manual

Daewoo
Daewoo Q230PF User manual

Daewoo
Daewoo VCR MECHANISM UNIT User manual

Daewoo
Daewoo ST200D User manual

Daewoo
Daewoo K-MECHA DECK Operating manual

Daewoo
Daewoo DV-F46N User manual

Daewoo
Daewoo DV-K813S Series User manual

Daewoo
Daewoo DV3K653NZ-T User manual

Daewoo
Daewoo DV-K10DY-QB User manual

Daewoo
Daewoo DVST8E32A-SN1 User manual

Daewoo
Daewoo Q250PF User manual

Daewoo
Daewoo DV4K611DZ-T User manual

Daewoo
Daewoo DT-K6323D-KS3 User manual