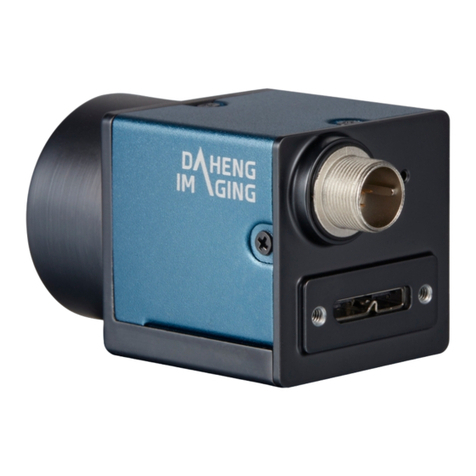
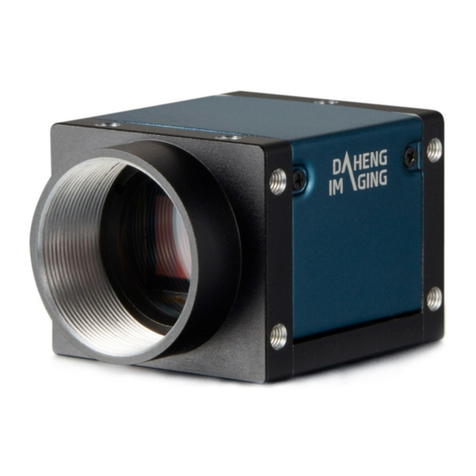
Daheng Imaging MARS GigE User manual

MARS GigE Cameras
User Manual
Version: V1.1.0
Date: 2022-06-28
China Daheng Group, Inc. Beijing Image Vision Technology Branch

All rights reserved. No parts of this manual may be used or reproduced, in any forms or by any means,
without prior written permission of China Daheng Group, Inc. Beijing Image Vision Technology Branch.
The right is also reserved to modify or change any parts of this manual in the future without prior notification.
All other trademarks are the properties of their respective owners.
© 2022 China Daheng Group, Inc. Beijing Image Vision Technology Branch
Web:
www.daheng-imaging.com/en
Sales Email:
isales@daheng-imaging.com
Sales Tel:
+86 10 8282 8878
Support Email:
isupport@daheng-imaging.com

Preface
We really appreciate your choosing of DAHENG IMAGING products.
The MARS GigE series (MARS-G) camera is DAHENG IMAGING's mature area scan industrial digital
camera, featuring high resolution, high definition and extremely low noise. The camera is equipped with
standard GigE interface, supports Power over Ethernet (PoE, IEEE802.3af compliant), and is easy to
install and use.
The MARS family cameras are especially suitable for machine vision applications such as industrial
inspection, medical, scientific research, education, security and so on.
This manual describes in detail on how to install and use the MARS GigE digital cameras.

© China Daheng Group, Inc. Beijing Image Vision Technology Branch I
Contents
1. Introduction......................................................................................................................1
1.1. Series Introduction .................................................................................................. 1
1.2. Naming Rules.......................................................................................................... 1
1.3. Standards................................................................................................................ 2
1.4. Document, CAD/Technical Drawing and Software Downloads................................ 2
2. Precautions......................................................................................................................3
2.1. Guidelines for Avoiding EMI and ESD..................................................................... 3
2.2. Environmental Requirements.................................................................................. 3
2.3. Camera Mechanical Installation Precautions........................................................... 3
2.4. Certification and Declaration ................................................................................... 3
3. Installation Guidelines ....................................................................................................5
3.1. Host Preparation ..................................................................................................... 5
3.1.1. Software Package ...............................................................................................................5
3.1.2. User Software Interface.......................................................................................................5
3.2. Camera Power ........................................................................................................ 6
3.3. Camera Driver Installation....................................................................................... 7
3.3.1. System Requirements.........................................................................................................7
3.3.2. Driver Installation.................................................................................................................7
3.4. Camera IP Configuration......................................................................................... 8
3.5. Open Device and StartAcquisition.......................................................................... 8
4. General Specifications..................................................................................................10
4.1. Explanation of Important Parameters.................................................................... 10
4.1.1. About Spectral Response..................................................................................................10
4.2. MARS-880-13GC-P / MARS-880-13GM-P............................................................ 10
4.2.1. Parameters........................................................................................................................10
4.2.2. Spectral Response............................................................................................................ 12
4.3. MARS-1230-9GC-P / MARS-1230-9GM-P............................................................ 13
4.3.1. Parameter..........................................................................................................................13
4.3.2. Spectral Response............................................................................................................ 14
4.4. MARS-3140-3GC-P / MARS-3140-3GM-P............................................................ 15
4.4.1. Parameter..........................................................................................................................15
4.4.2. Spectral Response............................................................................................................ 16
4.5. MARS-880-13GC-P ETR / MARS-880-13GM-P ETR............................................ 17
4.5.1. Parameters........................................................................................................................17
4.5.2. Spectral Response............................................................................................................ 18
4.6. MARS-2621-4GM-P ETR / MARS-2622-4GM-P ETR........................................... 19
4.6.1. Parameters........................................................................................................................19

© China Daheng Group, Inc. Beijing Image Vision Technology Branch II
4.6.2. Spectral Response............................................................................................................ 20
4.7. MARS-2621-4GM-P NIR ETR / MARS-2622-4GM-P NIR ETR............................. 21
4.7.1. Parameters........................................................................................................................21
4.7.2. Spectral Response............................................................................................................ 22
5. Dimensions....................................................................................................................23
5.1. Camera Dimensions.............................................................................................. 23
5.2. Optical Interface.................................................................................................... 24
5.3. Tripod Adapter Dimensions ................................................................................... 25
6. Filters and Lenses.........................................................................................................27
6.1. Filters .................................................................................................................... 27
6.2. Lens Selection Reference ..................................................................................... 28
6.2.1. HN-2M Series....................................................................................................................29
6.2.2. HN-5M Series....................................................................................................................29
6.2.3. HN-6M Series....................................................................................................................30
6.2.4. HN-20M Series..................................................................................................................31
6.2.5. HN-P-6M Series ................................................................................................................31
6.2.6. HN-P-10M Series ..............................................................................................................32
6.2.7. HN-P-25M Series ..............................................................................................................32
7. Electrical Interface.........................................................................................................34
7.1. LED Light............................................................................................................... 34
7.2. Ethernet Port......................................................................................................... 34
7.3. I/O Port.................................................................................................................. 34
7.3.1. Line0 (Opto-isolated Input) Circuit ....................................................................................35
7.3.2. Line1 (Opto-isolated Output) Circuit..................................................................................38
7.3.3. GPIO 2/3 (Bidirectional) Circuit.........................................................................................39
7.3.3.1. Line2/3 is Configured as Input....................................................................................40
7.3.3.2. Line2/3 is Configured as Output.................................................................................41
8. Features..........................................................................................................................43
8.1. I/O Control............................................................................................................. 43
8.1.1. Input Mode Operation........................................................................................................43
8.1.2. Output Mode Operation.....................................................................................................44
8.1.3. Read the LineStatus..........................................................................................................48
8.2. Image Acquisition Control...................................................................................... 48
8.2.1. Acquisition Start and Stop .................................................................................................48
8.2.1.1. Acquisition Start..........................................................................................................48
8.2.1.2. Acquisition Stop ..........................................................................................................49
8.2.2. Acquisition Mode ...............................................................................................................50
8.2.3. Trigger Type Selection.......................................................................................................51
8.2.4. Switching Trigger Mode.....................................................................................................52
8.2.5. Continuous Mode and Configuration.................................................................................54

© China Daheng Group, Inc. Beijing Image Vision Technology Branch III
8.2.6. Software TriggerAcquisition and Configuration................................................................54
8.2.7. Hardware TriggerAcquisition and Configuration...............................................................55
8.2.8. Set Exposure.....................................................................................................................57
8.2.9. Overlaping Exposure and Non-overlaping Exposure........................................................ 59
8.3. Basic Features ...................................................................................................... 61
8.3.1. Gain...................................................................................................................................61
8.3.2. Pixel Format.......................................................................................................................62
8.3.3. ROI.....................................................................................................................................65
8.3.4. Auto Exposure/Auto Gain..................................................................................................66
8.3.4.1. ROI Setting ofAuto Exposure/Auto Gain...................................................................66
8.3.4.2. Auto Gain ....................................................................................................................67
8.3.4.3. Auto Exposure.............................................................................................................68
8.3.5. Auto White Balance...........................................................................................................68
8.3.5.1.Auto White Balance ROI.............................................................................................68
8.3.5.2. Auto White Balance Adjustment .................................................................................69
8.3.6. Test Pattern........................................................................................................................70
8.3.7. User Set Control................................................................................................................71
8.3.8. Device User ID ..................................................................................................................74
8.3.9. Timestamp.........................................................................................................................74
8.3.10. Binning.............................................................................................................................75
8.3.11. Decimation.......................................................................................................................77
8.3.12. Reverse X and Reverse Y...............................................................................................79
8.3.13. Digital Shift.......................................................................................................................81
8.3.14. Acquisition Status............................................................................................................ 82
8.3.15. Black Level ......................................................................................................................83
8.3.16. Remove Parameter Limits...............................................................................................83
8.3.17. User Data Area................................................................................................................85
8.3.18. Timer................................................................................................................................ 85
8.3.19. Counter............................................................................................................................86
8.4. Image Processing.................................................................................................. 86
8.4.1. Color Transformation Control............................................................................................86
8.4.2. Gamma..............................................................................................................................88
8.4.3. Sharpness..........................................................................................................................89
8.4.4. Lookup Table .....................................................................................................................90
8.4.5. Flat Field Correction..........................................................................................................91
8.4.5.1. FFC Factor Calculation and Preview.......................................................................... 93
8.4.5.2. Read/Save Factor.......................................................................................................94
8.4.5.3. Load/Save File............................................................................................................95
8.4.6. Remove Template Noise ...................................................................................................95
8.4.7. Defect Pixel Correction......................................................................................................95
8.5. Image Transmission .............................................................................................. 96
8.5.1. Maximum Allowable Frame Rate.......................................................................................96

© China Daheng Group, Inc. Beijing Image Vision Technology Branch IV
8.5.2. Stream Channel Packet Size ............................................................................................97
8.5.3. Stream Channel Packet Delay..........................................................................................98
8.5.4. Bandwidth Reserve ........................................................................................................... 99
8.5.5. Frame Transfer Control ..................................................................................................... 99
8.6. Events ................................................................................................................... 99
8.6.1. ExposureEnd Event.........................................................................................................101
8.6.2. BlockDiscard Event .........................................................................................................101
8.6.3. BlockNotEmpty Event......................................................................................................101
8.6.4. FrameStartOvertrigger Event..........................................................................................101
8.6.5. EventOverrun Event........................................................................................................101
8.6.6. FrameBurstStartOvertrigger Event..................................................................................101
8.6.7. FrameStartWait Event.....................................................................................................102
8.6.8. FrameBurstStartWait Event.............................................................................................102
9. Software Tools.............................................................................................................103
9.1. GigE IP Configurator ........................................................................................... 103
9.1.1. GUI...................................................................................................................................103
9.1.2. User Guide.......................................................................................................................104
9.1.2.1. Refresh Devices........................................................................................................104
9.1.2.2. Auto Config ...............................................................................................................105
9.1.2.3. Display Information...................................................................................................106
9.1.2.4. Configure IPAddress................................................................................................106
9.1.2.5. IP Configuration Mode..............................................................................................107
9.1.2.6. Change the Device User ID......................................................................................108
9.1.2.7. Reset Device and Reconnect Device.......................................................................108
9.1.3. Precautions......................................................................................................................108
9.1.3.1. Check IPAddress Format.........................................................................................108
9.1.3.2. Length Limitation of User-defined Name..................................................................109
9.1.3.3. Tips............................................................................................................................109
9.2. LUT Create Tool ...................................................................................................110
9.2.1. GUI................................................................................................................................... 110
9.2.2. User Guide........................................................................................................................111
9.2.2.1. User Case..................................................................................................................111
9.2.2.2. GroupBox...................................................................................................................111
9.2.2.3.Auto Create Lut......................................................................................................... 115
9.2.2.4. Save Lut.................................................................................................................... 116
9.2.3. Precautions...................................................................................................................... 117
9.2.3.1. Read from Device..................................................................................................... 117
9.2.3.2. Write to Device.......................................................................................................... 117
9.2.3.3. Directory Structure.................................................................................................... 117
9.3. Flat Field Correction Plugin..................................................................................117
9.3.1. GUI................................................................................................................................... 118
9.3.2. User Guide....................................................................................................................... 119
9.3.2.1. FFC Execution Steps................................................................................................ 119

© China Daheng Group, Inc. Beijing Image Vision Technology Branch V
9.3.2.2.Acquisition of Darkfield Images ................................................................................ 119
9.3.2.3.Acquisition of Brightfield Images...............................................................................121
9.3.2.4. Execute FFC.............................................................................................................122
9.3.2.5. Read FFC Data from Device / Write FFC Data to Device........................................122
9.3.2.6. Load FFC Data from File / Save FFC Data to File...................................................122
9.3.3. Precautions......................................................................................................................122
9.3.3.1. FFC is not Supported................................................................................................122
9.3.3.2. Preview .....................................................................................................................123
9.4. Frame Rate Calculation Tool............................................................................... 123
9.5. Static Defect Correction Plugin............................................................................ 125
9.5.1. GUI...................................................................................................................................125
9.5.2. User Guide.......................................................................................................................127
9.5.2.1. Steps of Static Defect Correction.............................................................................127
9.5.2.2. Image Acquisition......................................................................................................127
9.5.2.3. Static Defect Correction............................................................................................127
9.5.2.4. How to use Defect Data File.....................................................................................128
10. FAQ.............................................................................................................................129
11. Revision History ........................................................................................................131
12. Contact Us..................................................................................................................132
12.1. Contact Sales.................................................................................................... 132
12.2. Contact Support ................................................................................................ 132

1.Introduction
© China Daheng Group, Inc. Beijing Image Vision Technology Branch 1
1. Introduction
1.1. Series Introduction
The MARS GigE series (MARS-G-P) camera is DAHENG IMAGING's mature area scan industrial digital
camera, featuring outstanding performance, powerful features, outstanding price/performance ratio. The
camera supports Power over Ethernet (PoE, IEEE802.3af compliant), which is easy to install and use. The
MARS-G-P series cameras are available in a variety of resolutions and frame rates, and are available with
CMOS sensors from leading chip manufacturers.
The MARS-G-Pseries digital camera transmits image data through the GigE data interface. Thanks to the
locking screw connectors, the MARS series cameras can secure the reliability of cameras deployed in
harsh industrial environments. Featuring high reliability and high price/performance ratio, the MARS series
cameras are especially suitable for machine vision applications such as industrial inspection, medical,
scientific research, education, security and so on.
1.2. Naming Rules
Details of the MARS GigE series (MARS-G-P) camera are given in the general specifications below. Each
camera model name is determined by its sensor's maximum resolution, maximum frame rate at maximum
resolution, the color/monochrome type of the sensor, etc.
Figure 1-1 Naming rules

1.Introduction
© China Daheng Group, Inc. Beijing Image Vision Technology Branch 2
1.3. Standards
The camera follows the GigE Vision 1.2 standard, the GEN<i>CAM3.0 standard and the IEEE802.3af
standard.
1.4. Document, CAD/Technical Drawing and Software Downloads
Product related document, CAD/Technical drawing and software can be downloaded from the Downloads
of DAHENG IMAGING website. The relevant contents are as follows:
Document
MARS GigE Cameras User Manual
CAD/Technical Drawing
DAHENG IMAGING MARS-G-P CAD/Technical Drawing
Software
Galaxy Windows SDK—USB3.0, GigE, MERCURY USB2.0 Cameras
Galaxy Linux SDK—USB3.0, GigE, MERCURY USB2.0 Cameras

2.Precautions
© China Daheng Group, Inc. Beijing Image Vision Technology Branch 3
2. Precautions
2.1. Guidelines for Avoiding EMI and ESD
1) CAT-5e cables or above with S/STP shielding are recommended.
2) Using shielded cable can avoid electro-magnetic interface. Shielding layer of the cable should conduct
to ground nearby and not until stretched too long.When many devices need conduct to ground, using
single point grounding to avoid earth loop.
3) Try to use camera cables that are the correct length. Avoid coiling camera cables. If the cables are
too long, use a meandering path rather than coiling the cables.
4) Keep your cameras away from equipment with high voltage, or high current (as motor, inverter, relay,
etc.). If necessary, use additional shielding.
5) ESD (electro-static discharge) may damage cameras permanently, so use suitable clothing (cotton)
and shoes, and touch the metal to discharge the electro-static before operating cameras.
2.2. Environmental Requirements
1) Housing temperature during operation: 0°C ~ 45°C, humidity during operation: 10% ~ 80%.
Storage temperature: -20°C ~ 70°C.
2) To avoid collecting dust in the optical filter, always keep the plastic cap on cameras when no lens is
mounted.
3) PC requirement: Intel Core 2 Duo, 2.4GHz or above, and 2GB memory or above.
4) NIC requirement: Intel Pro 1000 NIC or higher performance Gigabit LAN confirming to IEEE802.3af
standard, CAT-5e or CAT-6 cables, less than 100m, Gigabit Switch confirming to IEEE802.3af
standard.
5) Make sure that cameras are transported in the original factory packages.
2.3. Camera Mechanical Installation Precautions
Camera installation requirements:
1) The screw and camera have a screw length between 3 and 4.8 mm.
2) Screw assembly torque ≤ 5N.M. If the screw assembly torque is too large, it may cause the camera
thread stripping.
2.4. Certification and Declaration
1. CE, RoHS
We declare that DAHENG IMAGING MARS GigE digital cameras have passed the following EU
certifications:

2.Precautions
© China Daheng Group, Inc. Beijing Image Vision Technology Branch 4
2014/30/EU—Electromagnetic Compatibility Restriction
2011/65/EU—Restriction of Hazardous Substances (RoHS) and its revised directive 2015/863/EU
Operation of this equipment in a residential environment could cause radio interference.

3.Installation Guidelines
© China Daheng Group, Inc. Beijing Image Vision Technology Branch 5
3. Installation Guidelines
3.1. Host Preparation
3.1.1. Software Package
The Software package of DAHENG IMAGING's MARS series is used to control the MARS series camera
to provide stable, real-time image transmission, and provides a free SDK and abundant development
sample source code. The package is composed of the following modules:
1) Driver Package (Driver): This package provides the MARS series camera driver program, such as:
the GigE Vision cameras' Filter Driver Program.
2) Interface Library (API): This package provides the camera control interface library and the image
processing interface library, supports the user for secondary development.
3) Demonstration Program (GalaxyView.exe): This demonstration program is used to display the camera
control, image acquisition and image processing functions, the user can control the camera directly
by the demonstration program, and the user can develop their own control program based on the
camera interface library.
4) IP configurator (GxGigeIPConfig.exe): The tool is used to configure the camera IP address and to set
the IP mode when the camera is powered on.
5) Sample: These samples demonstrate cameras' functions, the user can easily use these samples to
control cameras, or refer to the samples to develop their own control programs.
6) Programmer's Manual: This manual is the users programming guide that instructs the users how to
configure the programming environment and how to control cameras and acquisition images through
the camera interface library.
You can download the latest software package from the website: www.daheng-imaging.com/en/Downloads.
3.1.2. User Software Interface
After installing the MARS series camera software package, the user can use the demonstration program
and the samples to control the camera, also the user can control the camera by the program which is
written by the user themselves. The software package provides three kinds of program interface, the user
can select the suitable one for use according to their own requirements:
1) API Interface
In order to simplify the users' programming complexity, the package provides the general C programming
interface GxIAPI.dll and image processing algorithm interface DxImageProc.dll for the user to control the
camera, and provides the samples and software development manual which are based on these interfaces.
The API interface supports C/C++/C#/Python, etc.
2) GenTL Interface
This interface is developed according to the standard of general transport layer in Gen<i>Cam standard,
DAHENG IMAGING follows the Gen<i>Cam standard and provides the GenTL interface for the user, and
the user can use the GenTL interface directly to develop their own control program. The definition and
usage of GenTL interfaces can be downloaded from the website of EMVA.

3.Installation Guidelines
© China Daheng Group, Inc. Beijing Image Vision Technology Branch 6
In addition, users can use some third-party software that supports Gen< i >Cam standard to control the
camera, such as HALCON.
3) GigE Vision interface
The MARS series GigE Vision camera is compatible with the GigE Vision protocol, which allows the user
to control the camera directly through the GigE Vision protocol. In addition, the user can use some third-
party software that supports the GigE Vision protocol to control the camera, such as HALCON.
Note
GEN<i>CAM standard: GEN<i>CAM is administered by the European Machine VisionAssociation (EMVA).
GenICam provides a generic programming interface for all kinds of cameras and devices. It provides a
standard application programming interface (API), no matter what interface technology is being used. It
mainly includes the following modules:
GenAPI: an XML description file format defining how to capture the features of a device and how to
access and control these features in a standard way
GenTL: a generic Transport Layer Interface, between software drivers and libraries, that transports
the image data from the camera to the application running on a PC
SFNC: common naming convention for camera features, which promotes interoperability between
products from different manufacturers
Figure 3-1 GEN<i>CAM standard schematic diagram
3.2. Camera Power
MARS-G-P series camera can get power in either of two different ways: via PoE (power over Ethernet) or
via Hirose I/O port.
1) Via PoE (Power over Ethernet)
Via PoE (Power over Ethernet), i.e., via the Ethernet cable plugged into the camera's RJ-45 jack. Use the
IEEE 802.3af compliant PSE (Power sourcing equipment) to power the MARS-G-P camera.

3.Installation Guidelines
© China Daheng Group, Inc. Beijing Image Vision Technology Branch 7
2) Via the Hirose I/O port
Camera can get power from the 12-pin Hirose I/O port via a standard I/O cable.
Nominal operating voltage is +12V (±10%) ~ +24VDC (±10%).
When you supply power to the camera both via the camera’s RJ-45 jack and via the 12-pin Hirose I/O port,
the camera will get power via the Hirose I/O port.And if you cut off the Hirose I/O port, the camera will get
power via PoE and may restart.
1) Voltage outside of the specified range can cause damage.
2) The plug on the cable that you attach to the Hirose 12-pin receptacle must have 12 female
pins. Using a plug designed for a smaller or a larger number of pins can damage the
connector. See section 7.3 for the definition of IO port.
3.3. Camera Driver Installation
3.3.1. System Requirements
GalaxySDK is suitable for all cameras in the MARS series. The GalaxySDK contains various operating
systems such as windows and Linux. The requirements for the operating system and version of the
installation package are as follows:
Operating Systems
Applicable Version
Windows
Windows XP (32bit, 64bit)
Windows 7 (32bit, 64bit)
Windows 8 (32bit, 64bit)
Windows 8.1 (32bit, 64bit)
Windows 10 (32bit, 64bit)
Linux
Ubuntu 12.04 or above, kernel version 3.5.0.23 or above
Android
Android6 or above
3.3.2. Driver Installation
The steps to install the GalaxySDK under Windows are as follows:
1) Downloadthecorrespondingversionoftheinstallationpackagefromwww.daheng-imaging.com/en/Downloads.
2) Run the installer.
3) Follow the instructions of the installation wizard to complete the installation process. During the
installation process, you can choose the camera interface you need (USB2.0, USB3 Vision, GigE
Vision, etc.).
During the installation process, especially when installing the *.sys file, you must always pay attention to
the anti-virus software to intercept the driver. If intercepted, it may cause the driver installation to fail.

3.Installation Guidelines
© China Daheng Group, Inc. Beijing Image Vision Technology Branch 8
3.4. Camera IP Configuration
The IP Configurator provided by GalaxySDK eliminates the need for users to configure IP for hosts and
devices. Implement one-click configuration IP. You only need to follow the steps below to configure the
camera IP. For details on how to use the tool, please refer to section 9.1.
1) Connect the GigE camera to the network port of the current host.
2) Open the GigE IP Configurator of the installation package.
3) Click "Auto Config" on the right side of the GigE IP Configurator to automatically configure the IP.
Figure 3-2 GigE IP Configurator
3.5. Open Device and Start Acquisition
After powering the device, connecting the device to the host, and configuring the IP, you can double-click
the GalaxyView software to acquire image. The steps are as follows:
Figure 3-3 GalaxyView

3.Installation Guidelines
© China Daheng Group, Inc. Beijing Image Vision Technology Branch 9
1) Click the icon on the Toolbar in the GalaxyView to refresh device list.
2) After the device is enumerated, double-click the device enumerated in the device list.
3) Click the icon on the Toolbar to perform the StartAcquisition operation on the current device.

4.General Specifications
© China Daheng Group, Inc. Beijing Image Vision Technology Branch 10
4. General Specifications
4.1. Explanation of Important Parameters
4.1.1. About Spectral Response
QE: Which is the ratio of the average number of photoelectrons produced per unit time to the number of
incident photons at a given wavelength.
Sensitivity: The change of the sensor output signal relative to the incident light energy. The commonly
used sensitivity units are V/((W/m2) •s), V/lux •s, e-/((W/m2) •s) or DN/ ((W/m2) •s).
The spectral response graphs given by different manufacturers are different. Some graphs' ordinate is
relative sensitivity response, and abscissa is wavelength. Some graphs' ordinate is QE, and abscissa is
wavelength.
4.2. MARS-880-13GC-P / MARS-880-13GM-P
4.2.1. Parameters
Specifications
MARS-880-13GC-P
MARS-880-13GM-P
Resolution
4096 ×2160
Sensor Type
Sony IMX267 global shutter CMOS
Max. Image Circle
1 inch
Pixel Size
3.45μm ×3.45μm
Frame Rate
12.1fps @ 4096 ×2160 (default)
13fps @ 4096 ×2160 (adjust the packet size to 8192 and reserved bandwidth to 7)
ADC Bit Depth
12bit
Pixel Bit Depth
8bit, 12bit
Shutter Time
36μs ~ 1s
Gain
0dB ~ 24dB
Pixel Formats
Bayer RG8 / Bayer RG12
Mono8 / Mono12
Signal Noise Ratio
39.89dB
39.81dB

4.General Specifications
© China Daheng Group, Inc. Beijing Image Vision Technology Branch 11
Synchronization
Hardware trigger, software trigger
I/O
1 input and 1 output with opto-isolated, 2 programmable GPIOs
Operating Temp.
0°C ~ 45°C
Storage Temp.
-20°C ~ 70°C
Operating
Humidity
10% ~ 80%
Camera Power
Requirements
PoE(PoweroverEthernet,IEEE802.3afcompliant) or 12VDC-10%~24VDC+10%,
supplied via the camera's 12-pin Hirose connector
Power
Consumption
< 3W @ 12VDC, < 3.5W @ PoE
Lens Mount
C
Dimensions
50.4mm ×62mm ×62mm (without lens adapter or connectors)
Weight
274g
Operating System
Windows XP/Win7/Win8/Win10 32bit, 64bit OS
Data Interface
Fast Ethernet(100Mbit/s) or Gigabit Ethernet(1000Mbit/s)
Programmable
Control
Image size, gain, exposure time, trigger polarity, flash polarity
Conformity
CE, RoHS, GigE Vision, GenICam, IEEE802.3af

4.General Specifications
© China Daheng Group, Inc. Beijing Image Vision Technology Branch 12
4.2.2. Spectral Response
Figure 4-1 MARS-880-13GC-P sensor spectral response
Figure 4-2 MARS-880-13GM-P sensor spectral response
Table of contents
Other Daheng Imaging Digital Camera manuals

Daheng Imaging
Daheng Imaging MERCURY2 USB3 User manual

Daheng Imaging
Daheng Imaging VENUS USB3 Series User manual

Daheng Imaging
Daheng Imaging MERCURY2 GigE Series User manual

Daheng Imaging
Daheng Imaging VENUS USB3 Series User manual

Daheng Imaging
Daheng Imaging MERCURY2 GigE Series User manual

Daheng Imaging
Daheng Imaging VENUS USB3 Series User manual

Daheng Imaging
Daheng Imaging MER-030-120UC-L User manual

Daheng Imaging
Daheng Imaging MARS USB3 User manual

Daheng Imaging
Daheng Imaging VEN-134-90U3M-D User manual