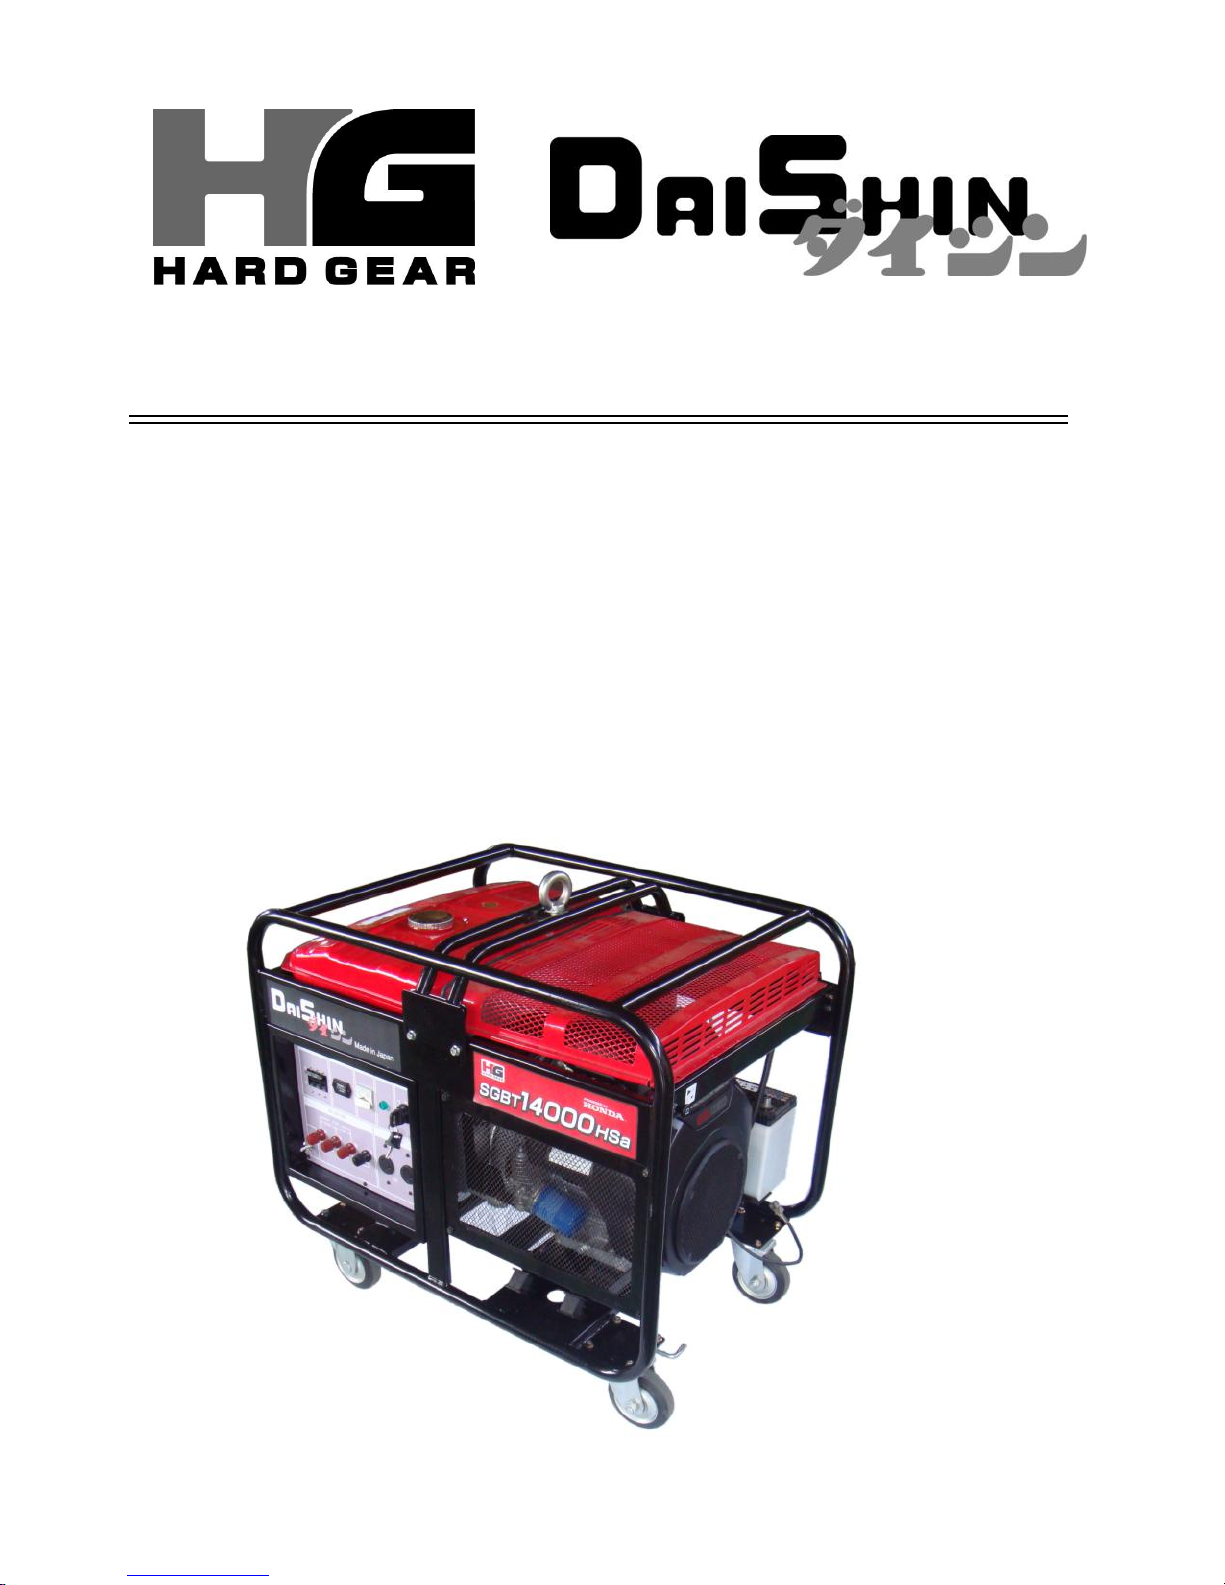
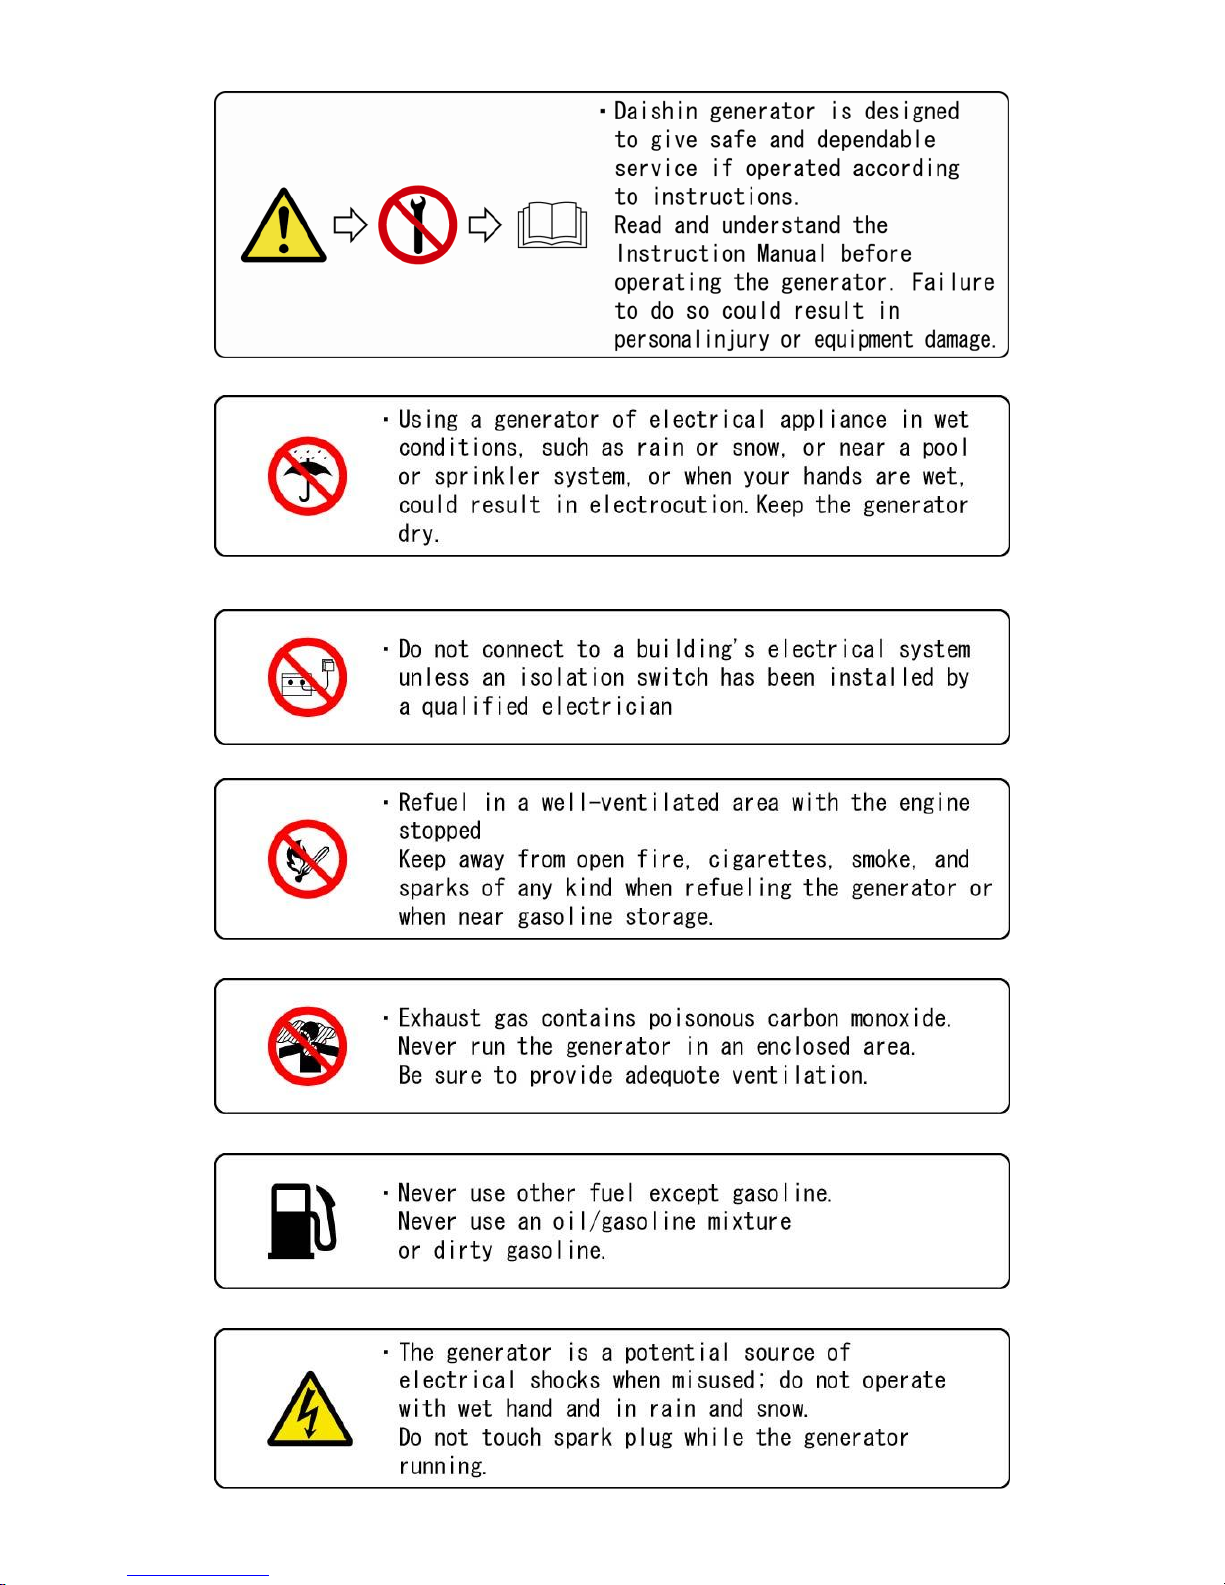
DAISHIN SGB12000HSa User manual

PORTABLE GENERATOR
INSTRUCTION MANUAL
WWW.DAISHIN-JAPAN.CO.JP P・No.15750210000
SGB12000HSa
SGBT14000HSa

- 1 -
Dear Customer:
We carefully manufactured to give you a dependable operation.
However, similar to all mechanical products, your machine will occasionally require
adjustments and maintenance. This manual should be read carefully before operating
or performing any adjustments on your machine. Please contact DAISHIN dealer if
technical assistance is required.
Please be advised that unit was designed / manufactured for specific applications. So
please do not modify and use the unit for any application other than which it was
designed for. If you have any questions regarding any applications, please ask
DAISHIN dealer before using.
Please read an instruction manual before use.
Safety Messages
Your safety and the safety of others are very important. We have provided important
safety messages in this manual and on the generator. Please read these messages
carefully.
Safety message alerts you to potential hazards that could hurt you or others. Each safety
message is preceded by a safety alert symbol and one of three words; DANGER,
WARNING, or CAUTION.
These words mean:
You will be killed or seriously hurt if you don't follow instructions.
You can be killed or seriously hurt if you don't follow instructions.
You can be hurt if you don't follow instructions.
Each message tells you what the hazard is, what can happen, and what you can do to
avoid or reduce injury.

- 2 -
Damage Prevention Messages
You will also see other important messages that are preceded by the word.
NOTICE
This word means:
Your generator or other property could be damaged if you don't follow
instructions.
The purpose of these messages is to help prevent damage to your generator, other
property, or the environment.

- 3 -
Table of Contents
1. SAFETY LABEL LOCATION .............................................. 4
2. SAFETY MESSAGES ......................................................... 6
3. COMPONENTS ................................................................... 7
4. CONTROLS ........................................................................ 10
5. BEFORE STARTING ENGINE ............................................ 12
6. OPERATION ....................................................................... 13
7. STOPPING ENGINE ........................................................... 15
8. MAINTENANCE .................................................................. 16
9. TRANSPORTING AND STORAGE ..................................... 27
10. WATTAGE INFORMATION ................................................. 29
11. TROUBLE SHOOTING ....................................................... 30
12. SPECIFICATION ................................................................. 32
13. WIRING DIAGRAM ............................................................. 33

- 4 -
1. SAFETY LABEL LOCATION
These labels warn you of potential hazards that can cause serious injury.
Read them carefully.
If a label comes off or becomes hard to read, contact your DAISHIN dealer for a
replacement.

- 5 -

- 6 -
2. SAFETY MESSAGES
Your safety and the safety of others are very important. We have provided important
safety messages in this manual and on the generator. Please read these messages
carefully.
Operator responsibility
・Know how to stop the generator quickly in case of emergency.
・Understand the use of all generator controls, output receptacles, and connections.
・Be sure that anyone who operates the generator receives proper instruction. Do not let
children operate the generator without parental supervision.
Carbon monoxide hazards
・Exhaust contains poisonous carbon monoxide, a colorless and odorless gas. Breathing
exhaust can cause loss of consciousness and may lead to death.
・If you the generator in an area that is confined, or even partially enclosed, the air you
breathe could contain a dangerous amount of exhaust gas. To keep exhaust gas from
building up, provide adequate ventilation.
Electric shock hazards
・The generator produces enough electric power to cause a serious shock or
electrocution if misused.
・Using a generator or electrical appliance in wet conditions, such as rain or snow, or
near a pool or sprinkler system, or when your hands are wet, could result in
electrocution. Keep the generator dry.
・If the generator is stored outdoors, unprotected from the weather, check all electrical
components on the control panel, before each use. Moisture or ice can cause a
malfunction or short circuit in electrical components, which could result in electrocution.
・Do not connect to a building’s electrical system unless an isolation switch has been
installed by a qualified electrician.
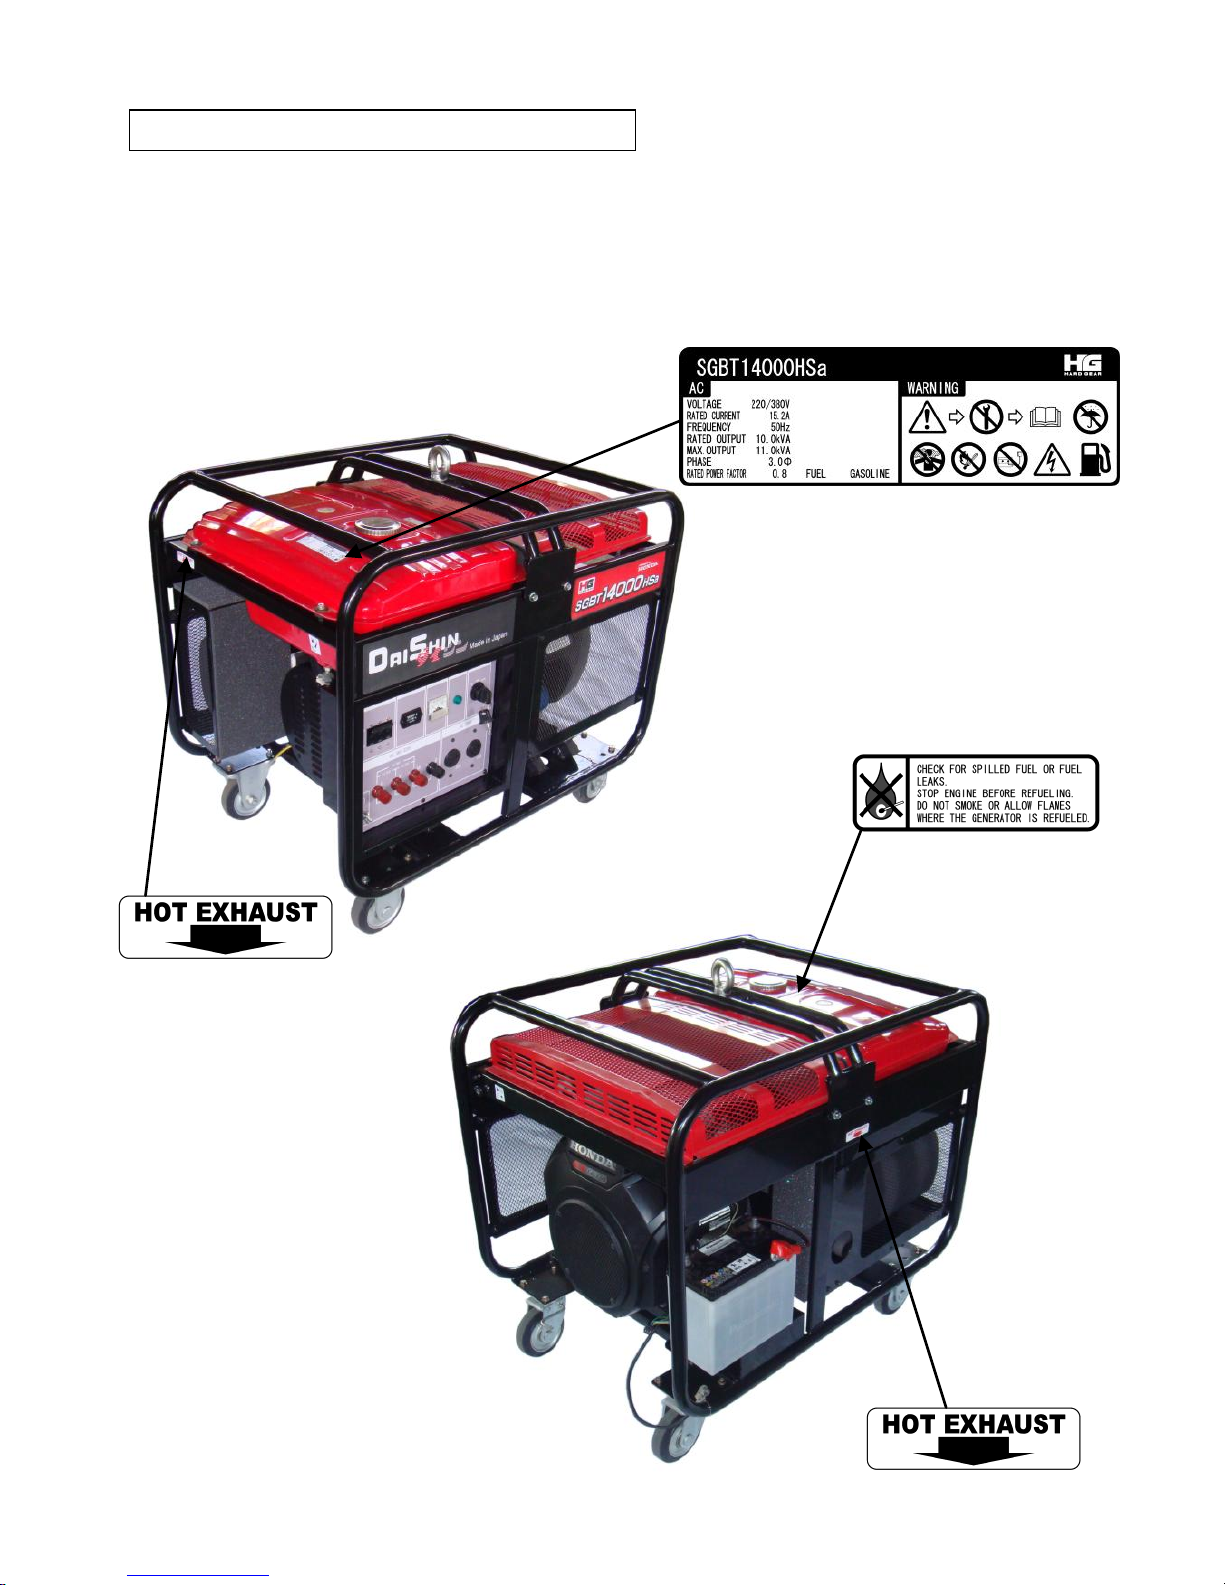
Fire and burn hazards
・The exhaust system gets hot enough to ignite some materials.
Keep the generator at least 1 meter (3 feet) away from buildings and other equipment
during operation.
Do not enclose the generator in any structure.

- 7 -
Keep flammable materials away from the generator.
・The muffler becomes very hot during operation and remains hot for a while after
stopping the engine. Be careful not to touch the muffler while is in hot. Let the engine
cool before storing the generator indoors.
・Gasoline is extremely flammable and is explosive under certain conditions. Do not
smoke or allow flames or sparks where the generator is refueled or where gasoline is
stored. Refuel in a well ventilated area with the engine stopped.
・Fuel vapors are extremely flammable and may ignite after the engine has started. Make
sure that any spilled fuel has been wiped up before starting, the generator.
3. COMPONENTS
FUEL METER
FUEL TANK
CAP
LIFTING EYE
CONTROL
PANEL
FUEL TANK
GENERATOR
FUEL VALVE

- 8 -
CONTROL PANEL
SGB12000HSa (220V 50Hz)
CIRCUIT BREAKER
GROUND TERMINAL
PILOT LAMP
AC RECEPTACLES
ENGINE KEY SWITCH
VOLT METER
HOUR METER
AC TERMINALS
MUFFLER
BATTERY
A battery liquid is not in
at the time of the
factory shipment. Fill a
suitable battery liquid
before the use.
CASTER
ENGINE COVER
ENGINE
CHOKE KNOB

- 9 -
SGBT14000HSa (220/380V 50Hz)
CASTER KIT
CIRCUIT BREAKER
GROUND TERMINAL
PILOT LAMP
AC RECEPTACLES
ENGINE KEY SWITCH
VOLT METER
HOUR METER
AC TERMINALS
CASTER
FLANG BOLT M8-20
NUT M8

- 10 -
4. CONTROLS
Engine key switch
To start and stop the engine.
Switch position:
Off: To stop the engine. Key can be removed/ inserted.
On: To run the engine after starting.
Start:To start the engine by turning the starter motor.
Return the key to the “ON” position once the engine has started. Do not use the starter for
more than 5 seconds at a time. If the engine fails to start, release the switch and wait 10
seconds before operating the starter again.
Fuel valve
The fuel valve is located between the fuel tank
and carburetor.
When the valve lever is in the “ON” position,
fuel is allowed to flow from the fuel tank to the
carburetor. Be sure to return the lever to “OFF”
after stopping the engine.
ENGINE KEY SWITCH
ON
OFF
START
ON
OFF

- 11 -
Choke knob
The choke is used to provide proper starting mixture when the engine is cold. It can be
opened and closed by operating the choke rod manually.
Pull the knob out toward “CLOSED” to enrich the mixture.
Circuit Breaker
The Circuit breaker will automatically cut off the circuit if there is a short circuit or a
significant overload of the generator at the receptacle.
If the circuit breaker is OFF automatically, check that the appliance is working properly
and does not exceed the rated loadcapacity of the circuit before turn on to reset the circuit
breaker.
Ground terminal
The generator ground terminal is connected to the frame of the generator, the metal
non-current carrying parts of the generator, and the ground terminals of each receptacle.
Pilot lamp
The pilot lamp is illuminated when the generator is operating normally.
PULL THE KNOB
CLOSED POSITION

- 12 -
5. BEFORE STARTING ENGINE
1. Fill recommended engine oil to the upper limit mark if the oil is short.
2. Change oil if it becomes dirty or discolored.
Oil capacity at upper limit mark:
See attached HONDA OWNER’S MANUAL.
3. Remove the tank cap and check the fuel
level.
If fuel level is low, refill with unleaded
automotive gasoline.
4. Fuel tank capacity: see page 20 (this
INSTRUCTION MANUAL)
5. Battery liquid is not in at the time of the
factory shipment. Fill a suitable battery
liquid.
1) Remove the battery cell caps.
2) Fill the electrolyte into the each cell,
the level must be maintained between the
UPPER and LOWER limit marks.
3) Peel the protection seal.
Protection seal
Battery cell cap
UPPER LIMIT
LOWER LIMIT

- 13 -
ON
OFF
6. OPERATION
1. STARTING THE ENGINE (Refer to HONDA OWNER’S MANUAL for engine.)
1) Make sure that disconnect all electrical
loads from panel receptacles.
The generator may be hard to start if a
load is connected.
2) Turn the fuel valve to the “ON” position.
3) If you want to start operate the choke manually, move the choke knob to the
“CLOSED” position.
4) Start the engine
With the electric starter:
Turn the engine key switch to the
“START” position and hold it there
until the engine starts.
Do not use the electric starter for more than 5 seconds at the time.
If the engine fails to start, release the switch and wait 10 seconds
before operating the starter again.
ON
OFF
START
OPEN POSITION
CLOSED POSITION

- 14 -
When the speed of the starter motor drops after a period of the time, it
is the indication that the battery should be recharged.
5) After the engine starts, let the engine switch return to “ON”.
6) If you have manually closed the choke, move it to the “OPEN” position as the
engine warms up.
2. APPLYING AC LOAD
1) Start engine (see STARTING THE ENGINE).
2) Allow the engine to warm up for 2-3 minutes before connecting tools or
appliances.
3) Insert the plug of the electrical appliance into “AC RECEPTACLE”.
4) Turn the circuit breaker knob to the on position.
** Do not take a current exceeding the specified amperage.
** Be sure that total wattage of all appliances does not exceed the rated output of the
generator.
When the generator is overloaded or a short circuit is made, the CIRCUIT BREAKER will
trip to protect the circuit automatically. If CIRCUIT BREAKER trips during operation, the
generator is either over loaded or the appliance is defective.
Check the appliance and / or generator for overloading or defect make necessary
corrections or repairs before use.
BE SURE THAT THE TOTAL WATTAGE OF ALL APPLIANCES DOES NOT
EXCEED THE RATED OUTPUT OF THE GENERATOR.

- 15 -
OFF
7. STOPPING ENGINE
1) Turn the circuit breaker knob to the “OFF” position.
2) Turn the engine key switch to the “OFF” position.
3) Disconnect all electrical loads from panel receptacles.
4) Turn the fuel valve to the “OFF” position.
Never leave an appliance plugged into the generator when you stop the generator as
damage could result to the generator and / or appliance.
OFF

- 16 -
8. MAINTENANCE
Periodic inspection and adjustment of HONDA ENGINE & Generator is essential if
high-level performance is to be maintained. Regular maintenance will also ensure a long
service life. The required service intervals and kind of maintenance to be performed are
described on HONDA OWNER’S MANUAL, so please see HONDA OWNER’S MANUAL.
Exhaust gas contains poisonous carbon monoxide.
Shut off the engine before performing any maintenance, if the engine must be run, make
sure the areas is well ventilated.
Use only genuine HONDA parts or their equivalent for maintenance or repair.
Replacement parts, which are not of equivalent quality, may damage the generator.
MAINTENANCE SCHEDULE
REGULAR SERVISE PERIOD
Performed at every indicated month or operating
hour interval, whichever comes first.
Each
use
First
month
or
20Hrs.
(3)
Every
3month
or
50Hrs.
(3)
Every
6month
or
100Hrs.
(3)
Every
Year
or
300Hrs
(3)
ITEM
Engine oil
Check level
O
Change
O
O
Engine oil filter
Replace
Every
200
Hrs
Air filter
Check
O
Clean
O (1)
Replace
O*
Spark plug
Check-adjust
O
Replace
O
Valve clearance
Check-Adjust
O (2)
Combustion chamber
Clean
After every 500 Hrs(2)
Fuel filter
Clean
O
Replace
O (2)
Fuel tank
Clean
Every 2 years (2)
Fuel tube
Check
Every 2 years (Replace if necessary)(2)
* Replace the paper air filter element only

- 17 -
(1) Service more frequently when used in dusty areas.
(2) These items should be service by your dealer, unless the owner has the
proper tools and is mechanically proficient. See the service manual.
(3) For professional commercial use, log has of operation to determine proper
maintenance intervals.
Engine oil
Engine oil is a major factor affecting engine performance and service life.
No detergent and 2-stroke engine oils will damage the engine and are not
recommended.
Check the oil level BEFORE EACH USE with the generator on a level surface with the
engine stopped.
Use a high quality detergent oil classified for API Service SJ,SL or equivalent.
Use no special additives with recommended oils. Do not mix oil with gasoline.
** Air-cooled engines run hotter than automotive engines. The use of no-synthetic
multi-viscosity oils (5W-30,10W-30,etc.)in temperatures above 40°F(4℃), will
result in higher than normal oil consumption. When using multi-viscosity oil, check
oil level more frequently
** SAE30 oil, if used below
40°F (4℃), will result in
hard starting and possible
engine bore damage due to
inadequate lubrication.
Ambient temperature

- 18 -
Engine oil change
Drain the oil while the engine is warm to assure rapid and complete draining.
1) Remove the drain plug and sealing washer, oil filler cap, and drain the oil.
2) Reinstall the drain plug and sealing washer. Tighten the plug securely.
3) Refill with the recommended oil and check the level.
Oil filler cap
Oil capacity:
1.7ℓ(1.79 US qt , 1.50 lmp qt)
Drain plug
Use some tray
In case of removing the drain pipe, please control the extended pipe by spanner.
Engine oil filter change
1) Drain the engine oil, and retighten the drain plug securely.
2) Remove the oil filter, and drain the oil into a suitable container.
Dispose the used oil and filter in a manner compatible with the environment.
Used an oil filter socket, rather than a strap wrench, to avoid striking and damaging
the oil pressure switch.

- 19 -
3) Clean the filter mounting base, and coat
the seal of the new oil filter with clean
engine oil.
Oil filter
Used only a genuine HONDA oil filter or a
filter of equivalent quality specified for your
model. Using the wrong filter, or a non-HONDA filter which is not of equivalent
quality, may cause engine damage.
4) Screw on the new oil filter by hand until the seal contacts the filter mounting
base, then use an oil filter socket tool to tighten the filter an additional 7/8 turn.
Oil filter tightening torque:12N-m(1.2kg・m , 16lb・ft)
5) Refill the crankcase with the specified amount of the recommended oil.
Reinstall the oil filter cap and dipstick.
6) Start the engine, and check for leaks.
7) Stop the engine, and check the oil level.
If necessary, and oil to bring the oil level to the upper limit mark on the dipstick.
Used motor oil may cause skin cancer if repeatedly left in contact with the skin for
prolonged periods. Although this is unlikely unless you handle used oil on a daily
basis, it is still advisable to thoroughly wash your hands with soap and water as
soon as possible after handling used oil.
Please dispose of used motor oil in a manner that is compatible with the environment. We
suggest you take it in a sealed container to your local servicestation or recycling center for
reclamation. Do not throw it in the trash or pour it on the ground.
This manual suits for next models
1
Table of contents
Other DAISHIN Portable Generator manuals
Popular Portable Generator manuals by other brands

Winco
Winco PSS150/B Installation and operator's manual

maxwatt
maxwatt MX6500i Operator's manual

Middle Atlantic Products
Middle Atlantic Products MPR Series instruction sheet

Honeywell
Honeywell HW5500 - 5500 Portable Generator Service manual

Shindaiwa
Shindaiwa DG20MK-P Owner's and operator's manual

Aksa
Aksa AGM 25 manual

Hyundai
Hyundai HPS-300 user manual

TrickleStar
TrickleStar PowerStation1500 quick start guide

Westinghouse
Westinghouse WGen12000DF user manual

Briggs & Stratton
Briggs & Stratton 10000 Watt Operator's manual

STEELE PRODUCTS
STEELE PRODUCTS SP-GD650E owner's manual

AirMan
AirMan SDG25S-6A7 Instructional manual