STEP 3
Do not connect the tube to the tanks yet, but route it
between them so that it stays level. Once you have the
best level route, mark the tube for cutting, making abso-
lutely sure there is enough to go over both elbows.
STEP 4
Before cutting the tube, notice that one of the locking rings
will need to be moved inward, beyond the mark for the cut.
Use pliers to squeeze open this locking ring and move it
intoposition. Theprongsshould befacingdown.
STEP 5
Slip one tube end over the elbow on each tank. It is a good
idea to do this outside the piano in order to provide ad-
equate support for the elbows.Alittle water on the inside of
the ends of the tube will provide some lubricant to enable
the tube end to slip over the elbow. It is important that
you support the elbow when pushing on it to avoid
breaking the seal between the elbow and the tank.
STEP 6
With the pliers, squeeze open
the locking rings and move them
forwardon thetube until theyare
overtheelbows.
STEP 7
Usingthe Velcroprovided, create
a “sling” to support the tube.
STEP 8
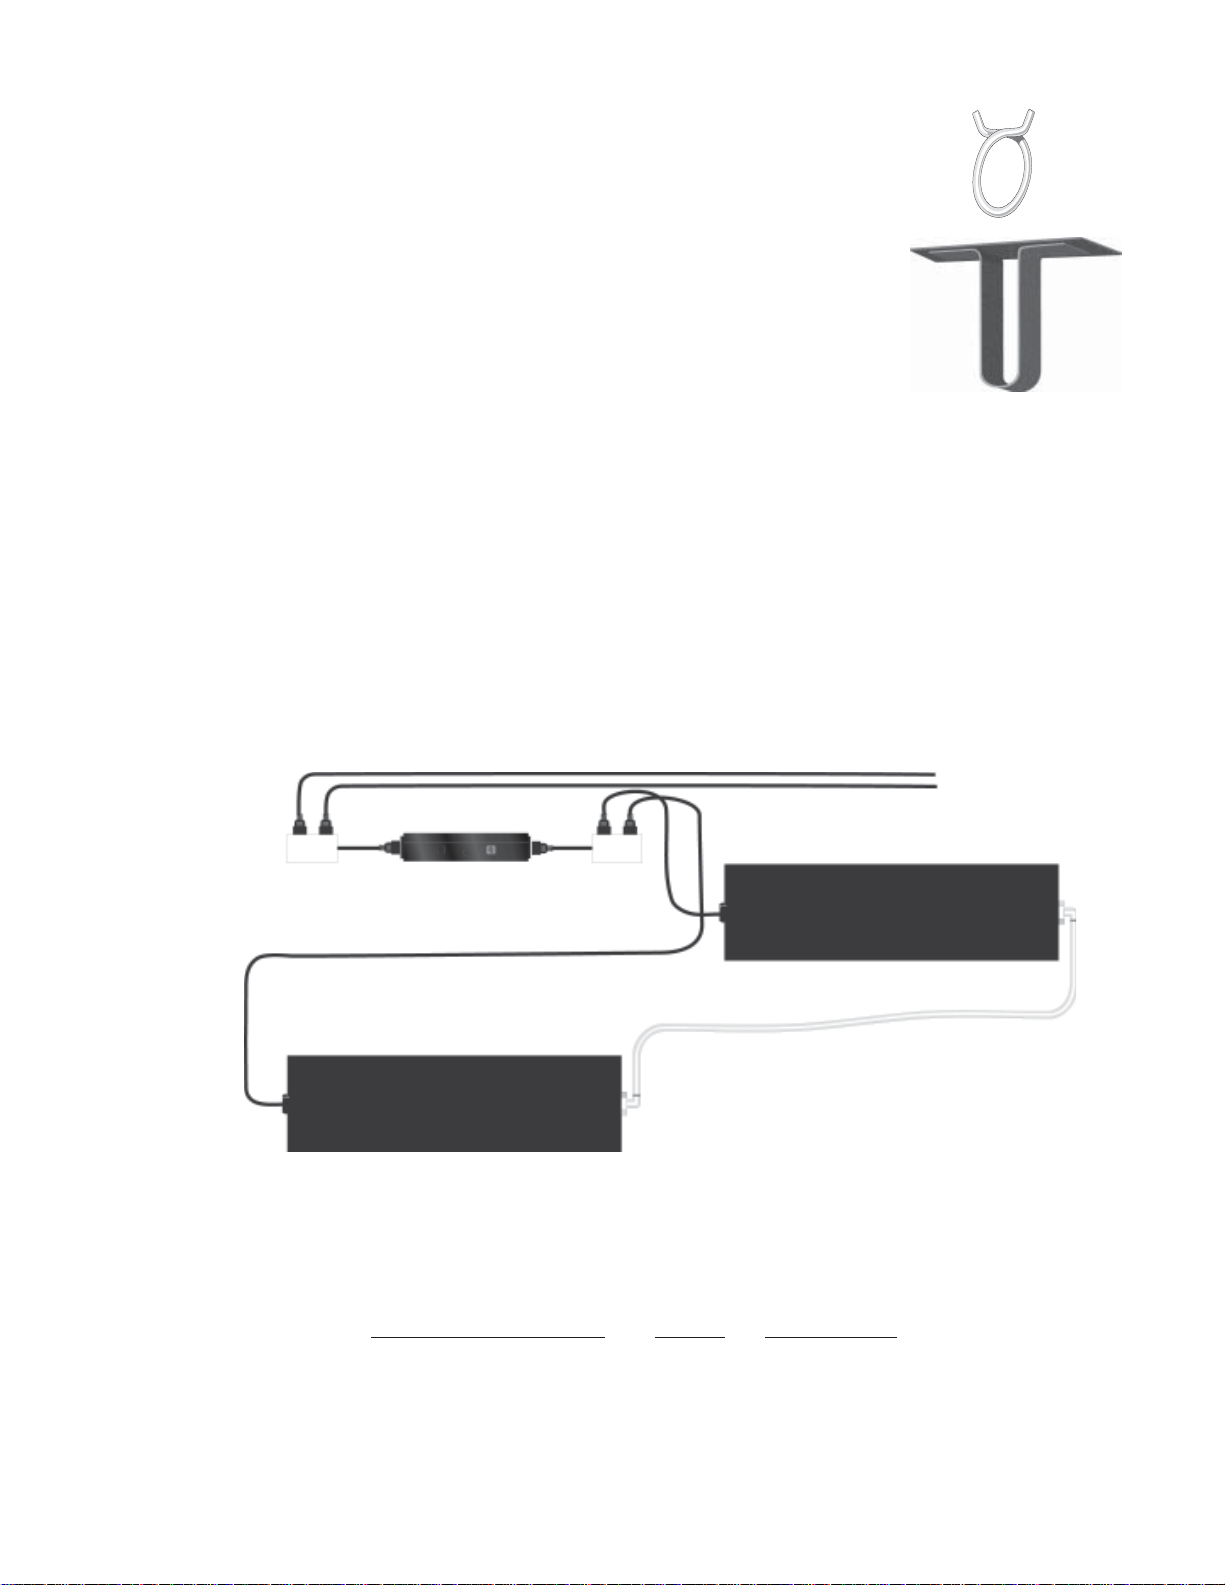
Install the Humidifiers according to the grand System
instructions. Two power strips are included with the dual
tanks (see drawing below). Install one of the power strips
nearthe Humidistatoutletmarked HUMIDIFIER.Then plug
bothHumidifier heaterbarsinto thepowerstrip.
STEP 9
Install the Dehumidifiers according to the grand System
instructions. Install the other power strip near the
Humidistat and plug it into the Humidistat outlet marked
DEHUMIDIFIER.Then plug allDehumidifiersintothe
powerstrip.
Power Strip for
the Dehumidifiers
The finished installation,
looking up at it, should look like this.
Tank Filling Information: Initially Subsequently
DualUniversalTanks 2Cans 2 Cans
Humidistat
STEP 10
3
Power Strip for
the Humidifiers