Danver MOBILE KITCHEN CART AND COCINA User manual

LIMITED 5 YEAR WARRANTY
Danver warrants this product to be free from defects in material and workmanship and
agrees to remedy any such defect. This warranty covers five years from date of original
purchase. This is solely limited to the repair or replacement of defective furniture
components and no assembly labor is included.
This warranty does not apply to any product which has been improperly assembled,
subjected to misuse or abuse or which has been altered or repaired in any way.
Liability for consequential damages is excluded to the extent exclusion is permitted by
law. This warranty gives you specific legal rights. Additional warranty rights may be
provided by law in some areas.
To obtain warranty services, purchaser must present original bill of sale. Components
repaired or replaced are warranted though the remainder of the original warranty period
only. The defective components will be repaired or replaced without charge, subject to
the terms and conditions described above.
DANVER
MOBILE KITCHEN CART
AND COCINA
ASSEMBLY INSTRUCTIONS
PARTS LIST
Description Qty.
A. Top* 1
B. Front/Back Skirt 2
C. Towel Bar Skirt** 1
D. Utensil Hanger Skirt 1
E.Legs 4
F. Shelves 2
G. Towel Bar** 1
H. Casters 4
I. Utensil Hanger Hook 3
J. Small Screw & Nut 24
K. Large Screw & Washer 2
(Located in handle)
L. #10 Screw*** 10
F
*The top shown in these assembly instructions is shown as a butcher block. Danver does not provide tops other than stainless steel, but any cart can
be ordered without a top so that you may install a custom top of your choice . #10 screws not provided for topless carts.
** C0322 model only
***Holes for screws are small to maintain proper screw bite into backer material

ASSEMBLY
Step 1) – Top & Skirt
• Pre-drill hole if needed, 1/8” dia. x 1” deep maximum. Only
drill the hole for the optional drawer (if needed).
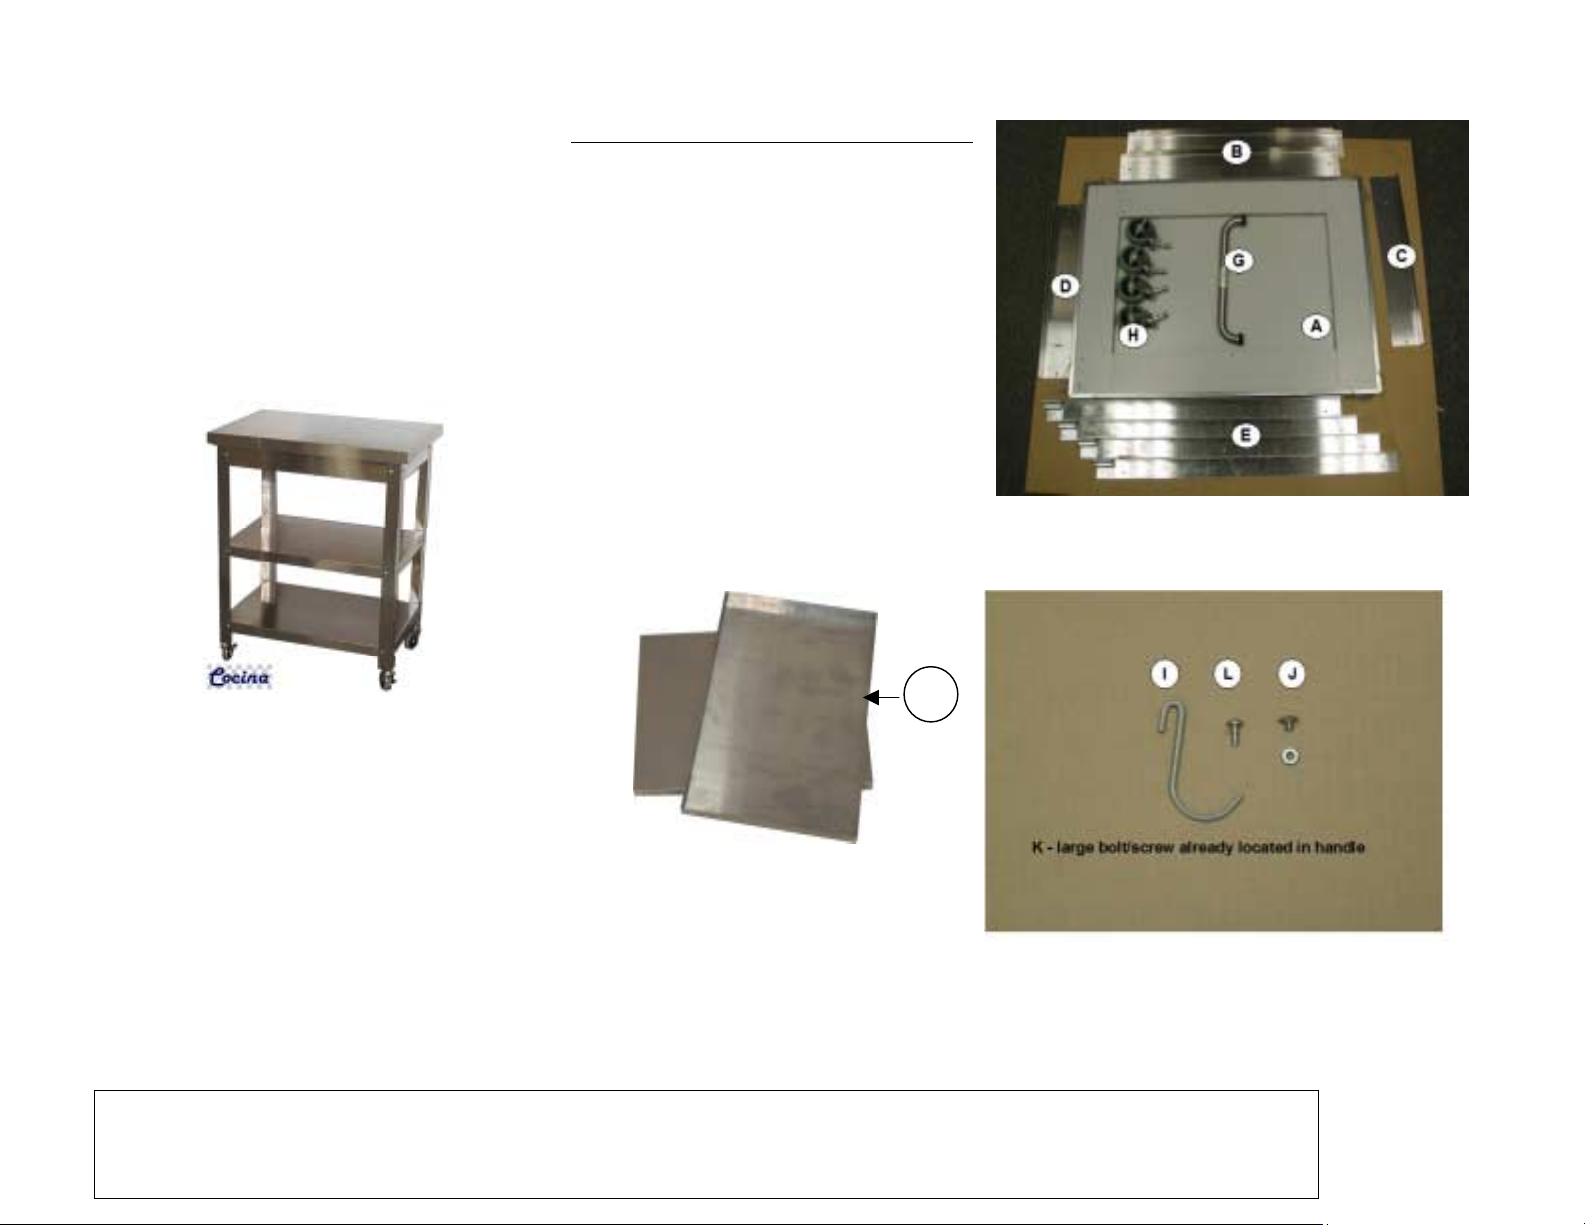
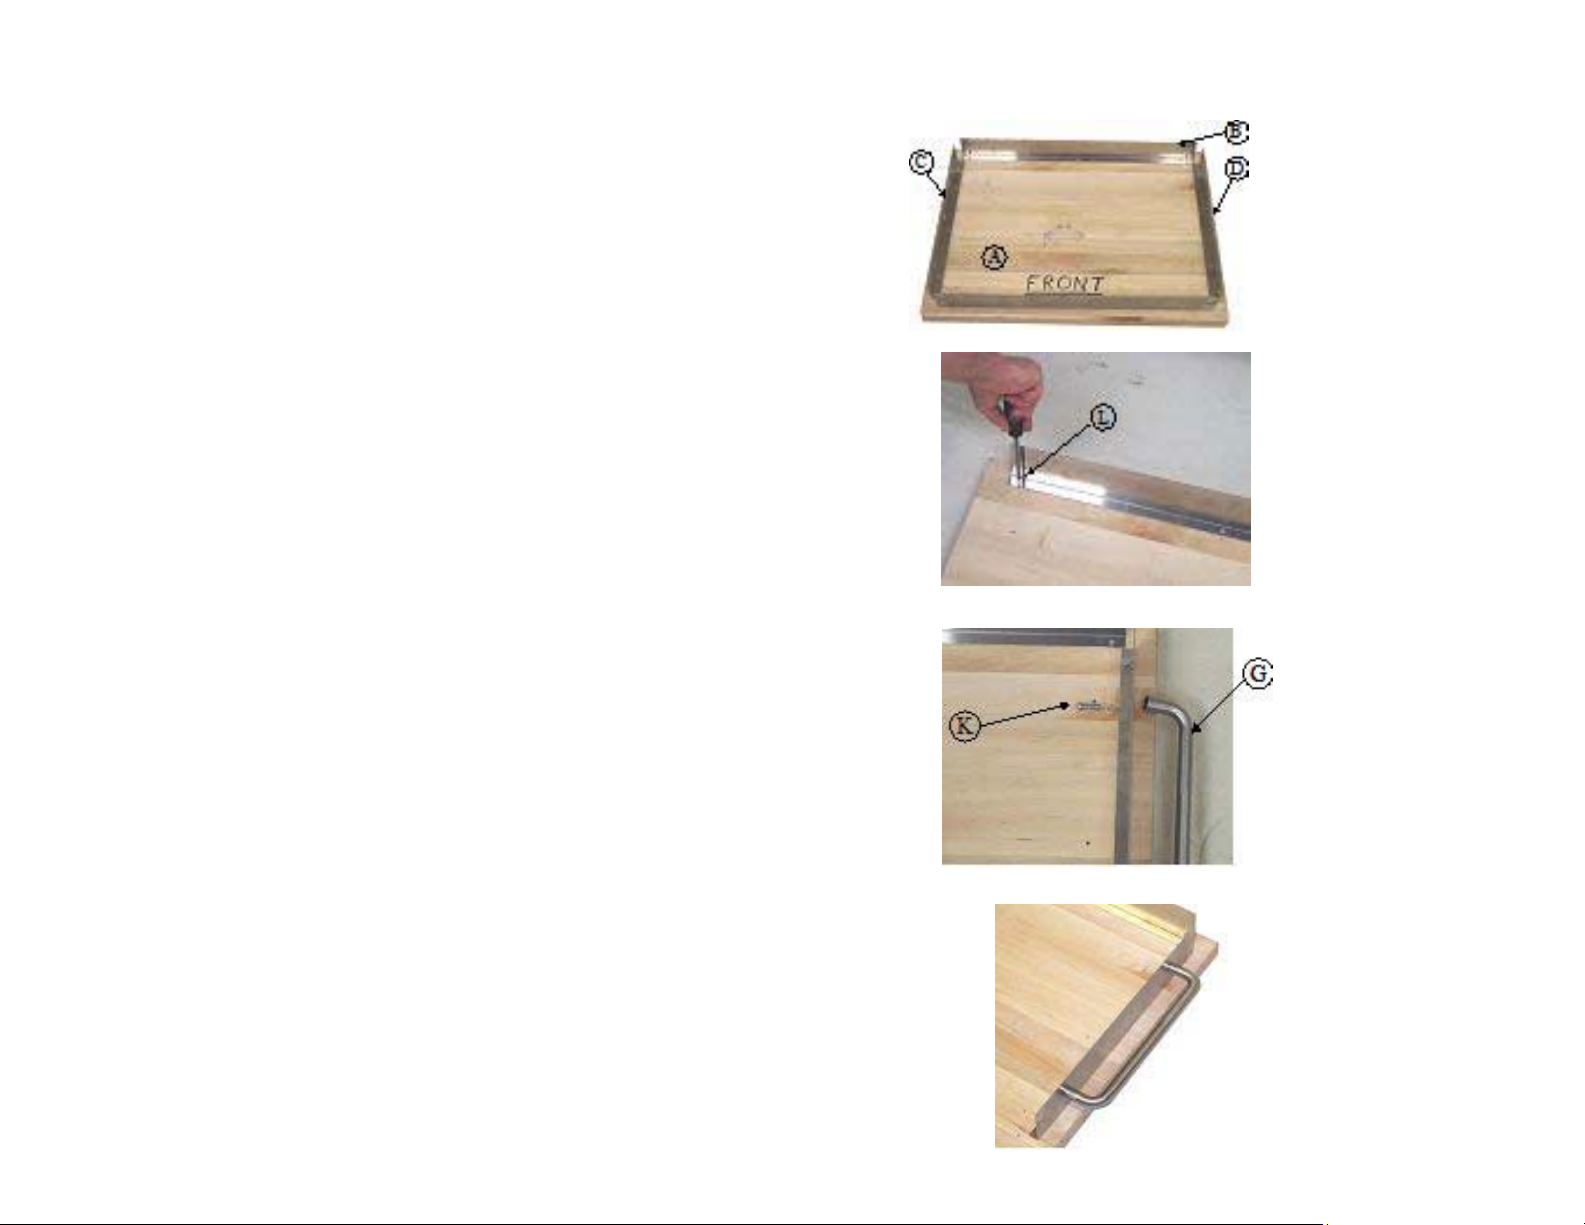
• Items needed: Top (A), Front & Back skirts (B), Handle bar
skirt (C), Tool hanger skirt (D) and #10 screws (L).
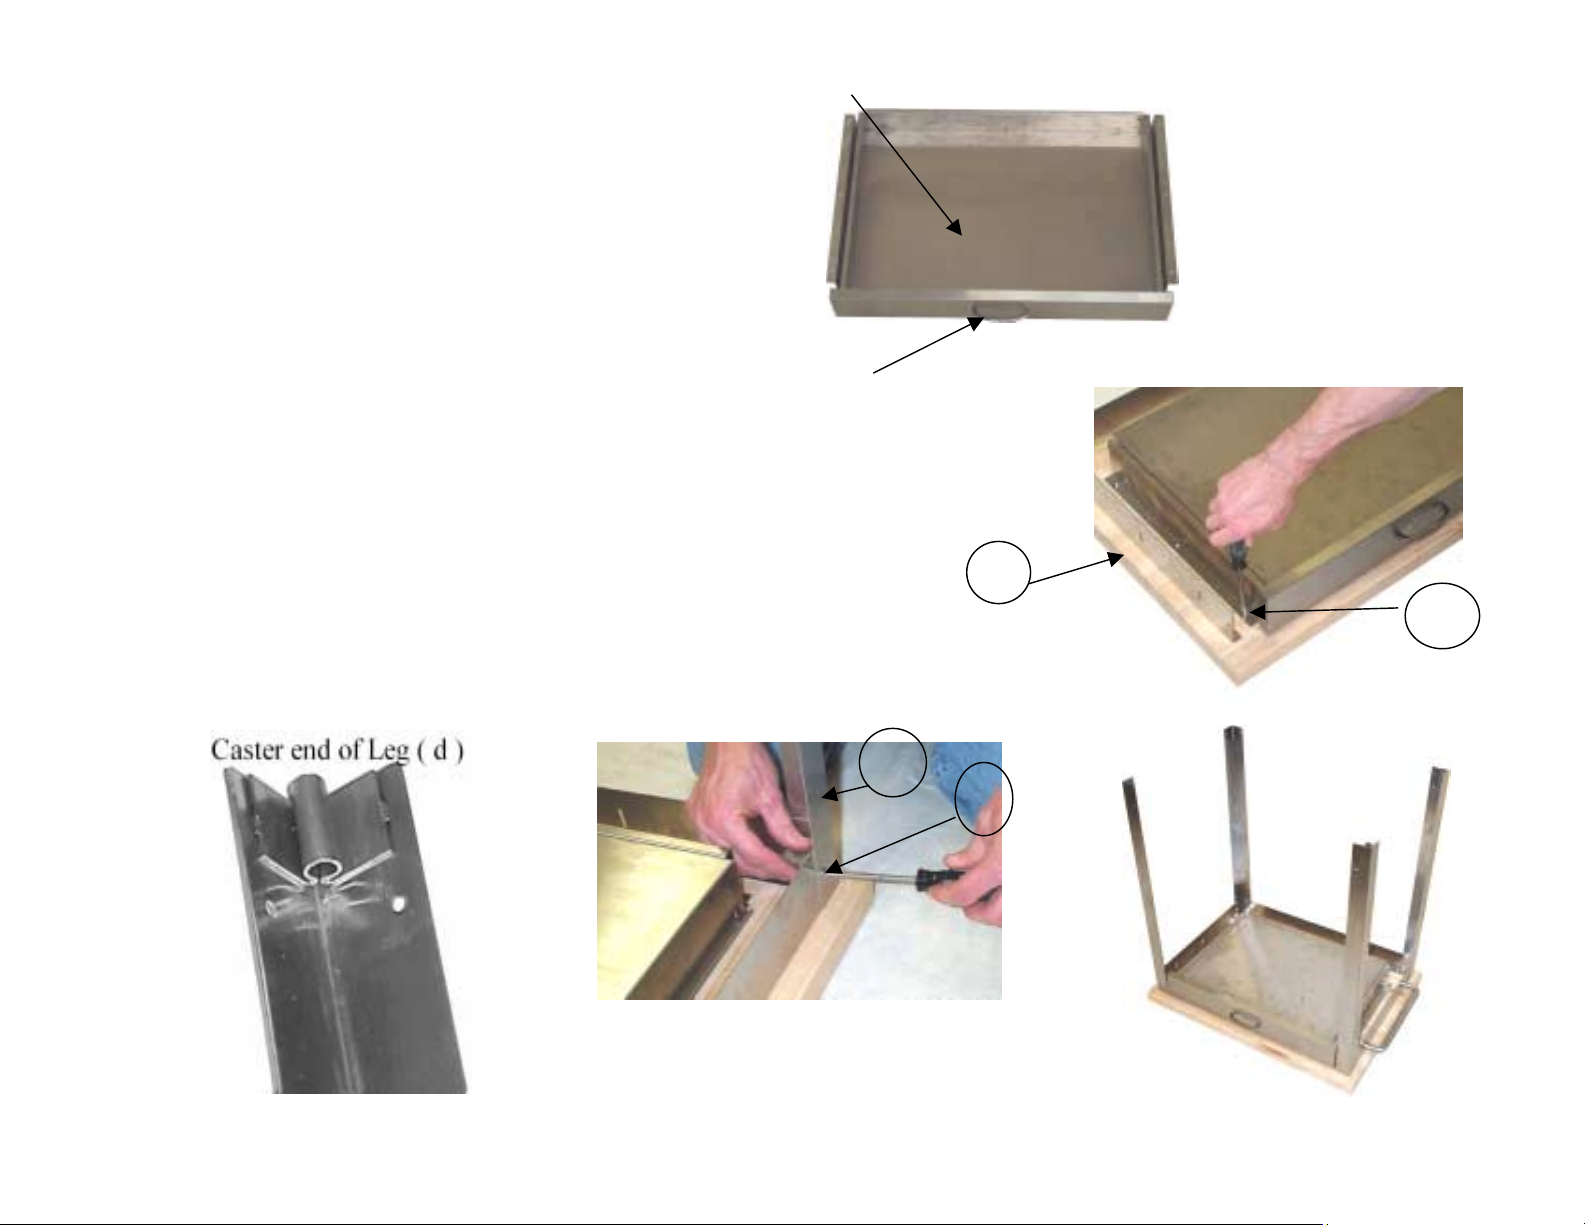
• Place Top (A) top side down on a soft flat surface such as carpet
or towels. (Fig- 1)
• Place the short side of the Front skirt (B) on the underside of the
Top (A) with the skirt long side facing the outer edge of the Top
(A).
• Use a Phillips head screwdriver and 3-#10 screws (L) to fasten
the skirt to the Top (A). Repeat for the Back skirt.
(Fig-2)
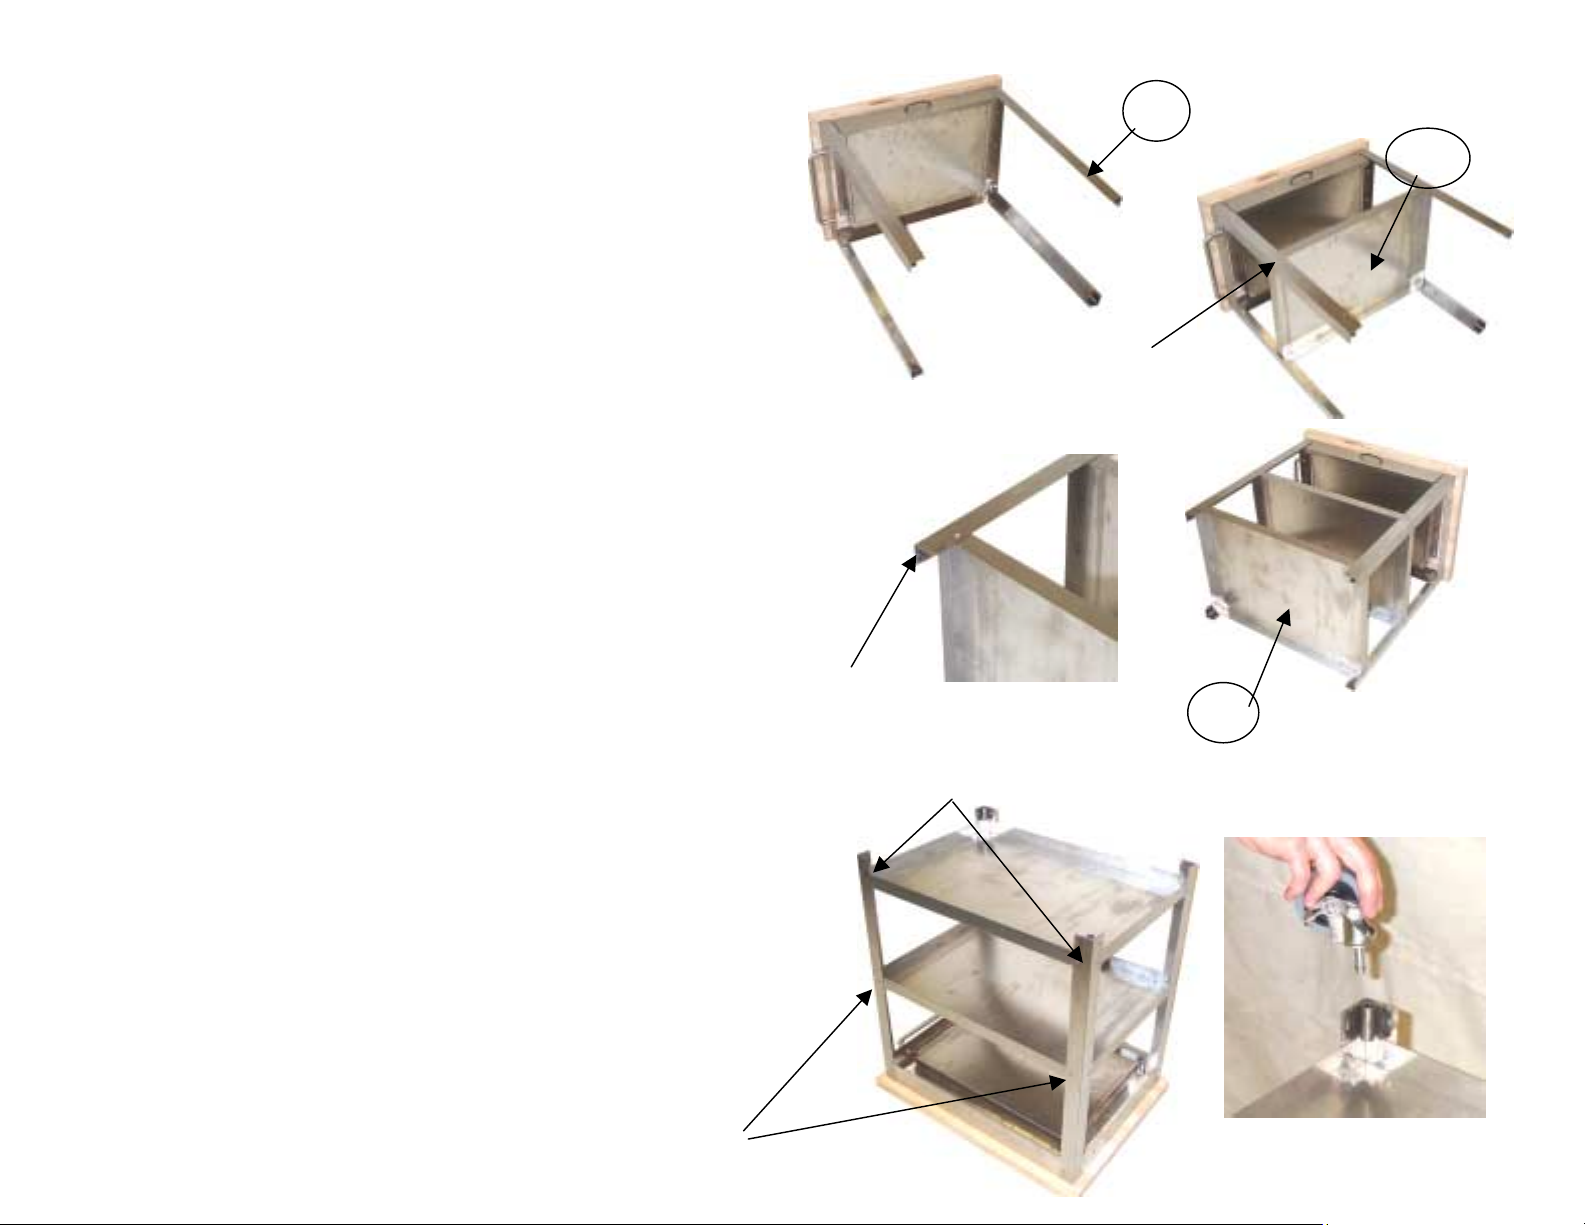
• Fasten the Handle bar skirt (C) and the Tool hanger skirt (D) to
the Top (A) with 2-#10 screws (L) for each skirt.
Fig-1
Step 2) Towel Bar (C3022 only)
• Items needed: Towel bar (G) and Large screw and
washer (K) (located in handle)
• Place the washer on the larger screw. There are two
large screws and washers one for each hole in the side
of the Towel bar skirt. (Fig. 3)
• Place one screw through one hole in the skirt from the
inside. Align the screw with one end of the Towel bar
and screw-in two or three turns. Repeat for the other
end. (Fig. 4)
• Tighten both screws with a Phillips head screw driver.
Fig-3
Fig-2
Fig-4

Drawe
r
Drawer pull
STEP 3) Optional Drawer
• Follow this step only if you have the optional add-on drawer.
Items needed: Drawer and 4-#10 screws (L).
• Attach the drawer pull to the front of the drawer with the screws
provided with the drawer pull.
• Remove the Front skirt.
• Place the drawer with the open side down on the Top (A) with the
drawer front at the opening left from the removed front skirt.
(Fig. 5)
• Align the four mounting holes and use 4 #10 screws (L) to fasten
the drawer to the Top (A). (Fig 6)
A
L
STEP 4) Attaching Legs
• Items needed: 4 – Legs (E) and 8 – Small nuts and screws (J).
• Place one leg at a corner formed by two skirts from the outside, setting the leg on the
bottom of the Top (A). The caster end of the leg should be the end that is up.
(Fig. 7)
• Use a straight head screwdriver to fasten 2 - Small screws and nuts (J). Place the
screw head on the outside of the leg, and the nuts on the inside of the skirt.
• Repeat for all legs. (Fig. 9)
Fig-7
Fig-9
Fig-8
E
L
Fig-5
Fig-6

STEP 5) Middle Shelf
• Items needed: 1- Shelf (F) and 6-Small screws and nuts (J).
• Place the cart onto one side. (Fig. 10)
• Place one Shelf in the middle of the legs with the open side facing the caster end of
the legs. Align the holes in the shelf with the middle holes in the legs. (Fig. 11)
• Use 2- Small screws and nuts (J) to fasten the shelf to the legs. Note: do not try to
fasten a screw and nut through the holes that are blocked by the floor. Place the
screw from the outside of the legs and the nut from the inside of the shelf.
STEP 6) Lower Shelf
• Items needed: 1- Shelf (F) and 6-Small screws and nuts (J)
• Place second Shelf at the end of the legs with the open side facing the caster end of
the legs. Align the holes in the shelf with the middle holes in the legs. (Fig. 13)
• Use 2- Small screws and nuts (J) to fasten the shelf to the legs. Note: do not try to
fasten a screw and nut through the holes that are blocked by the floor. Place the
screw from the outside of the legs and the nut from the inside of the shelf.
(Fig. 12)
Fig-10
E
Fig-11
Screw and nut
(J)
F
Caster End of
leg
F
Fig-13
Fig-12
STEP 7) Shelf Screws and Caster
• Items needed: 4-Small screws and nuts (J) and 4- Casters (H)
• Place the cart with the Top (A) down. (Fig. 14) Fasten the 4 remaining screws and
nuts to the Legs and Shelves.
• Insert the stem end of the caster into the hole at the end of each leg. Press firmly
(DO NOT HIT) until it seats. (Fig. 15)
Fig-14
Screw and
nut
(
J
)
Screw and nut (J)
Fig-15

STEP 8) Utensil Hangers
• Items needed: 3-Utensil hangers ( I ).
• Move the caster lock into the lock position. Carefully flip the cart
onto the casters. Unlock the casters.
• Align and hang the small loop of the Utensil hanger hook with the
oblong opening in the Utensil hanger skirt.
• View the completed cart. If your cart looks “Out of square”,
loosen the small screws and nuts (J) fastening the legs and adjust
until square and tighten. (Fig. 17)
Enjoy your new cart
Fig-16 Fig-17
Utensil
Hangers ( I )

IMPORTANT INFORMATION
• DO NOT climb on unit.
• DO NOT step or sit on shelves or drawers.
• Read and follow all assembly instructions.
• Check the parts list to make sure all parts are included and in good condition.
• Read each step carefully before starting. It is very important that each step of instruction is performed in the correct order. If these steps are not followed in sequence,
assembly difficulties may occur.
• Work in a spacious area, preferably on a carpet or rug.
• Have the following tools close at hand: One medium sized straight point screwdriver, one medium sized phillips head screwdriver and one pair of pliers.
• To clean the product, use your favorite general purpose cleaner and a soft cloth. DO NOT USE harsh chemicals or abrasive pads or cleaners.
CARE FOR YOUR STAINLESS STEEL TOP
Stainless Steel Tops
Use your favorite general-purpose cleaner or Stainless Steel polish on your Stainless Steel top. Follow the directions for applying your chosen cleaning product. The use of
scouring powder or abrasive pads is not advised.
Table of contents
Popular Outdoor Cart manuals by other brands

Fantom Professional
Fantom Professional PROCART 600 Assembly manual

LDI Spaces
LDI Spaces SAFCO Scoot 5373 Assembly instructions

OYPLA DIY
OYPLA DIY 3071 user manual

Gorilla Carts
Gorilla Carts GOR1001-COM Assembly instructions

Secabo
Secabo 183.000.06 quick guide

peerless-AV
peerless-AV DS-C560-1X3 installation instructions