Dare RadiSense RSS1004 User manual

DARE!!
DARE!! Instruments
EMC & RF Measurement equipment
Vijzelmolenlaan 3
3447 GX Woerden
The Netherlands
DARE!! Products B.V.
CoC number: 30138672
VAT number: NL8056.13.390.B01
Eori number: NL805613390
Rabobank Utrechtse Waarden e.o.
IBAN: NL31RABO0158313585 SWIFT code RABONL2U
RadiSense®
Product Manual
Electric Field Sensors
With Radi
S
upply®Plug-In Card for the Radi
C
entre®
Sensor Model:
Card Model:
RSS1004
RSS1006
RSS1018
LPS1001A

Copyright © 2008 –2019 DARE!! International
Page 2
Radi
S
ense®Product Manual
This service and operating manual pertains to the Radi
S
upply®plug-in card and the Radi
S
ense®
electric field sensors.
Card model: LPS1001A.
Sensor models: RSS1004, RSS1006 and RSS1018.
Made by DARE!! Instruments.
We ask that you read this manual carefully before operating your new product and adhere to any
safety instructions it might contain.
A Quick Start Guide has been added to this product for your convenience. This double printed A4
sheet contains the basic start-up steps and the safety warnings for the Radi
S
ense®.
Please keep the Quick Start Guide (and this regular manual) close at hand when you operate your
new Radi
S
ense®.
Please contact DARE!! Instruments or your local reseller if you have any questions.
Supplier Information
DARE!! Products B.V.
Vijzelmolenlaan 3
3447 GX, Woerden
The Netherlands
Tel.:
+31 (0)348 41 65 92
Fax:
+31 (0)348 43 06 45
Internet:
www.dare.eu
Email:
instruments@dare.nl
Radi
S
ense®manual v.4.9
Published on: 2019-08-12
By: DARE!! Instruments

Copyright © 2008 –2019 DARE!! International
Page 3
Table of Content
WARNINGS & PRECAUTIONS ...............................................................................................4
1Introduction ......................................................................................................................6
1.1 Product Introduction .............................................................................................6
1.2 Related Products ....................................................................................................6
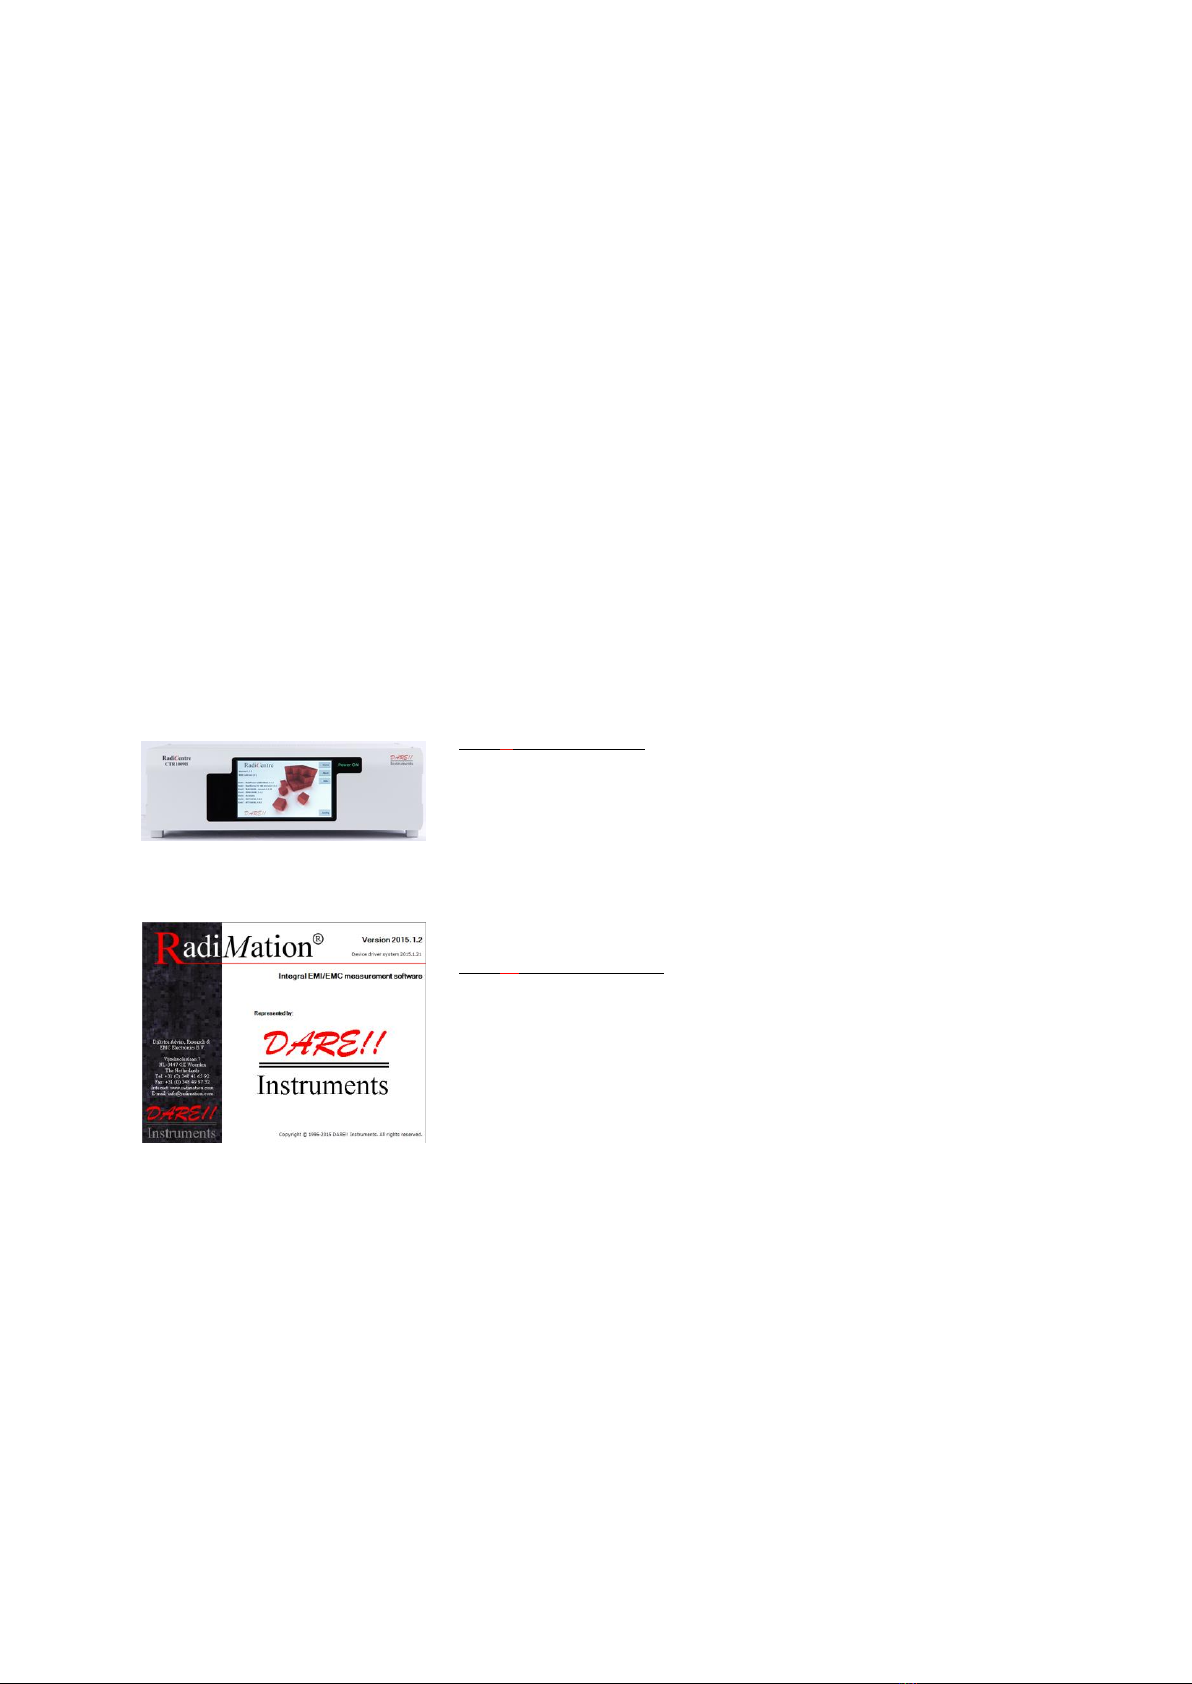
2The RadiSense®................................................................................................................7
2.1 Product Characteristics.........................................................................................7
2.2 Components............................................................................................................8
2.3 Different Models.....................................................................................................9
2.4 Fiber Optic Cables ................................................................................................ 10
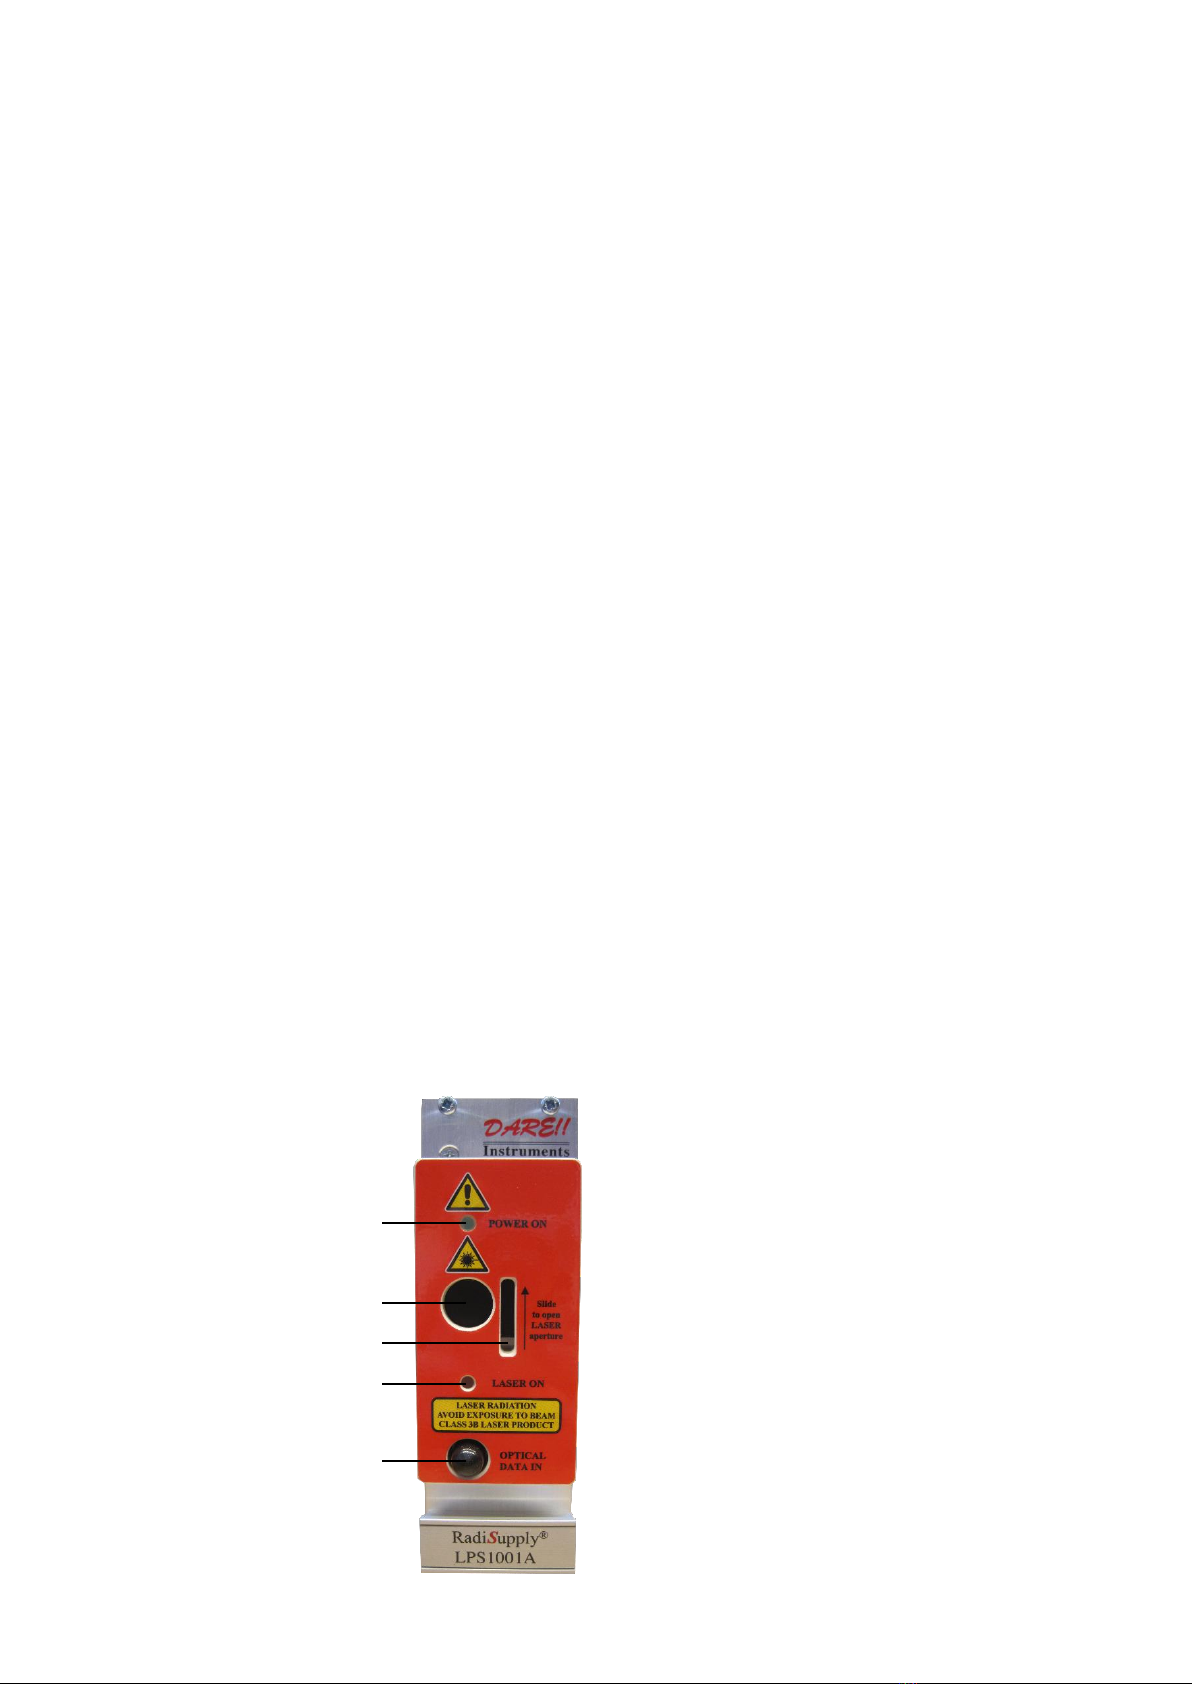
2.5 RadiSupply®Plug-In Card, Rear Panel .............................................................10
2.6 Beam Shutter ........................................................................................................11
2.7 LASER Safety Measures.......................................................................................13
2.8 Fiber Handling and Maintenance .....................................................................18
3Installation.......................................................................................................................20
3.1 Hardware Configuration..................................................................................... 20
3.2 Software Configuration.......................................................................................22
4Using the RadiSense®...................................................................................................26
4.1 Manual Control .....................................................................................................26
4.2 Remote Control.....................................................................................................28
5RadiSense®Command Set ..........................................................................................29
5.1 General ...................................................................................................................29
5.2 Commands ............................................................................................................30
5.3 Error Codes............................................................................................................33
6RadiSense®Specifications ...........................................................................................34
WARRANTY CONDITIONS ................................................................................................36
EUROPEAN DECLARATION OF CONFORMITY ............................................................. 37

Copyright © 2008 –2019 DARE!! International
Page 4
WARNINGS & PRECAUTIONS
Read the contents of the product manual (including the manual for the
Radi
C
entre® system) and become familiar with the safety markings,
instructions, operation and handling of the system.
Only qualified service personnel is allowed to carry out adjustments,
maintenance or repairs on the equipment.
This equipment is designed to be used as a plug-in card for the Radi
C
entre®.
Do not use this card in combination with any other main frame.
The Radi
S
ense®contains materials that can be recycled and reused to
minimize material waste. At the ‘end-of-life’, specialized companies can
dismantle the discarded system to collect the reusable and recyclable
materials. If your product is discarded at its ‘end-of-life’, please return it to your
local reseller for recycling.

Copyright © 2008 –2019 DARE!! International
Page 5
WARNINGS & PRECAUTIONS
NEVER look into any of the fibre optic connectors. The LASER emits an infrared
beam that is invisible to the naked eye. This may cause permanent eye
damage. Avoid eye or skin exposure to direct or scattered radiation.
As a safety precaution, products that use a LASER can only be turned on using
a LASER Code. This code can be entered using the touchscreen of the
Radi
C
entre®system.
(In combination with the Radi
C
entre®CTR1004B or CTR1009B.)
As a safety precaution, products that use a LASER can only be turned on by
pressing the ‘START’ button of the Radi
C
entre®system for several seconds. An
auditory warning will sound during this activation period.
(In combination with the Radi
C
entre®CTR1001S.)
Make sure that the fiber cables and ‘beam shutter’ are installed correctly
before activating the system.
The field sensor calibration data of the Radi
S
ense®probes is stored in flash
memory within the Radi
S
upply®plug-in card. It is therefore not possible to
interchange sensors and plug-in cards.
Do not activate the system if the fiber optic cables show any sign of damage or
tampering.
To make the Radi
S
ense®as safe as possible, the plug-in card and sensors have
their own safety interlock system that is designed to work with the
Radi
C
entre®.

Copyright © 2008 –2019 DARE!! International
Page 6
1Introduction
1.1 Product Introduction
The Radi
S
ense®E-field sensor is designed for broadband electric field strength measurements.
The sensor is optically isolated to minimize field perturbation.
Applications for the E-field sensor are:
•Radiated immunity field monitoring
•Anechoic chambers calibration
•Field homogeneity measurements
•RF broadcast and welding radiation-hazard monitoring
•Long term field monitoring
1.2 Related Products
Radi
C
entre®system
The Radi
C
entre®is a modular EMC test system that serves as
the user and computer interface for all the Radi
C
entre®plug-in
cards and modules (such as the Radi
F
ield®system).
Radi
M
ation®software
Radi
M
ation®is the EMC software package from DARE!!
Instruments used for remote control and automated testing of
the Radi
C
entre®plug-in cards and modules (such as the
Radi
F
ield®system).

Copyright © 2008 –2019 DARE!! International
Page 7
2The Radi
S
ense®
2.1 Product Characteristics
LASER Powered - The sensor is LASER powered. This allows for testing over very long periods of
time without the need to change or recharge batteries.
Increased Measurement Accuracy –To perform accurate field measurements, the E-field sensor
dimensions must be as small as possible compared to the wavelength of the measured signal.
There are two reasons for this:
•First, because large sensor dimensions cause the sensor to resonate at lower frequencies
and therefore causes measurement inaccuracies.
•Secondly, to maintain field uniformity in an anechoic chamber. The smaller the sensor,
the better the obtainable resolution for field homogeneity measurements.
In TEM and G-TEM cells, sensor dimensions above 10 cm are large compared to the dimensions
of the homogenate field area.
The sensor dimensions of the Radi
S
ense®are extremely small, increasing measurement
accuracy.

Copyright © 2008 –2019 DARE!! International
Page 8
2.2 Components
The Radi
S
ense®is delivered with the following items:
Radi
S
ense®E-field sensor (with fixed fiber cables)
Model: RSS1004, RSS1006 or RSS1018.
Electric field sensors to be used together with the
Radi
S
upply®plug-in card.
Radi
S
upply®plug-in card
Model: LPS1001A.
An electric field sensor plug-in card to be used in the
Radi
C
entresystem.
Fiber extension cable
Model: CBL1000
10 meter fiber extension cable with inline couplings.
Cleaning wipes
Lint-free alcohol wipes to clean the fiber optic cable
connectors.
Supporting documentation in the form of:
•USB stick containing:
•The (digital) User Manual and Quick Start Guide.
•Optional - The calibration certificate for the probes (if a certification was
requested).
•Hardcopy of the Quick Start Guide.

Copyright © 2008 –2019 DARE!! International
Page 9
2.3 Different Models
The Radi
S
ense®sensor is available in 3 models; the RSS1004, RSS1006 and RSS1018. The
difference between these models is the frequency range that they cover.
The sensors are enclosed in a rugged housing to minimize the risk of damage. Labels indicate the
field directions for the three axis.
Radi
S
ense®RSS1004
Frequency range: 9 kHz –4 GHz
Radi
S
ense®RSS1006
Frequency range: 10 MHz –6 GHz
Radi
S
ense®RSS1018
Frequency range: 30 MHz –18 GHz

Copyright © 2008 –2019 DARE!! International
Page 10
2.4 Fiber Optic Cables
Use an extension fiber to connect the sensors to the plug-in card mounted in the Radi
C
entre®.
This extension fiber is a robust duplex fiber cable and uses dissimilar connectors to avoid
misconnections. The fiber optic cable with FC connectors feeds LASER light to the field sensor.
The fiber optic cable with FSMA connectors sends data from the sensor to the readout unit. Refer
to chapter 2.8 for fiber handling and maintenance.
To ensure safe and correct operation of the sensor, only use the Radi
S
ense® with the original
fibers. Do not use other fibers than those supplied by DARE!! Instruments. Fiber extension cables
are available on request. Contact your local reseller for more detailed information.
2.5 Radi
S
upply®Plug-In Card, Rear Panel
The following connections and indicators are found at the back panel of the Radi
S
upply® plug-in
card:
POWER ON This green LED lights up when the power is on and the interlock is
closed.
LASER APERTURE Connect to the E-field sensor through the fiber extension cable
with FC connectors.
LASER ON This red LED lights up when the LASER is active. For safety reasons,
never disconnect the fiber optic cables when the LASER is switched
on.
OPTICAL DATA INPUT Connect to the E-field sensor through the fiber extension cable
with FSMA connectors.
Figure 1: RadiSupply®plug-in card with
beam shutter
LASER APERTURE
OPTICAL DATA
INPUT
BEAM SHUTTER
SLIDE
‘POWER ON’ LED (GREEN)
‘LASER ON’ LED
(RED)

Copyright © 2008 –2019 DARE!! International
Page 11
2.6 Beam Shutter
The Radi
S
upply® plug-in card can only be used with a beam shutter. The beam shutter is
mounted on the panel of the plug-in card and prevents accidental LASER light to be emitted if
there is an unconnected LASER aperture. The beam shutter operates a reed contact in the
module and needs to be in place to enable the laser. If the optical connector of the laser is not
mounted, the black slide will shut the laser beam.
Figure 2: Beam shutter (red) on the Radi
S
upply®plug-in card (in the Radi
C
entre®system)

Copyright © 2008 –2019 DARE!! International
Page 12
To connect the Radi
S
ense®sensor, the slide in the beam shutter must be opened. Use a small
tool (for example a tweezer) to open the slide in the beam shutter. Hold the slide open and insert
the FC connector at the same time. While inserting the FC connector, keep the notch facing to the
right, to mate with the slot in the socket.
Figure 3: Opening the slide (left) and inserting the FC connector with the notch facing right (right)
When the FC connector is inserted in the laser aperture,
plug-in the FSMA connector in the optical data input.
Do not use any tools or excessive force to tighten the optical
connectors!
If both connectors are properly connected, the Radi
C
entre®
can be switched on and the LASER can be activated to start
measurements.
Be sure that the FC connector is lined correctly (Figure 4a)
otherwise the LASER will not start correctly.
Figure 5: Both the FC connector (top) and FSMA
connector (bottom) are connected to the beam shutter
Figure 4a: FC connector correctly lined (green) and not-
correctly lined (red)

Copyright © 2008 –2019 DARE!! International
Page 13
2.7 LASER Safety Measures
The Radi
S
ense®uses a high-power LASER to supply energy to a remote measuring device. The
wavelength of these LASERS is approximately 808nm. These are highly powerful, infrared lasers
and are therefore invisible to the human eye.
Figure 6: LASER safety warning label
During ‘normal operations’, exposure to LASER radiation is not possible because the system only
uses fiber-coupled LASERS. However, we ask that you comply with the following precautions for
your own safety:
NEVER look into any of the fibre optic connectors. The LASER emits an
infrared beam that is invisible to the naked eye. This will cause permanent
eye damage. Avoid eye or skin exposure to direct or scattered radiation.
•Assign a ‘LASER safety officer’ in your company. The ‘LASER safety officer’ is
responsible for reviewing the safety precautions.
•Connect all fiber cables and install the ‘beam shutter’ (protective cover) before
activating the system. Protective covers are identified by the following label:
*The LASER safety measures continued on the next page.
Figure 7: Fiber cable cover label

Copyright © 2008 –2019 DARE!! International
Page 14
•Do not activate the system if the fiber optic cables show any sign of damage or
tampering.
•The Radi
C
entre® system is equipped with a remote interlock system. This
interlock system prevents inadvertent LASER radiation. For example, to prevent
LASER radiation when someone enters a shielded room and steps on a fiber.
•The remote interlock connection should be connected to an ‘emergency master
disconnect’ and in series with the room door or fixture interlocks.
•A visual ‘LASER ON’ indicator LED will light up when the LASER is activated. This
LED on the front panel of the Radi
C
entre®system serves as a reminder to the
operator that one or more LASERS are switched on.
Radi
C
entre®2-slot and 7-slot specific:
•A ‘LASER Code’ is required to activate the Radi
C
entre®2-slot and 7-slot systems.
This LASER code enables the power supply to all installed (LASER) modules.
•To prevent accidental activation of the LASER, an ‘Acknowledge’ button will appear
directly after the LASER ‘Start’ button is pressed. The LASER will only be activated if
this button is pressed within the ‘4 seconds timeframe’.
Radi
C
entre®single-slot specific:
•To start the Radi
C
entre®1-slot system (which has no touchscreen display), a ‘Start’
button needs to be pressed for at least 3 seconds to activate the LASER. If you are
interrupted during the activation process (and release the ‘Start’ button by
accident), the LASER will not be activated.
•To prevent accidental activation of the LASER, an auditory warning will alert you of
the LASER activation procedure (if the ‘Start’ button is being pressed). To interrupt
the activation process, all you must do is release the ‘Start’ button.

Copyright © 2008 –2019 DARE!! International
Page 15
2.7.1 LASER code
As a safety precaution, products that use a LASER can only be turned on using a LASER Code. This
code can be entered into the system by tapping the touchscreen of the Radi
C
entre®.
(This safety feature is linked to the Radi
C
entre®2- and 7-slot version. The LASER activation and
safety is implemented differently in the Radi
C
entre®Single, see chapter 2.7.2.)
To meet the LASER safety precaution, enter the LASER Code in the ‘LASER Code’ screen and press
‘OK’for confirmation (see Figure 8).
The default LASER code is: 3447
This code can be changed by the customer in the main configuration screen (see Figure 9).
To change the laser code, the user will be asked to enter the current code ones and the new code
twice (for confirmation). Press ‘Close’ to leave each notification and enter the code in the
following numeric window (see Figure 10).
Figure 8: LASER code window

Copyright © 2008 –2019 DARE!! International
Page 16
Figure 9: Change the laser protection code in the main configuration screen
Figure 10: ‘Enter new code’ notification.

Copyright © 2008 –2019 DARE!! International
Page 17
2.7.2 LASER activation - Radi
C
entre®Single
The Radi
C
entre®Single does not have a touchscreen, as a result the LASER code safety feature
(mentioned in chapter 2.7.1) cannot be used. Instead a specific activation procedure combined
with auditory warnings is used.
To activate the LASER in the Radi
C
entre®Single, follow these steps:
1. Press the ‘Start’ button on the back panel (of the Radi
C
entre®) and hold it.
2. Five loud ‘beeps’ can be heard; four short followed by one long.
3. On the fifth ‘beep’ the LASER link is activated and the red ‘LASER ON’ LED (on the
Radi
S
upply®card) lights up.
4. Release the ‘Start’ button.
This means that:
•If you want to interrupt the activation process, all you have to do is release the
‘Start’ button (before the fifth ‘beep’). The LASER will not be activated.
•If you are interrupted during the activation process (and release the ‘Start’ button
by accident), the LASER will not be activated.
•If you press the button by accident (and do not wish to activate the LASER), the
auditory warning will alert you to this action.

Copyright © 2008 –2019 DARE!! International
Page 18
2.8 Fiber Handling and Maintenance
The fiber optic cables in the Radi
S
ense®are a crucial part of the system. Improper handling and
poor maintenance can cause deterioration or permanent damage. Please read the follow
handling and maintenance guidelines to ensure both your safety and the quality of the product.
2.8.1 Handling guidelines
•Always place the plastic end-caps on the fiber connectors when they are not in
use. Only use the supplied end caps.
•Never touch the tip of the fiber connector (core surface).
•Never drop the fiber connectors, as this may damage the core surface.
•Never bend the fibers (exceed the minimum bend radius (<5 cm)), as this will
break the fiber core.
•Never pull the fiber connector out of a coupling by its orange jacket, always use
the connector.
•Fasten the connectors by hand only, never use tools.
•Do not stand on or crush the fibers.
•Do not apply mechanical stress (pull) to the fibers.
•Switch off the system before detaching the fibers.

Copyright © 2008 –2019 DARE!! International
Page 19
2.8.2 Maintenance guideline
Clean the contact surface of the fibers before installation with the lint-free alcohol wipes.
Do not use other solvents or wipes. Fibers are clean and polished on delivery and do not
need to be cleaned when installed for the first time.
2.8.3 Fiber conditions
Use the examples and instructions in the following figure as a guideline for further fiber
maintenance.
Figure 11: Examples of fiber conditions and maintenance

Copyright © 2008 –2019 DARE!! International
Page 20
3Installation
3.1 Hardware Configuration
1
The hardware configuration is carried out in the following 7 steps:
1. Choose the slot of the Radi
C
entre® system in which you want to install the plug-in
card.
2. Remove the blind panel from this slot by removing the four screws of the panel
(two on top and two at the bottom). See Figure 12.
3. Gently insert the plug-in card into the slot of the RadiCentre®and reinsert the four
screws. See Figure 12.
Figure 12: Example of a (Radi
S
upply®LPS1001A) plug-in card installation
4. Switch on the Radi
C
entre® system. The new plug-in card will automatically be
detected and initialized by the Radi
C
entre®.
*Steps 5 to 7 of the hardware configuration are visible on the next page.
1
These are the basic steps in a plug-in card installation, the exact installation of your plug-in card might vary.
This manual suits for next models
2
Table of contents
Other Dare Accessories manuals
Popular Accessories manuals by other brands

YOKOGAWA
YOKOGAWA FU20-FTS instruction manual

Dorner
Dorner AquaPruf Ultimate CE 7400 Series Installation, Maintenance, and Parts Manual

Bresser
Bresser Vixen AXJ Equatorial Mount instruction manual

Milnor
Milnor K36 0005 Instruction

Panasonic
Panasonic EX Series instruction manual

Campbell
Campbell CS120A instruction manual