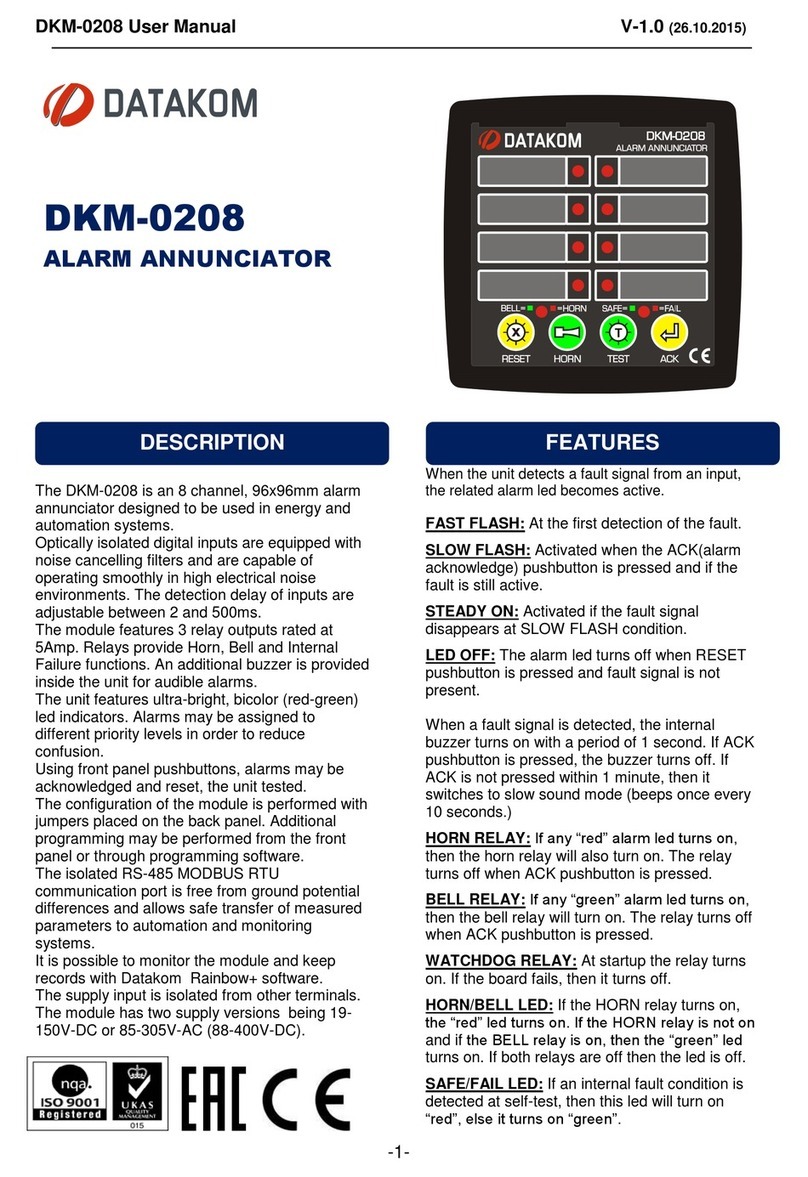
Datakom DKM-0224 User manual

DKM-0224 User Manual V-1.0 (11.08.2016)
-1-
DKM-0224
ALARM ANNUNCIATOR
The DKM-0224 is an 24 channel, 144x144mm
alarm annunciator designed to be used in energy
and automation systems.
Optically isolated digital inputs are equipped with
noise cancelling filters and are capable of
operating smoothly in high electrical noise
environments. The detection delay of inputs are
adjustable between 2 and 500ms.
The module features 3 relay outputs rated at
5Amp. Relays provide Horn, Bell and Internal
Failure functions. An additional buzzer is provided
inside the unit for audible alarms.
The unit features ultra-bright, bicolor (red-green)
led indicators. Alarms may be assigned to
different priority levels in order to reduce
confusion.
Using front panel pushbuttons, alarms may be
acknowledged and reset, the unit tested.
The configuration of the module is performed with
jumpers placed on the back panel. Additional
programming may be performed from the front
panel or through programming software.
The isolated RS-485 MODBUS RTU
communication port is free from ground potential
differences and allows safe transfer of measured
parameters to automation and monitoring
systems.
It is possible to monitor the module and keep
records with Datakom Rainbow+ software.
The supply input is isolated from other terminals.
The module has two supply versions being 19-
150V-DC or 85-305V-AC (88-400V-DC).
When the unit detects a fault signal from an input,
the related alarm led becomes active.
FAST FLASH: At the first detection of the fault.
SLOW FLASH: Activated when the ACK(alarm
acknowledge) pushbutton is pressed and if the
fault is still active.
STEADY ON: Activated if the fault signal
disappears at SLOW FLASH condition.
LED OFF: The alarm led turns off when RESET
pushbutton is pressed and fault signal is not
present.
When a fault signal is detected, the internal
buzzer turns on with a period of 1 second. If ACK
pushbutton is pressed, the buzzer turns off. If
ACK is not pressed within 1 minute, then it
switches to slow sound mode (beeps once every
10 seconds.)
HORN RELAY: If any “red” alarm led turns on,
then the horn relay will also turn on. The relay
turns off when ACK pushbutton is pressed.
BELL RELAY: If any “green” alarm led turns on,
then the bell relay will turn on. The relay turns off
when ACK pushbutton is pressed.
WATCHDOG RELAY: At startup the relay turns
on. If the board fails, then it turns off.
HORN/BELL LED: If the HORN relay turns on,
the “red” led turns on. If the HORN relay is not on
and if the BELL relay is on, then the “green” led
turns on. If both relays are off then the led is off.
SAFE/FAIL LED: If an internal fault condition is
detected at self-test, then this led will turn on
“red”, else it turns on “green”.
DESCRIPTION
FEATURES

DKM-0224 User Manual V-1.0 (11.08.2016)
-2-
Electrical equipment should be installed only by qualified
specialist. No responsibility is assured by the manufacturer or
any of its subsidiaries for any consequences resulting from the
non-compliance to these instructions.
Check the unit for cracks and damages due to transportation. Do
not install damaged equipment.
Do not open the unit. There are no serviceable parts inside.
Fuses must be connected to the power supply and phase voltage
inputs, in close proximity of the unit.
Fuses must be of fast type (FF) with a maximum rating of 6A.
Disconnect all power before working on equipment.
When the unit is connected to the network do not touch
terminals.
Short circuit terminals of unused current transformers.
Any electrical parameter applied to the device must be in the
range specified in the user manual. Although the unit is designed
with a wide safety margin, over-range parameters may reduce
lifetime, alter operational precision or even damage the unit.
Do not try to clean the device with solvent or the like. Only clean
with a dump cloth.
Verify correct terminal connections before applying power.
Only for panel base mounting.
SAFETY NOTICE
CAUTION
Failure to follow below instructions
will result in death or serious injury

DKM-0224 User Manual V-1.0 (11.08.2016)
-3-
1. INSTALLATION INSTRUCTIONS
1.1. FRONT AND BACK PANELS
1.2. MECHANICAL INSTALATION
1.3. ELECTRICAL INSTALLATION
2. PUSHBUTTON FUNCTIONS
3. LED FUNCTIONS
4. SETTINGS
4.1. JUMPER SETTINGS
4.2. SIGNAL LED RED/GREEN SETTINGS
4.3. BUZZER SETTINGS
5. MODBUS COMMUNICATION
5.1. INTRODUCTION
5.2. PROGRAM PARAMETERS
5.3. COMMANDS
5.4. CALCULATED VALUES
6. TECHNICAL SPECIFICATIONS
TABLE OF CONTENTS

DKM-0224 User Manual V-1.0 (11.08.2016)
-4-
Before Installation:
Read the user manual carefully, determine the correct connection diagram.
Remove all connectors and mounting brackets from the unit, then pass the unit through
the mounting opening.
Put mounting brackets and tighten. Do not tighten too much, this can brake the
enclosure. Spring type brackets do not need to be tightened.
Make electrical connections with plugs removed from sockets, then place plugs to their
sockets. Otherwise, the sockets may get damaged.
Be sure that the relay outputs are not over-loaded. Use auxiliary contactors if necessary.
Below conditions may damage the device:
Incorrect connections.
Incorrect power supply voltage.
Voltage at measuring terminals beyond the specified range.
Current at measuring terminals beyond the specified range.
Overload or short circuit at relay outputs.
Below conditions may cause abnormal operation:
Power supply voltage below minimum acceptable level.
1. INSTALLATION INSTRUCTIONS

DKM-0224 User Manual V-1.0 (11.08.2016)
-5-

DKM-0224 User Manual V-1.0 (11.08.2016)
-6-
Panel Cutout Required Panel Depth
1.1 FRONT and BACK PANELS
1.2 MECHANICAL INSTALLATION

DKM-0224 User Manual V-1.0 (11.08.2016)
-7-
Although the unit is protected against electromagnetic disturbance, excessive disturbance
can affect the operation and measurement precision
ALWAYS remove plug connectors when inserting wires with a screwdriver.
Fuses must be connected in series with the power supply, in close proximity of
the unit.
Fuses must be of fast type (FF) with a maximum rating of 6A.
Use cables of appropriate temperature range.
Use adequate cable section, at least 0.75mm2 (AWG18).
1.3 ELECTRICAL INSTALLATION
Do not install the unit close to high electromagnetic noise
emitting devices like contactors, high current busbars,
switchmode power supplies and the like.
Be sure that the relay outputs are not over-loaded.
Use auxiliary contactors if necessary.

DKM-0224 User Manual V-1.0 (11.08.2016)
-8-
BUTTON
FUNCTION
If the pushbutton is pressed all fault leds turn off, Horn and
Bell relays are released. If the fault signal still persists, the
fault alarm re-appears again. This button is also used in
settings menu.
If the pushbutton is pressed, all leds flash green and red in
sequence, the internal buzzer sounds, Horn, Bell and
Watchdog Relays turn on and off with a period of one
second. During this test, if the pushbutton pressed for 3
seconds, the buzzer function can be disabled/enabled. By
pressing the pushbutton again, module exits from the test.
This button is also used in settings menu.
If the pushbutton is pressed, all leds turn-on with the pre-
adjusted color. (If it is pressed again, the unit returns back
to normal operation.) After pressing it short, if this button
is pressed for 3 seconds, then the first Led flashes with the
pre-adjusted color and the unit enters the settings menu.
If the pushbutton is pressed, fast flashing leds turn into
slow flashing(or Steady On) state, the internal buzzer turns
off. Horn and Bell relays are released. This button is also
used for exiting the settings menu.
2. PUSHBUTTON FUNCTIONS

DKM-0224 User Manual V-1.0 (11.08.2016)
-9-
SIGNAL LEDs: There are 24 red/green
adjustable signal leds on the panel.
According to the input signal and pressed
pushbutton,leds can be on Fast Flash,
Slow Flash, Steady On and Off states.
FAST FLASH: At the first detection of the
fault.
SLOW FLASH: Activated when the
ACK(alarm acknowledge) pushbutton is
pressed and if the fault is still active.
STEADY ON: Activated if the fault signal
disappears at SLOW FLASH condition.
LED OFF: The alarm led turns off when
RESET pushbutton is pressed and fault
signal is not present.
HORN/BELL LED: If the HORN relay
turns on, the “red” led turns on. If the
HORN relay is not on and if the BELL
relay is on, then the “green” led turns on.
If both relays are off then the led is off.
FAIL/SAFE LED: If an internal fault
condition is detected at self-test, then this
led will turn on “red”, else it turns on
“green”.
HORN RELAY: If any “red” alarm led
turns on, then the horn relay will also turn
on. The relay turns off when ACK
pushbutton is pressed.
BELL RELAY: If any “green” alarm led
turns on, then the bell relay will turn on.
The relay turns off when ACK pushbutton
is pressed.
WATCHDOG RELAY: At startup the
relay turns on. If the board fails, then the
wathcdog relay turns off.
3. DISPLAY AND RELAYS
Horn Button
Reset Button
Signal Leds
(1-24)
Test Button
Ack Button
Horn/Bell Led
Fail/Safe Led
Alarm Labels
(1-24)

DKM-0224 User Manual V-1.0 (11.08.2016)
-10-
The main configuration of the unit is done with DIP switches located on back panel.There
are 8 Dip Switch on the unit and the settings are described below.
1-2-3. Switch: 4. Switch 5-6-7-8 Switch:
Filtering Time Setting: BaudRate Setting: Modbus Adress Setting:
1 2 3 4 5 6 7 8
0 0 0 2ms 0 9600 baud 8 4 2 1
0 0 1 5ms 1 19200 baud There are 16(1-16) adresses
0 1 0 10ms can be defined. For example:
0 1 1 20ms 5(ON),6(ON),7(ON),8(ON)
1 0 0 50ms 1 + 8 + 4 + 2 + 1 = 16
1 0 1 100ms 5(ON),6(OFF),7(OFF),8(ON)
1 1 0 200ms 1 + 8 + 0 + 0 + 1 = 10
1 1 1 500ms 5(OFF),6(OFF),7(OFF),8(OFF)
1 + 0 + 0 + 0 + 0 = 1
Adjusted led colors can be checked by pressing the TEST pushbutton.(If the TEST
pushbutton is pressed again, the unit returns back to normal operation) After that, if the
TEST pushbutton is pressed long (for 3 seconds) first led flashes with the adjusted color.
By pressing RESET pushbutton, signal leds can be selected from up to down, by
pressing HORN pushbutton signal leds can be selected from left to right. The color of the
signal can be adjusted by pressing the TEST pushbutton. After pressing the ACK
pushbutton all leds are seen with the adjusted color.(If the ACK pushbutton is pressed
again, the unit returns back to settings menu) After that, if the ACK pushbutton is
pressed long(for 3 seconds) the unit saves all settings and exist from the menu.
If the HORN pushbutton is pressed, all leds flash green and red in sequence, the internal
buzzer sounds, Horn, Bell and Watchdog Relays turns on and off with a period of one
second. During this test, if the pushbutton pressed long(for 3 seconds) buzzer function
can be disabled/enabled. By pressing the pushbutton again, the unit exists from the test.
4. SETTINGS
4.1 DIP-SWITCH SETTINGS
4.2 SIGNAL LED RED/GREEN SETTINGS
4.3 BUZZER SETTINGS

DKM-0224 User Manual V-1.0 (11.08.2016)
-11-
The unit has serial communication port that can be integrated to automation systems.
Serial port is a standart RS-485 MODBUS-RTU isolated from supply input and
measuring terminals. Therefore, the unit survives under harsh industrial conditions
without any damage.
The MODBUS properties of the unit are:
-Data transfer mode: RTU
-Serial data: 9600 and 19200 bps, 8 bit, no parity, 1 bit stop
-The unit replies within 4.3ms when it receives a message.
Each register consists of 2 bytes(16 bits). Larger data structures will contain multiple
registers.
For further details of Modbus Protocol, “Modicon Modbus Protocol Reference Guide”
can be rewieved. The guide can be downloaded from
www.modbus.org/docs/PI_MBUS_300.pdf
Supported Function:
- Function 3 (Read multiple registers)
- Function 16 (Write multiple registers)
Error Codes:
There are only 3 error codes are being used:
01: Invalid function code
02: Invalid adress
10: Read protection (try to write Read-Only memory)
Data Types:
Each register consists of 16 bits (2 bytes)
If the data type is byte, only low byte is valid. Ignore high byte.
A larger data structure(more than 16bit) will contain multiple registers.
Least significant register comes first.
Baudrate Options:
4th jumper determines Modbus Baudrate.
BaudRate
Value
9600
0
19200
1
5. MODBUS COMMUNICATION
5.1 INTRODUCTION
5.2 PROGRAM PARAMETERS

DKM-0224 User Manual V-1.0 (11.08.2016)
-12-
There are 3 parameters for this unit. Function 10 (Write multiple registers) is used for
changing the parameter value.
ADDRESS
NAME
DESCRIPTION
SIZE
R/W
TYPE
X
0
Led 1-8 Settings
Led Color Setting Red: 1,
Green:0
16 BIT
R/W
unsigned word
1
1
Led 9-16 Settings
Led Color Setting Red: 1,
Green:0
16 BIT
R/W
unsigned word
1
2
Led 17-24
Settings
Led Color Setting Red: 1,
Green:0
16 BIT
R/W
unsigned word
1
Function 16 (Write multiple register) is used for sending commands.
ADDDRESS
VALUE
R/W
DESCRIPTION
4
1 and 0
R/W
Buzzer active/deactive( Deactive:1, Active:0)
16384
1
W-O
Reset Button short press
16385
1
W-O
Horn Button short press
16386
1
W-O
Test Button short press
16387
1
W-O
ACK Button short press
16388
1
W-O
Reset Button long press
16389
1
W-O
Horn Button long press
16390
1
W-O
Test Button long press
16391
1
W-O
ACK Button long press
ADRESS
NAME
DESCRIPTION
LENGTH
R/W
TYPE
X
20480
Filtering Time
Filtering Time of Inputs
16 BIT
R-O
unsigned
word
1
20481
Baudrate
Modbus Baudrate Value
16 BIT
R-O
unsigned
word
1
20482
Node Adress
Modbus Node Adress Value
16 BIT
R-O
unsigned
word
1
20483
Jumper Value
Jumper Value
16 BIT
R-O
unsigned
word
1
20484
LED 1-2
1. and 2. Led Instant State
16 BIT(2x8)
R-O
unsigned
word
1
20485
LED 3-4
3. and 4. Led Instant State
16 BIT(2x8)
R-O
unsigned
word
1
20486
LED 5-6
5. and 6. Led Instant State
16 BIT(2x8)
R-O
unsigned
word
1
20487
LED 7-8
7. and 8. Led Instant State
16 BIT(2x8)
R-O
unsigned
word
1
20488
LED 9-10
9. and 10. Led Instant State
16 BIT(2x8)
R-O
unsigned
word
1
20489
LED 11-12
11. and 12. Led Instant State
16 BIT(2x8)
R-O
unsigned
word
1
ADRESS
NAME
DESCRIPTION
LENGTH
R/W
TYPE
X
5.3 COMMANDS
5.4 CALCULATED VALUES

DKM-0224 User Manual V-1.0 (11.08.2016)
-13-
20490
LED 13-14
13. and 14. Led Instant State
16 BIT(2x8)
R-O
unsigned
word
1
20491
LED 15-16
15. and 16. Led Instant State
16 BIT(2x8)
R-O
unsigned
word
1
20492
LED 17-18
17. and 18. Led Instant State
16 BIT(2x8)
R-O
unsigned
word
1
20493
LED 19-20
19. and 20. Led Instant State
16 BIT(2x8)
R-O
unsigned
word
1
20494
LED 21-22
21. and 22. Led Instant State
16 BIT(2x8)
R-O
unsigned
word
1
20495
LED 23-24
23. and 24. Led Instant State
16 BIT(2x8)
R-O
unsigned
word
1
20496
Horn/Bell&Fault Led
Horn/Bell&Fault Led State
16 BIT(2x8)
R-O
unsigned
word
1
20497
Horn&Bell Relay
Horn&Bell Relay State
16 BIT(2x8)
R-O
unsigned
word
1
20498
Fault Relay&Buzzer
Fault Relay ve Buzzer State
16 BIT(2x8)
R-O
unsigned
word
1
Led Instant States: Buzzer Instant States:
0 Led Off 0 Buzzer Off
1 Led Steady On 1 Buzzer Steady On
2 Led Slow Flash 2 Buzzer slow frequency(10sec) buzzing
3 Led Fast Flash 3 Buzzer fast frequency(1sec) buzzing
Supply Input: 88-400VDC, 85-270VAC
(optional 19-150VDC)
Power Consumption: < 4 VA
Fault Inputs: 24. Optically isolated, equipped
with noise cancelling filters allowing
smooth operation in high electrical noise
environments, positive inputs and common
negative terminal.
Input Impedance: 130K-ohm (opt. 40K-ohm)
Max Input Voltage: 250VDC/AC (opt 140VAC/DC)
Input Current: max. 1mA (110VDC)
Surge Protection: 1000V / 50us
Isolation: 1000VAC, 1 minute
Filter Timing: 2-5-10-20-50-100-200-500msec
optional
Optical Warning: 26 red-green bicolor, ultra bright
led indicators.
Audible Warning: Internal 23mm buzzer, 80dB
Relay outputs:3 x 5A @ 250V AC
Serial Port:
Signal Type: RS-485
Protocol: Modbus RTU
Data Rate: 9600-19200baud
Isolation: 1000V AC, 1 minute
Operating Temperature Range: -20°C...+70 °C
Storage Temperature Range: -40°C...+85 °C
Max. Relative Humidity: %95 non-condensing.
Protection: IP 65 (Front Panel, with gasket)
IP 30 (Back panel)
Enclosure: Flame retardant, ROHS compliant,
high temperature ABS/PC (UL94-V0)
Installation: Panel mount, rear retaining plastic
brackets.
Connections: Two part connection system.
Cable section: max. 2.5mm2
Dimensions: 164x164x60mm (WxHxD)
Panel Cut-ot: 140x140mm
Weight: 400 gr
EU Directives:
2006/95/EC (LVD)
2004/108/EC (EMC)
Norms of Reference
EN 61010 (safety)
EN 61326 (EMC)
DATAKOM Electronics Ltd.
5. TECHNICAL SPECIFICATIONS
Table of contents
Other Datakom Security System manuals
Popular Security System manuals by other brands
System Sensor
System Sensor APA151 Installation and maintenance instructions

Micron
Micron Scorpion Z4120C Features & operation

Honeywell
Honeywell FBII OMNI 624 Installation and setup guide
GARDINER TECHNOLOGY
GARDINER TECHNOLOGY Gardtec 500 series user manual
FAAC
FAAC HSE Installation and use instructions
Interlogix
Interlogix Simon 3 user manual
