manuals.online logo
Brands
  1. Home
  2. •
  3. Brands
  4. •
  5. LEGRAND
  6. •
  7. Security System
  8. •
  9. LEGRAND 43260 User manual

LEGRAND 43260 User manual

•Présentation
• Presentation
• Presentazione
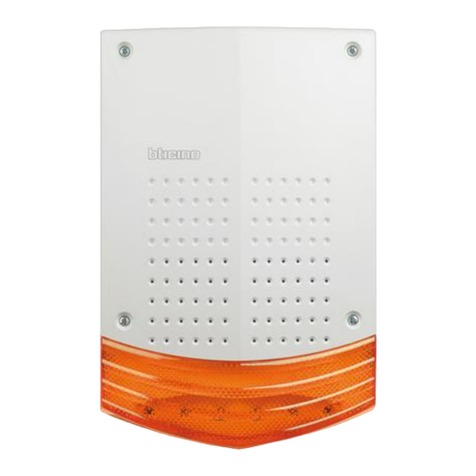
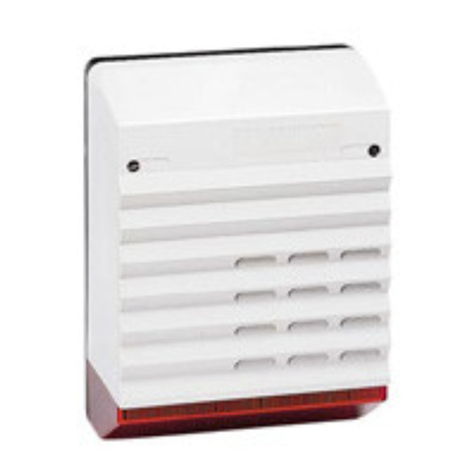
• Sirène extérieure / intérieure auto-alimentée - Sirène extérieure auto-alimentée avec flash
• Self-powered outdoor/indoor audible alarm - Self-powered outdoor audible alarm with flash
• Sirena esterna/interna autoalimentata - Sirena esterna autoalimentata con flash
432 60 / 63
•Installation dans un système neuf
Reportez vous au guide d’installation et d’utilisation de l’alarme intrusion filaire.
Installation dans un système existant
Vérifier qu’il n’y a pas de dépassement de la configuration maximale gérée par la centrale : reportez-vous au
chapitre Présentation des appareils du guide d’installation et d’utilisation de l’alarme intrusion filaire.
Mettez le système hors tension : reportez-vous au guide d’installation et d’utilisation de l’alarme intrusion filaire.
•Installation in a new system
Please refer to the wired intruder alarm installation and operation manual.
Installation in an existing system
Ensure that the maximum configuration managed by the control panel is not exceeded: please refer to the
˝Presentation of Equipmentsection in the wired intruder alarm installation and operation manual.
Disconnect the voltage supply to the system: please refer to the wired intruder alarm installation and operation
manual.
•Installazione in un sistema nuovo
Consultare la guida per l’installazione e l’uso dell’allarme antintrusione filare.
Installazione in un sistema esistente
Verificare di non superare la configurazione massima gestita dalla centrale: consultare il capitolo Presentazione
degli apparecchi della guida per l’installazione e l’uso dell’allarme antintrusione filare.
Spegnere il sistema: consultare la guida per l’installazione e l’uso dell’allarme antintrusione filare.
LE01775AB
•Caractéristiques techniques
-Commande par absence de tension
(12 V CC -15% +25%) à la borne 3 (déclenchement
garanti en deça de 3 VCC, réarmement garanti au
delà de 9 VCC) consommation inférieure à 0,5 mA
-Tension de charge batterie : 13,7 V (-1% +5%) sur
borne 1, avec ondulation max = 250 mV
-Fonctionne avec batterie 12 V 1,2 Ah
Réf. 0 433 40 - non fournie
-Date de péremption hors utilisation : 1 an après la
date de dernière charge indiquée sur la batterie
-Température de fonctionnement : -25°C +70°C
-Encombrement : 246 mm x 175 mm x 76 mm
-Résistance du contact d’auto-surveillance entre
les bornes 5 et 6 :
- inférieure à 1 ohm boitier fermé et sirène
collée au mur
- supérieure à 1 Mohm boitier ouvert ou sirène
décollée du mur
-Consommation en alarme inférieure à 1,2 A
-Consommation hors alarme inférieure à 10 mA
-Déclenchement en cas d’absence de tension de
charge
-Niveau sonore :
- extérieur = 112 dB ± 2 dB à 1m
- intérieur = 112 dBA ± 2 dBA à 1m
-IP43 - IK08
•Technical Characteristics
-Control in the event of no voltage
(12 V CC -15% + 25%) at terminal 3 (trigger
guaranteed within 3 VCC, reset guaranteed above
9 VCC) power consumption below 0.5 mA
-Battery charge voltage: 13.7 V (-1% + 5%) at
terminal 1, with max. ripple = 250 mV
-Operates using a 12 V 1.2 Ah battery
Cat. No. 0 433 40 - not included
-Expiry date when out of use: 1 year following the
date of the last charge shown on the battery
-Operating temperature: -25°C +70°C
-Dimensions: 246 mm x 175 mm x 76 mm
-Automatic surveillance contact resistance between
terminals 5 and 6:
- less than 1 ohm with the box closed and the
audible alarm affixed to the wall
- above 1 Mohm with the box open or the
audible alarm detached from the wall
-Power consumption during an alarm less than 1.2 A
-Power consumption without alarm less than 10 A
-Triggering in the event of no charge power
-Sound level:
- outdoor = 112 dB ± 2 dB at 1m
- indoors = 112 dBA ± 2 dBA at 1m
-IP43 - IK08
•Caratteristiche tecniche
-Comando per assenza di tensione
(12 V CC -15% +25%) al morsetto 3 (attivazione
garantita entro 3 V CC, riarmo garantito oltre 9 V CC),
consumo inferiore a 0,5 mA
-Tensione del caricabatterie: 13,7 V (-1% +5%) su
morsetto 1, con ondulazione max = 250 mV
-Funziona con batteria da 12 V 1,2 Ah
rif. 0 433 40 - non fornita
-Data di scadenza fuori utilizzo: 1 anno dalla data
dell’ultima ricarica indicata sulla batteria
-Temperatura di esercizio: -25°C +70°C
-Ingombro: 246 mm x 175 mm x 76 mm
-Resistenza del contatto di autosorveglianza tra
i morsetti 5 e 6:
- inferiore a 1 ohm con morsettiera chiusa e
sirena fissata alla parete
- superiore a 1 Mohm con morsettiera aperta o
sirena staccata dalla parete
-Consumo con allarme inferiore a 1,2 A
-Consumo fuori allarme inferiore a 10 mA
-Attivazione in caso di assenza di tensione di carica
-Livello acustico:
- esterno = 112 dB ± 2 dB a 1m
- interno = 112 dBA ± 2 dBA a 1m
-IP43 - IK08
Consignes de sécurité
Ce produit doit être installé conformément aux règles d’installation
et de préférence par un électricien qualié. Une installation et une
utilisation incorrectes peuvent entraîner des risques de choc électrique
ou d’incendie. Avant d’eectuer l’installation, lire la notice, tenir compte
du lieu de montage spécique au produit.
Ne pas ouvrir, démonter, altérer ou modier l’appareil sauf mention
particulière indiquée dans la notice. Tous les produits Legrand doivent
exclusivement être ouverts et réparés par du personnel formé et
habilité par Legrand. Toute ouverture ou réparation non autorisée
annule l’intégralité des responsabilités, droits à remplacement et
garanties.
Utiliser exclusivement les accessoires de la marque Legrand.
Safety instructions
This product should be installed in compliance with installation rules,
preferably by a qualied electrician. Incorrect installation and use can
lead to risk of electric shock or re.
Before carrying out the installation, read the instructions and take
account of the product’s specic mounting location.
Do not open up, dismantle, alter or modify the device except where
specically required to do so by the instructions. All Legrand products
must be opened and repaired exclusively by personnel trained and
approved by Legrand. Any unauthorised opening or repair completely
cancels all liabilities and the rights to replacement and guarantees.
Use only Legrand brand accessories.
Istruzioni di sicurezza
Questo prodotto deve essere installato in conformità con le regole
d’installazione e di preferenza da un elettricista qualicato. L’eventuale
installazione e utilizzo improprio dello stesso possono comportare
rischi di shock elettrico o incendio. Prima di procedere all’installazione,
leggere attentamente le istruzioni associate e individuare un luogo
di montaggio idoneo in funzione del prodotto. Non aprire, smontare,
alterare o modicare l’apparecchio eccetto speciale menzione indicata
nel manuale. Tutti i prodotti Legrand devono essere esclusivamente
aperti e riparati da personale adeguatamente formato e autorizzato da
Legrand. Qualsivoglia apertura o riparazione non autorizzata comporta
l’esclusione di eventuali responsabilità, diritti alla sostituzione e
garanzie.
Utilizzare esclusivamente accessori a marchio Legrand.
Certification NF et A2P types 2 432 60 432 63
N° d’agrément : 3020000120A0 N° d’agrément : 3020000150A0
Coordonnées des organismes certificateurs : UF : 70 P2 UF : 70 P2
- AFNOR Certification : www.marque-nf.com
- CNPP Certification : www.cnpp.com
(Centre national de prévention et de protection)
• Installation • Installation • Installazione
• Il est recommandé de fixer les sirènes en hauteur pour réduire leur accessibilité et accroître la propagation du son.
L’installation doit être réalisée conformément aux règles en vigueur.
• We recommend that your mount the audible alarms at a height which will deter access and increase the distribution of the alarm sound.
Installation must be carried out in line with the rules and regulations in force.
• Si raccomanda di fissare le sirene in altezza per ridurne l’accessibilità e aumentare la propagazione del suono.
Realizzare l’installazione in conformità alle normative in vigore.
• Recommandations pour la sirène extérieure
• Recommendations for an outdoor siren
• Raccomandazioni per la sirena esterna
• Installez la sirène en position verticale.
A chaque installation d’une sirène extérieure, il est nécessaire de remplir un formulaire d’autorisation à se procurer à la mairie.
• Install the siren in the vertical position.
Whenever an outdoor audible alarm is installed, it will be necessary to complete an authorisation form, which can be obtained
from the town hall.
• Installare la sirena in posizione verticale.
Per ogni installazione di una sirena esterna, compilare un modulo di autorizzazione emesso dal municipio.
1• Pour ouvrir, appuyez et tournez d’un quart de
tour les deux vis en face avant.
• To open, depress and turn the two screws on
the front panel by one quarter of a revolution.
• Per aprire, premere e ruotare di un quarto di
giro le due viti della parte anteriore.
2• Perçez ø6mm et mettre en place les chevilles.
• Drill a hole with a 6 mm øand insert the plugs.
• Pratica un foro da ø6mm e installare i perni
ad espansione.
3• Préparez les câbles, utilisez les câbles
Réf. 433 95 (6 x 0,6 mm2)
• Prepare the wiring, use wires
Cat. No. 433 95 (6 x 0.6 mm2)
• Preparare i cavi, utilizzare i cavi
rif. 433 95 (6 x 0,6 mm2)
130 mm
175 mm
147 mm
4• En utilisation extérieure des sirènes, faire
arriver le câble obligatoirement par le bas, en
le découpant au moyen d’une pince.
• When installing sirens outdoors, the wiring
must be inserted from below by cutting with
pliers.
• Per uso esterno delle sirene, fare arrivare
obbligatoriamente il cavo dal basso,
tagliandolo con una pinza.
5• Faire arriver le câble derrière le socle et
ressortir par le trou prévu à côté du bornier.
• Pass the cable behind the base and then out
again through the hole provided on the side of
the terminal block.
• Fare arrivare il cavo dietro la base e farlo uscire
dal foro previsto a lato della morsettiera.
6• Accrochez le socle sur les deux vis du haut.
• Affix the base to the two upper screws.
• Agganciare la base sulle due viti in alto.
7• Fixez le socle avec les deux vis du bas.
• Secure the base using the two bottom screws.
• Fissare la base con le due viti in basso.
8• Vérifiez le contact d’auto-surveillance.
• Check the automatic surveillance contact.
• Verificare il contatto di autosorveglianza.
130 mm
175 mm
147 mm
2
130 mm
175 mm
147 mm
3
• Raccordement • Connection • Collegamento
•Câblage d’une sirène sur centrale
filaire 6 boucles Réf. 432 05/07
•Wiring of one audible alarm to the
wired control panel, 6 loops
Cat. No. 432 05/07
•Cablaggio di una sirena su centrale
filare a 6 circuiti rif. 432 05/07
•Si le bornier sortie universelle de la centrale réf. 432 03 est occupé,
utilisez le bornier sortie alarme et l’alimentation d’une boucle.
•If the universal output terminal block on the control panel Cat.
No, 432 03 is assigned, use the alarm output terminal block and the
power supply for one loop.
•Se la morsettiera con uscita universale della centrale rif. 432 03 è
occupata, utilizzare la morsettiera con uscita allarme e l’alimentazione
di un circuito.
•Bornier centrale
•Control panel terminal block
•Morsettiera centrale
•Bornier centrale
•Control panel terminal block
•Morsettiera centrale
•Câblage d’une sirène sur centrale
filaire 3 boucles Réf. 432 03
•Wiring of one audible alarm to the
wired control panel, 3 loops
Cat. No. 432 03
•Cablaggio di una sirena su centrale
filare a 3 circuiti rif. 432 03
•Bornier centrale
•Control panel terminal block
•Morsettiera centrale
•Câblage de plusieurs sirènes sur
centrale filaire 6 boucles
Réf. 432 05/07
•Wiring of several audible alarms
to the wired control panel,
6 loops Cat. No. 432 05/07
•Cablaggio di numerose sirene
centrale filare a 6 circuiti
Rif. 432 05/07
•Câblage de plusieurs sirènes sur
centrale filaire 3 boucles
Réf. 432 03
•Wiring of several audible alarms
to the wired control panel, 3 loops
Cat. No. 432 03
•Cablaggio di numerose sirene
centrale filare a 3 circuiti
Rif. 432 03
•Bornier centrale
•Control panel terminal block
•Morsettiera centrale
•Bornier centrale
•Control panel terminal block
•Morsettiera centrale
•Correspondances borniers
•Terminal block correspondence
•Corrispondenza morsettiere
• Centrale
• Control panel
• Centrale 12356
• Sirène
• Audible alarm
• Sirena 12356
•Correspondances borniers
•Terminal block correspondence
•Corrispondenza morsettiere
• Centrale
• Control panel
• Centrale 1 2 3 4 5 6
• Sirène
• Audible alarm
• Sirena 1 2 3 5 6
•Fonctions sirène :
•Audible alarm functions:
•Funzioni della sirena:
1 2 3 5 6
•Charge + 1,7 V
• Load + 1.7 V
•Carica + 1,7 V
•Masse
• Earth
• Massa
•Commande
• Control
• Comando
•Auto-surveillance
• Automatic surveillance
• Autosorveglianza
• Réglage des micro-interrupteurs • Setting the micro-switches • Impostazione dei microinterruttori
• Mise sous tension et test de l’installation • Connecting the power supply and installation tests • Accensione e test d’installazione
• Reportez-vous au guide d’installation et d’utilisation de l’alarme intrusion filaire réf. 432 03 / 432 05 / 432 07
• Please refer to the wired intruder alarm installation and operation manual Cat. No. 432 03 / 432 05 / 432 07
• Consultare la guida per l’installazione e l’uso dell’allarme antintrusione filare rif. 432 03 / 432 05 / 432 07
•Sirènes extérieures Réf. 432 60/63
•Outdoor audible alarms Cat. No. 432 60/63
•Sirene esterne rif. 432 60/63
1234
aaaa
bbbb
213
56
• Attention : toute autre position de ces quatre micro-interrupteurs
en usage extérieur entraine l’annulation de la notification
d’admission NFa2p. Dans ce cas, vous devez retirer l’étiquette
NFa2p du capot de votre sirène.
• Warning: if these four micro-switches are in any other
position during outdoor use, this will lead to cancellation of the
of the NFa2p admission notification In this case, you must remove
the NFa2p label from the cover of your audible alarm.
• Attenzione: qualsiasi altra posizioni di questi quattro
microinterruttori in uso esterno implica l’annullamento della
notifica di ammissione NFa2p. In questo caso, rimuovere l’etichetta
NFa2p dal coperchio della sirena.
1234
aaaa
bbbb
213
56
1234
aaaa
bbbb
213
56
•Usage extérieur : Les micro-interrupteurs doivent être en position bbbb
•For outdoor use : The micro-switches must be in position bbbb
•Uso esterno: I microinterruttori devono trovarsi in posizione bbbb
• Configuration usine
• Factory settings
• Configurazione di fabbrica
• Attention : toute autre position de ces quatre micro-interrupteurs
en usage intérieur entraine l’annulation de la notification
d’admission NFa2p. Dans ce cas, vous devez retirer l’étiquette
NFa2p du capot de votre sirène.
• Warning: if these four micro-switches are in any other
position during indoor use, of the NFa2p admission notification In
this case, you must remove the NFa2p label from the cover of your
audible alarm.
• Attenzione: qualsiasi altra posizioni di questi quattro microinterruttori
in uso interno implica l’annullamento della notifica di ammissione
NFa2p. In questo caso, rimuovere l’etichetta NFa2p dal coperchio
della sirena.
•Usage intérieur : Les micro-interrupteurs doivent être en position aaaa
•Indoor use: The micro-switches must be in position aaaa
•Uso interno: I microinterruttori devono trovarsi in posizione aaaa
•Sirènes intérieures Réf. 432 60
•Audible alarms for indoor use Cat. No. 432 60
•Sirene interne rif. 432 60
•Micro-interrupteur
•Micro-switch
•Microinterruttore
Durée max. de déclenchement de la sirène
Max. duration as soon as the audible alarm is activated
Durata max. di attivazione della sirena
123456
bbbbbb 3mn
•Micro-interrupteur
•Micro-switch
•Microinterruttore
Durée max. de déclenchement de la sirène
Max. duration as soon as the audible
alarm is activated
Durata max. di attivazione della sirena
1 2 3 4
b b a a 3 mn
a b a a 5 mn
b a a a 10 mn
a a a a 30 mn
• Fonctions des micro-interrupteurs • Micro-switch functions • Funzioni dei microinterruttori
•Micro-interrupteur 1 et 2 :
•Micro-switch 1 and 2:
•Microinterruttore 1 e 2:
durée
duration
durata
Micro-interrupteur 3 :
Micro-switch 3:
Microinterruttore 3:
a = son intérieur, b = son extérieur (NFa2p)
a = its interior, b = its exterior (NFa2p)
a = suo interno, b = suo esterno (NFa2p)
Micro-interrupteur 4 :
Micro-switch 4:
Microinterruttore 4:
a = pas de ash, b = ash (réf. 432 63)
a = no ash, b = ash (Cat. no. 432 63)
a = senza ash, b = ash (rif. 432 63)
1• Connectez la batterie : fil rouge sur la borne rouge (+)
et fil bleu sur la borne noire (-).
Placez ensuite la batterie dans le logement.
• Connect the battery: red wire to red terminal (+) and blue
wire to black terminal (-).
Then place the battery into the housing.
• Collegare la batteria: filo rosso su morsetto rosso (+) e filo blu
su morsetto nero (-).
Quindi inserire la batteria nel proprio alloggiamento.
2• Mettez en place le capot
• Attach the cover
• Mettere in posizione il coperchio
3• Vissez le capot (vis quart de tour)
• Screw on the cover (screw a quarter
of a turn)
• Avvitare il coperchio (vite di un
quarto di giro)

This manual suits for next models

1

Other LEGRAND Security System manuals

LEGRAND Tynetec ZXT813 User manual

LEGRAND

LEGRAND Tynetec ZXT813 User manual

LEGRAND 3486 MyHome User manual

LEGRAND

LEGRAND 3486 MyHome User manual

LEGRAND tynetec ZXT833 User manual

LEGRAND

LEGRAND tynetec ZXT833 User manual

LEGRAND tynetec Aidcall ZXT434 User manual

LEGRAND

LEGRAND tynetec Aidcall ZXT434 User manual

LEGRAND 4073 User manual

LEGRAND

LEGRAND 4073 User manual

LEGRAND tynetec ZXT832 User manual

LEGRAND

LEGRAND tynetec ZXT832 User manual

LEGRAND 766 21 Setup guide

LEGRAND

LEGRAND 766 21 Setup guide

LEGRAND tynetec ZXT832 User manual

LEGRAND

LEGRAND tynetec ZXT832 User manual

LEGRAND neat SMILE FALL User manual

LEGRAND

LEGRAND neat SMILE FALL User manual

LEGRAND tynetec FM0823 User manual

LEGRAND

LEGRAND tynetec FM0823 User manual

LEGRAND tynetec ZXT830 User manual

LEGRAND

LEGRAND tynetec ZXT830 User manual

LEGRAND Tynetec REACH User manual

LEGRAND

LEGRAND Tynetec REACH User manual

LEGRAND tynetec ZXT821 User manual

LEGRAND

LEGRAND tynetec ZXT821 User manual

LEGRAND Unity System User manual

LEGRAND

LEGRAND Unity System User manual

LEGRAND L4601 User manual

LEGRAND

LEGRAND L4601 User manual

LEGRAND 625 30 User manual

LEGRAND

LEGRAND 625 30 User manual

LEGRAND Tynetec ZXT817 User manual

LEGRAND

LEGRAND Tynetec ZXT817 User manual

LEGRAND Tynetec REACH User manual

LEGRAND

LEGRAND Tynetec REACH User manual

LEGRAND 5739 34 User manual

LEGRAND

LEGRAND 5739 34 User manual

LEGRAND 84424 User manual

LEGRAND

LEGRAND 84424 User manual

LEGRAND 5739 35 User manual

LEGRAND

LEGRAND 5739 35 User manual

LEGRAND E47ADCN User manual

LEGRAND

LEGRAND E47ADCN User manual

LEGRAND 675 20 Quick start guide

LEGRAND

LEGRAND 675 20 Quick start guide

LEGRAND tynetec Reach IP User manual

LEGRAND

LEGRAND tynetec Reach IP User manual

Popular Security System manuals by other brands

LDA Audio Tech NEO Series Support Handbook

LDA Audio Tech

LDA Audio Tech NEO Series Support Handbook

Safety Technology International STI-SA5000 SERIES manual

Safety Technology International

Safety Technology International STI-SA5000 SERIES manual

Gewiss Chorus manual

Gewiss

Gewiss Chorus manual

DSC Neo Power Series installation guide

DSC

DSC Neo Power Series installation guide

Microjack MicroJack MP2016 user manual

Microjack

Microjack MicroJack MP2016 user manual

Cooper Security Homelink 75 user guide

Cooper Security

Cooper Security Homelink 75 user guide

Clover RJ325 installation guide

Clover

Clover RJ325 installation guide

CADDX NX1308e user guide

CADDX

CADDX NX1308e user guide

SmartPool PE-12 Installation and operation instructions

SmartPool

SmartPool PE-12 Installation and operation instructions

Visonic POWERMASTER-10 Installer's guide

Visonic

Visonic POWERMASTER-10 Installer's guide

Novalynx 200-WS-21-A user manual

Novalynx

Novalynx 200-WS-21-A user manual

Samvix X105 instructions

Samvix

Samvix X105 instructions

Profile Auto-dial user manual

Profile

Profile Auto-dial user manual

MSA ICM 2000 installation instructions

MSA

MSA ICM 2000 installation instructions

Bibene WP7 user manual

Bibene

Bibene WP7 user manual

Satel SPW-250 manual

Satel

Satel SPW-250 manual

Conrad GKA100 operating instructions

Conrad

Conrad GKA100 operating instructions

Chuango A9 manual

Chuango

Chuango A9 manual

manuals.online logo
manuals.online logoBrands
  • About & Mission
  • Contact us
  • Privacy Policy
  • Terms and Conditions

Copyright 2025 Manuals.Online. All Rights Reserved.