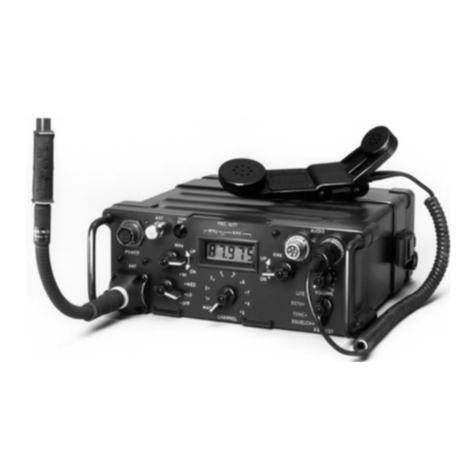
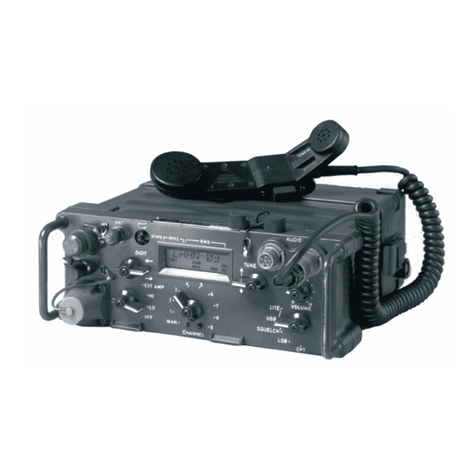
Datron PRC1099A User manual

PRC1099A-MSOP
PRC1099A
Radio Set
Operator Manual
Datron World Communications Inc.
Manual Part No. PRC1099A-MSOP
Release Date: May 2007
Revision: C
3030 Enterprise Court
Vista, CA 92081, U.S.A.
Phone: (760) 597-1500 Fax: (760) 597-1510
E-Mail: [email protected]
www.dtwc.com


PRC1099A-MSOP i
Change Description
Date of
Revision
Revision
Letter Description of Changes Pages
Affected
2/2006 B Overall update to text and format. All
5/2007 C Update to graphics and text. All


PRC1099A-MSOP iii
© 2003 Datron World Communications, Inc. (Datron)
All rights reserved.
Datron World Communications, Inc.
This manual, as well as the software described in it, is
furnished under license and may only be used or copied
in accordance with the terms of such license. The information
in this manual is furnished for informational use
only, is subject to change without notice, and should not
be construed as a commitment by Datron. Datron
assumes no responsibility or liability for any errors or
inaccuracies that may appear in this book.
Except as permitted by such license, no part of this publication
may be reproduced, stored in a retrieval system,
or transmitted, in any form or by any means, electronic,
mechanical, recording, or otherwise without the prior
written permission of Datron.
Software License Agreement and Warranty
This software is licensed to the user (licensee) under the
express terms and conditions of Datron’s software
licensing policies and agreement as outlined below. By
receiving and installing this software package the user
(licensee) has indicated acceptance of the terms and conditions
of this agreement presented herewith.
As used in this document, the term “Software” shall
mean the application or control software in machine readable
format and the hardware protection key, along with any or all
supporting documentation, as well as all updated or enhanced
versions of the program supplied to the user at later date(s).
This software license does not include source code, and there-
fore, no license is granted with respect to source code of any
kind utilized directly or indirectly in any Datron or Datron
supplied third party product. Note, in some cases, covered
software may be included in Datron products in RAM or
ROM, and/or forms of machine readable code, not readily
accessible to the user or licensee.
In consideration of the terms and conditions of this
agreement, Datron grants the user a non-exclusive, nontrans-
ferable license to install and operate one copy of the program.
Licensee agrees not to attempt, aid, authorize, or direct any
effort, either directly or indirectly to reverse engineer or
reverse compile the Software. Licensee further agrees they or
their agents are not authorized to
make derivative versions or changes to the Software.
Title to and ownership of the Software shall at all times
remain with Datron and/or its licensors. Further, no
license is granted to copy or reproduce in any form whatsoever
the Software supplied without the express written permission
of Datron, prior to any such contemplated action.
Datron may terminate this agreement and discontinue
further warranty coverage at any time due to failure to
comply with the terms and conditions of this agreement.
In such an event, Datron will provide the user
with written notice of such a “failure-to-comply” and the
user will have 10 days to demonstrate that a remedy has
been implemented. If the user fails to perform, the
agreement will be terminated by further written notice
from Datron. Upon termination, the user shall immediately
return all original Software, documentation, and
any copies of each to Datron.
This Software is licensed “AS IS” and Datron provides a war-
ranty that covers the media upon which the Software is embed-
ded for a period of 30 days from receipt of the product. Under
this warranty policy Datron’s sole obligation shall be to
replace or repair, at Datron’s discretion, any such media that in
Datron’s opinion proves defective.
The user is obligated to provide Datron with a detailed
description of possible defects along with sample material
such that Datron can reproduce the identified defects.
By receipt and use, user (licensee) acknowledges that
certain software developed or distributed by Datron is
controlled by one or more governmental agencies. The
user (licensee) herewith acknowledges they will take all
necessary actions to comply with applicable regulations
concerning the use of licensed software. Further, Datron
is under no obligation to supply source code or documentation
of its software for any reason.
Datron makes no representation, express or implied, with
respect to any Software licensed under this document as to its
fitness for any particular purpose or intended use.
Furthermore, Datron shall have no liability under this
agreement for any incidental, special, or consequential
damages arising out of the use of any supplied software
programs. Datron reserves the right to make periodic
changes in it’s software for any purpose without any
obligation to notify users.
One Year Limited Warranty and Remedies
Datron warrants that its equipment is free from defects in
design, materials, and workmanship for a period of 12
months from the date of installation of the equipment,
but in no event later than 15 months from the date of
shipment. If the equipment does not provide satisfactory
service due to defects covered by this warranty, Datron
will, at its option, replace or repair the equipment free of
charge.
Should it be impractical to return the equipment for
repair, Datron will provide replacements for defective
parts contained in the equipment for a period of 12
months from the date of installation of the equipment,
but in no event later than 15 months from the date of
shipment.
This warranty is limited to the original purchaser and is
not transferable. Repair service performed by Datron is
warranted for the balance of the original warranty or 90
days, whichever is longer.
Exclusive Warranty: There are no other warranties
beyond the warranty as contained herein. No agent,
employee, or representative of Datron has any authority
to bind Datron to any affirmation, representation, or warranty
concerning the equipment or its parts that is not in
conformity with the warranties contained herein.
EXCEPT AS EXPRESSLY SET FORTH ABOVE, NO
OTHER WARRANTIES, EITHER EXPRESS OR
IMPLIED, ARE MADE WITH RESPECT TO THE
EQUIPMENT OR THE PARTS CONTAINED

iv PRC1099A-MSOP
THEREIN, INCLUDING BUT NOT LIMITED TO
THE IMPLIED WARRANTIES OF MERCHANTABILITY
AND FITNESS FOR A PARTICULAR PURPOSE, AND
DATRON EXPRESSLY DISCLAIMS ALL WARRANTIES
NOT STATED HEREIN.
Limitations of Warranty: This warranty does not
cover:
Physical damage to the equipment or its parts that does
not involve defects in design, material, or workmanship,
including damage by impact, liquids, temperature, or
gases.
Damage to the equipment or its parts caused by lightning,
static discharge, voltage transients, or application
of incorrect supply voltages.
Defects or failures caused by unauthorized attempts to
repair or modify the equipment.
Defects or failures caused by Buyer abuse or misuse.
Return of Equipment - Domestic: To obtain performance
of any obligation under this warranty, the equipment
must be returned freight prepaid to the Technical
Support Services. Datron World Communications Inc.,
3030 Enterprise Court, Vista, California 92081. The
equipment must be packed securely. Datron shall not be
responsible for any damage incurred in transit. A letter
containing the following information must be included
with the equipment.
a. Model, serial number, and date of installation.
b. Name of dealer or supplier of the equipment.
c. Detailed explanation of problem.
d. Return shipping instructions.
e. Telephone or fax number where Buyer may be contacted.
Datron will return the equipment prepaid by United Parcel
Service, Parcel Post, or truck. If alternate shipping is
specified by Buyer, freight charges will be made collect.
Return of Equipment - International: Contact Datron or
your local Representative for specific instructions. Do
not return equipment without authorization. It is usually
not possible to clear equipment through U.S. Customs
without the correct documentation. If equipment is
returned without authorization, Buyer is responsible for
all taxes, customs duties, clearance charges, and other
associated costs.
Parts Replacement: The following instructions for the
supply of replacement parts must be followed:
a. Return the parts prepaid to “Parts Replacement”
Datron World Communications Inc., 3030 Enterprise
Court, Vista, California 92081; and
b. Include a letter with the following information:
1. Part number
2. Serial number and model of equipment
3. Date of installation
Parts returned without this information will not be
replaced. In the event of a dispute over the age of the
replacement part, components date-coded over 24
months previously will be considered out of warranty.
Remedies: Buyer’s sole remedies and the entire liability
of Datron are set forth above. In no event will Datron be
liable to Buyer or any other person for any damages,
including any incidental or consequential damages,
expenses, lost profits, lost savings, or other damages
arising out of use of or inability to use the equipment.
1/95
Safety Considerations
This product and manual must be thoroughly understood
before attempting installation and operation. To do so
without proper knowledge can result in equipment failure
and bodily injury.
Caution: Before applying ac power, be sure that the
equipment has be properly configured for the available
line voltage. Attempted operation at the wrong voltage
can result in damage and voids the warranty. See the
manuals section on installation. DO NOT operate equipment
with cover removed.
Earth Ground: All Datron products are supplied with a
standard, 3-wire, grounded ac plug. DO NOT attempt to
disable the ground terminal by using 2-wire adapters of
any type. Any disconnection of the equipment ground
causes a potential shock hazard that could result in personal
injury. DO NOT operate any equipment until a suitable ground
has been established. Consult the manual section on ground-
ing.
Servicing: Trained personnel should only carry out servicing.
To avoid electric shock, DO NOT open the case
unless qualified to do so.
Various measurements and adjustments described in this man-
ual are performed in ac power applied and the protective
covers removed. Capacitors (particularly the
large power supply electrolytics) can remain charged for
a considerable time after the unit has been shut off. Use
particular care when working around them, as a short circuit
can release sufficient energy to cause damage to the equipment
and possible injury.
To protect against fire hazard, always replace line fuses
with ones of the same current rating and type (normal
delay, slow-blow, etc.). DO NOT use higher value
replacements in an attempt to prevent fuse failure. If
fuses are failing repeatedly this indicates a probable
defect in the equipment that needs attention.
Use only genuine Datron factory parts for full performance
and safety of this product.
Made in the USA

PRC1099A-MSOP v
CONTENTS
Chapter 1: Introduction
The PRC1099A. . . . . . . . . . . . . . . . . . . . . . . . . . . . . . . . . . . . . . . . . . . . . . . . . . 1-1
Technical Specifications . . . . . . . . . . . . . . . . . . . . . . . . . . . . . . . . . . . . . . . . . . . 1-2
Single Sideband and HF Communications . . . . . . . . . . . . . . . . . . . . . . . . . . . . . 1-3
Chapter 2: Installation
Unpacking. . . . . . . . . . . . . . . . . . . . . . . . . . . . . . . . . . . . . . . . . . . . . . . . . . . . . . 2-1
Location Considerations . . . . . . . . . . . . . . . . . . . . . . . . . . . . . . . . . . . . . . . . . . . 2-1
Manpack Installation. . . . . . . . . . . . . . . . . . . . . . . . . . . . . . . . . . . . . . . . . . . . . . 2-2
Figure 2-1. Installation of Battery in Transceiver. . . . . . . . . . . . . . . . . . . . . . . . . . . . . . 2-2
Figure 2-2. Manpack Harness Installation . . . . . . . . . . . . . . . . . . . . . . . . . . . . . . . . . . . 2-4
Mobile Installations . . . . . . . . . . . . . . . . . . . . . . . . . . . . . . . . . . . . . . . . . . . . . . 2-6
Figure 2-3. Mobile 20W System. . . . . . . . . . . . . . . . . . . . . . . . . . . . . . . . . . . . . . . . . . . 2-6
Figure 2-4. Mobile 100W System. . . . . . . . . . . . . . . . . . . . . . . . . . . . . . . . . . . . . . . . . . 2-7
Figure 2-5. Mobile 400W System. . . . . . . . . . . . . . . . . . . . . . . . . . . . . . . . . . . . . . . . . . 2-8
Base Installations . . . . . . . . . . . . . . . . . . . . . . . . . . . . . . . . . . . . . . . . . . . . . . . . 2-9
Connecting Audio Accessories. . . . . . . . . . . . . . . . . . . . . . . . . . . . . . . . . . . . . 2-10
Battery Charger Installation . . . . . . . . . . . . . . . . . . . . . . . . . . . . . . . . . . . . . . . 2-10
Figure 2-6. Charging a Battery using PRC-PS and PRC1099A . . . . . . . . . . . . . . . . . . 2-11
Figure 2-7. Charging a Battery using PRC-PS . . . . . . . . . . . . . . . . . . . . . . . . . . . . . . . 2-12
Figure 2-8. Charging Multiple Batteries using PRC-BC4 . . . . . . . . . . . . . . . . . . . . . . 2-13
Figure 2-9. Charging a Battery Using the PRC-HC-30 and PRC1099A . . . . . . . . . . . 2-14
Figure 2-10. Charging a Battery Directly from the PRC-HC-30 . . . . . . . . . . . . . . . . . 2-14
Figure 2-11. Charging a Battery Using PRC-SPU-10 and PRC1099A . . . . . . . . . . . . 2-15
Figure 2-12. Charging a Battery Directly from PRC-SPU-10 . . . . . . . . . . . . . . . . . . . 2-15
Table 2-1. Battery Charger Cables . . . . . . . . . . . . . . . . . . . . . . . . . . . . . . . . . . . . . . . 2-15
Internal Battery Charger Option . . . . . . . . . . . . . . . . . . . . . . . . . . . . . . . . . . . . 2-16
Chapter 3: Operation
Quick Start . . . . . . . . . . . . . . . . . . . . . . . . . . . . . . . . . . . . . . . . . . . . . . . . . . . . . 3-1
Figure 3-1. Front Panel Layout. . . . . . . . . . . . . . . . . . . . . . . . . . . . . . . . . . . . . . . . . . . . 3-1
Using Knobs, Connectors and Indicators . . . . . . . . . . . . . . . . . . . . . . . . . . . . . . 3-2
Tuning the Antenna . . . . . . . . . . . . . . . . . . . . . . . . . . . . . . . . . . . . . . . . . . . . . . 3-5
Jamming . . . . . . . . . . . . . . . . . . . . . . . . . . . . . . . . . . . . . . . . . . . . . . . . . . . . . . . 3-5
CW Operation . . . . . . . . . . . . . . . . . . . . . . . . . . . . . . . . . . . . . . . . . . . . . . . . . . . 3-6

vi PRC1099A-MSOP
Chapter 4: Radio Programming
Display Area . . . . . . . . . . . . . . . . . . . . . . . . . . . . . . . . . . . . . . . . . . . . . . . . . . . . 4-1
Menu Navigation . . . . . . . . . . . . . . . . . . . . . . . . . . . . . . . . . . . . . . . . . . . . . . . . 4-1
Setting Channels and Frequencies . . . . . . . . . . . . . . . . . . . . . . . . . . . . . . . . . . . 4-3
Standard Option Menu . . . . . . . . . . . . . . . . . . . . . . . . . . . . . . . . . . . . . . . . . . . . 4-4
Standard Data Menu . . . . . . . . . . . . . . . . . . . . . . . . . . . . . . . . . . . . . . . . . . . . . . 4-6
Standard Scan Menu . . . . . . . . . . . . . . . . . . . . . . . . . . . . . . . . . . . . . . . . . . . . . . 4-8
Optional ALE Menu . . . . . . . . . . . . . . . . . . . . . . . . . . . . . . . . . . . . . . . . . . . . . 4-10
Optional Message Menu . . . . . . . . . . . . . . . . . . . . . . . . . . . . . . . . . . . . . . . . . . 4-20
Optional Call Menu . . . . . . . . . . . . . . . . . . . . . . . . . . . . . . . . . . . . . . . . . . . . . 4-22
Optional TransAdapt/Transcall Menu . . . . . . . . . . . . . . . . . . . . . . . . . . . . . . . 4-25
Chapter 5: Maintenance
Preventive Maintenance . . . . . . . . . . . . . . . . . . . . . . . . . . . . . . . . . . . . . . . . . . . 5-1
Table 5-1. Daily Preventive Maintenance . . . . . . . . . . . . . . . . . . . . . . . . . . . . . . . . . . . 5-1
Table 5-2. Weekly Preventive Maintenance . . . . . . . . . . . . . . . . . . . . . . . . . . . . . . . . . 5-2
BITE System. . . . . . . . . . . . . . . . . . . . . . . . . . . . . . . . . . . . . . . . . . . . . . . . . . . . 5-5
Chapter 6: Antenna Systems
Short Whip Antenna . . . . . . . . . . . . . . . . . . . . . . . . . . . . . . . . . . . . . . . . . . . . . . 6-1
Internal Antenna Tuner. . . . . . . . . . . . . . . . . . . . . . . . . . . . . . . . . . . . . . . . . . . . 6-1
Ground Systems . . . . . . . . . . . . . . . . . . . . . . . . . . . . . . . . . . . . . . . . . . . . . . . . . 6-2
End-Fed Antennas. . . . . . . . . . . . . . . . . . . . . . . . . . . . . . . . . . . . . . . . . . . . . . . . 6-2
Figure 6-1. Whip Antenna Configuration. . . . . . . . . . . . . . . . . . . . . . . . . . . . . . . . . . . . 6-3
Figure 6-2. Slant Wire/Long Wire Antenna Configuration . . . . . . . . . . . . . . . . . . . . . . 6-3
Figure 6-3. Resonant Dipole Antenna Configuration . . . . . . . . . . . . . . . . . . . . . . . . . . . 6-4
Figure 6-4. Broadband Antenna Configuration . . . . . . . . . . . . . . . . . . . . . . . . . . . . . . . 6-4
Figure 6-5. Mobile Configuration with Remote Antenna Tuner . . . . . . . . . . . . . . . . . . 6-5
Figure 6-6. Remote Tuned Antenna Configuration . . . . . . . . . . . . . . . . . . . . . . . . . . . . 6-5
Chapter 7: Optional Accessories
Rechargeable Batteries . . . . . . . . . . . . . . . . . . . . . . . . . . . . . . . . . . . . . . . . . . . . 7-1
Non-Rechargeable Batteries . . . . . . . . . . . . . . . . . . . . . . . . . . . . . . . . . . . . . . . . 7-1
Power Cables . . . . . . . . . . . . . . . . . . . . . . . . . . . . . . . . . . . . . . . . . . . . . . . . . . . 7-2
Carrying Cases . . . . . . . . . . . . . . . . . . . . . . . . . . . . . . . . . . . . . . . . . . . . . . . . . . 7-2
Audio Equipment . . . . . . . . . . . . . . . . . . . . . . . . . . . . . . . . . . . . . . . . . . . . . . . . 7-2
Manpack and Long Range Antennas . . . . . . . . . . . . . . . . . . . . . . . . . . . . . . . . . 7-3
Amplifiers and Power Supplies . . . . . . . . . . . . . . . . . . . . . . . . . . . . . . . . . . . . . 7-4
Antenna Tuners. . . . . . . . . . . . . . . . . . . . . . . . . . . . . . . . . . . . . . . . . . . . . . . . . . 7-5
Shock Mounts . . . . . . . . . . . . . . . . . . . . . . . . . . . . . . . . . . . . . . . . . . . . . . . . . . . 7-5
Vehicle Mounts. . . . . . . . . . . . . . . . . . . . . . . . . . . . . . . . . . . . . . . . . . . . . . . . . . 7-5

PRC1099A-MSOP 1-1
CHAPTER 1
INTRODUCTION
The PRC1099A
The PRC1099A is a high frequency, manpack-portable, single-sideband (SSB)
transceiver providing long range, two-way, voice, CW, and data
communications. It can also be used as part of Datron’s RA100 or RA400-99
high power fixed, portable and mobile stations. The PRC1099A is watertight
when assembled. All controls are on the front panel. The PRC1099A consists of
the transceiver and battery pack.
The PRC1099A is held in its case by four captive screws. A battery box that
protects and houses the battery is attached to the case by two clamps. To
prevent movement, the battery sits on a foam pad attached to the bottom of the
case. A pressure relief valve in the battery case prevents hydrogen gas (by-
product of battery discharge) from accumulating in the transceiver case. The
battery connector projects from the bottom of the case and plugs into the battery
in the battery box.
The PRC1099A communicates with most HF SSB radios operating within the
1.6 to 30 MHz range and in conjunction with the following equipment:
• Long wire antennas in place of the whip antennas and the internal tuner to
extend the communication range.
• Coaxial-fed 50 ohm antennas such as resonant dipoles, broadband antennas
and directional antennas in place of the whip antenna for extended range or
where directional transmission/reception is desired.

1: Introduction
1-2 PRC1099A-MSOP
• RAT7000B antenna tuner in mobile installations and other applications
where the antenna must be located away from the transceiver.
• PRC-PS AC power supply in place of the internal battery.
• High power amplifiers RA100 (100W) and RA400-99 (400W) to provide
automatic control of these amplifiers.
• PRC1099A-ECU extended control unit.
• Loudspeaker electromagnetic LS-R to monitor radio reception.
• Morse key KYR for telegraphy.
• Secure voice equipment designed for HF SSB operation.
• PRC1099A for digital data (burst or RTTY) transmission and reception.
Technical Specifications
Note: Specifications are subject to change without notice or obligation.
Characteristic Specification
General
Frequency Range 1.6 to 30 MHz
Available Channels 2,840,000 in 10 Hz steps
Preset Channels 100 programmable memory channels
Scanning Radio and ALE scan modes
Channel Programming From front panel or remotely via computer
Modes USB, LSB, CW, AME; simplex or
half-duplex
Input Power 11 to 15 Vdc
Battery Pack BB-LA6 sealed lead calcium
Low Battery Indicator LCD battery icon
Antenna Port BNC for 50 ohm broadband antennas or for
connection to external amplifier; whip
antenna port
Display Multifunction custom LED with backlight
Mechanical/Environmental
Size 11.1“ x 4.1” x 9.25”
(28.2 cm x 10.5 cm x 23.5 cm);
W x H x D, including battery pack
Weight 9.7 lb. (4,4 kg) without battery pack;
BB-LA6 pack 2 lb. (0.9 kg)

1: Introduction
PRC1099A-MSOP 1-3
Single Sideband and HF Communications
This section discusses single sideband (SSB) mode and high frequency
communications to provide more effective communications.
Single Sideband The PRC1099A provides voice communications in SSB mode. This mode
provides more efficient operation for high frequency communications than the
FM (frequency modulation) mode used for tactical communications in the 30
to 88 MHz range. SSB has almost completely replaced the earlier AM
(amplitude modulated) mode and provides a major advantage for HF
communications. The SSB transmitter uses special circuitry to suppress the
carrier and one of the two sidebands of an AM signal. This provides a sixfold
Package Olive drab green, sealed, including battery
pack
Operating Temperature -30° to +60°
Shock, Vibration,
Humidity, Fungus, Altitude
Per MIL-STD-810
Transmitter
RF Power Output 5/20W, PEP, or average, in manpack;
5/20/100/400W in mobile configuration
Duty Cycle Continuous service, all modes
Harmonics -50 db (2 to 30 MHz)
Receiver
Sensitivity 10 db SINAD for 0.5 uV input
Squelch Audio derived, noise immune
Audio 500 mW into 16 ohm, 50 mW at 150 ohm, 0
dBm into 600 ohm
Antenna Tuning
Whip AT-271A/U and longwires (use LWA for
wires longer than 15m), fully automatic
antenna tuning, 100-channel memory
Tune Time 1 to 3 seconds initial tune; 20 ms, memory
mode for preset channels (no RF output in
memory tune mode)
Antenna Switching Tuner bypassed and 50 ohm port
automatically engaged when whip (or long
wire) antenna removed
Characteristic Specification

1: Introduction
1-4 PRC1099A-MSOP
increase in efficiency, as the carrier uses 2/3 of the power and carries no useful
information; the two sidebands contain identical information. This means that
the SSB transmitter puts all of the power into one information carrying
sideband. This makes the PRC1099A as effective as a 120W AM transmitter.
Apart from the improved efficiency, the SSB signal occupies less than half the
frequency space of the AM signal and permits much better utilization of the
crowded HF spectrum. The SSB signal is more intelligible at poor signal
levels and is far less affected by selective fading and interference. To receive
SSB, it is necessary to use a special receiver that locally reinserts the
suppressed carrier so that the transmission may be demodulated. The SSB
signal is unintelligible when received by a standard AM receiver.
HF
Communications
The HF communications spectrum is primarily for long distance
communications, while VHF is favored for local communications. If the
correct frequencies and antenna systems are used, the HF spectrum will
provide effective communications over almost any distance including inter-
continental ranges. There are two main modes of propagation of HF signals–
ground wave and sky wave. The ground wave follows the surface of the earth
and provides reliable signals over short ranges. The signals are attenuated
very rapidly as they pass over the surface of the earth, so that high powers and
good antennas are essential for good ground wave coverage. The ground wave
attenuation increases as a function of frequency, and the lower frequencies
below 3 MHz are favored for ground wave operation. This mode may be the
only effective method for local coverage in areas too mountainous for VHF
and UHF operation.
Most HF communication is by sky wave where the signals are refracted by the
reflecting layers of the ionosphere. Long distances can be covered with little
signal attenuation, provided the correct frequency is chosen. The ionosphere
does not stay constant; it varies with the time of day, time of year, the sun spot
cycle and the activity of the sun. Solar flares can cause complete radio
blackouts with little warning. HF communications are affected by static
caused by lightning; sometimes from storms many hundreds or thousands of
kilometers away. A clear channel can never be assured, as long distance
propagation may cause strong interfering signals on the frequency from great
distances. It must always be understood that although long distance
communications are possible with low powers and simple antennas, high
reliability and freedom from interference is not possible. In spite of the
problems, a surprisingly good standard of communications can be achieved
provided that care is taken to select the correct frequency and to use good
equipment with an efficient antenna system.
The correct choice of frequency is beyond the scope of this manual and may
be limited by the available frequency allocations. The following information
provides a starting point for choosing the best frequency. Remember that the
final guide should be an actual test, as often only a small change in frequency
may make a big difference in signal strength.

1: Introduction
PRC1099A-MSOP 1-5
The low frequencies, below 3 MHz, will normally be restricted to short ranges
during the day. At night, longer ranges (3 to 400 kilometers) are possible, but
interference and static may be major problems. Good antennas and high
power are essential for anything but the shortest distances.
The medium frequencies from 3 to 5 MHz may be a good choice for moderate
distances (3 to 400 kilometers) during the day. At night, considerable
distances are possible, although static will be a frequent problem during
summer months. The physical length of a good antenna is still quite long, and
it is difficult to achieve good efficiencies with whip antennas in this range.
The medium frequencies from 5 to 11 MHz are the most popular for
communications up to 1000 kilometers. Good ranges are possible during the
day with the higher frequencies being favored for the longer distances.
Communications may become more difficult at night with interfering signals
from all over the world.
The higher end of the spectrum, above 12 MHz, is favored for long distance
communications. The propagation will be severely affected by the ionosphere
and expert advice is essential in choosing the correct frequencies for long
distance operation. For example, frequencies as high as 30 MHz may be used
for worldwide communications during the peak of the sunspot cycle.
However, during periods of low sunspot activity, this frequency range will be
completely dead. It is important to remember that at the higher frequencies
there can be skip zones; and a strong signal may be received from 2000
kilometers away, while closer stations cannot be heard.


PRC1099A-MSOP 2-1
CHAPTER 2
INSTALLATION
Unpacking
The PRC1099A is packed in a heavy duty, corrugated cardboard carton with the
accessories packed in a separate carton. Retain the cartons and packing
materials for storage or reshipping purposes.
Inspect the equipment for possible shipping damage. Check all accessories
against the packing list.
Location Considerations
Although the PRC1099A is primarily preferred as a manpack transceiver, it can
be deployed in a number of configurations. For more information on variations
to the manpack configuration, refer to "Mobile Installations" on page 2-6 and
"Base Installations" on page 2-9.
Manpack The PRC1099A operates in the high frequency spectrum where signals are
reflected by the ionosphere and line-of-sight is not required. Since the signal
can be absorbed by tall buildings or vegetation, the operating site should be
clear of obstacles directly in the line of communication. If possible, avoid
locations near sources of electrical interference, such as power or telephone
lines, electric motors or gasoline engines.
Mobile Use the MT-1099A mobile mount to mount the PRC1099A. Datron offers
mobile and shock mount kits for the PRC1099A, suitable for most installations.
Base A good ground or counterpoise will extend the operating range. It is preferable
to site the transceiver where a ground can be connected to the ground terminal.
If possible, avoid locations near sources of electrical interference, such as
power or telephone lines, electric motors or gasoline engines.

2: Installation
2-2 PRC1099A-MSOP
Manpack Installation
Installing the
Battery
1. Place the PRC1099A on a level surface with the front panel facing down.
2. Release the two clamps by pushing down.
3. Remove the battery box.
4. Check the battery connector. If it is damaged, the transceiver must be
repaired. Make sure the pressure-test screw and relief valve are tight.
5. Position the battery so that the connectors are aligned and then mate the
connectors.
6. Install the battery case and tighten the clamps.
CAUTION: Remove the battery when the transceiver is not in use
for more than one day.
Figure 2-1. Installation of Battery in Transceiver
Clamp
Pressure
Te s t S c r e w
Battery Bo
x
Radio
Connector
Transceiver
Case
Captive
Screws
Front Panel
Guard
Pressure
Relief
Valve
Battery

2: Installation
PRC1099A-MSOP 2-3
CAUTION: Ensure battery power is between 12.0V and 15 Vdc, with pos-
itive (+) applied to the B terminal on the battery connector (rear of trans-
ceiver) and negative (-) applied to the A terminal. To avoid serious
damage to the transceiver, do not change battery polarity.
For information on the types of batteries that are available, refer to Chapter 6,
Optional Accessories.
Installing the
Manpack
Harness
1. Place the harness flat on a level surface with the metal braces facing up.
2. Place the transceiver on the harness with the front panel to the top and the
battery case resting on the metal braces.
3. Fasten the transceiver to the harness with the two retaining straps. Feed
the metal-tipped strap from below, through the center slot on the buckle,
and then down through the end slot on the buckle.
4. Clip the cotton duck bag to the harness.
5. Install the desired antenna (refer to "Installing the Antenna" on page 2-4).
6. Connect the handset to one of the audio connectors on the front panel of
the transceiver.
7. Place the harness with the transceiver attached, on the operator’s back
and place the shoulder straps over the shoulders.
8. Feed the end of the lower strap through the right shoulder strap ring. Feed
the metal tip of the strap from below, through the center slot in the buckle,
and then down through the end slot (refer to figure below).
9. Install the left shoulder strap in a similar manner.
10. Hook the two belt straps to the combat belt.

2: Installation
2-4 PRC1099A-MSOP
Installing the
Antenna
1. Remove the cover from the antenna mount (refer to Front Panel Layout
figure on page 3-1).
2. Screw the antenna support into the antenna mount.
3. Extend the antenna by holding the base (the heaviest section) and
carefully whipping it outward. If all sections are not secure, insert the
sections by hand.
4. Secure the extended antenna into the support.
5. Periodically tighten the antenna in the mount.
Caution: Make sure the base is tight against the mount. Even a small
gap between the base and the mount can cause the antenna to break
leaving the thread portion in the mount. In addition, the end of the
mount activates an internal switch that activates the automatic antenna
tuner. The plastic filling in the thread is designed to prevent the antenna
from unscrewing. If the plastic wears, the antenna can unscrew under
vibration.
Figure 2-2. Manpack Harness Installation
Shoulder straps
Transceiver
Retaining
Straps
Shoulder
Strap
Buckle (2)
Shoulder strap ring (2)
Cotton Duck
Bag Lower
Strap (2)
Metal Braces
Belt Strap (2)
Retaining Stra
p
Buckles (2)

2: Installation
PRC1099A-MSOP 2-5
Installing the
Handset
1. Remove the cover from the Audio connector on the front panel of the
transceiver.
2. Connect the handset to one of the Audio connectors.
Manpack
Accessories
The following accessories are available as part of the PRC1099A manpack
configuration.
Item Part Number Description
Antenna AT-271A/U Each of six sections fits into end of wider
section. Braided plastic cord under spring
tension is threaded through sections to keep
them together during operation. When
sections are folded, the cable keeps them
together as a group.
Antenna
Support
AB-591/U Semi-flexible, tubular and main support for
AT-271A. Pin at base of support activates
internal antenna tuner.
Harness ST-138 Secures PRC1099A for carrying on back.
Cloth Bag CW-503 Storage for antennas, antenna support,
handset.
Handset H-250/U
MHS
Contains dynamic microphone and receiver
for transmitting and receiving signals. PTT
switch mounted in handle. Connecting cord
retractile, terminating in a five-pin connector.
Harness (ST-138) Handset (H-250/U)
Cotton Duck Bag
(CW-503)
Support Antenna
(
AB-591/U
)
Antenna
(AT-271A/U)

2: Installation
2-6 PRC1099A-MSOP
Mobile Installations
Each configuration in this section is designed so that the core radio can be
quickly removed (jerk-and-run) for emergency use of the PRC1099A as a
manpack.
20W System The PRC1099A can be used in a 20W mobile configuration as shown below.
12V vehicle installations must use the MT-1099A-12 mount, and 24V vehicle
installations must use the MT-1099A-24 mount. Everything else, including
cabling, is the same.
1. Attach the battery box to the radio.
2. Slide the PRC1099A into the MT-1099A mount and clamp it in place.
3. Connect the cables as indicated.
Figure 2-3. Mobile 20W System
AAW
Whip
Adapter
DC Power
Source
RA-MAS
Whip Antenna
PRC1099A
MT-1099A
C991580
For 12V vehicles, use MT-1099A-12
For 24V vehicles, use MT-1099A-24
Note:
ACC
ANT
C991949
C992102
XCVR
J5
Cable Description
C991580 External DC power to MT-1099A, power cable
C991949 MT-1099A to PRC1099A, control cable
C992102 PRC1099A to RA-MAS, RF cable
Other manuals for PRC1099A
2
Table of contents
Other Datron Radio manuals
