Davina CADMUB-917N Owner's manual

Davina
“All I want in life is to help everyone
be healthier and more active
(and hopefully even enjoy it!)”
DAVINA AND FITNESS
Thank you for choosing Davina products. We
offer you the best equipment and instruction
possible to help you unleash your exercise
potential and optimize your training.
Important Note
Consult your physician before starting any
exercise program, especially if you have had
recent injuries, surgery, physical problems or
if you have been inactive for some time.
Read the safety warnings carefully and only
use the product as described in these
instructions to avoid accidental injury or
damage. Keep these instructions for future
reference. If you pass this product on to
another person, remember to give them
these instructions.
DAVINA’S MESSAGE
Important – Please read these instructions fully before assembly or using
VD/917N
Assembly & User Instructions - Please keep for future reference
24APR19
Important – Please read these instructions fully before assembly or use
These instructions contain important information which will help you get the best from your equipment and ensure
safe and correct assembly, use and maintenance.
If you need help or have damaged or missing parts, call the Customer Helpline: +44 (0) 1482 212098
CADMUB-917N
Davina Folding Magnetic Bike
Assembly & User Instructions - Please keep for future reference

2
Contents
3
4
5
7-11
12
Safety Information
Components - Parts
Components - Fixings
Assembly Instructions
Computer Operation
Exercising Information 13-16
Before starting to exercise 13
Muscle chart 14
Warming up and cooling down exercises 15
17
17
18
Care and Maintenance
Disposal information
Exploded Parts Diagram
Exploded Diagram Parts List
Warranty Information
19
20

3
Davina
Safety Information
To reduce the risk of serious injury, read the entire manual before you assemble or operate the Davina Folding
Magnetic Bike. In particular, note the following safety precautions:
Important – Please read fully before assembly or using
Assembly
Using
Battery safety
• Check you have all the components and tools listed,
bearing in mind that, for ease of assembly, some
components are pre-assembled.
• Keep children and animals away from the work area,
small parts could choke if swallowed.
• Make sure you have enough space to layout the
parts before starting.
• Assembletheitemasclosetoitsfinalposition(in
the same room) as possible.
• Position the equipment on a clear, level surface.
• Dispose of all packaging carefully and responsibly.
• Only one person at a time should use the
equipment.
• Keep hands away from all moving parts.
• Always wear appropriate workout clothing when
exercising. Do not wear loose or baggy clothing,
since it may get caught in the equipment. Wear
athletic shoes to protect your feet while exercising.
• Do not place any sharp objects around the
equipment.
• Disabled persons should not use the equipment
withoutaqualifiedpersonordoctorinattendance.
• This product is suitable for user’s weight of: 100kgs.
• This product conforms to: BS ENISO 20957 -1 and
-5class(H)-HomeUse.
•This exercise product has been designed and
manufacturedtocomplywiththelatest(BSEN957)
British and European Safety Standards.
• It is the responsibility of the owner to ensure that all
users of this product are properly informed as to how
to use this product safely.
• This product is intended for domestic use only. Do
not use in any commercial, rental, or institutional
setting.
• Before using the equipment to exercise, always do
stretching exercises to properly warm up.
• If the user experiences dizziness, nausea, chest
pain, or other abnormal symptoms stop the workout
and seek immediate medical attention.
Warning: Before beginning any exercise program, consult your Doctor. This is especially important for
persons over the age of 35 or persons with pre-existing health problems. You MUST read all instructions before
usinganyfitnessequipment.
• Warning: Incorrect installation of batteries may
cause battery leakage and corrosion, resulting in
damage to the computer.
• Do not mix old and new batteries, or
batteries of different types.
• Donotdisposeofbatteriesinafire.
• Do not dispose of batteries with
normal household waste, take to a
local recycling centre.

4
19. Main Frame x 1
1+4.ComputerwithHandlebarx1
2. Seat Adjustanle Frame x 1 6. Left Pedal x 1
5. Saddle x 1 7. Right Pedal x 1
3A. Front Stabilizer x 1 3B. Rear Stabilizer x 1
Components - Parts
Note:Someofthesmallercomponentsmaybepre-fittedtolargercomponents.
Please check you have all the parts listed below
If you have damaged or missing components, call
the Customer Helpline: +44 (0) 1482 212098
Note: Left hand threaded parts,
attach counter clockwise only

5
Davina
05 10 15 20 25 30 35 40 45 50 55 60 65 70 75 80 85 90 95 100 110 115 120 125 130 135 140 145 150 155 160 165 170
105
10
M6x15mm Bolt x 4
11
18x1.5 Flat Washer x 4
12
20x1.5 Cuved Washer x 4
13
M8 Cap Nut x 4
14
M8x50mm Cattiage Bolt x 4
8
Knob x 1
No.15
Safety Pin x 1
Tools
Allen Wrench x 1 Rigent Wrench x 1
Components - Fixings
Note: Someofthefixingsarepre-fittedtothelargercomponents.
Pleasecheckyouhaveallthefixingslistedbelow
Ruler - Use this ruler to help correctly identify the hardware
Note: Cutoutthispagetohelpfixingidentificationduringassembly.

6

7
Davina
13
13
12
13
12
12
19
3A
3B
14
14
Assembly Instructions
a:Attachfrontstabilizer(3A)tomain
frame(19),tightenwith2setsof
carriagebolt(14),washer(12)and
capnut(13).
Step 1
b:Then,attachrearstabilizer(3B)to
mainframe(19),tightenwith2sets
ofcarriagebolt(14),washer(12)and
capnut(13).

8
17
16
5
2
2
19
8
Assembly Instructions
a:Remove3xNylocknuts(17)
andplainwashers(16)from
saddle(5).AttachSaddleto
Seatpost(2),refitandtighten
fixings.
b:Insertseatpost(2)intomain
frame(19)andfixatdesired
heightwithknob(8),ensuringit
is fully engaged in the seat post
and tightened securely.
Step 2

9
Davina
4
9
1
19
18
15
11
10
10
11
18
9
Batteries
Battery
Compartment
4
Assembly Instructions
a:Attachhandlebar(1)tomain
frame(19).Using4setsofbolt
(10),atwasher(11).
b: Plug the pulse sensor wires
(18) andthespeedsensorwire
(9) tothebackofcomputer(4).
d: Remove the battery cover
from the back of the computer
(4) andinsert2pcsofAAA
batteriey(included).Seeinside
battery compartment for correct
orientation.
Step 3

10
6
7
19
7
6
Assembly Instructions
IMPORTANT NOTE:
LEFT PEDAL SCREWS
ON COUNTER (ANTI)
CLOCKWIZE.
Theleftpedal(6)andrightpedal
(7) whicharemarked“L”and“R”.
Connect them to their appropriate
crank arm. The right pedal is on the
right hand side of the cycle as you sit
on it.
Step 4
Note that the right pedal should be
threaded on clockwise and the left
pedal on counter-clockwise.

11
Davina
15
19
Assembly Instructions
Foldthemainframe(19)to
upright position. Insert the pin
(15) intotheholetosecure.
Note: When folding do not trap
yourfingersinthemovingparts
CAUTION:
Please ensure that the folding
bike is securely stored in either
anuprightorfullatposition
away from children.
Folding for storage

12
Computer Operation
Functions and operations
SPECIFICATIONS
TIME (TMR) 00:00 ~ 99:59 min
SPEED (SPD) 0.0 ~ 99.9 km/h
DISTANCE (DST) 0.00 ~ 999.9 km
ODOMETER (ODO) 0.00 ~ 999.9 km
CALORIES (CAL) 0 ~ 9999 kcal
HEART RATE (PULSE) 40 ~ 240 BPM
KEY FUNCTION
MODE: This key lets you to select and lock on to a particular function you want.
OPERATION PROCEDURES
1. AUTO ON/OFF:
▲ Thesystemturnsonwhenanykeyispressedorwhenitreceivesaninputfromthespeedsensor.
▲ Theprocessorturnsoffautomaticallywhenthespeedsensorhasnosignalinputornokeyispressedfor
approximately 4 minutes.
2. RESET:
The unit can be reset by changing the batteries or pressing the RESET key for 3 seconds.
3. HOWTOPRESETTIME,DISTANCE,PULSE&CALORIES:
PresstheMODEkeyuntilthefunctionbrandwhichisgoingtobepresetisashing.
PresstheMODEkeyoncethefunctionbrandstopashing.
Next, choose the value you want to exercise by the SET key.
When the speed sensor has any signal input, the monitor will begin to count down.
It will beep for 10 seconds to indicate the completion of workout which is preset, press any key to stop beeping.
If data is not preset, any function date will count up.
TIME The time of exercise will be displayed by pressing MODE. Key until brand TMR appear.
SPEED Current speed will be shown by pressing MODE key until brand DST appear.
DISTANCE The distance of each workout will be displayed by pressing MODE key until brand DST
appear.
CALORIES The calories burned will be displayed by pressing mode key until brand CAL appear.
SCAN Auntomatic display of the following functions in the order shown:
TIME→SPEED→DISTANCE→CALORIES(repeat)
4. BATTERY
Thecomputeruses2pcs“AAA”batteries.Youcanreplacethebatteriesatthebackoftheunit.

13
Davina
Exercising Information
Howyoubeginyourexerciseprogramdependsonyourphysicalcondition.Ifyouhavebeeninactiveforseveral
years, or are severely overweight, you must start slowly and increase your time on the equipment; a few minutes
per workout.
Initially,youmaybeabletoexerciseonlyforafewminutesinyourtargetzone,however,youraerobicfitnesswill
improve over the next six to eight weeks. Don’t be discouraged if it takes longer. It’s important to work at your own
pace.Ultimately,you’llbeabletoexercisecontinuouslyfor30minutes.Thebetteryouraerobicfitness,theharder
you will have to work to stay in your target zone.
Please remember these essentials:
• Haveyourdoctorreviewyourtraininganddietprogramstoadviseyouofaworkoutroutineyoushouldadopt.
• Begin your training program slowly with realistic goals that have been set by you and your doctor.
• Monitor your pulse frequently. Establish your target heart rate based on your age and condition.
• Setupyourequipmentonaatevensurfaceatleast3feetfromwallsandfurniture.
Exercise intensity
Tomaximizethebenefitsofexercising,itisimportanttoexercisewiththeproperintensity.Theproperintensity
level can be found by using your heart rate as a guide. For effective aerobic exercise, your heart rate should be
maintained at a level between 65% and 85% of your maximum heart rate as you exercise. This is known as your
targetzone.Youcanfindyourtargetzoneinthetablebelow.
Duringthefirstfewmonthsofyourexerciseprogram,keepyourheartratenearthelowendofyourtargetzone
as you exercise. After a few months, your heart rate can be increased gradually until it is near the middle of your
target zone as you exercise.
To measure your heart rate, stop exercising but continue moving your legs
orwalkingaroundandplacetwofingersonyourwrist.Takeasix-second
heartbeatcountandmultiplytheresultsby10tofindyourheartrate.For
example, if your six-second heartbeat count is 14, your head rate is 140
beatsperminute.(Asix-secondscountisusedbecauseyourheartratewill
drop rapidly when you stop exercising.) Adjust the intensity of your exercise
until your heart rate is at the proper level.
Before starting to exercise
80
100
120
140
160
180
200
Beats per minute (bpm)
25
Age
30 35 40 45 50 55 60 70
Cardiovascular
performance
Intermediate aerobic
Effective fat burning
Up to 55%
55% to 65%
65% to 85%
85% to Max

14
Exercising Information
Muscle chart
Aerobic Exercise
Aerobicexerciseimprovesthefitnessofyourlungsandheart-yourbody’smostimportantmuscle.Aerobic
exercisefitnessispromotedbyanyactivitythatusesyourlargemuscles(arms,legs,orgluteals,forexample).
Your heart beats quickly and you breathe deeply. An aerobic exercise should be part of your entire exercise
routine.
Weight Training
Along with aerobic exercising which helps get rid of and keep off the excess fat that our bodies can store, weight
training is an essential part of the exercise routine process. Weight training helps tone, build and strengthen
muscle. If you are working above your target zone, you may want to do a lesser amount of reps. As always,
consult your doctor before beginning any exercise program.
Muscle Groups
A:
Trapezius
B:
Anterior
C:
Pectoralis Major
D:
Serratus Anterior
E: Biceps
F: Abdominal
G: Sartorius
H: Quadriceps
I: Tibialis
J: Trapezius
K: Posterior
L: Triceps
M: Latissimus Dorsi
N: Gluteals
O: Hamstrings
P: Gastrocnemius
A
B
C
E
F
G
H
I
J
K
L
M
N
O
P
D
Front
Back

15
Davina
Exercising Information
Warming up and Cooling down exercises
Each workout should include the following three parts:
1. A warm-up, consisting of 5 to 10 minutes of stretching and light exercise. A proper warm-up increases your body
temperature, heart rate, and circulation in preparation for exercise.
2. Training zone exercise, consisting of 20 to 30 minutes of exercising with your heart rate in your training zone.
(Note:Duringthefirstfewweeksofyourexerciseprogram,donotkeepyourheartrateinyourtrainingzonefor
longer than 20 minutes.)
3. Acool-down,with5to10minutesofstretching.Thiswillincreasetheexibilityofyourmusclesandwillhelpto
prevent post-exercise problems.
Exercise Frequency
To maintain or improve your condition, plan three workouts each week, with at least one day of rest between
workouts.Afterafewmonthsofregularexercise,youmaycompleteuptofiveworkoutseachweek,ifdesired.
Remember, the key to success is make exercise a regular and enjoyable part of your everyday life.
Suggested Stretches
For a correct warm up, see the following basic stretching exercises. Move slowly as you stretch, never bounce.
Toe touch stretch
Hamstringstretch
Stand with your knees bent slightly and slowly bend
forward from your hips. Allow your back and shoulders
to relax as you reach down toward your toes as far as
possible.
Holdfor15counts,thenrelax.
Repeat 3 times.
Stretches:Hamstrings,backofkneesandback.
Sit with one leg extended. Bring the sole of the
opposite foot toward you and rest it against the inner
thigh of your extended leg. Reach toward your toes as
far as possible.
Holdfor15counts,thenrelax.
Repeat 3 times for each leg.
Stretches:Hamstrings,lowerbackandgroin.

16
Exercising Information
Calf/achilles stretch
Quadriceps stretch
Inner thigh stretch
With one leg in front of the other, reach forward and
place your hands against a wall. Keep your back leg
straightandyourbackfootatontheoor.Bendyour
front leg, lean forward and move your hips toward the
wall.
Holdfor15counts,thenrelax.
Repeat 3 times for each leg. To cause further stretching
of the achilles tendons, bend your back leg as well.
Stretches
: Calves, achilles tendons and ankles.
With one hand against the wall for balance, reach back
and grasp one foot with your other hand. Keeping your
bentkneepointingdirectlydownwardtowardsthefloor,
gentlypull your heel towards your gluteals until you
feel a gentle stretch in the target area.
Holdfor15counts,thenrelax.
Repeat 3 times for each leg.
Stretches
: Quadriceps and hip muscles.
Sit with the soles of your feet together and your knees
outward. Pull your feet toward your groin area as far as
possible.
Holdfor15counts,thenrelax.
Repeat 3 times.
Stretches
: Quadriceps and hip muscles.

17
Davina
Care and Maintenance
Using the Equipment
Information for Users on Disposal of old Equipment and Batteries(EuropeanUniononly)
1. Examine the equipment
periodically in order to detect any
damage or wear which may have
been produced.
2. Lubricate moving parts with
light oil periodically to prevent
premature wear.
3. Inspect and tighten all parts
before using the equipment,
replace any defective parts
immediately, and do not use
the equipment again until it is in
perfect working order.
4. The equipment can be cleaned
using a damp cloth and mild non-
abrasive detergent. Do not use
solvents.
5. Do not attempt to repair this
equipment yourself. Should you
haveanydifficultywithassembly,
operation or use of your exercise
product or if you think that you
may have parts missing.
CUSTOMER HELPLINE:
+44(0)1482212098
EMAIL:support@puretecfitness.com
WEB:www.puretecfitness.com
Guarantee:
For guarantee purposes, please
retain your purchase receipt.
These symbols indicate that equipment with these
symbols should not be disposed of as general household
waste. If you want to dispose of the product or battery,
please consider the collection systems or facilities for
appropriate recycling.
Notice: The sign Pb below
the symbol for batteries
indicates that this battery
contains lead.
Products
Battery

18
7
11
11
5
10
10
16 2
9
4
1
18
19
17
8
16
17
15
13
6
13
13
12
12
12
3B
14
3A
14
Exploded Parts Diagram

19
Davina
Part Description Qty
1HandleBar 1
2 Seat Post 1
3A Front Stabilizer 1
3B Rear Stabilizer 1
4 Computer 1
5 Seat 1
6Pedal(Left) 1
7Pedal(Right) 1
8 Adjustment Knob 1
9Wire(fromtheComputer) 1
10 CapNut(M6x15mm) 4
11 FlatWasher(18x1.5) 4
12 CurvedWasher(ø20xø8.5xT1.5) 4
13 CapNut(M8) 4
14 CurvedWasher(M8x50) 4
15 Safety Pin 1
16 FlatWasher(ø18xø8.5xT1.2) 3
17 NylockNut(M8) 3
18 Connect Wire 1
19 Main Body 1
Exploded Diagram Parts List

20
LIMITED WARRANTY
Pure-Tec. warrants this product to be free from defects in workmanship and material,
under normal use
and service conditions. Please refer to www.puretecfitness.com for
warranty conditions. This warranty
extends only to the original purchaser and is valid
for home use only. Pure-Tec’s obligation under this
Warranty is limited to replacing
damaged or faulty parts at Pure-Tec’s option.
All returns must be pre-authorised by Pure-Tec. This warranty does not extend to any
product or damage
to a product caused by or attributable to freight damage, abuse,
misuse, improper or abnormal usage,
purchasers own repairs or for products used for
commercial or rental purposes. No other warranty beyond that specifically set forth
above is authorised
by Pure-Tec.
Pure-Tec is not responsible or liable for indirect, special or consequential damages
arising out of or in
connection with the use or performance of the product or other
damages with respect to any economic
loss, loss of property, loss of revenues or profits,
loss of enjoyments or use, costs of removal, installation
or other consequential damages
or whatsoever natures.
The warranty extended hereunder is in lieu of any and all other warranties and any implied
warranties of
merchantability or fitness for a particular purpose is limited in its scope and
duration to the terms set forth
herein.
Your statutory rights are not affected.
ORDERING REPLACEMENT PARTS
Replacement parts can be ordered by contacting our Customer Solutions Department
Monday to Friday 9am to 5pm GMT.
Pure-Tec Limited
www.puretecfitness.com
Tel: +44 (0) 1482 212098
Email: service@puretecfitness.com
Monday - Friday 9 a.m. – 5 p.m. GMT
When ordering replacement parts, please provide the following information.
1.
Model
2.
Description of Parts
3.
Part Number
4.
Date of Purchase
Table of contents
Popular Fitness Equipment manuals by other brands

Weider
Weider WEBE4496.0 user manual
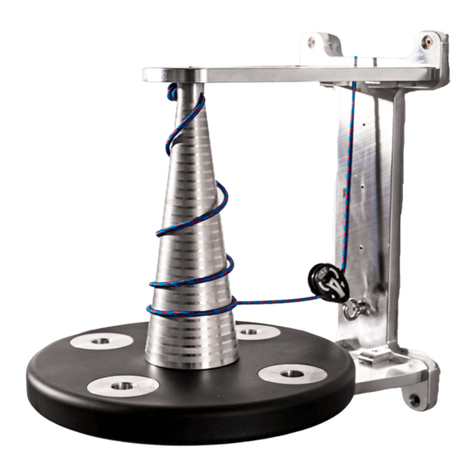
Inercial Performance
Inercial Performance RSP CONIC Installation and user instructions
Concept2
Concept2 Dynamic Indoor Rower User's product manual
Tuff stuff
Tuff stuff SP-404 Assembly instructions
ICON
ICON WESLO MOMENTUM G 3.2 user manual
Muscle Hammer
Muscle Hammer GLIDE quick start guide

