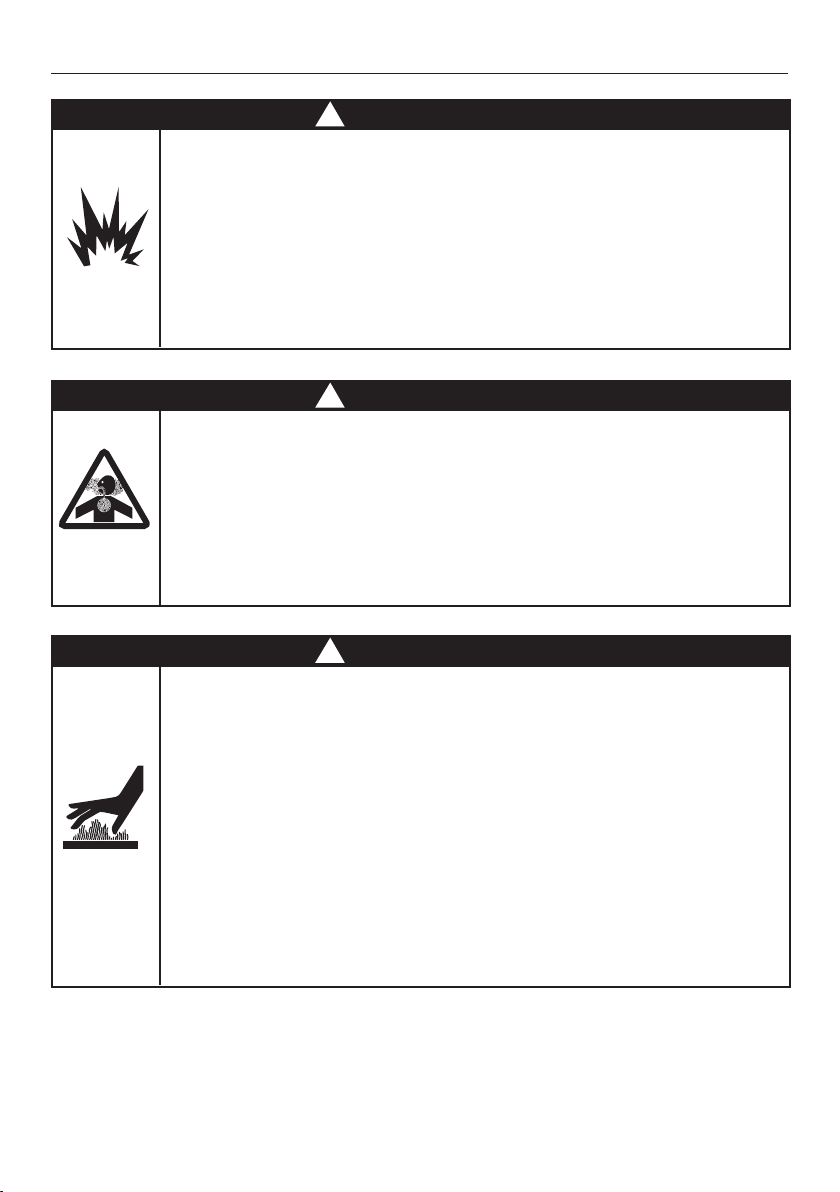
DCS CDV2 SERIES User manual

Drop-in gas cooktops
Table de cuisson suspendue
CDV2 models
Modèles CDV2
US CA
GUIDE D’UTILISATION
USER GUIDE

Do not store or use gasoline or other flammable
vapors and liquids in the vicinity of this or any
other appliance.
NEVER use this appliance as a space heater to
heat or warm the room. Doing so may result in
carbon monoxide poisoning and overheating of
the appliance.
WHAT TO DO IF YOU SMELL GAS
Do not try to light any appliance.
Do not touch any electrical switch.
Do not use any phone in your building.
Immediately call your gas supplier from a
neighbor’s phone. Follow the gas supplier’s
instructions.
If you cannot reach your gas supplier, call the
fire department.
Installation and service must be performed by
a qualified installer, service agency or the gas
supplier.
WARNING!
If the information in this manual is not
followed exactly, a fire or explosion may
result causing property damage, personal
injury or death.
!

1
CONTENTS
IMPORTANT!
SAVE THESE INSTRUCTIONS
The models shown in this user guide may not be available in all markets and are subject
to change at any time. For current details about model and specification availability in
your country, please visit our website listed on the back cover
or contact your DCS by Fisher & Paykel dealer.
Safety and warnings 2
Introduction 7
Using your cooktop 8
Using the cooktop burners 10
Guidelines for using the cooktop burners 11
Care and cleaning 12
Troubleshooting 17
Warranty and service 19
EN

2
SAFETY AND WARNINGS
To reduce the risk of fire, electrical shock, injury to persons, or damage when using the
appliance, follow the important safety instructions listed below:
WARNING!
Electrical Shock Hazard
This appliance is equipped with a three-prong grounding
plug for your protection against shock hazard and should be plugged
directly into a properly grounded power outlet. Do not under any
circumstances cut or remove the grounding prong from this plug.
Failure to follow this advice may result in electrical shock.
!
WARNING!
FIre Hazard
Never use your appliance for warming or heating the room. Persons could
be injured or a fire could start.
Keep the area around the appliance free from combustible materials (e.g.
wall coverings, curtains, drapes), gasoline and other flammable vapors
and liquids.
Never store flammable materials on or near the cooktop.
Do not let cooking grease or other flammable materials accumulate on or
near the appliance.
Never leave the cooktop burners unattended when in use –
Boilover causes smoking and greasy spillovers that may ignite.
Be sure all the controls are turned off and the appliance is cool before
using any type of aerosol cleaner on or around the appliance. Chemicals
in such cleaners could, in the presence of heat, ignite or cause metal parts
to corrode.
Failure to follow this advice may result in death or serious injury.
!

3
SAFETY AND WARNINGS EN
WARNING!
Explosion Hazard
If you smell gas, do not use the appliance. Open a window or door to let
the gas escape, then follow the instructions on the inside front cover of
this manual.
Do not use water on grease fires. A violent steam explosion may result.
Turn all burners off, then smother fire or flame or use dry chemical or
foam-type extinguisher.
Do not heat unopened food containters such as cans – Build-up of
pressure may cause container to burst and result in injury.
Failure to follow this advice may result in injury or death.
!
WARNING!
Poisoning Hazard
Clean the appliance with caution. If a wet sponge or cloth is used to wipe
spills on a hot cooking area, be careful to avoid steam burn. Some
cleaners can produce noxious fumes if applied to a hot surface. Follow the
directions of the cleaner manufacturer.
Never use this appliance as a space heater to heat or warm the room.
Doing so may result in carbon monoxide poisoning and overheating of
the appliance.
Failure to follow this advice may result in poisoning or death.
!
WARNING!
Hot Surface Hazard
Accessible parts may become hot during use.
Do not touch burners or areas near burners. These may be hot enough to
cause burns even though they are dark in color. During and after use, do
not touch, or let clothing or other flammable materials contact these parts
and surfaces until they have had sufficient time to cool. Other parts and
surfaces of the appliance may become hot enough to cause burns - among
these areas are the grates, back trim at the back of the cooktop, front
edge, surfaces adjacent to the cooktop.
Use only dry potholders – Moist or damp potholders on hot surfaces may
result in burns from steam. Do not let potholder touch hot heating
elements. Do not use a towel or other bulky cloth.
Let hot grease cool before attempting to handle it.
Failure to follow this advice may result in serious injury.
!

4
SAFETY AND WARNINGS
IMPORTANT SAFETY INSTRUCTIONS!
Operational
Read all the instructions before using the appliance. Use the appliance only for its
intended purpose as described in these instructions.
Be sure your appliance is properly installed and grounded by a qualified technician.
Be sure to have the installer show you where and how to turn off the power supply
to the cooktop (i.e. location of the main fuse or circuit breaker panel) and where and
how to turn off the gas supply to the cooktop in an emergency.
Keep children away from the cooktop when it is in use.
Household appliances are not intended to be played with by children.
Children of less than 8 years old must be kept away from the appliance unless
continuously supervised. This appliance can be used by children aged from 8 years
and above, and persons with reduced physical, sensory or mental capabilities or
lack of experience and knowledge, if they have been given supervision or instruction
concerning the use of the appliance in a safe way and they understand the hazards
involved. Cleaning and user maintenance shall not be done by children without
supervision.
If the electrical supply cord is damaged, it must only be replaced by an authorized
person.
If the appliance is connected to the gas supply with a flexible hose, make sure that
the hose cannot come in contact with the bottom of the appliance or any sharp edges.
Ensure that the electrical connection plug is accessible after installation.
This appliance should be connected to a circuit that incorporates an isolating switch
providing full disconnection from the electricity supply.
Do not use an asbestos mat or decorative covers between the flame and the saucepan
as this may cause serious damage to your cooktop.
Do not place aluminium foil or plastic dishes on the cooktop burners or use aluminum
foil to line any part of the cooktop.
Do not let large saucepans, frying pans or woks push any other pans aside. This could
make them unstable or deflect heat onto your countertop and damage the surface.
For efficient and safe cooking, use cookware of the appropriate size for the different
burners on this appliance. Select cookware with flat bottoms large enough to cover
the burner flames. The use of undersize cookware will expose a portion of the burner
flames to direct contact and may result in ignition of clothing.
For safety reasons, the cooktop burner flame size should be adjusted so it does not
extend beyond the edge of the cookware.
Glazed cooking utensils – only certain types of glass, glass/ceramic, ceramic,
earthenware, or other glazed utensils are suitable for cooktop service without
breaking due to the sudden change in temperature.
Do not use a steam cleaner for cleaning this cooktop.
Clean only the parts listed in this manual.
For proper lighting and performance of the cooktop burners, keep the burner ports
clean. It may be necessary to clean these when there is a boil over or when the burner
does not light, even though the electronic igniters click.
Saucepan handles may be hot to touch. Ensure saucepan handles do not overhang
other gas burners that are on. Keep handles out of reach of children.
After use, ensure that the control knobs are in the OFF position.

5
SAFETY AND WARNINGS
IMPORTANT SAFETY INSTRUCTIONS!
Operational
Where this appliance is installed in marine craft or in caravans, it shall not be used as
a space heater.
The use of a gas cooking appliance results in the production of heat and moisture in
the room in which it is installed. Ensure the kitchen is well ventilated. Keep natural
ventilation holes open or install a mechanical ventilation device (mechanical extractor
hood). Prolonged intensive use of the appliance may call for additional ventilation,
for example opening of a window, or more effective ventilation, for example
increasing the level of mechanical ventilation where present.
After having unpacked the appliance, check to ensure that it is not damaged.
Be careful when reaching for items stored in cabinets above the appliance.
Wear proper apparel – Loose-fitting or hanging garments should never be worn while
using the appliance.
In case of doubt, do not use the cooktop and consult your supplier or a professionally
qualified technician.
Packing elements (eg plastic bags, polystyrene foam, nails, packing straps, etc.)
should not be left around within easy reach of children, as these may cause serious
injuries.
Do not modify this appliance.
Some products are supplied with protective film on steel and aluminium parts. This
film must be removed before using the appliance.
Ensure the area around the gas cooktop is always clear of combustible materials,
gasoline and other flammable vapors and liquids.
Do not stand or place heavy objects on this gas appliance.
For safety reasons, do not store items of interest to children above or at the back of
the appliance - children climbing on the appliance to reach items could be seriously
injured.
When deep-frying in fat, be sure the pan is large enough to avoid boiling over from
bubbling of the fat. Do not deep-fry foods with a high moisture content or food
covered with frost.
Do not let cooking grease or other flammable materials accumulate near the
appliance.
Do not repair or replace any part of the appliance unless specifically recommended in
this user guide.
You should not attempt to disassemble the burner and modify the original gas flow
settings. Doing so is extremely dangerous and will void the warranty. All other
servicing should be referred to a qualified technician. Technicians must disconnect the
appliance from the power supply before any servicing.
This appliance is to be serviced only by an authorized person.
The Governor of California is required to publish a list of substances known to the
state of California to cause cancer or reproductive harm and requires businesses to
warn customers of potential exposures to such substances.
WARNING! Gas appliances contain or produce substances which can cause death or
serious illness and which are known to the State of California to cause cancer, birth
defects or other reproductive harm. To reduce the risk from substances in fuel or
from fuel combustion, make sure this appliance is installed, operated, and maintained
according to the manufacturer’s instructions.
EN


7
INTRODUCTION EN
About your new cooktop
Thank you for buying a DCS by Fisher & Paykel gas cooktop. We recommend you read
the whole guide before using your new cooktop, for both safety and cooking success.
For more information, visit our website listed on the back cover.
Safety feature: Auto-reignition
Auto-reignition is for your convenience and safety. The auto-reignition feature causes
the ignitors to spark automatically and the burner to relight if a flame blows out or if the
flame is severely distorted by a draft or a cooktop ventilation system.
Before using the cooktop for the first time
Find the model and serial numbers on the label on the underside of the chassis.
Note these numbers down for future reference in the space provided in section
`Warranty and service’.
Read this guide, taking special note of the ‘Safety and warnings’ section.
Remove all the packaging from the cooktop. Recycle items that you can. If any adhesive
residue is left on surfaces, remove this using dishwashing liquid on a soft cloth.
Do not use any harsh or abrasive cleaners.

8
USING YOUR COOKTOP
CDV2-304
CDV2-365
PLAN VIEW
PLAN VIEW
BURNER MAX. BTU/HR SIMMER BTU/HR
NG LP NG & LP
C15,000 12,000 1,200
D20,000 20,000 1,200
BURNER MAX. BTU/HR SIMMER BTU/HR
NG LP NG & LP
C15,000 12,000 1,200
D20,000 20,000 1,200
1C burner
2D burner
3Control knobs
1C burner
2D burner
3Control knobs
1
1
1
1
3
3
2
1
1
1
2

9
EN
USING YOUR COOKTOP
OFF
HI
LO
SIM
OFF
HI
LO
SIM
OFF
HI
LO
SIM
OFF
HI
LO
SIM
1Identify the knob of the burner you
want to use.
3After the burner has lit, adjust the flame
anywhere between HI and SIM.
Do not adjust or leave the knob
between HI and OFF.
IMPORTANT!
Turn the burner OFF and see
‘Troubleshooting’ for what to do next if
you experience any of the following:
There’s a strong gas smell.
The flame has been blown out by a draft
or extinguished by a spill and does not
re-ignite.
There is no clicking/sparking or there is
clicking/sparking, but a burner or burners
won’t light.
The flames don’t burn all the way
around a burner, or some flames flicker.
The flame is yellow or yellow-tipped
rather than blue.
The flames are too large, small, irregular,
noisy or lift away from the burner.
2Press down then turn counter-clockwise
to HI.
The ignitors start clicking as they spark.
CDV2-365H/304H models only:
All the halos will glow white.
Once the burner lights, the halo will
glow orange.
If there is no clicking, there is no spark
to light the burner. If the burner fails to
light turn the knob back to OFF and see
‘Troubleshooting’.
4When you have finished cooking, turn the
knob clockwise back to OFF.
CDV2-365H/304H models only:
If you have other burners on:
The halo will glow white.
If you don’t have any other burners on:
All the halos will go out.
Check that the burner has gone out.
Before leaving the kitchen, check that
all burners have been turned off.
Burner
indicator
Halo
(Orange)
-H models
only

10
USING THE COOKTOP BURNERS
Cooking guidelines
IMPORTANT!
Never leave the cooktop unattended when in use. Boilover causes smoking and
greasy spills that may ignite.
Take care when deep-frying: oil or fat can overheat very quickly, particularly on a high
setting.
Using a lid will reduce cooking times through retaining the heat.
Minimise the amount of liquid to reduce cooking times.
Cookware
Use saucepans with thick flat bases.
For best results we recommend using professional cookware.
If using regular cookware, be very careful if the pans have plastic handles, as these
professional size burners can flame up on the outside of the pan and melt or bubble the
handles.
Do not let large saucepans or frying pans overlap the bench, as this can deflect heat
onto your countertop and damage its surface.
Always make sure saucepans are stable by centring them over the burner.
Make sure the size of the pan matches the size of the burner. A small pot on a large
burner is not efficient.

11
GUIDELINES FOR USING THE COOKTOP BURNERS EN
All burners have the same low turn-down setting (SIM) for gentle simmering
(1,200 BTU/hr). Use the SIM setting for melting chocolate and butter, cooking rice and
delicate sauces, simmering soups and stews, and keeping cooked food hot.
For cooking that requires especially intense heat (e.g. searing meat, wok-cooking, stir-
frying), use the D burners, as these have a higher maximum output
(20,000 BTU/hr for Natural gas) than the other burners (15,000 BTU/hr for Natural gas).
Never leave the cooktop unattended when in use. Boilover causes smoking and greasy
spills that may ignite.
Never allow flames to extend beyond cookware or curl up its sides. This could discolor
and damage the utensil and you may get burned touching a hot handle.
Keep handles out of the way. Turn handles so that they don’t extend over the edge of
the cooktop or another burner that is on.
Take care when deep-frying. Oil or fat can overheat very quickly, particularly on a high
setting.
Make sure that all burner parts are properly in place. Incorrectly or incompletely
assembled burners may produce dangerous flames. See ‘Replacing the burner parts’ in
‘Care and cleaning’.
Keep the burners clean. Especially after a spill or boilover, make sure you clean the
affected burners before using them again. Food residue may clog the ignitor and the
notches of the flame spreader, stopping the burner from functioning correctly. See ‘Care
and cleaning’ for instructions.
Check that the burner flames are regular. They should be blue with no yellow tipping,
and burn without fluttering all around the burner cap. If not, see ‘Troubleshooting’ for
advice.
Use woks only with a wok ring. Wok rings can be purchased separately through your
DCS by Fisher & Paykel dealer or Customer Care. To use, place the wok ring over the
grates, making sure the small protrusions on its bottom straddle the grate fingers. The
wok ring should be stable and unable to rotate.
Ignitor
Notches Flame spreader
(Brass)
Burner cap
CORRECT WRONG

12
DOS DON’TS
Read these cleaning instructions and the
‘Safety and warnings’ section before you
start cleaning your cooktop.
Before cleaning or removing any part,
make sure that everything on the cooktop
has been turned off.
Unless suggested otherwise in the chart
following, allow any part to cool to a
safe temperature before cleaning. Wear
long protective mitts to avoid burns from
steam or hot surfaces.
Try using any cleaner on a small area first,
to ensure it doesn’t stain.
Use only clean sponges, soft cloths, paper
towels, and plastic non-metal pads for
cleaning or scouring (use only soap pads
with soap still in them, an empty pad can
scratch).
Do not use aerosol cleaners until
the cooktop has completely cooled.
The propellant substance in these
cleaners could catch fire in the
presence of heat.
Do not let soiling or grease
accumulate anywhere on the
cooktop. This will make future
cleaning more difficult and may
present a fire hazard.
Do not use any abrasive or harsh
cleaners, cloths, scouring pads or
steel wool. These will scratch your
cooktop and damage its appearance.
Do not use a steam cleaner to clean
any part of the cooktop.
Do not perform any cleaning
or maintenance on parts not
specifically named in the chart
below. If in doubt, contact Customer
Care.
CARE AND CLEANING
IMPORTANT!
Before any cleaning or maintenance, always:
turn all burners off.
switch the power to the cooktop off at the wall.
make sure that the cooktop and its parts are a safe temperature to touch.
General advice
Clean the cooktop regularly—do not let stains become burnt on, as they may become
very difficult to remove.
All parts of the appliance can be cleaned with a small amount of hot soapy water,
rinsed, dried and buffed to a shine with a soft, heavy pile cloth. Always try this first, as it
is the mildest cleaning procedure.
Do not use abrasive cleaners, cloths or pads to clean any part of your cooktop. Some
nylon scourers may also scratch. Check the label.
To avoid marring the surfaces, always rub metal finishes in the direction of the polish
lines. The cleaner will be more effective when used in the direction of the polish lines.
Clean up spillages as soon as possible. If left to dry on, food residue may clog the flame
ports, causing an uneven flame pattern.
Make sure that no cleaner residue is left on any cooktop part; when heated, these could
stain the cooktop.
See the following pages for instructions on reassembling the burners correctly after
cleaning.
Do not clean cooktop parts in a self-cleaning oven.
Do not use a steam cleaner.

13
CARE AND CLEANING EN
DOS DON’TS
Read these cleaning instructions and the
‘Safety and warnings’ section before you
start cleaning your cooktop.
Before cleaning or removing any part,
make sure that everything on the cooktop
has been turned off.
Unless suggested otherwise in the chart
following, allow any part to cool to a
safe temperature before cleaning. Wear
long protective mitts to avoid burns from
steam or hot surfaces.
Try using any cleaner on a small area first,
to ensure it doesn’t stain.
Use only clean sponges, soft cloths, paper
towels, and plastic non-metal pads for
cleaning or scouring (use only soap pads
with soap still in them, an empty pad can
scratch).
Do not use aerosol cleaners until
the cooktop has completely cooled.
The propellant substance in these
cleaners could catch fire in the
presence of heat.
Do not let soiling or grease
accumulate anywhere on the
cooktop. This will make future
cleaning more difficult and may
present a fire hazard.
Do not use any abrasive or harsh
cleaners, cloths, scouring pads or
steel wool. These will scratch your
cooktop and damage its appearance.
Do not use a steam cleaner to clean
any part of the cooktop.
Do not perform any cleaning
or maintenance on parts not
specifically named in the chart
below. If in doubt, contact Customer
Care.
Manual cleaning chart
WHAT?
HOW OFTEN? HOW? IMPORTANT!
Stainless steel
base
After every use
1Soak any stubborn stains
under a hot soapy cloth.
2Wipe the soiling off with a
cloth using a mild household
detergent or stainless steel
cleaner.
3Wipe with a clean damp
cloth.
4Wipe the surface dry with a
microfiber cloth.
5For extra shine, use a
suitable stainless steel polish.
Hard water spots can be
removed with household
white vinegar.
Do not use abrasive cleaners,
steel soap pads or sharp
objects on stainless steel.
Always read the label to
make sure that your stainless
steel cleaner does not
contain chlorine compounds
as these are corrosive and
may damage the appearance
of your cooktop.
Always rub the stainless steel
in the direction of the grain.
The graphics are etched onto
the steel by laser and will
not rub off.
Control knobs
As required
1Wipe with a damp cloth
using a solution of mild
detergent and hot water.
2Dry thoroughly with
microfiber cloth.
If wished, the knobs can be
removed for cleaning. Before
removing a knob, make sure
that it is set to OFF, then pull
it straight upwards. Remove
only one knob at a time, and
make sure that you refit it
on its shaft completely and
correctly after cleaning.
Do not use stainless steel
cleaner or oven cleaner on
these parts, as doing so may
damage their coating.

14
CARE AND CLEANING
WHAT?
HOW OFTEN? HOW? IMPORTANT!
Burner caps
and
brass flame
spreaders
As needed,
but at least
once a month
1Check that the burner is turned
OFF and allow it to cool.
2Lift off the burner cap and
brass flame spreader.
3Wash them in hot soapy water,
rinse, and dry.
Use a stiff nylon brush or
straight-ended paper clip to
clear the notches of a flame
spreader.
4Replace the flame spreader
and burner cap correctly. See
‘Replacing the burner parts’.
Keep the notches of the flame
spreaders clear. Soiling may
clog these and cause ignition
problems.
Before replacing the burner
parts, check that they are dry.
Wet burner parts may result
in an irregular flame.
Before lighting a burner you
have reassembled, check that
all of its parts are positioned
correctly. Incorrect assembly
can cause dangerous irregular
flames and ignition problems.
Ignitors
At least once
a month
1Check that the burner is turned
OFF.
2Clean the ignitor with a small
brush (e.g. old toothbrush)
or cotton swab that has been
dipped into denatured alcohol..
The ignitors must be kept
clean and dry to work
correctly. Dirty or wet ignitors
could cause constant clicking
and sparking, even if a flame
is present.
Burner grates
As needed,
but at least
once a month
1Wait until the grates have
cooled completely.
2Carefully lift the grates off the
cooktop and place them on a
protected surface.
3To remove stubborn stains,
soak the grates in a mixture of
clothes washing detergent and
water.
4Wash in a mixture of hot water
and dishwashing liquid, then
rinse and allow to dry.
The grates are also dishwasher
safe.
Take care, the grates are
heavy.
Make sure you place a dish
towel or other soft cover on
the surface before putting a
grate on it.
Rapid cooling of the grates
such as placing hot grates in
cool or tepid water to clean,
can thermally shock the
porcelain coating and cause
cracking or chipping.
All gas
components
of the cooktop
Once every
3-4 years
Contact your local Authorized
Repairer to perform a thorough
check on all gas components of
the cooktop.
For Authorized Repairer details,
see your Service & warranty
book.
All checking and maintenance
must be performed by a
suitably qualified person.
If the gas is connected with a
flexible hose, checking should
include inspecting the entire
length of the flexible hose
assembly for any sign of wear
or damage.

15
CARE AND CLEANING
WHAT?
HOW OFTEN? HOW? IMPORTANT!
Simmer ring
As needed,
disassemble
only if ports
remain
clogged
after normal
cleaning of
burner parts
1Check that the burner is turned OFF
and allow it to cool.
2Lift off the burner cap and brass
flame spreader.
3Remove the hex nut at the top of
the simmer ring and lift off.
4Wash in hot soapy water using a
soft wire or plastic bristle brush,
rinse, and dry. Make sure all holes
are clear and open.
5Replace the simmer ring on burner
base and secure with the hex nut,
then replace the flame spreader
and burner cap. See ‘Replacing the
burner parts’.
Normal cleaning does
not require the simmer
ring to be disassembled,
however if ports remain
clogged after normal
cleaning it may be
necessary to remove the
simmer ring and clean
separately.
When replacing the
simmer ring, ensure
the locating pin on the
bottom aligns with the
corresponding hole
in the burner base.
Incorrect alignment will
produce a potentially
dangerous flame
and poor burner
performance.
Before replacing the
burner parts, check that
they are dry. Wet burner
parts may result in an
irregular flame.
Before lighting a burner
you have reassembled,
check that all of its parts
are positioned correctly.
Incorrect assembly
can cause dangerous
irregular flames and
ignition problems.
Wok ring
(not supplied,
purchased
separately)
As needed,
but at least
once a month
1To remove stubborn stains, soak
the wok ring in a mixture of clothes
washing detergent and water.
2Wash in a mixture of hot water and
dishwashing liquid, then rinse and
allow to dry.
When replacing, place
the wok ring over the
grates, making sure the
small protrusions on
its bottom straddle the
grate fingers. The wok
ring should be stable
and unable to rotate.

16
CARE AND CLEANING
Replacing the burner parts
IMPORTANT!
When replacing the burners, make sure that the two locating pins on the bottom of
the brass flame spreader are properly aligned with the locating pin holes on the top
of the simmer ring. Incorrect alignment will produce a potentially dangerous flame
and poor burner performance.
Burner cap
Main Burner Port
Ring
Burner Base
Simmer Ring
Igniter
Venturi
Locating Notch
Locating Pin
Hole Inside
Locating Pin
Hex Nut
Locating Pin

17
TROUBLESHOOTING
If you can’t find an answer to your problem in the chart below, or if the problem cannot
be fixed, you will need technical help. Contact your Authorized Service Center or
Customer Care.
EN
PROBLEM POSSIBLE CAUSES AND SOLUTIONS
There is a strong gas
smell.
The gas connection could be leaking because of
incorrect installation or damaged piping
IMPORTANT!
Do not use any electrical equipment or operate any
electrical switches.
1If any burners are on, turn all of them off
immediately.
2If you know how to shut off the gas supply to your
cooktop (either at the valve or the gas bottle), do so.
3Open a window to let the gas out.
4Contact your local Authorized Repairer as soon as
possible.
IMPORTANT!
Do not use the cooktop until it has been repaired.
There is a slight rubbery or
metallic smell when I use the
cooktop for the first time.
This is normal for first use and is caused by
manufacturing residues burning off. The smell will
disappear with use.
There is a power failure. You can still use your cooktop, but will need to match-
light the burner(s). To do so, press down and turn the
knob counter-clockwise to LO while holding a lighted
match close to the side of the burner. Wait until the
flame is burning evenly before adjusting it.
There is no clicking/
sparking.
The ignitor is dirty or there is a power failure. See ‘Care
and cleaning’ for instructions, or the entry ‘There is a
power failure’ above.
There is clicking/
sparking, but a burner
or burners won’t light
easily or at all.
The ignitor(s) may be dirty or wet. Clean them following
the instructions in ‘Care and cleaning’.
Wait 1 minute, then try to relighting the burner again,
holding the dial for a few more seconds this time
around. If this doesn’t work and the burner still won’t
light, see the other possible causes and solutions below.
The gas supply may not be turned on at the valve or gas
bottle. Turn all the burners off, and check whether the
gas supply to the cooktop is turned on.
The gas supply to the house may not be working. You
should hear the gas when you turn a burner on.
If you use bottled gas, this may indicate you are getting
near the end of the bottle and need to replace it.
Burner parts may be clogged or wet. Make sure that
they are clean and dry. See ‘Care and cleaning’ for
instructions.
Burner parts may not have been replaced correctly.
Check the assembly and make sure the burner cap is
sitting flat. See ‘Care and cleaning’ for illustrations.

18
TROUBLESHOOTING
PROBLEM POSSIBLE CAUSES AND SOLUTIONS
The flame has been
blown out by a draft
or extinguished by a
spill.
The auto-reignition feature will recognise this. The
ignitors will spark and attempt to relight the burner. If
the burner fails to relight, turn the burner off, then wait
for at least 1 minute before attempting to relight. This
is to allow for any small amount of gas that may have
escaped to disperse.
The flame goes out at
low settings.
The gas supply pressure may be low. Check this with
your service person or installer.
If you use bottled gas, this may indicate you are getting
near the end of the bottle
The flames are yellow
or yellow-tipped rather than
blue.
Burner parts (especially the flame ports) may be clogged
or wet. Check that they are clean and dry.
The cooktop may have been connected to the wrong
type of gas or the gas pressure is not correct. Contact
Customer Care and do not use your cooktop until it has
been checked by a qualified technician.
The flame pattern is uneven
around the burner.
Burner parts (especially the flame ports) may be clogged
or wet. Check that they are clean and dry. After cleaning,
check that there is flame coming out of each port.
Burner parts may not have been replaced correctly.
Check the assembly and make sure the burner cap and/
or ring is sitting flat on the flame spreader. See ‘Care and
cleaning’ for illustrations.
The flames are too
large, or too small.
The cooktop may have been connected to the wrong
type of gas. Contact Customer Care and do not use
your cooktop until it has been checked by a qualified
technician.
The flames are noisy.
The flames lift away
from the burner.
Burner cap
Other manuals for CDV2 SERIES
1
Table of contents
Languages:
Other DCS Cooktop manuals