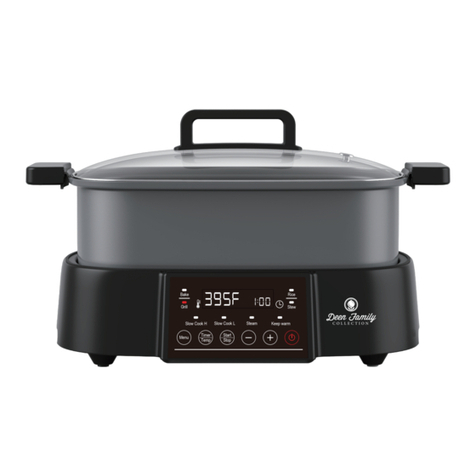
Deen Family LS-MC01ADF User manual

2-in-1 MULTI COOKER & GRILL!
MODEL LS-MC01ADF!
Instruction Manual!
1

IMPORTANT SAFEGUARDS
When using electrical appliances, basic safety
precautions should be followed:
• Read all the instruc0ons.
• Do not use the unit for anything other than intended use.
• Never immerse the unit fully into water or other liquid to
avoid damage to the unit.
• Do not leave the unit unattended during operation.
• Do not place the unit on or near gas or electric cooktops
to avoid damages.
• Make sure the unit is unplugged before moving the unit.
• Place the unit on a level surface away from walls and
cupboards. Do not let the cord hang over the edge of a
table or counter or touch hot surfaces.
• Close supervision is necessary when any appliance is
used by or near children.
• Do not move the appliance during cooking.
• If you are using plastic utensils, do not leave them
inside the appliance when hot.
• Do not use sharp utensils in the unit to avoid damaging
the coating.
• Do not touch hot surfaces. Use handles with dry pot
holders or oven mitts to move the unit.
• Do not use the unit near or under surfaces that are heat
sensitive or those that may be damaged by steam.
• Extreme caution must be used since the unit contains
hot food, hot oils and liquids.
2

• Do not place inner pot onto heat, gas or electric burner.
• Do not use a damaged or cracked inner pot.
• Use only the inner pot supplied. Do not use any other
pot inside the housing.
• Never operate the unit without food and liquid in the
inner pot.
• Ensure food or liquid to be cooked fills half or more of
the inner pot before switching on the appliance.
• Do not place frozen or very cold foods into the inner pot
when it is hot.
• Do not place inner pot when hot into cold water or
freezer.
• Do not start the unit when the unit has no liquid inside.
• Do not place anything, other than the lid, on top of the
unit when assembled, when in use and when stored.
• Do not use the unit with an extension cord, always plug
into a wall outlet.
• Unplug from outlet when not in use and before cleaning.
Allow to cool before cleaning.
• To prevent electrical shock do not immerse the cord in
water or other liquid.
3

• Do not operate unit with a damaged cord or plug or after
the unit malfunctions or has been damaged in any
manner. Do not place the cord underneath the unit at
any time.
• A short power supply cord is supplied to reduce the risk
of the cord becoming tangled or tripping over a long
cord.
• If the plug does not fit fully into the outlet, reverse the
plug. If it still does not fit, contact a qualified electrician.
Do not attempt to modify the plug in any way.
• Do not use outdoors.
• SAVE THESE INSTRUCTIONS.
4

BEFORE FIRST USE
1. Remove all packaging materials. Locate all included parts
before discarding the box.
2. Clean the lid, and pot with hot water, dishwashing liquid,
and a non-abrasive sponge.
3. Wipe the inside and outside of the unit with a soft cloth.
USING THE APPLIANCE
Control Panel
5
The Select button
aides in picking
which function to
cook with by
toggling through the
screen.
The “-“ button is
used to decrease
the time and
The “+” button is
used to increase the
time and the
temperature.
The control panel will illuminate once the unit is plugged in and the red power button
is pressed. To select one of the eight preset cooking functions press MENU until the
desired preset cooking function is illuminated. The time and temperature can be adjusted
by pressing TIMER/TEMP. To adjust the time press TIMER/TEMP until the time is flashing
on the screen, then to adjust the time press “+” to increase time or “-“ to decrease time. To
change the temperature press TIMER/TEMP until the temperature is blinking on the
screen, then to adjust the temperature press “+” to increase the temperature or “-“ to
decrease the temperature. Once the desired time and temperature is set press the
START/STOP button to begin cooking. You can stop the function by pressing START/
STOP again.
This button is used
to start or stop the
multi-cooker.
The Timer/Temp
button aides in
changing the
temperature and
the time.
The power button is
used to power on
and offthe multi-
cooker.

Operating Instructions
Before placing the inner pot in the housing, ensure the exterior is
clean and dry. This will ensure proper contact with the inner
cooking surface.
Using the Bake Function
1. Place the inner pot on the base then place ingredients in the
inner pot.
2. Press the “POWER” button to turn on the multi-cooker.
3. Press the “SELECT” until the “BAKE” function is selected on
the screen.
4. The default temperature is 350°F and the default time is 1
hour, use the “TEMP/TIME” to set desired time and
temperature.
5. After pressing the “TEMP/TIME”, the temperature will be
blinking. To adjust the temperature, press “+” and “-” to adjust
(range is from 250 to 395°F).
6. To adjust the time, press “TEMP/TIME” until the time is
blinking and press “+” and “-” to adjust (range is from 5mins to
1 hour).
7. Press “START/STOP” button to start the multi-cooker.
8. This function works best with the lid placed on the multi-
cooker.
6

Using the Grill Function
1. Place the grill plate on the base of the unit.
2. Press the “POWER” button to turn on the multi-cooker.
3. Press the “SELECT” until the “GRILL” function is selected on
the screen.
4. The default temperature is 395°F and the default time is 1
hour, use the “TEMP/TIME” to set desired time and
temperature.
5. After pressing the “TEMP/TIME”, the temperature will be
blinking. To adjust the temperature, press “+” and “-” to adjust
(range is from 325 to 395°F).
6. To adjust the time, press “TEMP/TIME” until the time is
blinking and press “+” and “-” to adjust (range is from 10mins
to 1 hour).
7. Press “START/STOP” button to start the multi-cooker.
Using the Slow Cook H Function
1. Place the inner pot on the base then place ingredients in the
inner pot.
2. Press the “POWER” button to turn on the multi-cooker.
3. Press the “SELECT”the “SLOW COOK H” function is
selected.
4. The time is adjustable, but the temperature is fixed. The
preset time is 4 hours.
5. To change the time, press “TEMP/TIME”. To adjust, press “+”
or “-”, the range is 30 hours to 24hours.
6. Then press “START/STOP” button to start the multi-cooker.
7. This function works best with the lid placed on the multi-
cooker.
8. After cooking is completed the unit will go into keep warm.
7

Using the Slow Cook L Function
1. Place the inner pot on the base then place ingredients in the
inner pot.
2. Press the “POWER” button to turn on the multi-cooker.
3. Press the “SELECT”the “SLOW COOK L” function is selected.
4. The time is adjustable, but the temperature is fixed. The
preset time is 6 hours.
5. To change the time, press “TEMP/TIME”. To adjust, press “+”
or “-”, the range is 30 minutes to 24hours.
6. Then press “START/STOP” button to start the multi-cooker.
7. This function works best with the lid placed on the multi-
cooker.
8. After cooking is completed the unit will go into keep warm.
Using the Steam Function
1. Place the inner pot on the base then place ingredients in the
inner pot.
2. Press the “POWER” button to turn on the multi-cooker.
3. Press the “SELECT” until the “STEAM” function is selected on
the screen.
4. The temperature is preset on this function and only time will
need to be selected for this function. The preset time is
15mins.
5. To change the time, press “TEMP/TIME”.
6. Then press “+” and “-” to adjust cooking time (range is from
1min to 2 hours).
7. Press “START/STOP” button to start the multi-cooker.
8. This function works best with the lid placed on the multi-
cooker.
9. After cooking is completed the unit will go into keep warm.
8

Using the Keep Warm Function
1. Place the inner pot on the base then place ingredients in the
inner pot.
2. Press the “POWER” button to turn on the multi-cooker.
3. Press “SELECT” button until the “KEEP WARM” function is
selected.
4. Then press “TIME/TEMP” and “+” or “-” to adjust cooking time
(range is from 1 to 10 hours).
5. Then press “START/STOP” button to start the multi-cooker.
Using the Stew Function
1. Place the inner pot on the base then place ingredients in the
inner pot.
2. Press the “POWER” button to turn on the multi-cooker.
3. Press the “SELECT” until the the “STEW” function is selected
on the screen.
4. The default temperature is 195°F and the default time is 2
hours, use the “TEMP/TIME” to set desired time and
temperature.
5. After pressing the “TEMP/TIME”, the temperature will be
blinking. To adjust the temperature, press “+” and “-” to adjust
(range is from 175 to 210°F).
6. To adjust the time, press “TEMP/TIME” until the time is
blinking and press “+” and “-” to adjust (range is from 15mins
to 4 hours).
7. Press “START/STOP” button to start the multi-cooker. After
the cooking time is complete, the multi-cooker will go into
keep warm.
8. This function works best with the lid on the multi-cooker.
9. After cooking is complete the unit will go into keep warm.
9

Using the Rice Function
1. Place the inner pot on the base then put rice and water in the
inner pot.
2. Press the “POWER” button to turn on the multi-cooker.
3. Press the “SELECT” button until the “RICE” function is
selected. Time and temperature can not be selected during
this function. There is no temperature displayed during this
function. When there is 10 minutes left in cooking there will
begin a countdown on the screen.
4. Then press “START/STOP” button to start the multi-cooker.
After the “RICE” function is completed, the multi-cooker will go
to the “KEEP WARM” function.
5. This function works best with the lid placed on the multi-
cooker.
CLEANING
Clean after every use.
1. Press the power button to turn off the unit,
unplug the unit and allow to cool completely.
CAUTION: To prevent injury or electric shock, always unplug the
unit before cleaning. Do not immerse cord or unit in water or other
liquid to avoid damage to parts.
2. Clean lid and pot with hot water, dishwashing
liquid, and a non-abrasive sponge. Wipe the
inside and outside of the unit with a cloth. Do not
use detergent or abrasives as these may scratch
the coating.
STORAGE
1. Unplug the cord.
2. Make sure all parts are clean and dry.
10

RECIPE NOTES
______________________________________
______________________________________
______________________________________
______________________________________
______________________________________
______________________________________
______________________________________
______________________________________
______________________________________
______________________________________
______________________________________
______________________________________
______________________________________
______________________________________
______________________________________
______________________________________
______________________________________
______________________________________
______________________________________
______________________________________
______________________________________
______________________________________
11

LIMITED ONE YEAR WARRANTY
This warranty covers all defects in workmanship or materials in the
mechanical and electrical parts, arising under normal use and care in this product
for a period of 12 months from the date of purchase provided you are able to
present a valid proof-of-purchase. A valid proof-of-purchase is a receipt
specifying item, date purchased, and cost of item. A gift receipt showing item and
date of purchase is an acceptable proof-of-purchase. Product is intended for
household use only. Any commercial use voids the warranty.
This warranty covers the original retail purchaser or gift recipient. During the
applicable warranty period within normal household use, we will repair or replace,
at our discretion, any mechanical or electrical part which proves defective, or
replace unit with a comparable model. Shipping and handling costs are not
included for warranty replacements and are the responsibility of the customer.
To obtain service under the terms of this warranty, send an email to
CST). Please provide the model number listed on the bottom of this page when
contacting us.
THIS LIMITED WARRANTY COVERS UNITS PURCHASED AND USED WITHIN
THE UNITED STATES AND DOES NOT COVER:
• Damages from improper installation.
• Damages in transit.
• Defects other than manufacturing defects.
• Damages from misuse, abuse, accident, alteration, lack of proper
care and maintenance, or incorrect current or voltage.
• Damage from service by other than authorized dealer or service
center.
• Shipping and handling costs.
• This warranty gives you special legal rights and you may also have
other rights to which you are entitled which may vary from state to
state.
Manufacturer does not assume responsibility for loss or damage for return
shipment. We recommend that you keep your original packaging should you
require repair service. Before returning product please contact our customer care
department for return authorization. When returning product for repair please
include your full name, return address, and daytime phone number. Also include
a brief description of the problem you are experiencing and a copy of your sales
receipt or other proof of purchase in order to validate warranty status.
MODEL LS-MC01ADF
12
Other manuals for LS-MC01ADF
1
Table of contents
Other Deen Family Kitchen Appliance manuals
Popular Kitchen Appliance manuals by other brands
Nostalgia Electrics
Nostalgia Electrics RETRO COTTON CANDY MACHINE RCM-605 instructions
Siemens
Siemens HEZ9SE040 manual
AMERICANA
AMERICANA EIM-9268 instruction manual
Ninja
Ninja COMBI SFP700 Series owner's guide
Minipack-Torre
Minipack-Torre MX 2 Installation, operation and maintenance
MPM
MPM MSG-11 user manual
