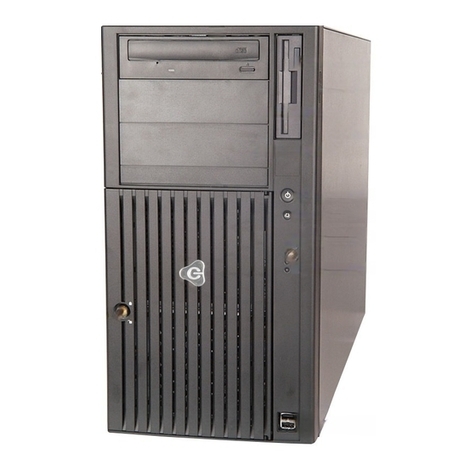
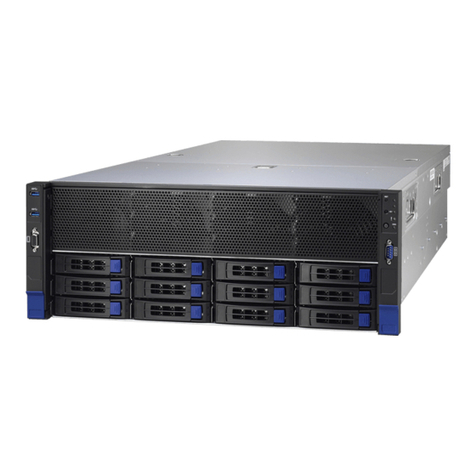
Deep Secure HRB001 User manual

June 2017
Page 1 of 12
HRB001 Server Installation Guide

Page 2 of 12
Table of Contents
1 Introduction ....................................................................................................................................3
1.1 Scope....................................................................................................................................... 3
1.2 Audience .................................................................................................................................3
1.3 Conventions ............................................................................................................................ 3
1.4 Purpose ...................................................................................................................................3
2 Rack Installation.............................................................................................................................. 5
2.1 Overview .................................................................................................................................5
2.2 Unpacking the System.............................................................................................................5
2.3 Preparing for Setup.................................................................................................................5
2.3.1 Choosing a Setup Location..............................................................................................5
2.3.2 Rack Precautions.............................................................................................................5
2.3.3 Rack Mounting Considerations .......................................................................................6
2.4 Rack Mounting Instructions .................................................................................................... 7
2.4.1 Identifying the Sections of the Rack Rails .......................................................................7
2.4.2 Installing the Inner Rail ...................................................................................................7
2.4.3 Assembling the Outer Rails ............................................................................................. 8
2.4.4 Installing the Outer Rails to the Rack..............................................................................8
2.4.5 Installing the HRB001 Server into a Rack........................................................................9
2.4.6 Removing the HRB001 Server from a Rack...................................................................10
3 User Maintenance......................................................................................................................... 11
4 Warranty and User Support..........................................................................................................12

Page 3 of 12
1Introduction
1.1 Scope
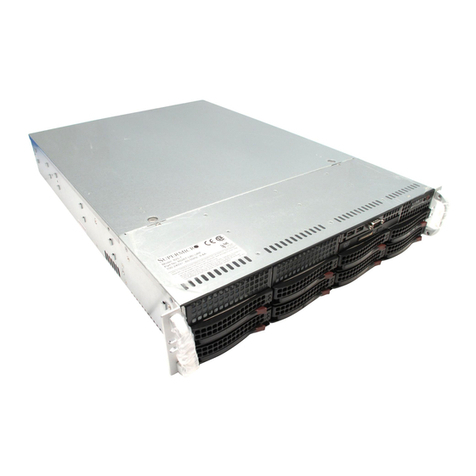
The Deep-Secure HRB001 hardware server is described at www.deep-secure.com/platforms/. Details
for the electrical ratings and operating conditions for the servers are contained in the datasheet
accessible from www.deep-secure.com/platforms/.
This document is the server installation guide, advising how the HRB001 server should be installed
and deployed. The server will have been delivered with pre-installed Deep-Secure software.
Reference should be made to the Getting Started Guide contained inside the box the server was
shipped in to confirm the packing checklist and how to configure the software that has been
installed by Deep-Secure.
1.2 Audience
Installation of an HRB001 server should only be performed by suitably trained service personnel.
This guide is aimed at such personnel.
1.3 Conventions
This guide uses the conventions shown below:
Convention
Indicates
Important warning statement information that should not be ignored.
A caution statement that denotes a hazard that can cause damage to the
equipment.
A tip that suggests an alternative method for applying a technique or procedure, or
helps you to understand the benefits and capability of the product.
1.4 Purpose
The guide covers the following installation steps:
Rack Mounting Instructions;
User Maintenance;
Warranty and User Support.
The Deep-Secure HRB001 server has no user serviceable parts inside.
It is intended for indoor use only.
The Deep-Secure HRB001 server is an EMC Class A product. In a domestic environment,
this product may cause radio interference. The HRB001 server complies with the EMC Class
A protection requirements when used in accordance with the installation requirements
identified in this manual and the Getting Started Guide contained in the box the server was
shipped in.
Read and obey all instructions before applying power to the server. Safety may be impaired
if the instructions are not followed.

Page 4 of 12
Ethernet wiring made to the HRB001 server should be internal to the building containing
the server, due to risk of lightning strikes.
Only an appropriately rated and approved cord-set should be used with this equipment in
accordance with the regulations of the country of use.
This product must be disposed of in accordance with all applicable national and
international waste disposal regulations.

Page 5 of 12
2Rack Installation
2.1 Overview
This chapter provides a quick setup checklist to install the server into a rack.
2.2 Unpacking the System
Decide on a suitable location for the rack unit that will hold your server. It should be situated in a
clean, dust-free area that is well ventilated. Avoid areas where heat, electrical noise and
electromagnetic fields are generated. You will also need to place it near a grounded power outlet.
2.3 Preparing for Setup
The box your server was shipped in should include two 19” chassis rails and the mounting
bolts/screws you will need to install the system into the rack. Please read this section in its entirety
before you begin the installation procedure outlined in the sections that follow.
Basic electrical safety precautions should be followed to protect yourself from harm and
the HRB001 server from damage.
Be aware of the locations of the power on/off switch on the server as well as the room’s
emergency power-off switch, disconnection switch or electrical outlet. If an electrical
accident occurs, you can then quickly remove power from the system.
The server has more than one power supply. All connections to the power supplies must be
removed to de-energize the unit.
2.3.1 Choosing a Setup Location
Leave enough clearance in front of the rack to enable you to open the front door completely (~25
inches).
Leave approximately 30 inches of clearance in the back of the rack to allow for sufficient airflow.
This product is for installation only in a Restricted Access Location (for example dedicated
equipment rooms).
2.3.2 Rack Precautions
Ensure that the levelling jacks on the bottom of the rack are fully extended to the floor with the full
weight of the rack resting on them.
In single rack installation, stabilizers should be attached to the rack.
In multiple rack installations, the racks should be coupled together.
Always make sure the rack is stable before extending a component from the rack.
You should extend only one component at a time - extending two or more simultaneously may cause
the rack to become unstable.

Page 6 of 12
Use a regulating uninterruptible power supply (UPS) to protect the server from power
surges, voltage spikes and to keep your system operating in case of a power failure.
Allow the hot plug power supply modules to cool before touching them.
Always keep the rack’s front door and all panels on the server closed to maintain proper
cooling.
2.3.3 Rack Mounting Considerations
Ambient Operating Temperature
If installed in a closed or multi-unit rack assembly, the ambient operating temperature of the rack
environment may be greater than the ambient temperature of the room. Therefore, consideration
should be given to installing the equipment in an environment compatible with the manufacturer’s
maximum rated ambient temperature (Tmra).
Reduced Airflow
Equipment should be mounted into a rack so that the amount of airflow required for safe operation
is not compromised.
Mechanical Loading
Equipment should be mounted into a rack so that a hazardous condition does not arise due to
uneven mechanical loading.
Circuit Overloading
Consideration should be given to the connection of the equipment to the power supply circuitry and
the effect that any possible overloading of circuits might have on overcurrent protection and power
supply wiring. Appropriate consideration of equipment nameplate ratings should be used when
addressing this concern.
Reliable Ground
A reliable ground must be maintained at all times. To ensure this, the rack itself should be grounded.
Particular attention should be given to power supply connections other than the direct connections
to the branch circuit (such as the use of power strips and other devices).
Slide rail mounted equipment is not to be used as a shelf or a work space.

Page 7 of 12
2.4 Rack Mounting Instructions
This section provides information on installing the HRB001 server into a rack unit with the rails
provided. There are a variety of rack units on the market, which may mean the assembly procedure
will differ slightly.
You should also refer to the installation instructions that came with the rack unit you are
using.
2.4.1 Identifying the Sections of the Rack Rails
The chassis package includes two rack rail assemblies including the required bolts in the rack
mounting kit, as identified below.
Figure 2-1: HRB001 server package contents
Each of the 19” chassis rails (b.) consists of two sections that form the outer fixed rack rail that
secures directly to the rack itself.
Figure 2-2: Outer fixed rack rail sections
2.4.2 Installing the Inner Rail
The inner rail is pre-installed on the server, prior to delivery. This means that no installation steps
are required.
If either of the inner rails is missing please contact your supplier and do not continue with
installing the server.

Page 8 of 12
Figure 2-3: Pre-installed inner rail
2.4.3 Assembling the Outer Rails
The chassis rail (b.) comprises 2 parts, as shown in Figure 2-2.
The part stamped Back should be placed down with the lettering uppermost and the front
parted offered up with the word Front visible and engage the lugs.
Figure 2-4: Assembled outer rail
2.4.4 Installing the Outer Rails to the Rack
Locate the square lugs of the rail and attach to the rack at the required location.
Ensure the spring clips at both front and back of the rail engage to hold the rail firmly in place.
Repeat the above steps for the other outer rail.

Page 9 of 12
Figure 2-5: Front of outer rail correctly installed
2.4.5 Installing the HRB001 Server into a Rack
Confirm that the inner rails are attached to the server. Also, confirm that the outer rails are
installed on the rack before proceeding to install the server into a rack.

Page 10 of 12
Align chassis rails with the front of the rack rails.
Slide the chassis rails into the rack rails, keeping the pressure even on both sides (It may be
necessary to depress the locking tabs when inserting). When the server has been pushed in
about 1/3 of the length of the rail a click should be heard (the safety catches engaging), push the
server fully in.
Figure 2-6: HRB001 server in rack
Use the supplied rack bolts (a.) to securely attach the server to the front of the rack rail.
2.4.6 Removing the HRB001 Server from a Rack
Before removing the server from the rack ensure that all cables have been removed.
Gently pull the server forward until a firm resistance is felt (around 2/3 of the inner rail length).
Locate the spring releases on either side of the inner rail and depress both.
Gently ease the server forward until the unit is free from the rack.

Page 11 of 12
3User Maintenance
Maintenance tasks are limited to routine cleaning and inspection.
The warranty will be invalidated if any attempt is made to open the unit.
Check that all cables and connectors are undamaged and secure.
If required, clean the external surfaces with a dry, lint-free cloth.

Page 12 of 12
© 2017 Deep-Secure Ltd. All rights reserved. The Deep-Secure Logo and Deep-Secure product names
including DeepSecure® and Bastion® are trademarks of Deep-Secure Ltd. All other trademarks are
the property of their respective owners. Deep-Secure Ltd. (registered number 7005288) is registered
in Britain with registered offices at 1 Nimrod House, Sandy's Road, Malvern, WR14 1JJ, England.
4Warranty and User Support
Warranty for the HRB001 server is provided in accordance with the Deep-Secure Limited, Hardware
Supply Agreement, Version 1.0.
For Warranty and Returns advice contact:
No unit should be returned without prior arrangement with your supplier.
Table of contents
