Defender Inflatables – Operation, Maintenance & Warranty Manual
Page 4 of 16
1.3 National legislation
Before you prepare for the water with your
Defender Inflatable, check the local regulations and
on any restrictions on the specific water you want to
use. You might check for sailing restrictions, speed-
restriction, outboard engines restrictions,
restrictions on the airborne sounds, etc.
1.4 General safety information
Safe Boating Suggestions.
In order to safely enjoy the waterways, familiarize
yourself with local and other governmental boating
regulations and restrictions, and consider the
following suggestions.
Use flotation devices. Have an approved personal
flotation device of suitable size for each person
aboard (it is the law) and have it readily accessible.
Do not overload your boat. Most boats are rated and
certified for maximum load (weight) capacities
(refer to your boat capacity plate). If in doubt,
contact Defender for assistance.
Perform safety checks and required maintenance.
Follow a regular schedule and ensure that all repairs
are properly made.
Operate inflatable boat with tubes inflated to full
pressure at all times. Failure to do so can be unsafe,
will affect performance, will shorten the life of your
boat and may void the warranty coverage of your
Defender Inflatable boat.
Know and obey all nautical rules and laws of the
waterways.
Make sure everyone in the boat is properly
seated. Do not allow anyone to sit or ride on any
part of the boat that was not intended for such use.
This includes the transom, bow area or anywhere
that an unexpected acceleration, sudden stopping,
unexpected loss of boat control, or sudden boat
movement could cause a person to be thrown
overboard or into the boat.
Never be under the influence of alcohol or drugs
while boating (it is the law). Alcohol or drug use
impairs your judgment and greatly reduces your
ability to react quickly.
Prepare other boat operators. Instruct at least one
other person on board in the basics of starting and
operating the outboard, and boat handling, in case
the driver becomes disabled or falls overboard.
Passenger boarding. Stop the engine whenever
passengers are boarding, unloading, or are near the
back (stern) of the boat. Just shifting the outboard
into neutral is not sufficient.
Be alert. The operator of the boat is responsible by
law to maintain a proper lookout by sight and
hearing. The operator must have an unobstructed
view particularly to the front. No passengers, load,
or fishing seats should block the operators view
when operating the boat above idle speed.
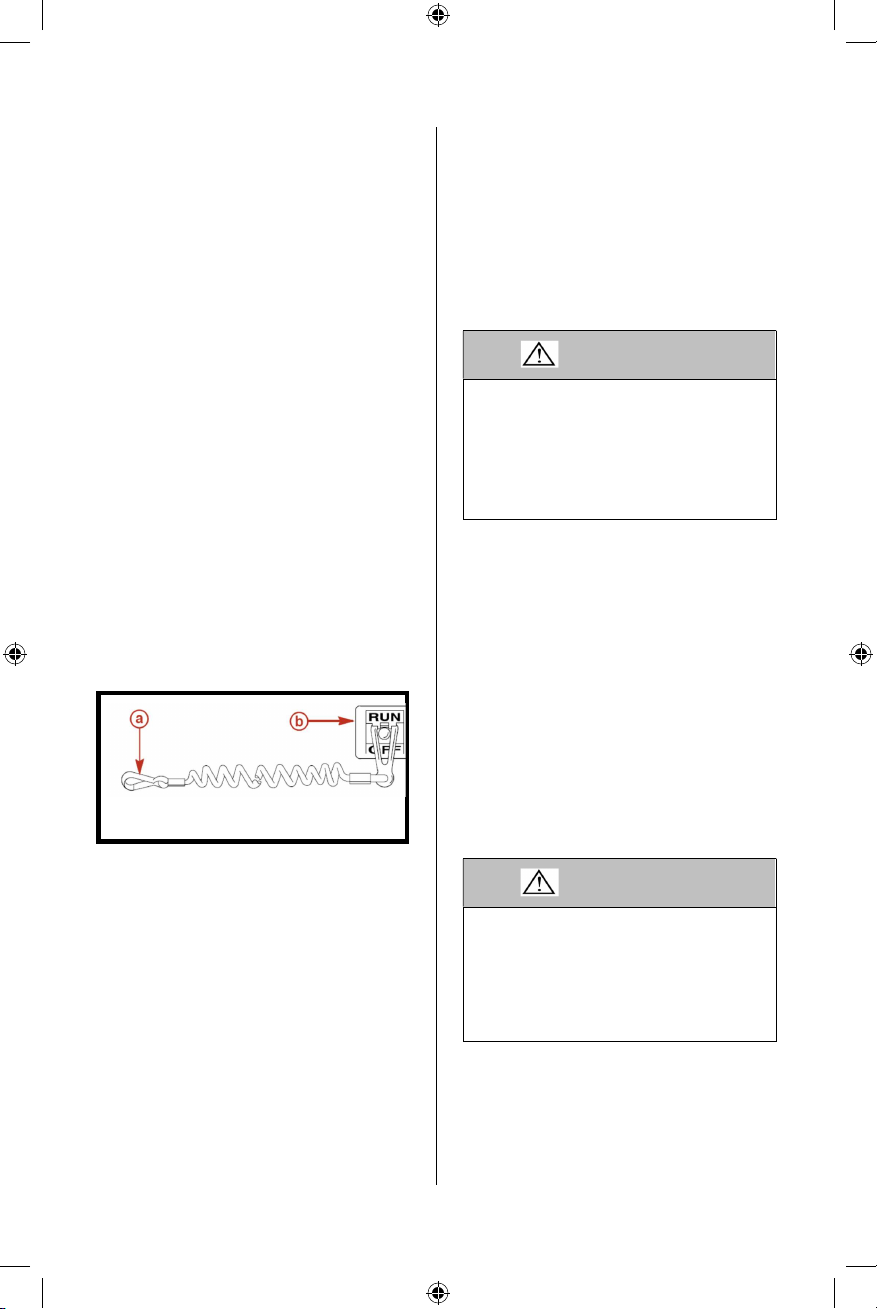
Always properly connect both ends of the stop
switch lanyard to the stop switch and the operator.
Never drive your boat directly behind a water
skier in case the skier falls. As an example, your
boat travelling at 40 km/h (25 MPH) will overtake a
fallen skier 61 m (200 ft.) in front of you in 5
seconds.
Watch fallen skiers. When using your boat for
water skiing or similar activities, always keep a
fallen or down skier on the operator's side of the
boat while returning to assist the skier. The operator
should always have the down skier in sight and
never back up to the skier or anyone in the water.
Report accidents.
2. Assembly and disassembly
2.0 Floorboard
Defender Inflatable boats equipped with an
inflatable or a non-inflatable floorboard must be
operated with these floorboards properly installed
before use. Using the boat without provided
floorboard is unsafe, uncomfortable and it might
result in damage to the boat. See section 2.4 for
floorboard installation.
Defender Inflatables – Operation, Maintenance & Warranty Manual
Page 5 of 16
2.1 The air valves
The air valves are specially designed for safe and
comfortable use.
The valves are designed flat to increase the comfort
in the boat and to prevent damage to the boat.
Operation of the air valve:
The boat should be inflated with the air
valves in the closed position (center stem
sticking up).
To deflate the boat, open the air valves.
Take off protective outside cap. The valve is
closed when the center spring-loaded stem is
protruding. It is open when the spring-loaded
stem is depressed and under load.
To close the valve, push and turn the center
spring-loaded stem with your finger ¼
clockwise until the center stem pops out.
To open the valve, push the spring-loaded
stem down, turn your finger ¼ turn
counterclockwise until the stem is locked in
the open position allowing air flow.
Pump connection:
Insert valve adapter into valve and push and twist
slightly for snug friction fit
Start pumping.
Keep pumping until no more air can be put
into the boat.
When ready, remove the pump adapter from
the valve.
Be sure to put on the protective valve cap
again. (for protection from dirt and damage).
Check the valve to make sure no air is lost in the
vicinity of the valve.
If any air is lost:
Take the valve key out of your repair kit.
Put the valve key into the valve.
Grab the back of valve (bunch the fabric) in
one hand and turn the valve stem with the key
in a clockwise position to tighten the valve.
If this does not stop the air loss, turn
counterclockwise to remove valve.
Inspect the valve for damage, dirt, or grit.
Reinsert valve into valve nut and tighten.
If air leakage persists, contact Defender
Industries for assistance; Tel: 800-628-8225.
Often, we can troubleshoot valve issues over
the phone or by shipping you a new air valve.
Valves should be routinely removed and
cleaned with fresh water to prolong their life.
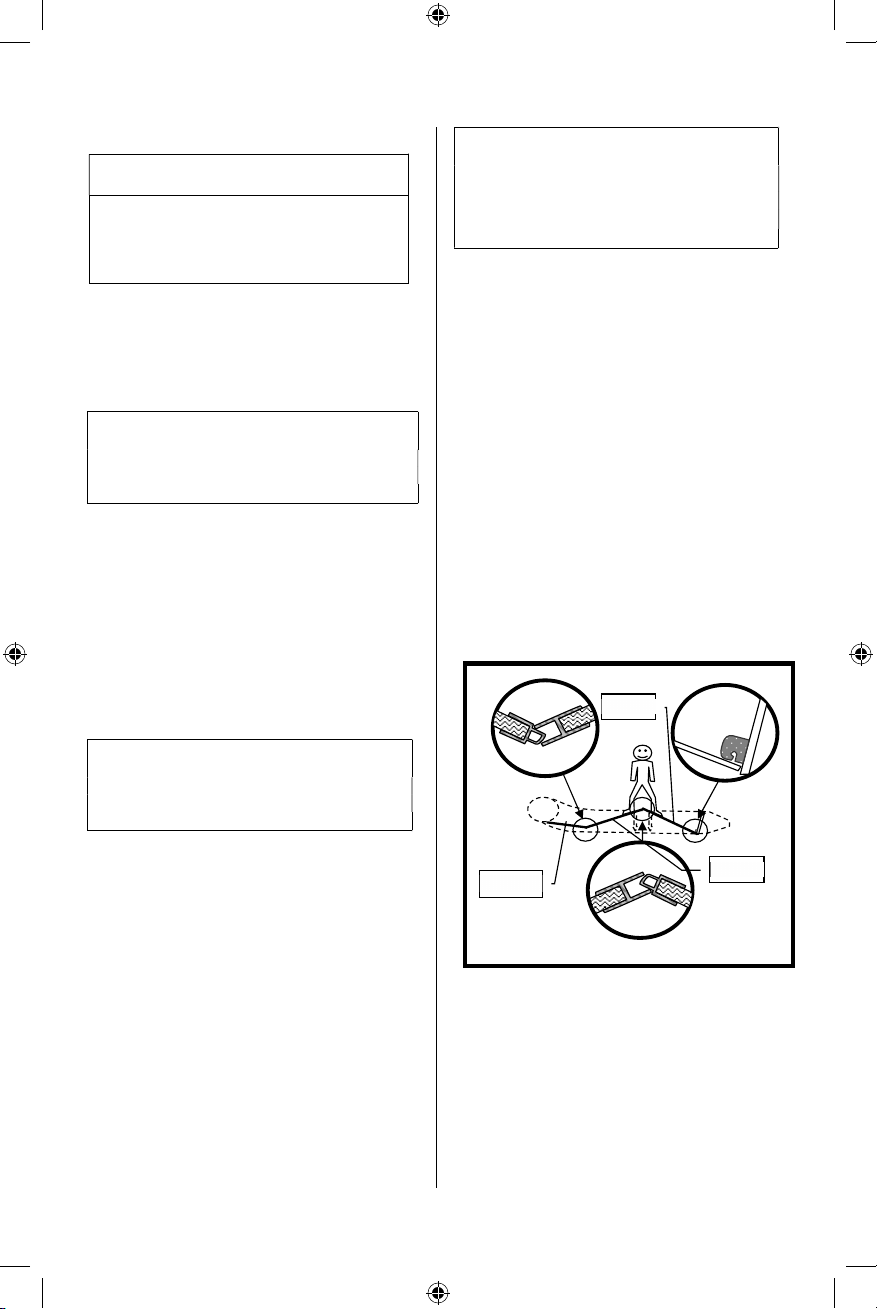
2.2 Seats and benches
If your boat is equipped with a separate seat and a
“seat webbing” on the tubes, you can install the
seat bench as in the following drawing.
The seat must be installed before you fully inflate
the boat.
2.3 Inflation
NOTE
The proper inflation and deflation are essential
for a long life of your boat.
Remove any sharp objects from flat surface where
boat will be assembled. Roll out boat on floor.
When the boat is unpacked, check if all parts
are present.
Check if the valves are closed. This can be
done by putting your finger in the valve,
pushing the center spring-loaded stem, and
turning ¼ turn.
If the stem pops out, the valve is now closed
and you are ready to inflate your boat.
(To let air out of the boat you have to press the
stem in and turn ¼ turn)
Seat webbing for
attaching the seat
in the boat.
This part
is glued
to the
body of
the boat.
This part is
attached to
the back of
the seat.
The protective cap is
attached to a retainer
and has a bayonet-
like way of securing
to the valve.
This part is fitted
in the air chamber.
For deflating, push
and turn the middle
part.
The valve
adapter twists
and locks onto
the hose end.
Page 4 www.defender.com