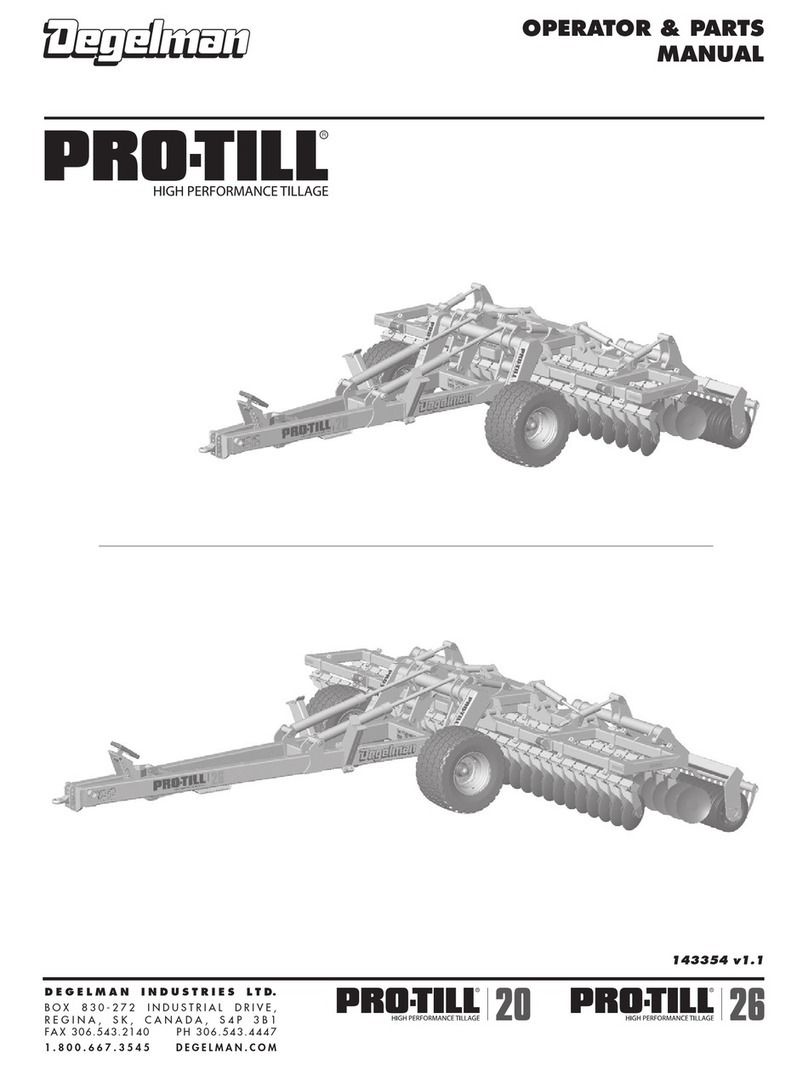
Degelman Pro-till 20 Programming manual

PRO-TILL 20/26/28
Serial Numbers: PTL1728 and above
OPERATOR & PARTS
MANUAL
DEGELMAN INDUSTRIES LTD.
BOX 830-272 INDUSTRIAL DRIVE,
REGINA, SK, CANADA, S4P 3B1
FAX 306.543.2140 PH 306.543.4447
1.800.667.3545 DEGELMAN.COM
143365 v1.7


AConnect Hydraulics
DEPTH
WINGS
TRANSPORT
JACK
3
4
2
14
1
3
2
FLOAT
FLOAT
3 3
4
22
1
11
1
* Refer to operators manual for
complete safety and operation info.
• Hydraulic Connections & Hoses
• Working points & pins
• Hubs & Spindles
• Tire Pressure: 58 PSI (400 kPa)
• Check for missing, worn or
damaged parts.
Maintenance
(Check Machine Daily)
PITCH
ADJUSTMENT
PITCH
ADJUSTMENT
143366 v1.4
QUICK-START GUIDE*
for PRO-TILL 20/26/28
* Refer to operators manual for complete safety and operation info.
T
O
B
E
E
L
I
G
I
B
L
E
F
O
R
Y
O
U
M
U
S
T
R
E
G
I
S
T
E
R
WARRANTY
REMEMBER! You must complete Product
Registration to be eligible for Warranty.

BPut in Field Position
iv)
i)
ii)
iii) v)
FMAX Transport Speed: 40 km/h (25 MPH)
DTest. Check. Adjust.
100m
ERaise for Headland Turns.
1
CSet Cutting Depth
3
2
(Start with 8stops
per cylinder, test
depth & adjust)
(IMPORTANT: Add depth
stops starting from depth plate end )
22
1”
3
3
Depth Adjustment
(2 Inner Wheel Cylinders)
Typically
Set to 2”
1
Pitch Adjustment
(2 Outer Cylinder
Adjustment Rods)
(Tool Storage Location)
Scraper Position Overview (Rubber Rollers)
Set Gap
distance at
1/4” to 3/8”
from roller surface.
Storage Position
Maintenance
Position
Engaged Position
Remove the 4 bolts to rotate into
or out of “Storage position”,
then re-install.
Loosen the 4 bolts to rotate up into
“Maintenance
Position”
& secure.
Loosen the 4
bolts to rotate
downward.
Set the scraper
clearance
(1/4” to 3/8”).
Properly tighten.
10-12 MPH
(Ideal Operating Speed)

IMPORTANT:
READ MANUAL
* Reference Sheet Quick-Start Guide
OPERATORS SECTION - TABLE OF CONTENTS
IMPORTANT Safety Notice
Introduction 1
Safety 2
Hook-Up 4
Transport 5
Transport to Field Position 6
Field to Transport Position 7
Operation 8
Pre-Operation Checklist 8
Operation Guidelines / Suggestions 9
Setting Disc Depth 10
Scraper Settings 12
Troubleshooting 13
Service & Maintenance 15
Maintenance Checklist 15
Repair - Wheel Hub 18
Repair - Hyd Cylinder Repair 20
Repair - Pressed Bushing 22
PARTS SECTION - TABLE OF CONTENTS
Pro-Till Section Overview 23
Hitch Pole Frame Components 24
Wheel & Rockshaft Components 26
Center Frame Components 27
Wing Frame Components 28
Disc Arm Components & Disc Options 29
Disc Gang Assembly & Components 30
Roller Frame Components 32
Rubber Roller & Scraper Components 33
Hydraulic Routing & Cylinders 34
Light Routing & Components 38
Optional Gauge Wheel & Components 40
Warranty 42
DEGELMAN INDUSTRIES LTD.
BOX 830-272 INDUSTRIAL DRIVE,
REGINA, SK, CANADA, S4P 3B1
FAX 306.543.2140 PH 306.543.4447
1.800.667.3545 DEGELMAN.COM
IMPORTANT: INSTALL DRY
Do NOT use any oil/grease/lubricant
on pin or bushing surfaces when installing the
maintenance free pins into composite bushings.
Maintenance Free Pins & Bushings

DANGER - NEVER PARK, UNHOOK, or
SERVICE Pro-Till with REAR WINGS RAISED
DANGER
If the front hitch becomes disconnected in this
position the front hitch will raise suddenly and
the back of the machine will drop!
IMPORTANT
SAFETY REMINDER
CHANGING DISCS AND SERVICING
The best position to safely change
or service the discs on the Pro-Till
is when it is secured in the winged
forward transport position.

-1-
143365 - PRO-TILL 20|26|28 (26-April-2018)
Introduction
OPERATOR ORIENTATION - The directions left, right, front and rear, as mentioned throughout the manual,
are as seen from the tractor drivers’ seat and facing in the direction of travel.
CONGRATULATIONS on your choice of a Degelman PRO-TILL to complement your farming operation. It has
been designed and manufactured to meet the needs of a discerning agricultural market. Degelman PRO-TILL
shreds heavy fall residue, opens up spring fields, levels ruts, destroys clods and produces an absolutely perfect
seed bed. Degelman PRO-TILL is the fastest and most versatile piece of tillage equipment you will ever own.
Use this manual as your first source of information about this machine.
TO THE NEW OPERATOR OR OWNER - Safe, efficient and trouble free operation of your Degelman PRO-TILL
requires that you and anyone else who will be operating or maintaining it, read and understand the Safety,
Operation, Maintenance and Troubleshooting information contained within this manual.
By following the operating instructions in conjunction with a good maintenance program your machine will
provide many years of trouble-free service. Keep this manual handy for frequent reference and to pass on to
new operators or owners. Call your Degelman Dealer if you need assistance, information, or additional copies
of the manual.
Front Hitch
Hyd.
Jack
Center Frame
Hitch Pole Frame
RH Wing
Roller Assembly
LH Wing
Roller Assembly
LH Wing
Frame
RH Wing
Frame
LH SIDE RH SIDE

-2-
143365 - PRO-TILL 20|26|28 (26-April-2018)
CAUTION
DANGER
WARNING
The Safety Alert Symbol identifies important
safety messages applied to the PRO-TILL and in this
manual. When you see this symbol, be alert to the
possibility of injury or death. Follow the
instructions provided on the safety messages.
The Safety Alert Symbol means:
ATTENTION!
BECOME ALERT!
YOUR SAFETY IS INVOLVED!
DANGER: Indicates an imminently hazardous situation
that, if not avoided, WILL result in death or serious injury
if proper precautions are not taken.
WARNING: Indicates a potentially hazardous
situation that, if not avoided, COULD result in death or
serious injury if proper precautions are not taken.
CAUTION: Indicates a potentially hazardous situation
that, if not avoided, MAY result in minor or moderate
injury if proper practices are not taken, or, serves as a
reminder to follow appropriate safety practices.
Why is SAFETY important to YOU?
3 BIG Reasons:
•Accidents Can Disable and Kill
•Accidents Are Costly
•Accidents Can Be Avoided
Note the use of the Signal Words: DANGER, WARNING, and CAUTION with the safety messages.
The appropriate Signal Word has been selected using the following guidelines:
SAFETY ALERT SYMBOL
SIGNAL WORDS
Safety

-3-
143365 - PRO-TILL 20|26|28 (26-April-2018)
1. Read and understand the Operator’s
Manual and all safety signs before
operating, maintaining or adjusting.
2. Install and properly secure all shields and
guards before operating. Use hitch pin with a
mechanical locking device.
3. Have a first-aid kit available for use
should the need arise and know
how to use it.
4. Have a fire extinguisher available
for use should the need arise and
know how to use it.
5. Wear appropriate protective gear.
This list includes but is not limited to:
• A hard hat
• Protective shoes with slip resistant soles
• Protective glasses or goggles
• Heavy gloves
• Wet weather gear
• Hearing protection
• Respirator or filter mask
6. Clear the area of people, especially small
children, and remove foreign objects from the
machine before starting and operating.
7. Do not allow riders.
8. Stop tractor engine, set park brake, remove
ignition key and wait for all moving parts to
stop before servicing, adjusting, repairing or
unplugging.
9. Review safety related items with all operators
annually.
YOU are responsible for the safe operation and
maintenance of your Degelman PRO-TILL.
YOU must ensure that you and anyone else who
is going to operate, maintain or work around
the PRO-TILL be familiar with the operating and
maintenance procedures and related SAFETY
information contained in this manual.
This manual will take you step-by-step through
your working day and alerts you to all good safety
practices that should be adhered to while operating
this equipment.
Remember, YOU are the key to safety. Good safety
practices not only protect you but also the people
around you. Make these practices a working
part of your safety program. Be certain that
EVERYONE operating this equipment is familiar
with the recommended operating and maintenance
procedures and follows all the safety precautions.
Most accidents can be prevented. Do not risk injury
or death by ignoring good safety practices.
• PRO-TILL owners must give operating
instructions to operators or employees
before allowing them to operate the
PRO-TILL, and at least annually thereafter
per OSHA regulation 1928.51.
• The most important safety device on this
equipment is a SAFE operator. It is the
operator’s responsibility to read and
understand ALL Safety and Operating
instructions in the manual and to follow
these. All accidents can be avoided.
• A person who has not read and
understood all operating and safety
instructions is not qualified to operate the
machine. An untrained operator exposes
himself and bystanders to possible serious
injury or death.
• Do not modify the equipment in any way.
Unauthorized modification may impair the
function and/or safety and could affect the
life of the equipment.
• Think SAFETY! Work SAFELY!
Safety
SAFETY GENERAL SAFETY

-4-
143365 - PRO-TILL 20|26|28 (26-April-2018)
Raised
Position
The PRO-TILL should always be parked on a level, dry
area that is free of debris and foreign objects. Follow this
procedure to hook-up:
1. Clear the area of bystanders and remove foreign
objects from the machine and working area.
2. Make sure there is enough room to back the tractor
up to the trailer hitch.
3. Start the tractor and slowly back it up to the hitch point.
4. Connect the hydraulic.
• Use a clean cloth or paper towel to clean the couplers
on the ends of the hoses. Also clean the area around
the couplers on the tractor. Remove the plastic plugs
from the couplers and insert the male ends.
• Be sure to match the pressure and return line to one
valve bank.
• Hoses have be labelled in a suggested order of
priority from most used to least:
(1) Depth (2) Wings 3) Transport (4) Jack
5. Use the hydraulic jack controls to raise or lower the
hitch to align with the drawbar.
IMPORTANT: Close the ball valve to prevent accidental
operation of this circuit. Ensure ball valve handle remains
in closed position.
WARNING:Tractor MUST be equipped with a clevis
hitch to prevent unit from tipping upward while folding
into and out of transport. A safety chain must also
always be properly installed.
6. Slowly back tractor up to align the hitch.
7. Install a drawbar pin with provisions for a mechanical
retainer such as a KLIK pin. Install the retainer.
8. Install a safety chain between the tractor and the hitch.
9. Connect lights (electrical socket plug) to tractor.
10. Raise the hydraulic hitch jack.
11. When unhooking from the tractor, reverse the above
procedure.
HOOK-UP / UNHOOKING
Hook-Up
WARNING/DANGER:
Never disconnect Pro-Till from tractor if rear
sections of machine are partially raised.
Negative Hitch Weight may result, the hitch pole
may suddenly raise, and the rear section would
come crashing down. Only disconnect when unit
is on level ground in the proper transport or field
position.
WARNING/DANGER:
The tractor MUST be properly equipped with a
clevis hitch and safety chain to prevent Negative
Hitch Weight occurring when raising or lowering
the rear sections.
If the unit is not properly attached to the tractor
with a clevis hitch and safety chain, the negative
hitch weight could result in the hitch pole
suddenly raising and the rear section to come
crashing down.

-5-
143365 - PRO-TILL 20|26|28 (26-April-2018)
1. Read and understand ALL the information in
the Operator’s Manual regarding procedures
and SAFETY when operating the PRO-TILL in the
field/yard or on the road.
2. Check with local authorities regarding machine
transport on public roads. Obey all applicable
laws and regulations.
3. Always travel at a safe speed. Use caution when
making corners or meeting traffic.
4. Make sure the SMV (Slow Moving Vehicle) sign,
and all the lights and reflectors that are required
by the local highway and transport authorities
are in place, are clean and can be seen clearly
by all overtaking and oncoming traffic. Be
sure to check with local highway authorities
and comply with their lighting and transport
requirements.
5. Keep to the right and yield the right-of-way to
allow faster traffic to pass. Drive on the road
shoulder, if permitted by law.
6. Always use hazard warning flashers on tractor
when transporting unless prohibited by law.
7. Always use a pin with provisions for a
mechanical retainer and a safety chain when
attaching to a tractor or towing vehicle.
TRANSPORT SAFETY
Use the following guidelines while transporting:
1. Use a safety chain and a pin with provisions for
a mechanical retainer.
2. Ensure Pro-Till is in the full transport position with
the wing rollers secure and properly in place.
3. Ensure debris that may fall or become dislodged
during transport is removed.
4. Be sure hazard lights are flashing and SMV
decal is visible.
5. MAXIMUM RECOMMENDED TRANSPORT
SPEED: MAX 40 km/h or 25 mph.
(Road Conditions, Field speeds may be lower.)
Due to weight of the machine and tire ratings,
do not exceed the recommended maximum
speeds or severe tire damage / excessive wear
may occur.
6. Check that the transport tires are properly
inflated to 58 PSI (400 kPa).
IMPORTANT: Under NO
CIRCUMSTANCES should there
ever be riders while the Pro-Till
is in transport.
TRANSPORTING
RIDERS
Transport

-6-
143365 - PRO-TILL 20|26|28 (26-April-2018)
3
Transport to Field Position Overview
TRANSPORT TO FIELD POSITION
B. Slightly extend the Transport Cylinders (#3) just
enough to remove the weight of wings off from
the wing transport carriers. Do not lift more than
needed.
IMPORTANT:DO NOT fully extend the transport
cylinders at this point. Follow proper procedures to
prevent possible equipment damage or failure.
D. After fully opening the wings, extend the Transport
Cylinders (#3) to completely lower the Pro-Till rear
frame sections to the ground.
NEVER LIFT WINGS!
Unfold using the Wing Cylinders (2),
then lower all rear sections using
the Transport Cylinders (3).
A. On level ground,
position the Pro-Till
so it is straight in-line
behind the tractor.
FOLLOW PROCEDURE BELOW:
C. Extend the Wing Cylinders (#2) to fully open the
wings behind the machine.
1”
3
22
E. Place both the Transport Cylinders (#3) and the
Wing Cylinders (#2) into the FLOAT position before
operation.
IMPORTANT:
The Transport & Wing Cylinders
MUST both be in the "FLOAT"
position in order for the Pro-Till
to properly contour the ground
and to avoid possible cylinder
or equipment damage.
3
2

-7-
143365 - PRO-TILL 20|26|28 (26-April-2018)
NEVER LIFT WINGS!
Lift rear sections using the Transport
Cylinders (3), then fold the wings forward
using the Wing Cylinders (2).
Field to Transport Position Overview
FIELD TO TRANSPORT POSITION
FOLLOW PROCEDURE BELOW:
E. When the wing frame rollers
are in proper position above
the transport holders, lightly
lower the wings in place
by retracting the Transport
cylinders (#3) to gently set
the wings onto the holders.
D. When the wings get close to the wing transport
holders, you may need to slightly extend the
Transport cylinders (#3) so the rollers can reach
the correct position.
1”
Wing
Transport
Holders
3
May need to
raise over hump
33
IMPORTANT:DO NOT retract the Wing cylinders to
raise the wings at this point. Follow proper procedures to
prevent possible equipment damage or failure.
B. Retract the Transport cylinders (#3), fully raising
the complete rear section.
NOTE:It is important to fully raise the disc frames
up as high as possible as it puts the rollers and
wheels in the correct position for low transport.
A. In field position, fully extend the Depth (#1)
cylinders (Wheels & Rollers) to completely raise the
disc frames.
22
C. After raising all the rear sections, retract the
Wing cylinders (#2) to bring both wings inward
towards the frame.

-8-
143365 - PRO-TILL 20|26|28 (26-April-2018)
1. Read and understand the Operator’s Manual
and all safety signs before using.
2. Stop tractor engine, set park brake, remove
ignition key and wait for all moving parts to
stop before servicing, adjusting, repairing or
unplugging.
3. Keep hands, feet, hair
and clothing away
from all moving and/
or rotating parts.
4. Do not allow riders on the PRO-TILL tractor
during operation or transporting.
5. Keep all shields and guards in place when
operating (if applicable).
6. Clear the area of all bystanders, especially
children, before starting.
7. Do not operate machine on overly steep side hills
or slopes.
8. Be careful when working around or maintaining
a high-pressure hydraulic system.
Ensure all components are tight and in good
repair before starting.
OPERATING SAFETY
Although there are no operational restrictions on the
PRO-TILL when it is new, there are some checks that
should be done when using the machine for the first
time, follow this procedure:
IMPORTANT:It is important to follow the Break-In
procedures especially those listed in the “Before using”
section below to avoid damage:
A. Before using:
1. Read Safety Info. & Operator’s Manual.
2. Complete steps in “Pre-Operation Checklist”.
3. Lubricate any grease points.
4. Check all Bolt Tightness.
5. Adjust Disc Cutting Depth as outlined in
the “Setting Disc Depth” section.
B. After operating for 2 hours:
1. Check all hardware. Tighten as required.
2. Check all hydraulic system connections.
Tighten if any are leaking.
BREAK-IN
Operation
Before operating the machine and each time thereafter,
the following areas should be checked off:
1. Lubricate the machine per the schedule outlined in
the “Maintenance Section”.
2. Use only a tractor with adequate power to pull the
PRO-TILL under ordinary operating conditions.
NOTE: It is important to pin the drawbar in the
central location only.
3. Ensure that the machine
is properly attached to
the tractor using a clevis
hitch, safety chain and
a drawbar pin with
provisions for a mechanical retainer. Make sure
that a retainer such as a Klik pin is installed.
WARNING:Negative Hitch Weight may occur
when raising or lowering the rear sections. If the unit
is not properly attached to the tractor with a clevis
hitch and safety chain, the negative hitch weight
could result in the hitch pole to suddenly raise and
the rear sections to come crashing down.
4. Before using, inflate tires to:
Center/Transport Tires (382 FLOTRUCK):
600/50 R22.5: 58 PSI (400 kPa)
5. Check oil level in the tractor hydraulic reservoir.
Top up as required.
6. Inspect all hydraulic lines, hoses, fittings and
couplers for tightness. Tighten if there are leaks.
Use a clean cloth to wipe any accumulated
dirt from the couplers before connecting to the
tractor’s hydraulic system.
7. Inspect the condition/wear of the discs. If needed
or desired, adjust the Disc Cutting Depth as
outlined in the adjustments section. If excessive
disc wear is evident, replacement may be
required. Refer to maintenance section.
PRE-OPERATION CHECKLIST
It is important for both personal safety and maintaining
good operational condition of the machine that the pre-
operational checklist be followed.

-9-
143365 - PRO-TILL 20|26|28 (26-April-2018)
Operation
1. Place both the Wing
Cylinders (#2) and the
Transport Cylinders (#3)
into the FLOAT position
before operation.
IMPORTANT:The
Transport Cylinders and
Wing Cylinders MUST
both be in the FLOAT
position for the PRO-TILL to contour properly and to
avoid possible cylinder or equipment damage.
2. IDEAL OPERATING SPEED is 10-12 mph.
Minimum operating speed is 7 mph.
Maximum operating speed is 14 mph.
3. When making headland turns, the operator
may wish to slightly raise the disc sections by
activating the Depth Cylinders (#1). Remember to
lower after coming out of the turn.
4. Each time you start a new field you may need
to adjust the cutting depth depending on the type
of crop residue or soil conditions. The operator
can adjust the cutting depth by following the
guidelines in the “Setting Disc Depth” section.
5. After making adjustments to the cutting depth it
is recommended to bring the Pro-Till up to speed
(10-12mph) to test the depth setting by driving
about 100m (cutting performance changes
dramatically from a slow speed to high speed).
Stop, check depth and cut of field, re-adjust the
height higher or lower, if needed, based on your
preference. Remember: Removing one depth stop
lowers cutting depth 1/2” deeper, Adding one
depth stop raises discs up 1/2” higher.
6. Check/adjust the deflector shield height setting.
7. Harder, packed soil may require additional
passes for optimum results. It is recommended
to do a second pass at an angle to the original
pass.
OPERATING GUIDELINES FACTORY DISK SETUP
20" Disc Setup
20" Outer Disc
RH Front
20" Discs
at all other
locations
20" Outer Disc
LH Rear
18" Outer Disc - RH Rear adjust the
disc all the way to the bottom of slot
Initial Distance
settings for Wing
Cylinder Pitch
Adjustment Lugs.
Both Sides:
1-7/8"
Bolt and small washer
installed in front.
Hitch set to lowest position
& install one bolt and nut
from each side.
Safety Chain, thick washer &
lock nut behind front plate.
Front Hitch Setting
Safety Chain
Initial Distance
settings for Wing
Cylinder Pitch
Adjustment Lugs.
Both Sides:
1-7/8"
Bolt and small washer
installed in front.
Hitch set to lowest position
& install one bolt and nut
from each side.
Safety Chain, thick washer &
lock nut behind front plate.
Front Hitch Setting
Safety Chain
22" Outer Disc
RH Front
22" Discs
at all other
locations
22" Outer Disc
LH Rear
20" Outer Disc - RH Rear adjust the
disc all the way to the bottom of slot
22" Disc Setup

-10-
143365 - PRO-TILL 20|26|28 (26-April-2018)
Disc Depth
Adjustment
IMPORTANT: You may need to adjust the deflector
height according to soil penetration. Best setting is
when deflector runs just slightly above the ground.
RECOMMENDED PROCEDURE TO SET DEFLECTOR HEIGHT:
1 - Run the machine with discs set to the proper depth.
2 - Stop the machine.
3 - Adjust the height so the deflector is running just
slightly above the ground.
Adjust "Dirt Deflector Angle" whenever
the Pitch of the Frame is adjusted.
Note: If running Nose up or Nose down,
adjust the deflector angle accordingly.
Typically
Set to 2”
Pitch Adjustment
Dirt Deflector
DEPTH SETTING OVERVIEW
Adjusting the disc cutting depth is accomplished by
adding or removing a number of spacers from the two
wheel cylinders.
The spacers limit the stroke distance of the cylinders,
changing the amount that the disc frames are lowered.
Each spacer that is added to the cylinders raises the
frame height by 1/2”. Therefore, to lower discs deeper
into the soil, you would remove one spacer for each
1/2” of depth change required.
A typical recommended penetration depth of 2” is
suggested. This depth, however, can be adjusted to the
operators needs and preferences or based on different
crop varieties and soil conditions.
PITCH ADJUSTMENT
Some operators may also prefer to adjust the front or rear
frame disc sections to run slightly higher than the other.
Adjustments to the front to rear disc section height or "pitch"
are done with the threaded pitch adjustment rods:
• Shortening adjustment rod length:
- Lowers the Rear Discs
- Reduces Roller Pressure
• Lengthening adjustment rod length:
- Raises the Rear Discs
- Increases Roller Pressure
NOTE: As the discs wear with usage, the disc depth
settings will also need to be adjusted accordingly.
Use the following as a guideline for setting depth:
1. Drive the PRO-TILL onto level ground. For initial
setup, try "8 Depth Stops" on each cylinder
stop.
2. Fully retract the Depth (#1) cylinders to lower
rear frame to ground.
3. Check the penetration depth of the front and
rear row of discs. Take note of how much you
would like to raise or lower both the front and
rear disc sections - round to the nearest 1/2”.
4. Fully raise the frame back off the ground by
extending the Depth (#1) cylinders.
5. Adjust Disc height at the two front wheel cylinder
positions.
Lower Discs - Remove one Depth Stop for each 1/2”
Raise Discs - Add one Depth Stop for each 1/2”
6. Repeat above procedure until proper depth is
achieved.
7. Adjust Dirt Deflector height as shown below.
SETTING DISC DEPTH & DIRT DEFLECTOR
(Start with 8stops
per cylinder, test
depth & adjust)
(IMPORTANT: Add depth
stops starting from depth plate end )
Operation
NOTE: For better
performance, adjust
pitch slightly down
(lengthen rod length)
to increase roller
pressure.
Use Tool Provided

-11-
143365 - PRO-TILL 20|26|28 (26-April-2018)
Deflector Arm
Length Adjustment
6"
Operation
SETTING DIRT DEFLECTOR ARM DISTANCE
The Dirt Deflector Arm has multiple extension settings.
The position can be adjusted to the operator's
preference depending on the disc/frame pitch settings
and soil conditions. For example, if the deflector is
plugging or restricting the flow of dirt and trash, you
may wish to move the deflector arm outward.
SETTING ADJUSTMENT DISC
This furrow reducer end disc allows the operator to
adjust the setting up or down. Typically, this end disc is
set at one inch higher than the other discs.
If the overall cutting depth is changed however, this
disc may also need to be adjusted. For example, if the
cutting depth is lowered, this end disc may leave too
deep of a groove. The operator should adjust the disc
higher or lower as needed for desired results.
ADJUSTMENT TOOL
A tool is provided to help adjust the large 1-1/2"
nuts on the Pitch adjustment rods. It can also adjust
the 3/4" hardware on the Adjustment Disc or Dirt
Deflector. It is located and stored on the
inside of the left wing frame.
1-1/2" Hdw
3/4" Hdw
Adjusting Dirt
Deflector or the
Adjustment Disc
Making Pitch
Adjustment
DISENGAGING THE DIRT DEFLECTOR
The Dirt Deflector may be rotated into a disengaged
position by following these simple instructions:
- Remove the pin securing the deflector arm.
- Pull out the deflector arm only far enough to where
the round pipe is connected to the square tube.
(Note: The round pipe section is only 6" long.
If you pull it out too far, it will fall out.)
- Rotate the deflector arm upward to either the 90° or
180° position, as desired. (See Below)
- Re-install the pin to secure
deflector arm in place.
If preferred, the deflector arm could also be completely
removed and stored by pulling the pin and removing.
90°
180°
Storage Position
(LH Wing)

-12-
143365 - PRO-TILL 20|26|28 (26-April-2018)
Hole for holding
in maintenance
position.
Operation
SETTING SCRAPER POSITIONSCRAPER POSITION OVERVIEW
Change into Storage Position:
• Loosen & remove the 4 bolts (2 per arm).
• Rotate section upward to new position.
• Reinstall bolts and tighten in place.
• Reverse procedure to put into working position.
Change into Maintenance Position (from engaged):
• Loosen the 4 bolts (2 per arm).
• Rotate section upward until top hole is open.
• Tighten bolts to secure and/or insert bolt or
insert pin (user supplied) into top
hole to secure in position.
Change into Engaged Position (from maintenance):
• Loosen the 4 bolts (2 per arm).
• Rotate section down until scraper blades are set
to proper distance from inner roller groove.
(1/4" to 3/8" is the recommended distance)
• Tighten bolts to secure in position.
Storage Position
Maintenance Position
Engaged Position
Gap Distance
1/4”-3/8”
Remove the
4 bolts to rotate
into or out of
“Storage position”
then re-install.
Retighten main
bolts or insert a
bolt/pin here to
hold in raised
position.
REVERSING SCRAPER BLADES
Double Sided Scraper Blades
Note: When blades are being
reversed, the complete section must
be changed at the same time or
adjustment will not work properly.
The scraper blades are designed to be
reversable in order to provide extended wear.
It is advised to reorder replacement blades
soon after reversing to prevent possible
downtime in the future.
SCRAPER SIDE-TO-SIDE POSITIONING
Inspect that the scraper plates are
as close to centered as possible
in the roller groove & that no
scrapers are touching the sides
of the rubber roller. (Ideally there
should be a 1/4" gap)
If adjustment is needed, loosen the
scraper arm clamps and adjust position until there is
proper clearance on all edges. You may need to slightly
adjust engagement distance if side-to-side is unsuccessful.
Loosen Clamps to Adjust Side to Side
Needs Adjustment
1/4" Gap Both Sides

-13-
143365 - PRO-TILL 20|26|28 (26-April-2018)
Troubleshooting - Pro-Till 20/26/28
Restriction or blocking on right side:
- Raise the deflector plate.
- Move deflector assembly outward.
- Raise working depth of adjustable disc.
- Raise machine working depth.*
- Reduce operating speed slightly.
- Check condition & operation of disc hubs (make sure
they turn freely).
- Wait for soil conditions to dry out more.
Rear discs or roller not engaging in very
hard soil:
- Adjust pitch so front discs are higher by retracting
threaded pitch adjustment. (It may be necessary to
lower overall machine depth also*).
- Extend gauge wheel ratchet jacks as necessary to
reduce weight on outer front wing corners.
- Momentarily take out of float & extend transport
cylinders to simulate a rigid hitch (flat ground only).
Re-engage float as soon as possible to avoid possible
equipment damage.
Mud not clearing from rubber rollers:
- Check scraper to roller distance & adjust if necessary
(scraper should be 1/4" to 3/8” from roller).
- Check scraper plate wear & adjust or replace as
necessary (replace all scrapers per row at the same time).
- Check scraper row adjustment for slippage &
re-torque or replace hardware if necessary.
Roller plugged in wet conditions:
- Retract transport cylinders to pass over pushed up
mound & smooth out when soil dries.
- Raise discs all the way up & drive 12-14 mph on firm
soil to clear rollers.
- In certain wet soil conditions place scrapers in storage
position to continue operating.
- If plugging persists wait for soil conditions to dry out
even more.
Roller skidding in wet conditions:
- Check scraper operation & settings.
- Raise machine working depth.*
- Adjust pitch so front discs are slightly lower by
extending threaded pitch adjustment & add depth
stops to raise machine working depth.
- Momentarily take out of float & extend transport
cylinders to simulate a rigid hitch (flat ground only).
Re-engage float as soon as possible to avoid possible
equipment damage.
- Wait for soil conditions to dry out more.
- Check condition & operation of bearings on both ends
of the rollers.
Plugging disc rows in wet conditions:
- Ensure roller is turning & scrapers are set properly.
- Raise machine working depth.*
- Increase operating speed slightly.
- Adjust pitch so front discs are slightly higher by
retracting threaded pitch adjustment.
- Fully extend depth control cylinders & hold for 30
seconds to re-phase.
- Check condition & operation of disc hubs (make sure
they turn freely).
- Wait for soil conditions to dry out more.
Leaving a ridge or a groove between rollers:
- Adjust ridge wiper down slightly to remove ridge.
- Adjust ridge wiper up slightly to eliminate groove.
* Gauge wheel usually needs adjustment when changing
working depth by more than one depth control plate.
Leaving a ridge between passes:
- Adjust deflector up to reduce ridge.
- Adjust deflector assembly out to reduce ridge.
- Set right rear adjustable disc lower.
- Check that end disc size configuration matches factory
suggested setup.
- Reduce implement width on guidance system for
slightly more overlap.

-14-
143365 - PRO-TILL 20|26|28 (26-April-2018)
Troubleshooting - Pro-Till 20/26/28
Leaving a ridge or a groove between passes:
- Adjust deflector down to fill groove.
- Adjust deflector assembly in to fill groove.
- Set right rear adjustable disc higher.
- Check that end disc size configuration matches factory
suggested setup.
- Reduce implement width on guidance system for
slightly more overlap.
Subsoil leaving a groove every 10”:
- Adjust pitch to level machine (disc rows are not set to
the same depth).
- Adjust pitch to lower rear disc row by retracting
threaded pitch adjustment (front is prone to running
deeper with floating hitch & firm soil conditions).
- Rear discs following in front disc groove (see
troubleshooting for this below).
End of wing discs cutting deeper or
shallower than center:
- Fully extend depth control cylinders & hold for 30
seconds to re-phase.
- Extend gauge wheel ratchet jack slightly to reduce
weight at end of wing if cutting deeper.
- Retract gauge wheel ratchet jack slightly to increase
weight at end of wing if cutting shallower.
- Check for same number of depth control plates used
on each side.
Hopping or leaving waves:
- Change operating speed (best performance is
achieved over 10mph).
- Change field working angle (best finishing at 5 to 15
degrees off previously worked).
- Adjust working depth (deeper & run slower or
shallower to run faster*).
- Pre-work heavy trash or wet areas at a slower speed
& at a different angle than final pass.
- Wait for soil conditions to dry out more.
- Install optional gauge wheels (if not already equipped)
& ensure proper adjustment as shown in the manual.
Tracking to the left:
- Adjust pitch so front discs are higher by
retracting threaded pitch adjustment.
- Reduce implement width on guidance
system for slightly more overlap.
- Adjust implement offset on guidance
system to the right.
Tracking to the right:
- Adjust pitch so rear discs are higher by
extending threaded pitch adjustment.
- Reduce implement width on guidance
system for slightly more overlap.
- Adjust implement offset on guidance
system to the left.
Rear discs following in front disc cut or discs
not doing a full cut:
- Adjust tracking by extending threaded pitch
adjustment to track left or retract threaded pitch
adjustment to track right.
- Adjust entire front row in small increments either left
or right to achieve full cut.
- Check disc wear & adjust gang spacing or replace
discs as necessary (as discs wear move front row
right).
- Check factory settings on disc row locations to verify
gang clamp hardware is tight & clamps have not slipped.
- Adjust GPS to actual cutting width minus 6” overlap
per side depending on working depth.
(with 20" discs) 2" Depth MAX Depth
Pro-Till 20 19’-2” (5.8m) 19’-5” (5.9m)
Pro-Till 26 25’-10” (7.9m) 26’-2” (8m)
Pro-Till 28 27’-5” (8.4m) 27’-9” (8.5m)
* Gauge wheel usually needs adjustment when changing
working depth by more than one depth control plate.
Other manuals for Pro-till 20
3
This manual suits for next models
2
Table of contents
Other Degelman Tiller manuals